

OBD-II Code P0704: Clutch Switch Input Circuit Malfunction
An ASE-Certified Master Technician's Expanded Guide to P0704
- P0704 flags a clutch position switch circuit failure, directly causing no-start conditions, disabled cruise control, or erratic idling.
- Replacing a faulty clutch switch resolves this code in 80% of cases, costing $25–$90 for the part and taking under an hour for DIYers.
- Verify the failure before buying parts by checking the clutch switch PID in your scanner's live data; if the status doesn't toggle when pressed, test the switch continuity.
- Stop driving the vehicle immediately if it starts without pressing the clutch, as this severe safety hazard risks sudden lurching and collisions.
What Does P0704 Mean?

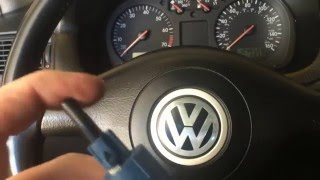
The Powertrain Control Module (PCM) or Transmission Control Module (TCM) is not receiving a valid signal from the clutch switch. This switch indicates when the clutch pedal is pressed or released. The PCM requires this signal to authorize engine cranking, disengage cruise control, and manage engine RPM 🎬 Watch: How to replace a clutch switch to fix cruise control and high revs. during gear shifts.
Technical definition: The PCM or TCM detects an intermittent, stuck-high (reference voltage), or stuck-low (ground) voltage signal from the clutch position sensor circuit when a state change is expected.
Can I Drive With P0704?
Yes, But With Caution. Driving is possible but strongly discouraged. The primary risks are safety-related: the engine stalls unexpectedly in traffic, increasing collision risk, or starts in gear, causing the car to lurch. Continued driving strains the starter motor from repeated failed start attempts. Address this code promptly to avoid being stranded by a no-start condition.
Common Causes

- Faulty or worn-out clutch switch (Very Common) — Internal mechanical and electrical contacts wear out over thousands of cycles, creating high resistance or complete failure. Low-quality aftermarket switches also cause out-of-range voltage readings, triggering the code.
- Misadjusted clutch switch or pedal (Common) — The switch must align perfectly to activate at the correct pedal travel point. Loose brackets, bent pedal stops, or improper installation prevent the switch from sending the signal at the expected time.
- Damaged wiring or loose connectors (Common) — Wires near the pedal assembly fray, pinch, or short to ground due to driver foot movement. Connectors loosen, corrode, or suffer backed-out pins, interrupting the signal.
- Mechanical failure of the clutch pedal assembly (Less Common) — Worn plastic bushings, a bent pedal arm, or a cracked mounting bracket introduce excessive play, preventing the pedal from physically actuating the switch plunger.
- Blown fuse (Less Common) — A blown fuse interrupts power to the clutch switch circuit, immediately triggering the code and a no-start condition.
- Poor ground connection (Less Common) — The circuit requires a solid ground to function. Corroded or loose ground connections for the switch circuit or control module cause erratic voltage readings.
- Faulty PCM or TCM (Rare) — An internal failure in the module's input driver circuit prevents it from reading a valid signal from a fully functional switch and wiring harness.
Symptoms

- Check Engine Light is on — An illuminated Malfunction Indicator Lamp (MIL) on the dashboard is the universal indicator of this circuit fault.
- Engine will not start or cranks intermittently — The PCM blocks the starter from engaging if it does not receive confirmation that the clutch is depressed, resulting in a no-crank condition.
- Cruise control does not work — Cruise control systems use the clutch switch signal to disengage automatically. A faulty signal disables the cruise control system entirely for safety.
- Engine stalling or rough/high idle — The computer uses the clutch signal to manage engine RPM during shifts. A missing signal causes rough shifting, harsh engagement, stalling, or an unusually high idle RPM.
- Engine starts without depressing the clutch — If the switch fails in the 'closed' position, the vehicle starts without the clutch pedal depressed, creating a severe safety hazard as the car lurches unexpectedly.
Diagnostic Flowchart
Tap your situation to follow the diagnostic path that matches what you're seeing on this code.
Common Fixes & Costs
- Replace the clutch switch — Parts: $25-$90, Labor: $100-$200, ~0.8 hr book time (DIY)
- Adjust the clutch switch — Parts: $0, Labor: $50-$120, ~0.5 hr book time (DIY)
- Replace a blown fuse — Parts: $1-$10, Labor: $0-$50, ~0.1 hr book time (DIY)
- Repair wiring or connectors — Parts: $10-$50, Labor: $150-$500, ~2.0 hr book time (Intermediate)
- Replace the Powertrain Control Module (PCM) — Parts: $600-$900, Labor: $200-$300, ~2.0 hr book time (Professional)
DIY vs Professional
- Replace a blown fuse — Beginner: Yes
Tools: Owner's Manual, fuse puller or small pliers. - Adjust the clutch switch — Beginner: Yes
Tools: Basic hand tools (wrenches, sockets), flashlight. - Replace the clutch switch — Beginner: Yes, with patience.
Tools: Basic hand tools, flashlight, trim removal tools. - Repair wiring or connectors — Beginner: No
Tools: Multimeter, wire strippers, crimpers, heat shrink tubing, soldering iron. - Replace the PCM/TCM — Beginner: No
Tools: Advanced diagnostic scanner for programming, socket set.
Used vs. New Parts: Buying Guide
When a used part is worth it: Almost never. Given that a new switch costs between $25 and $90, the minimal savings from a used part do not justify the risk of receiving a worn component.
Donor-vehicle mileage cap: roughly under 20000 miles for the part to have meaningful remaining life.
Donor quality checklist:
- If you must buy used for a rare vehicle, source from a low-mileage accident vehicle.
- Match the part number exactly; physical fit does not guarantee correct electrical operation.
- Avoid parts from flood-damaged vehicles.
Decision logic:
- If The vehicle is a daily driver and the new part is available for under $100. → Always buy new. The labor cost to replace the switch a second time negates any savings.
- If The part is No Longer Available (NLA) from the manufacturer or aftermarket. → A tested, used part from a reputable salvage yard is your only option.
Warranty tradeoff: Used parts carry a 30-90 day warranty. New aftermarket parts offer one year to a lifetime. OEM parts include a manufacturer's warranty.
Worst-case if a used part fails: $150-$300. If the used part fails, you pay for a new part plus labor costs a second time.
What Happens If You Wait — Timeline
- Immediate (First 0-100 miles): Code sets, MIL illuminates. Primary symptom is a no-start condition or disabled cruise control. Vehicle drives normally otherwise. (MPG impact: 0%% · Added cost: $0-$250 (if a tow is required for a no-start).)
- 1-4 weeks: No-start condition becomes frequent. High idle causes a minor drop in fuel economy. Strain on the starter motor begins from repeated failed crank attempts. (MPG impact: 0-5%% · Added cost: $20-$50 in wasted fuel and increased risk of being stranded.)
- 1-3 months: Inconvenience becomes a major disruption. Risk of starter motor damage from repeated key turns increases significantly. Safety risk of starting in gear is constant if the switch fails closed. (MPG impact: 0-5%% · Added cost: $250-$500 (potential premature starter motor failure).)
- 3+ months: Risks are constant. Continued abrupt engagement stresses the drivetrain, but the immediate safety risk of sudden lurching is the overriding concern. (MPG impact: 0-5%% · Added cost: $250-$500+ (persistent risk of starter failure plus high collision costs).)
Cost of Not Fixing It
- Immediate: Major safety and convenience issue. The vehicle fails to start, leaving you stranded. It stalls in traffic or starts in gear, posing a severe collision risk. (Added cost: $100-$250 for a tow.)
- 1-3 Months: Increased wear on the starter motor and ignition system from repeated failed start attempts. Continued high idle leads to a minor decrease in fuel economy. (Added cost: $0-$50 in wasted fuel.)
- 3+ Months: Persistent no-start conditions and safety hazards remain the primary cost. Repeated key turns eventually destroy the starter motor. (Added cost: $250-$500 for premature starter motor replacement.)
Diagnosis Steps

- Read Live Data with an OBD-II Scanner
Connect a scanner and monitor the clutch switch PID (Parameter ID) in the Live Data stream. Press and release the clutch pedal. The status must toggle cleanly between 'On' and 'Off'. No change confirms a circuit or switch failure.
Tools: OBD-II Scanner with Live Data (Beginner) - Visually Inspect the Clutch Pedal Assembly
Locate the clutch switch on the pedal bracket under the dashboard. Inspect for a broken plastic plunger, loose mounting, or a bent actuator tab. Check the pedal for excessive side-to-side play. Ensure the electrical connector is fully seated.
Tools: Flashlight (Beginner) - Check the Circuit Fuse
Consult the owner's manual to locate the fuse related to the clutch switch, starting circuit, or ignition system. Pull the fuse and verify the internal filament is intact.
Tools: Owner's Manual, Fuse Puller or Pliers (Beginner) - Test Switch Continuity with a Multimeter
Disconnect the switch connector. Set a multimeter to Ohms (Ω). Probe the switch terminals while pressing and releasing the plunger. A functional switch transitions instantly from infinite resistance (O.L.) to near-zero resistance (<2.0 Ω).
Tools: Multimeter (Intermediate) - Test Circuit Voltage and Ground
Turn the key to 'On' (engine off). Set the multimeter to DC volts. Probe the harness-side connector. One wire must show a reference voltage (5V or 12V) from the PCM. The ground wire must show near 0V (<100mV). Missing voltage indicates a wiring or PCM fault.
Tools: Multimeter (Intermediate) - Perform a 'Wiggle Test'
If the fault is intermittent, monitor live data or connect a multimeter to the signal wire. Gently wiggle the wiring harness at the switch connector and along the firewall. Flickering data or voltage drops pinpoint an intermittent open or short.
Tools: OBD-II Scanner with Live Data, Multimeter (Advanced) - Inspect the Full Wiring Harness
If the switch, fuse, power, and ground test perfectly at the connector, the fault lies deep in the wiring. Visually trace the harness to the PCM, looking for chafing, melting, or corrosion.
Tools: Flashlight, Trim Removal Tools (Advanced) - Analyze Signal with an Oscilloscope
Connect an oscilloscope to the signal and ground wires. A healthy circuit produces a clean square wave during pedal operation. Slow transitions, bouncing contacts, or voltage drops indicate high resistance confusing the PCM.
Tools: Oscilloscope (Advanced)
When This Code Triggers (Freeze-Frame Conditions)
- Vehicle Speed: 0 MPH (Recorded during an engine start attempt where the PCM did not see the clutch switch signal change to 'pressed'.)
- Engine RPM: 1500-3000 RPM (Recorded while cruising when the driver attempts to disengage cruise control by pressing the clutch, but the PCM detects no signal change.)
- Engine Load: 20-50% (Recorded during a gear shift where the PCM detects RPM and speed changes indicative of a shift, but receives no clutch switch signal.)
- System Voltage: 11.5-12.5V (Key On, Engine Off) or 13.2-14.8V (Engine Running) (Recorded if system voltage is unstable, causing the sensor's signal to appear erratic to the PCM.)
Related Codes
- P0700 — P0700 is a generic 'Transmission Control System Malfunction' flag. It tells the PCM to illuminate the Check Engine Light. You must use a scanner capable of reading TCM codes to find the specific underlying fault, which is often P0704.
- P0833 — Indicates 'Clutch Pedal Switch B Circuit Malfunction.' Modern cars use two clutch switches for redundancy. P0704 and P0833 together strongly confirm a failure in the clutch switch assembly rather than a broader electrical issue.
- P0507 — Indicates 'Idle Air Control System RPM Higher Than Expected.' A faulty clutch switch prevents the computer from adjusting idle correctly during shifts, causing RPMs to hang. Fixing the clutch switch circuit resolves both codes.
- P0562 / P0563 — Indicate 'System Voltage Low' and 'System Voltage High.' An overcharging alternator or failing battery causes abnormal voltage, making the clutch switch send out-of-range signals. Diagnose and fix the charging system first.
Climate & Environmental Factors
- High Humidity: Moisture accelerates corrosion on the clutch switch's electrical connector pins and ground points. This increases electrical resistance, disrupting the voltage signal and triggering P0704 even if the switch is mechanically sound.
- Cold Temperatures: Extreme cold makes the plastic components of the clutch switch brittle, increasing mechanical failure risk. Older relays in the circuit become sluggish, leading to intermittent connection issues that resolve once the cabin warms up.
How to Talk to a Mechanic About This Code
Say this: "I have a P0704 code and my car is intermittently failing to start. I'd like to schedule a diagnosis focusing on the clutch pedal switch and its circuit."
This tells the shop you've done basic research and points them in the right direction, saving diagnostic time and preventing unnecessary battery/starter tests.
Avoid saying:
- 'My car won't start sometimes.' (Too vague, leads to unnecessary battery tests)
- 'Just fix the check engine light.' (Authorizes parts replacement without proper diagnosis)
- 'I think it's the computer.' (Suggests the most expensive fix first)
Questions to ask before authorizing the repair:
- Did you confirm the switch is bad with a multimeter test, or is the live data from the scanner not changing?
- If the switch is good, did you check for power and ground at the connector?
- Will you check the switch's adjustment before recommending a replacement?
- What is the warranty on the parts and labor for this repair?
Where to Take It: Dealer vs Independent vs Chain
- Dealer:
Best for: Vehicles under warranty, Complex electrical issues requiring PCM software updates, Cases where previous attempts at a fix by other shops have failed
Downsides: Highest labor rates, More likely to replace a whole harness rather than perform a simple wiring repair (Typical cost: +50% vs. baseline) - Independent Shop:
Best fit. P0704 is a common electrical fault that competent independent shops diagnose and repair efficiently.
Best for: Out-of-warranty vehicles, Straightforward part replacement, Customers looking for the best balance of cost and quality
Downsides: Diagnostic capabilities vary; ensure they are experienced with electrical issues. (Typical cost: +0% vs. baseline) - Chain Shop:
Not recommended. The risk of misdiagnosis is high. This code requires electrical testing beyond the scope of quick-lube shops.
Best for: Selling you a new battery or starter, which are unlikely to be the root cause.
Downsides: Technician experience with electrical diagnosis is limited., High pressure to upsell services., Lacks specific diagnostic tools for complex wiring issues. (Typical cost: -10% vs. baseline)
When to Walk Away From the Repair
If the estimated repair cost exceeds 50% of the car's private-party value, and the car has other significant issues, evaluate your options.
- Car worth $3000, fix is $250: Fix it. This is a minor cost to restore a critical safety and reliability function.
- Car worth $2000, fix is $800: Borderline. If P0704 is caused by a rare PCM failure, get a second opinion before proceeding.
- Car worth $1500, fix is $1000: Walk away. If the diagnosis points to an expensive PCM replacement on an older car, it is not worth the investment.
What Scan Tool You Need for This Code

Minimum: A basic code reader that displays Live Data.
A simple code reader is insufficient. You must view the 'Clutch Switch Status' in the live data stream to confirm the computer recognizes pedal movement.
Budget: ANCEL AD310 (~$40) — Reads codes and displays live data streams, allowing you to watch the clutch switch status change as you press the pedal.
Mid-range: BlueDriver Pro (~$100) — Provides detailed live data with graphing capabilities to spot intermittent signal dropouts, plus access to a database of reported fixes.
Professional: Autel MaxiCOM MK808S (~$470) — Offers OE-level diagnostics to communicate with the TCM directly. Bidirectional control actively tests circuits for complex wiring faults.
Rent vs buy: A budget scanner with live data is a great investment. Alternatively, a free rental from an auto parts store providing live data is valid for a one-time fix.
How to Clear the Code After You Fix It
- Use an OBD-II scan tool to formally clear the P0704 code.
- Ensure the fuel tank is between 15% and 85% full for the EVAP monitor to run.
- Perform a complete drive cycle to allow all readiness monitors to run their self-tests.
Drive cycle (~30 minutes): 1) Cold start (vehicle sits for 8+ hours), followed by a 5-minute idle. 2) 15-20 minutes of mixed city and highway driving, including steady speeds around 55 MPH. 3) Several slow decelerations without using the brake. 4) Cool down and repeat if necessary.
Readiness monitors affected: Catalyst Monitor, Evaporative System (EVAP) Monitor, O2 Sensor Monitor, Comprehensive Component Monitor
Before emissions retest: drive at least 100 miles to fully set monitors.
Watch out for:
- Clearing the code resets all readiness monitors to 'Incomplete', causing an immediate emissions test failure.
- The code returns immediately if the root electrical fault (bad switch, shorted wire) was not repaired.
- Failing to let the vehicle sit for a cold start prevents the EVAP monitor from completing its test.
Will This Fail Emissions / State Inspection?
Yes — this code typically fails an OBD-II emissions inspection.
- California: An illuminated Check Engine Light is an automatic failure. After repairs, a full drive cycle must be completed to set all readiness monitors to 'Ready' before a retest.
- New York: A vehicle automatically fails the mandatory annual OBD-II emissions inspection if the Check Engine Light is on for any reason.
- Texas: In the 17 counties requiring emissions testing, an illuminated Check Engine Light results in an automatic failure. After clearing the code, you can have at most one monitor 'Not Ready' to pass.
Most Commonly Affected Vehicles
- Ford Focus, Fiesta (2000-2018) — Frequently cited with P0704. On 2012-2018 Focus models with the DPS6 automatic transmission, this code relates to TCM faults. For manual models, switch failure is the primary cause.
- Volkswagen Golf, Jetta, Passat (1998-2020) — VW models frequently trigger this code due to a broken plastic switch plunger. The repair is inexpensive, requiring a $30 part and under an hour of labor.
- Mazda Mazda3 (2004-2018) — Causes no-start conditions and cruise control failure. On BK series (2004-2009), the issue is sometimes misdiagnosed and relates to the neutral switch on the gearbox.
- Honda Civic, Accord (1996-2015) — The cause is typically a worn-out switch or wiring issues near the pedal. The switch is a dual-purpose part for both starter interlock and cruise control cancel.
- Chevrolet Cruze, Corvette (2005-2016) — Owners report P0704 leading to immediate no-start conditions. On Corvettes, an intermittent no-crank issue is a classic symptom of a failing clutch switch.
- Subaru Impreza, WRX, Forester (2002-2018) — These models utilize two switches: a cruise control cancel switch and a starter interlock switch. A failure in either triggers P0704. The starter switch is the lower unit.
- Hyundai Elantra, Veloster (2001-2017) — P0704 points to either a faulty switch or problems with the wiring harness connector becoming loose or corroded in the footwell.
- BMW 3-Series (E46, E90) (1999-2013) — The code is often due to the clutch switch module (CSM) failing. It is a small magnetic module attached to the master cylinder assembly.
Manufacturer-Specific Notes
- Volkswagen/Audi: A small, brittle plastic plunger on the switch is a frequent failure point. The electronics remain functional, but the broken plunger cannot be actuated by the pedal. Always inspect the mechanical integrity of the switch first.
- General Motors (GM): Vehicles like the Corvette feature two separate switches on the clutch pedal assembly—one for the starter interlock and one for cruise control. A failure in either triggers this code, requiring independent testing of both units.
- Ford: In models with early electronic throttle control, an outdated PCM software calibration misinterprets the clutch switch signal, causing a false P0704. If the switch and wiring test perfectly, check for available PCM software updates.
- Subaru: Subaru uses two distinct switches. The upper switch (cruise control) is normally closed. The lower switch (starter interlock) is normally open and closes only when fully depressed. P0704 usually points to the lower switch.
Real Owner Stories
VW Golf 1.9 TDI with No-Start Condition
Owner reported a P0704 code along with a complete no-start condition. The engine would not crank at all.
What they tried:
- Tested the starter and battery, which were both fine.
- Checked live data for the clutch switch using a professional scanner.
Outcome: Live data showed the clutch switch status stuck 'OFF' even when pressed. Physical inspection revealed a broken plastic plunger on the switch. Replacing the $30 switch resolved the no-start issue completely.
Lesson: For VWs, physically inspect the switch for mechanical failure (like a broken plunger). Checking live data first saves you from needlessly replacing the starter.
Chevy Blazer S10 with Recurring P0704 after Switch Replacement
Owner experienced a P0704 code and replaced the clutch pedal switch.
What they tried:
- Replaced the clutch switch.
- The Service Engine Soon (SES) light returned shortly after the replacement.
Outcome: The new switch was improperly adjusted. A new switch must be positioned to activate at the proper point of pedal travel. Adjusting the switch's mounting position permanently cleared the code.
Lesson: Replacing the part is not the final step. Proper adjustment is critical. If the code returns after replacement, verify the switch's position before assuming wiring problems.
Jeep Liberty (KJ) with Intermittent P0704 and Eventual Transmission Failure
Owner of a high-mileage Jeep Liberty received an intermittent P0704 code.
What they tried:
- Researched the code and assumed a simple switch issue.
- Continued driving a long daily commute without repairing it.
Outcome: Shortly after the code appeared, the transmission failed completely, requiring a replacement. The P0704 was a symptom of a larger internal transmission problem confusing the computer.
Lesson: While P0704 is usually a simple circuit fault, on high-mileage vehicles with harsh shifting, it indicates severe internal transmission issues. Do not ignore the code.
How to Prevent This Code From Triggering
- Apply Dielectric Grease to Connectors (During any repair or every 3-5 years) — Dielectric grease blocks moisture and salt from reaching metal pins, preventing the corrosion that causes high resistance and intermittent signal loss.
- Practice Smooth Clutch Pedal Operation (Daily habit) — Avoid snapping your foot off the clutch. Gentle, deliberate operation reduces mechanical stress on the switch's plastic plunger, extending its lifespan.
- Keep the Driver-Side Footwell Clean and Dry (Seasonally or as needed) — Melting snow or leaking heater cores introduce moisture directly onto the switch. Keeping the area dry prevents short circuits and corrosion.
- Periodically Wash Vehicle Undercarriage (Monthly in winter (salt-belt areas)) — Road salt corrodes electrical wiring and ground straps. Washing the firewall area removes salt buildup that migrates into engine bay connectors.
Frequently Asked Questions
Can a bad clutch switch prevent my car from starting?
Yes. Most manual cars have a safety interlock preventing the engine from cranking unless the clutch is fully depressed. A faulty switch blocks this signal, causing a complete no-crank condition.
What's the difference between a clutch switch and a neutral safety switch?
A clutch switch is used on manual transmissions and activated by the clutch pedal. A neutral safety switch is used on automatic transmissions and activated by the gear selector. Both ensure the engine only starts in a safe state.
Can a weak battery cause a P0704 code?
Yes. A failing battery or unstable alternator causes voltage fluctuations. Control modules interpret these erratic signals from the clutch switch as a fault, setting P0704 even if the switch is perfect.
Is it expensive to fix a P0704 code?
No, it is generally inexpensive. Replacing the clutch switch costs between $125 and $290 for parts and labor at an independent shop. DIY replacement drops the cost to just the price of the part ($25-$90).
Where is the clutch switch located?
The clutch switch mounts directly to the clutch pedal support bracket. Look up under the dashboard in the driver's footwell to locate the plunger mechanism resting against the pedal arm.
Will replacing the clutch switch definitely fix the P0704 code?
Not always. While a faulty switch is the most common cause, the problem also stems from damaged wiring, a blown fuse, or improper pedal adjustment. Proper multimeter diagnosis prevents wasting money on unnecessary parts.
Can a bad clutch switch affect gas mileage?
Indirectly. If the faulty switch causes the engine to idle higher than normal or creates hesitation during shifts, it decreases fuel efficiency over time.
Key Takeaways
- P0704 flags a clutch position switch circuit failure, directly causing no-start conditions, disabled cruise control, or erratic idling.
- Replacing a faulty clutch switch resolves this code in 80% of cases, costing $25–$90 for the part and taking under an hour for DIYers.
- Verify the failure before buying parts by checking the clutch switch PID in your scanner's live data; if the status doesn't toggle when pressed, test the switch continuity.
- Stop driving the vehicle immediately if it starts without pressing the clutch, as this severe safety hazard risks sudden lurching and collisions.
Helpful Videos

The information in this article is provided for general reference and educational purposes only. Vehicle specifications, procedures, and part compatibility can vary by production date, trim level, and region. Always consult your vehicle's factory service manual and verify part numbers before purchasing or performing repairs. Safety-critical components such as airbags, seat belts, and braking systems should be installed by a qualified professional.
- 🎬 Helpful Videos
- What Does P0704 Mean?
- Can I Drive With P0704?
- Common Causes
- Symptoms
- Diagnostic Flowchart
- Common Fixes & Costs
- DIY vs Professional
- Used vs. New Parts: Buying Guide
- What Happens If You Wait — Timeline
- Cost of Not Fixing It
- Diagnosis Steps
- When This Code Triggers (Freeze-Frame Conditions)
- Related Codes
- Climate & Environmental Factors
- How to Talk to a Mechanic About This Code
- Where to Take It: Dealer vs Independent vs Chain
- When to Walk Away From the Repair
- What Scan Tool You Need for This Code
- How to Clear the Code After You Fix It
- Will This Fail Emissions / State Inspection?
- Most Commonly Affected Vehicles
- Manufacturer-Specific Notes
- Real Owner Stories
- VW Golf 1.9 TDI with No-Start Condition
- Chevy Blazer S10 with Recurring P0704 after Switch Replacement
- Jeep Liberty (KJ) with Intermittent P0704 and Eventual Transmission Failure
- How to Prevent This Code From Triggering
- Frequently Asked Questions
- Can a bad clutch switch prevent my car from starting?
- What's the difference between a clutch switch and a neutral safety switch?
- Can a weak battery cause a P0704 code?
- Is it expensive to fix a P0704 code?
- Where is the clutch switch located?
- Will replacing the clutch switch definitely fix the P0704 code?
- Can a bad clutch switch affect gas mileage?
- Key Takeaways
- 🎟️ Get 5% Off