

P0703 on 2017 Jeep Renegade: Brake Switch Performance Causes and Fixes
On a 2017 Jeep Renegade, code P0703 almost always points to a faulty or misadjusted brake light switch. This can cause the check engine light, non-working brake lights, disabled cruise control, and an inability to shift out of Park. Replacing the switch is an inexpensive and common DIY fix, but a scan tool calibration may be required after installation.
- P0703 on a 2017 Renegade means there's a problem with the brake switch circuit.
- The most common symptoms are a check engine light, no brake lights, and cruise control not working.
- The most likely fix is replacing the inexpensive brake light switch located above the brake pedal.
- Before replacing the switch, check for a blown fuse and ensure the switch is properly adjusted.
- Because this fault affects brake lights, it is a safety-critical issue that should be addressed immediately.
What's Unique About the 2017-2017 Jeep RENEGADE
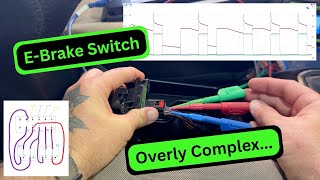
For the 2017 Renegade, this code is specifically defined as "Brake Switch 2 Performance" in TSBs, highlighting an issue with the secondary signal circuit. These bulletins show P0703 appearing alongside a cluster of other seemingly unrelated codes (U0418, P0128, P0101, etc.), which can suggest a broader electrical issue or a software anomaly rather than just a simple switch failure. In some cases, a PCM/BCM software update may be required to resolve the condition if a new switch does not fix it. The Renegade's complex electronics can also lead to other related symptoms, like electronic parking brake warnings, 🎬 Watch: How the brake switch affects the parking brake system. even if the primary fault is the main brake switch. After replacing the switch, a "Brake Pedal Calibration" using a capable scan tool like AlfaOBD may be necessary for the ABS module to recognize the new sensor's parameters.
Diagnostic Flowchart
Tap your situation to follow the diagnostic path that matches what you're seeing on this vehicle.
Symptoms You May Notice
- Check Engine Light is on
- Brake lights do not work or stay on constantly
- Cruise control is inoperative
- Unable to shift the vehicle out of Park
- ABS or Electronic Stability Control (ESC) warning light may illuminate
- "Service Parking Brake" message may appear intermittently
- Engine may stall when rolling to a stop if the torque converter lockup fails to disengage
- Replacing brake light bulbs when the issue is the switch. If all brake lights fail simultaneously, the problem is almost never the bulbs themselves.
- Assuming a transmission failure because the vehicle won't shift out of Park, when the root cause is the brake switch signal that the shift interlock relies on.
- Replacing the switch without first checking for proper adjustment. A perfectly good switch that is simply misaligned can cause the exact same symptoms as a failed one.
- Replacing the switch but failing to perform the required 'Brake Pedal Calibration' with a scan tool, causing the code to return.
Most Likely Causes
- Faulty Brake Light Switch 🔴 High Probability The brake light switch is a high-use electromechanical part that wears out over time. It's the most frequent point of failure for this code across most vehicles, including the Renegade. The internal contacts can fail, leading to an open or intermittent circuit.
How to confirm: Check if brake lights function when the pedal is pressed. If they don't, or if they are stuck on, the switch is the primary suspect. A multimeter can be used to test for continuity changes as the switch's plunger is operated. The switch is located above the brake pedal and has a twist-to-lock design.
Typical fix: Replace the brake light switch located above the brake pedal arm. This involves disconnecting the electrical connector, twisting the old switch to remove it, and installing the new one in its place. A scan tool calibration may be required afterward.
Est. part cost: $15-$30 - Misadjusted Brake Light Switch 🟡 Medium Probability The switch's position relative to the brake pedal is critical. If it's knocked out of place, improperly installed, or the self-adjusting plunger is not set correctly, it can send incorrect signals without being electrically faulty.
How to confirm: Visually inspect the switch to ensure it is securely mounted and that its plunger is making proper contact with the brake pedal arm. Check if there is any play or looseness. One owner reported a fix that only required readjusting the switch, which solved all symptoms without needing a new part.
Typical fix: Adjust the switch's position until it activates and deactivates correctly with the pedal's movement. This often involves simply re-seating the switch in its bracket. In some cases, a "Brake Pedal Calibration" procedure must be run using a scan tool.
Est. part cost: $0 - Blown Fuse ⚪ Low Probability
How to confirm: Locate the fuse box and consult the owner's manual to identify the fuse for the stop lamp circuit. Visually inspect the fuse to see if it is blown.
Typical fix: Replace the blown fuse with a new one of the same amperage. If the new fuse blows immediately, it indicates a short circuit in the wiring that needs further diagnosis.
Est. part cost: $1-$5 - Wiring or Connector Issue ⚪ Low Probability
How to confirm: Visually inspect the wiring harness and connector at the brake light switch for any signs of damage, corrosion, or loose pins. Water intrusion into the connector can also cause this fault. A multimeter can be used to check for voltage and continuity between the switch and the control module. Pay attention to specific circuits like (B16) Brake Signal 2.
Typical fix: Repair the damaged section of wire or clean/replace the corroded connector. Ensure the connector is fully seated.
Est. part cost: $5-$50
Rare But Worth Checking
- Powertrain Control Module (PCM) or Body Control Module (BCM) Fault: This is very rare. Before suspecting a control module, all other possibilities like the switch, wiring, and fuses must be exhaustively ruled out. The presence of many other unrelated codes, as seen in TSBs #1805520 and #1801617, could increase the likelihood of a module software issue requiring a dealer re-flash rather than a hardware failure.
- Poor Ground Connection: A compromised ground strap or corroded chassis ground point for the brake circuit can alter the reference voltage, causing the control module to incorrectly flag a P0703 code even with a good switch and wiring. This can include the ground pin at the tail light assembly connector itself.
- Aftermarket LED Tail Lights: Some aftermarket LED bulbs do not have the correct resistance, which can interfere with the circuit monitoring performed by the BCM or TCM. This can sometimes trigger a P0703 code. If you have recently installed LED brake lights, this could be the cause.
Diagnosis Steps
- Verify the code P0703 is present using an OBD-II scanner.
- Check the operation of the brake lights. Do they illuminate when the pedal is pressed? Are they stuck on?
- Using a scan tool with live data, monitor the status of the brake switch parameter. It should change from 'Off' to 'On' when the pedal is pressed.
- If brake lights are not working, inspect the fuse for the stop lamp circuit, often labeled with circuit ID (F941). Replace if blown.
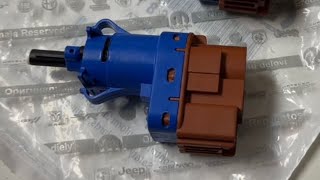
- Locate the brake light switch above the brake pedal arm. It is often blue or black with an orange connector.
- Visually inspect the switch and its electrical connector for any obvious damage, corrosion, or looseness.
- Ensure the switch is properly adjusted and making contact with the pedal arm. A simple readjustment can sometimes fix the issue.
- If the switch and fuse are good, use a multimeter to test the switch. With the switch disconnected, check for resistance change from open circuit to under 5.0 ohms when the plunger is operated.
- Test for voltage at the switch connector. You should have ~12V at the input circuit (F941) with the key on. The output circuit (B16) should show ~12V only when the pedal is pressed.
- If the switch tests good, inspect the wiring harness between the switch and the control module for shorts or open circuits. Check for a solid ground connection.
- If multiple seemingly unrelated codes are present along with P0703, consult a dealer about potential software updates as indicated by TSBs #1805520 and #1801617.
- After replacing the switch, use a capable scan tool to perform the 'Brake Pedal Calibration' function in the ABS module.
- If all other components check out, the issue may lie with the PCM/BCM, which requires professional diagnosis.
Parts You'll Likely Need
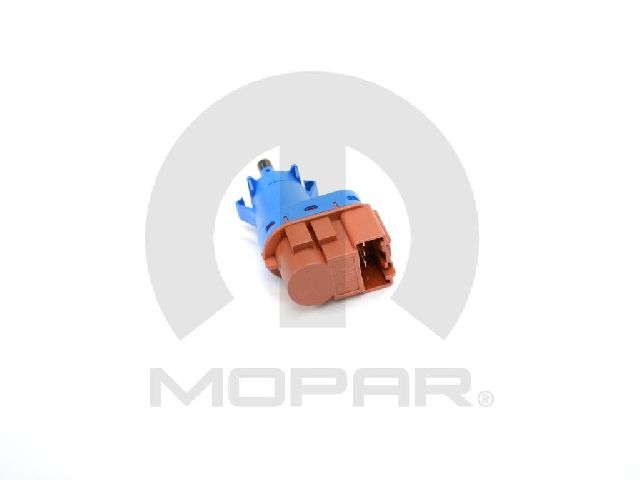
- Brake Light Switch / Stop Lamp Switch
(OEM #68073610AA)— This is the most common component to fail, causing the P0703 code. It is a high-wear item responsible for sending the brake pedal position signal.
Trusted brands: Mopar, Duralast, Standard Motor Products
OEM price range: $20-$30
Aftermarket price range: $15-$25
Related Codes That Often Appear With This One
- U0418 — Cited in TSB #1805520 and #1801617, this code for 'Invalid Data Received From Brake System Control Module' often appears with P0703, suggesting a related brake system communication fault or a broader software issue.
- P0128 — Also cited in the same TSBs, 'Thermostat Rationality' can appear in the same fault event, possibly due to a software anomaly or a broader electrical system issue triggering multiple codes simultaneously.
Technical Service Bulletins (TSBs) & Recalls
- 1805520: A 2020 manufacturer TSB that lists P0703 - Brake Switch 2 Performance alongside other electrical and sensor codes, suggesting a potential software or broad electrical fault.
- 1801617: A 2017 manufacturer TSB that also lists P0703 with the same group of codes, indicating a known pattern that may not be an isolated switch failure.
Platform-Specific Known Issues
- NHTSA Technical Service Bulletins #1805520 and #1801617 document that the P0703 code can appear in a group with other fault codes on the 2017 Renegade. This indicates that while the brake switch is a likely culprit, the appearance of multiple codes simultaneously could point to a more complex electrical or module-level software issue that may require a dealer visit for a re-flash.
- Owners on forums have confirmed that a simple misadjustment of the switch can cause the full range of P0703 symptoms, making an adjustment check a critical first step before replacement.
- After replacing the brake light switch, a 'Brake Pedal Calibration' procedure may need to be performed using a diagnostic tool like AlfaOBD to allow the ABS control module to learn the new switch's resting position.
Mechanic-Grade Diagnostic Values
- Brake switch resistance (disconnected) — expected: Should change from open circuit (infinite resistance) to less than 5.0 ohms when the plunger is operated.. Failure: Resistance does not change, or remains high when the switch is activated.
- Brake switch output circuit voltage at the switch connector — expected: Near 0V with the brake pedal released, and approximately 12V when the pedal is fully depressed.. Failure: Voltage is present when the pedal is released, or no voltage appears when pressed.
- Brake switch input circuit voltage at the switch connector — expected: Approximately 12V whenever the ignition is on.. Failure: No voltage present, indicating an issue with the fuse or the (F941) Fused Ignition Switch Output circuit.
Scan Tool Commands That Help
- AlfaOBD / Witech / other capable scan tools: Brake Pedal Calibration — This procedure must be run after replacing the brake light switch. It allows the ABS control module to learn the resting and activated positions of the new sensor, preventing the P0703 code from returning even with a new part.
- Any OBD-II scanner with live data: Live Data / Data Stream for Brake Switch Status — Use this as an initial check to see if the PCM is recognizing the switch's state change from 'On' to 'Off' when the pedal is pressed. This can quickly confirm if a signal is being received at all, without needing a multimeter.
Wiring & Ground Locations
- (B16) Brake Signal 2 Circuit — The wire running from the brake light switch harness connector to the Powertrain Control Module (PCM).. This is the specific secondary circuit monitored for the P0703 code. An open or short in this wire is a direct cause of the fault.
- (F941) Fused Ignition Switch Output Circuit — The wire providing ignition power to the brake light switch.. This circuit supplies the voltage that the switch sends back to the PCM. If this wire has no power, the switch cannot send a signal.
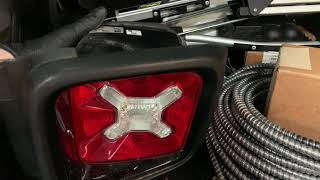
- Tail Light Assembly Ground Pin — The center pin on the electrical connector that plugs into the rear tail light housing.. This ground is known to burn out on Renegades. A poor ground at the light assembly can cause erratic voltage in the entire brake light circuit, which the PCM can interpret as a switch performance issue, triggering P0703.
Real Owner Repair Stories
- Carly.com community member (2014 Jeep Renegade Diesel) — Brake lights acting up, error messages in infotainment system.
❌ Tried (didn't work) Initially suspected a complete switch failure requiring replacement.
✅ What actually fixed it The brake light switch was only misaligned. A mechanic performed a simple adjustment of the switch's position relative to the brake pedal, which resolved all symptoms without replacing any parts. The total cost was 85 Euro for diagnostics and labor. - Reddit user in r/JeepRenegade (2015 Jeep Renegade Latitude) — Multiple dash errors for all passenger-side lights (Brake, Turn Signal, Parking, DRL) and a fast-blinking turn signal.
❌ Tried (didn't work) Assuming bulbs were burnt out.
✅ What actually fixed it The center ground pin on the passenger tail light connector was burnt and deformed. The user created a new, separate ground by attaching a wire to the grounding circuit on the light cluster's board, drilling a small hole to pass it through, and connecting it to a solid chassis ground, bypassing the faulty pin in the connector.
"I Checked Everything" — The Actual Cause
- A common scenario for P0703 is when a technician replaces the brake light switch, confirms with a multimeter that the new switch works, but the code comes back. The actual, missed cause is the need to perform a 'Brake Pedal Calibration' using a capable scan tool. The ABS module needs to electronically re-learn the switch's parameters; without this step, it will continue to see the new switch's signal as invalid and re-set the fault.
When the Usual Fixes Don't Work
- While replacing the brake light switch is the most common fix, it should not be the first action. A significant number of cases are resolved by simply checking and correcting the physical adjustment of the existing switch relative to the brake pedal arm, which can fix the code with zero parts cost. Furthermore, even when replacement is necessary, the repair is not always complete upon installation. A 'Brake Pedal Calibration' via a scan tool is often a required final step to prevent the code from returning.
OEM Part Supersession History
68094764AA→68073610AA— Standard part revision by the manufacturer.
Heads up: No known incompatibilities; 68073610AA is the correct service replacement for the 2017 Renegade.
Model Year Variations Within This Range
- 2017-2017: No significant variations are documented for this single model year that would affect the diagnosis or repair of a P0703 code.
Helpful Videos
We Have This Part in Stock


The information in this article is provided for general reference and educational purposes only. Vehicle specifications, procedures, and part compatibility can vary by production date, trim level, and region. Always consult your vehicle's factory service manual and verify part numbers before purchasing or performing repairs. Safety-critical components such as airbags, seat belts, and braking systems should be installed by a qualified professional.
- Jeep RENEGADE:
- 🎬 Helpful Videos
- 🛍️ Shop This Part
- What's Unique About the 2017-2017 Jeep RENEGADE
- Diagnostic Flowchart
- Symptoms You May Notice
- Most Likely Causes
- Rare But Worth Checking
- Diagnosis Steps
- Parts You'll Likely Need
- Related Codes That Often Appear With This One
- Technical Service Bulletins (TSBs) & Recalls
- Platform-Specific Known Issues
- Mechanic-Grade Diagnostic Values
- Scan Tool Commands That Help
- Wiring & Ground Locations
- Real Owner Repair Stories
- "I Checked Everything" — The Actual Cause
- When the Usual Fixes Don't Work
- OEM Part Supersession History
- Model Year Variations Within This Range
- 🎟️ Get 5% Off