

OBD-II Code P0622: Generator Field 'F' Control Circuit Malfunction
The Ultimate Guide to Diagnosing and Fixing P0622
- Code P0622 indicates the Powertrain Control Module (PCM) has lost control of the alternator's field circuit, stopping the battery from charging.
- A faulty internal alternator voltage regulator causes the majority of P0622 codes, but broken engine ground straps are the primary culprit on Jeep and Dodge vehicles.
- You have a maximum of 30 to 60 minutes of driving time on battery power before the engine stalls and you lose power steering and brakes.
- Test the battery voltage and inspect the 10A-20A charging system fuses before spending $350+ on a replacement alternator.
- Always install an OEM or premium remanufactured alternator, as Ford, GM, and Subaru computers frequently reject cheap aftermarket units and immediately trigger P0622 again.
What Does P0622 Mean?

P0622 means your car's main computer, the Powertrain Control Module (PCM), has detected a malfunction in the circuit that controls the alternator. This specific circuit, known as the generator field control or 'F' circuit, is what the PCM uses to command the alternator to increase or decrease its output to charge the battery and power the vehicle's electronics. When this control circuit fails, the alternator cannot be regulated correctly, leading to an undercharging condition that quickly drains the battery.
Technical definition: The official SAE/OBD-II definition for code P0622 is "Generator Field 'F' Control Circuit Malfunction". This indicates the Powertrain Control Module (PCM) detects an open, short, or electrical irregularity in the alternator's field coil control circuit. The 'F' circuit is the feedback and control path—using a Pulse Width Modulated (PWM) signal—that the PCM uses to monitor and command the alternator's charging duty cycle to maintain system voltage between 13.5 and 14.5 volts.
Can I Drive With P0622?

No — Do Not Drive. Driving is not recommended. You can drive for 30-60 minutes on a healthy, fully charged battery, but this is a major risk. Once the battery depletes, the engine stalls, causing an immediate loss of power steering and power brakes. Continuing to drive with a charging fault damages sensitive electronics and permanently ruins the battery due to deep discharging.
Common Causes

- Faulty Alternator (Very Common) — This is the most frequent cause. The internal voltage regulator, field coil windings, brushes, or diodes inside the alternator fail, preventing it from generating power correctly or responding to the PCM's commands.
- Poor Ground Connection (Common) — A loose, corroded, or broken ground strap for the engine or charging system creates an unstable voltage reference. This confuses the PCM into registering a fault in the field circuit, a notoriously common issue on Jeep and Dodge models. 🎬 Watch this alternator replacement walkthrough on a Dodge Grand Caravan.
- Damaged Wiring or Connectors (Common) — The wires leading to the alternator, specifically the 'F' terminal connector, become corroded, frayed, loose, or shorted. This interrupts the critical signal between the PCM and the alternator.
- Blown Fuse or Fusible Link (Less Common) — Many charging systems incorporate a fuse or fusible link for protection. If this link blows due to a surge or short circuit, it cuts power to the control circuit and immediately triggers a P0622 code.
- Incorrect or Low-Quality Aftermarket Alternator (Less Common) — Vehicles from manufacturers like Ford, GM, and Subaru are highly sensitive to alternator electronics. A low-quality remanufactured or incorrect aftermarket alternator fails to communicate properly with the PCM, leading to a P0622 code right after replacement.
- Weak or Failing Battery (Less Common) — A battery with an internal short or one that no longer holds a charge places extreme demand on the alternator. This strain damages a new alternator's regulator or causes erratic control signals.
- Faulty Powertrain Control Module (PCM) (Rare) — The internal driver circuit within the PCM that sends the signal to the alternator fails, or a software error misinterprets the signal. Consider this only after exhaustively testing and ruling out the alternator, wiring, grounds, and fuses.
Symptoms

- Battery or Alternator Warning Light On — This is the most immediate symptom. The light, shaped like a battery or labeled 'ALT' or 'GEN', illuminates on your dashboard.
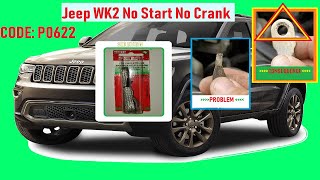
- Engine Stalling or Difficulty Starting — The engine stalls while driving once the battery voltage drops too low to power the ignition and fuel systems. You also experience slow cranking, rough idling, hesitant acceleration, or a no-start condition. 🎬 See how to fix a no-start condition caused by P0622.
- Dimming Lights and Widespread Electrical Issues — As the battery drains, headlights, interior lights, and the dashboard display flicker or become progressively dimmer. Accessories like the radio shut off. On some vehicles (like Toyota), this triggers widespread faults, disabling the speedometer, A/C, and turn signals simultaneously.
- Whining or Grinding Noises from Alternator — A growling or whining noise from the engine bay that changes with engine RPM indicates failing bearings inside the alternator, a mechanical failure that often accompanies the P0622 electrical fault.
Diagnostic Flowchart
Tap your situation to follow the diagnostic path that matches what you're seeing on this code.
Common Fixes & Costs
- Replace Alternator — Parts: $200-$650, Labor: $120-$300, ~1.5 hr book time (Intermediate)
- Clean or Replace Ground Strap — Parts: $20-$70, Labor: $50-$150, ~0.8 hr book time (DIY)
- Repair Wiring or Connector — Parts: $10-$50, Labor: $80-$200, ~1.2 hr book time (DIY)
- Replace Battery — Parts: $150-$350, Labor: $0-$50, ~0.3 hr book time (DIY)
- Replace Powertrain Control Module (PCM) — Parts: $400-$800, Labor: $150-$300, ~1.5 hr book time (Professional)
DIY vs Professional
- Replace Battery — Beginner:
Tools: Basic hand tools (wrench set). - Clean or Replace Ground Strap — Beginner:
Tools: Wrench set, wire brush. - Repair Wiring or Connector — Beginner:
Tools: Multimeter, wire strippers, crimpers, heat shrink, soldering iron (recommended). - Replace Alternator — Beginner:
Tools: Socket/wrench set, serpentine belt tool. - Replace Powertrain Control Module (PCM) — Beginner:
Tools: Advanced scan tool for programming, specialized connectors.
Used vs. New Parts: Buying Guide
When a used part is worth it: A used OEM alternator from a low-mileage (under 80,000 miles) wrecked vehicle is a good value, especially for older cars where the cost of a new OEM part is prohibitive. It is more reliable than a cheap, rebuilt aftermarket part.
Donor-vehicle mileage cap: roughly under 80000 miles for the part to have meaningful remaining life.
Donor quality checklist:
- Verify the donor vehicle's mileage and ensure it wasn't scrapped for an electrical or engine fire issue.
- Visually inspect for corrosion, damage to the pulley, or signs of excessive heat.
- Ask about the warranty; most used parts come with a 30-90 day guarantee.
Decision logic:
- If Vehicle is less than 7 years old OR you plan to keep it long-term → Buy a new OEM or high-quality remanufactured alternator. The reliability and longer warranty are worth the cost.
- If Vehicle is older, has high mileage, AND budget is the primary concern → A used OEM or a reputable remanufactured part is an acceptable risk. Avoid 'rebuilt' or no-name parts.
- If Your car is a Ford, GM, or Subaru → Strongly favor a new or remanufactured OEM part. These brands are notoriously sensitive to aftermarket alternator electronics.
Warranty tradeoff: Used parts typically offer a 30-90 day part-replacement warranty. Remanufactured parts usually come with a 1-year to limited lifetime warranty. New OEM parts carry a 1-2 year warranty.
Worst-case if a used part fails: $200-$400 if a used or cheap part fails prematurely, you pay for the replacement labor a second time.
What Happens If You Wait — Timeline
- First 5 Minutes: Battery/Alternator warning light illuminates. The PCM logs code P0622. The alternator stops charging, and the vehicle begins running entirely on the battery's stored power. No other symptoms are noticeable yet. (MPG impact: 0%% · Added cost: $0)
- 5-30 Minutes: On a healthy, fully charged battery, the car runs normally for 20-30 minutes. To maximize this time, all accessories (radio, A/C, heated seats, lights) must be turned off. Driving becomes a major risk as a stall is imminent. (MPG impact: 0%% · Added cost: $100-$300 if a tow is needed.)
- 30-60 Minutes: As the battery voltage drops below the level needed to power the fuel pump and ignition system (~11.5V), the engine stalls abruptly. This causes a loss of power steering and power brakes, creating a severe safety hazard. (MPG impact: 100% (vehicle is inoperable)% · Added cost: $150-$350 for a new battery. Deeply discharging a battery, even once, permanently damages its ability to hold a charge.)
- Post-Failure: Attempting to jump-start and continue driving repeats the cycle and causes further damage. The unstable and low voltage prior to stalling corrupts data in other electronic modules or causes stress to sensitive components, leading to more complex repairs. (MPG impact: N/A% · Added cost: $500-$2000+ if another electronic module like the BCM or TCM is damaged by the voltage instability.)
Cost of Not Fixing It
- Immediate (0-1 hour): High risk of being stranded. The vehicle runs on battery power alone for 30-60 minutes before stalling, potentially in a dangerous location. (Added cost: $100-$300 for a tow.)
- 1-7 days: Permanent battery damage. Deeply discharging a standard lead-acid or AGM battery by running it until the car stalls significantly shortens its lifespan and prevents it from ever holding a full charge again. (Added cost: $150-$350 for a new battery.)
- 1+ week: Damage to other electronics. Unstable or low voltage causes stress or erratic behavior in other sensitive electronic modules, such as the transmission control module or infotainment system. (Added cost: $500-$2000+ for module replacement.)
Diagnosis Steps
- Verify Battery and Basic Charging Voltage
Confirm the battery's state. With the engine off, a healthy battery reads ~12.6V. Start the engine; a healthy charging system reads 13.5V-14.5V across the battery terminals. A reading near 12V or falling indicates no charging is occurring. Check for AC ripple by setting the multimeter to AC volts; a reading above 50-100mV proves a bad alternator diode.
Tools: Digital Multimeter (Beginner) - Visual Inspection and 'Wiggle Test'
Inspect the charging system. Check that the alternator belt is tight. Examine the wiring and connector at the back of the alternator for corrosion, damage, or pushed-out pins. Trace and inspect the main engine-to-chassis ground strap for tightness and corrosion. While the engine is running, carefully wiggle the alternator harness to see if it causes the charging voltage to change, indicating an intermittent connection.
Tools: Flashlight, Basic Hand Tools (Beginner) - Scan for Other Codes and Check Fuses
Use an OBD-II scanner to check for other codes. P0562 (System Voltage Low) is a common companion code. Locate and visually inspect all fuses and fusible links related to the charging system and PCM. A blown fuse is a simple but often overlooked cause.
Tools: OBD-II Scanner (Beginner) - Test Alternator Field Coil Resistance
Disconnect the battery and the alternator connector. Set a multimeter to Ohms (Ω). Measure the resistance between the 'F' (Field) terminal pin on the alternator and the alternator's own ground case. The reading must be within manufacturer specifications, typically between 2.0 and 5.0 Ohms. A reading of infinity (O.L.) indicates an open circuit, while a reading near zero indicates a shorted coil. Both confirm a faulty alternator.
Tools: Digital Multimeter, Vehicle-Specific Wiring Diagram (Intermediate) - Test the Alternator Field Circuit Wiring
Disconnect the alternator connector and the corresponding PCM connector. Use a multimeter in continuity mode to check the 'F' terminal wire for breaks (open circuit). Then, check for continuity between the 'F' wire and a good ground; there should be none (short circuit). Resistance on the control wire must be less than 1.0 Ohm from end to end.
Tools: Digital Multimeter, Vehicle-Specific Wiring Diagram (Intermediate) - Bench Test the Alternator
If wiring and fuses are good, remove the alternator and take it to an auto parts store. Free bench testing definitively confirms if the internal voltage regulator, field coil, or other components have failed.
Tools: Basic Hand Tools (to remove alternator) (Intermediate) - Perform a Voltage Drop Test (Pro Tip)
A voltage drop test finds hidden resistance that a simple continuity test misses. With the engine running, connect the positive multimeter lead to the battery's positive post and the negative lead to the alternator's B+ terminal. The reading must be less than 0.2V (200mV). Next, connect the positive lead to the alternator case and the negative lead to the battery's negative post. This reading must also be under 0.2V. A higher reading proves excessive resistance in the charging cables or ground path.
Tools: Digital Multimeter (Advanced) - Analyze Live Data with a Scan Tool (Advanced)
Monitor PIDs related to the charging system. Key PIDs are 'Generator Field Duty Cycle', 'Commanded Generator Voltage', and 'Battery Voltage'. With the engine running, the duty cycle varies between approximately 5% and 95% as electrical loads switch on and off. If the duty cycle is stuck at 0% or 100%, or doesn't respond to commands, it proves a circuit or component failure.
Tools: Advanced Bi-Directional Scan Tool (Advanced) - Analyze the Field Control Signal with an Oscilloscope (Pro Tip)
Backprobe the 'F' circuit wire at the alternator. You must see a square wave (a PWM signal). The duty cycle of this wave changes as you turn electrical loads (like headlights and the blower fan) on and off. A flat line at 0V or battery voltage, or a messy/static signal, proves a problem with the PCM driver or the wiring. The PWM frequency is often between 100-400 Hz.
Tools: Automotive Oscilloscope (Scope), Probing Accessories (Advanced) - Verify PCM Function (Last Resort)
If the alternator passes a bench test, the wiring and grounds are perfect, and the field control signal is absent or incorrect on a scope, the PCM's driver circuit is faulty. Confirm this using an advanced scan tool to actuate the generator field driver and compare the commanded state versus the actual signal output. Stop DIY diagnosis and take the vehicle to a professional shop before condemning the expensive PCM.
Tools: Advanced Bi-Directional Scan Tool, Oscilloscope (Professional)
When This Code Triggers (Freeze-Frame Conditions)
- Engine Coolant Temp: 170-210°F (Fully warmed up, closed-loop operation.)
- RPM: 1200-2500 (Above idle, during light acceleration or steady cruise.)
- Engine Load: 20-50% (The PCM is actively managing charging output under normal driving demands.)
- System Voltage: < 13.0V or > 15.0V (The code sets when the PCM detects voltage outside the expected range for a specific duration.)
Related Codes
- P0620 — P0620 indicates a general 'Generator Control Circuit Malfunction.' P0622 is more specific, pointing directly to the 'Field (F) Control Circuit.' If you have P0622, the problem is in the circuit the PCM uses to regulate output.
- P0621 — P0621 refers to the 'Generator Lamp (L) Control Circuit,' which specifically operates the battery warning light. While P0622 deals with the alternator's charging function, P0621 deals with the warning light's function.
- P0562 — P0562 means 'System Voltage Low.' This code is an effect, while P0622 is a cause. The P0622 fault leads to the battery not being charged, which results in the system voltage dropping and logging a P0562 code.
- P0625 / P0626 — These codes indicate 'Generator Field/F Terminal Circuit Low' (P0625) and 'High' (P0626). They are more specific versions of P0622. P0625 suggests a short to ground or an open circuit, while P0626 suggests a short to power.
Climate & Environmental Factors
- High Humidity / Salt Belt Regions: Accelerates corrosion on wiring connectors, terminals, and especially engine/chassis ground straps. This corrosion creates unwanted resistance or intermittent open circuits, triggering a P0622 code.
- Extreme Cold: Cold temperatures make wire insulation brittle and prone to cracking or breaking, especially if disturbed during other maintenance. This leads to an open or short in the 'F' circuit.
- Extreme Heat: Sustained high temperatures in the engine bay accelerate the degradation of the alternator's internal voltage regulator and electronic components, leading to premature failure.
How to Talk to a Mechanic About This Code
Say this: "I have a P0622 code and a battery light on. I'd like to schedule a diagnostic for a charging system fault. Please check the battery, alternator output, wiring, and grounds before recommending a new alternator."
This shows you understand the code and its common causes. It directs the mechanic to perform a thorough diagnosis instead of immediately replacing the most expensive part (the alternator), saving you money if the issue is just a bad wire or ground.
Avoid saying:
- 'My check engine light is on, can you just fix it?'
- 'I think I need a new alternator.'
- 'Just do whatever it takes to get it running again.'
Questions to ask before authorizing the repair:
- What was the specific point of failure? Was it the alternator itself, the wiring, or a ground?
- If it was the alternator, did it fail the bench test? What were the voltage and ripple readings?
- If you are recommending an alternator replacement, is the new part OEM, remanufactured, or new aftermarket? What is the warranty on the part and the labor?
- Can I have my old parts back?
Where to Take It: Dealer vs Independent vs Chain
- Dealer:
Recommended if the vehicle is under warranty or has a known, complex electrical quirk specific to the manufacturer. Otherwise, an independent shop is more cost-effective.
Best for: Vehicles still under powertrain warranty, Known manufacturer-specific issues or recalls (e.g., Chrysler/Jeep alternator recalls), Complex electrical issues on newer cars where proprietary software is needed.
Downsides: Typically the highest labor rates and parts prices., Defaults to replacing entire assemblies rather than repairing smaller components. (Typical cost: +50% vs. baseline) - Independent Shop:
Best fit for most cases. P0622 is a common code, and a reputable independent shop with experience in electrical diagnostics is well-equipped to handle it efficiently and affordably.
Best for: Out-of-warranty vehicles where cost is a major factor., Straightforward charging system diagnosis and repair., Building a long-term relationship with a trusted mechanic.
Downsides: Quality and expertise vary greatly; look for ASE certification and good reviews., Lacks the latest specialized tools for very new or complex models. (Typical cost: +0% vs. baseline) - Chain Shop:
Acceptable for a free battery test to rule that out, but AVOID for diagnosing the P0622 code itself. Their business model encourages replacing parts before a thorough diagnosis is complete.
Best for: Simple battery testing and replacement (often with free installation).
Downsides: Technician skill varies dramatically., High pressure to upsell services and parts., Lacks the advanced diagnostic equipment and expertise for complex circuit testing beyond a simple alternator swap. (Typical cost: -10% vs. baseline)
When to Walk Away From the Repair
If the estimated repair cost exceeds 40-50% of the car's private-party value (check Kelley Blue Book or Edmunds), you should seriously consider not fixing it.
- Car worth $4000, fix is $850: Fix it. The repair cost is well below the 50% threshold and significantly less than a down payment on a new vehicle.
- Car worth $3000, fix is $1500: Borderline. This is at the 50% threshold. Get a second opinion and assess the car's overall health before proceeding.
- Car worth $2000, fix is $1200: Walk away. The repair cost is 60% of the car's value. It is not a sound financial decision to repair it.
What Scan Tool You Need for This Code
Minimum: A basic OBD-II scanner that reads and clears codes is a starting point, but for P0622, a tool that shows live data is crucial.
A simple code reader only tells you P0622 is present. It cannot show you the live charging system voltage, which is the first and most important diagnostic step. You need to see if the voltage is steady, dropping, or non-existent to know what's happening.
Budget: TOPDON AL500B / KZYEE KM301 (~$$60) — These tools combine a basic OBD2 code reader with a battery and charging system tester. They read the P0622 code and perform a charging test to show you the live voltage output from the alternator, helping you confirm a charging fault instantly.
Mid-range: Foxwell NT710 (~$$250) — Offers full system diagnostics and bi-directional control. This allows you to actively test the alternator's field circuit by commanding it on and off, which helps differentiate between a wiring problem and a faulty alternator. It also provides live data graphing for voltage and other parameters.
Professional: Autel MaxiCOM MK808 / MaxiBAS BT608 (~$$500-$800) — These professional-grade tools offer full bi-directional control, advanced battery and electrical system diagnostics, and guide you through vehicle-specific battery registration and system resets after a repair. The BT608 is specifically designed for comprehensive battery and charging system analysis.
Rent vs buy: Many auto parts stores (like AutoZone) scan your codes for free. This is a good first step to confirm the code. However, to perform the necessary live voltage tests, you need to own or borrow a scanner with that capability. For a one-time fix, a budget pick is a smart investment.
How to Clear the Code After You Fix It
- Reconnect battery if it was disconnected for the repair.
- Use an OBD-II scan tool to formally clear the P0622 code and any related codes.
- Perform a complete OBD-II drive cycle to allow readiness monitors to run.
Drive cycle (~20 minutes): A general drive cycle includes a cold start (sit overnight), 2-3 minutes of idle with electrical loads on (A/C, defroster), 10-15 minutes of mixed city/highway driving (e.g., steady 55 mph), and several deceleration periods without using the brake.
Readiness monitors affected: Comprehensive Component Monitor, Catalyst Monitor, Oxygen Sensor Monitor
Before emissions retest: drive at least 50 miles to fully set monitors.
Watch out for:
- Simply disconnecting the battery does not guarantee the code clears from permanent memory and resets all readiness monitors to 'Not Ready', causing an emissions test failure.
- The code returns immediately if the underlying electrical fault (wiring, alternator, ground) has not been properly fixed.
Will This Fail Emissions / State Inspection?
Yes — this code typically fails an OBD-II emissions inspection.
- California: An illuminated Check Engine Light results in an automatic failure of the smog check. After repairs, a full drive cycle must be completed to set readiness monitors before a retest is possible.
- New York: The NYS DMV inspection includes an OBD-II scan. A P0622 code and the associated Check Engine Light cause an automatic failure. The issue must be repaired to pass.
- Texas: In counties requiring emissions testing (like Harris, Dallas, Travis), an illuminated Check Engine Light is an automatic failure. You cannot pass the state inspection until the P0622 code is resolved and the light is off.
Most Commonly Affected Vehicles
- Dodge/Ram Ram Trucks (Cummins & Hemi) (2007-2018) — Very common on these trucks. The code points directly to an internal failure of the field windings or voltage regulator inside the alternator.
- Jeep/Dodge/Chrysler Grand Cherokee, Grand Caravan, Various Models (2005-2015) — On Grand Cherokees, P0622 is frequently caused by a broken or corroded main engine ground strap. Many 2011-2014 models were subject to a major alternator recall. On other models, it is due to a faulty alternator or a failing driver in the Totally Integrated Power Module (TIPM).
- Chevrolet/GMC Silverado/Sierra (Duramax & Gas) (2002-2012) — Caused by a failed internal voltage regulator in the alternator. Bent pins in the alternator connector after a replacement are also a common culprit.
- Ford Super Duty, F-150, Mustang (2005-2012) — Triggered by poor ground connections or corrosion on the alternator connectors. These vehicles are notoriously sensitive to non-OEM alternators, requiring a Motorcraft part to resolve the code.
- Chevrolet Avalanche (2007-2013) — These models use a Regulated Voltage Control (RVC) system where the PCM and BCM work together. A fault in the 'F' circuit feedback is critical and quickly sets this code.
- Toyota Hilux (2005-2015) — On these trucks, a P0622 code is accompanied by severe electrical symptoms like the simultaneous loss of the speedometer, A/C, and indicators.
- Subaru Outback, Forester (2008-2016) — Subaru models are sensitive to aftermarket alternators. If the code appears after a replacement, an incompatible part is the cause. The issue is sometimes traced to a failing diode within the alternator.
- Honda Accord, Civic (2003-2012) — Related to a failing Electronic Load Detector (ELD) unit or a faulty alternator. The ELD fails and sends incorrect load information, causing charging system codes.
Manufacturer-Specific Notes
- General Motors (GM): On many GM trucks with Regulated Voltage Control (RVC), the PCM and Body Control Module (BCM) work together to regulate voltage. A P0622 code sets if the feedback signal (the 'F' circuit) to the PCM is outside its expected 5% to 95% duty cycle range. Diagnosis requires checking BCM data as well.
- Ford: Ford vehicles are intolerant of many aftermarket alternators. If P0622 appears after a replacement, verify the part is a high-quality, compatible unit, preferably OEM (Motorcraft). Corroded connectors and grounds are extremely common causes on Super Duty trucks.
- Chrysler/Dodge/Jeep: The alternator field control routes through the Totally Integrated Power Module (TIPM) before the PCM. A failing driver or internal corrosion in the TIPM causes a P0622 code, even with a good alternator and PCM. On many trucks and SUVs, a broken engine ground strap is the primary cause. A major recall (NHTSA Campaign ID: 14V634000 and 17V435000) was issued for 2011-2014 models for alternators that fail suddenly.
- Subaru: Many Subaru models are sensitive to aftermarket alternators. Owners report that only an OEM or specific high-quality remanufactured alternator resolves a persistent P0622 code. The fault ties to the internal voltage regulator not communicating correctly with the ECU.
Real Owner Stories
2011 Jeep Grand Cherokee with No-Start
Vehicle would not crank or start, displaying a P0622 code along with multiple other communication and over-voltage codes across various modules.
What they tried:
- Initial thought was a dead battery or failed alternator.
- Upon inspection, the main engine-to-chassis ground strap was found completely broken and corroded.
Outcome: Replaced the braided ground strap with a new Dorman part (60213). After clearing the codes, the vehicle started and ran correctly, with charging voltage returning to normal.
Lesson: On Chrysler/Jeep products, a broken ground strap is a very common cause for P0622 and a host of other bizarre electrical issues. Always inspect the main grounds before condemning the alternator or PCM.
2005 Ford Mustang 4.0L with Intermittent Battery Light
The battery warning light came on and off randomly while driving. A scan revealed a P0622 code, but the alternator charged correctly at 14.0-14.6V when tested.
What they tried:
- The battery was only a year old and tested fine.
- The alternator passed a voltage output test, leading to confusion.
Outcome: The cause was a failing internal component of the alternator, creating an intermittent fault in the field circuit that the PCM detected. The alternator worked most of the time but had moments where the 'F' circuit signal was lost. The fix was replacing the alternator.
Lesson: An alternator produces correct voltage but has an internal circuit fault that triggers P0622. An intermittent warning light points to a failing component rather than a complete failure, but replacement is imminent.
2007 Toyota Hilux with Multiple Electrical Failures
Vehicle intermittently experienced a P0622 code which caused the speedometer, A/C, and turn signals to stop working and locked the gearbox.
What they tried:
- The owner replaced the alternator, but the problem persisted intermittently.
- The issue sometimes resolved itself after restarting the engine.
Outcome: This is a known issue on this model where a fault in the alternator's internal regulator or the associated wiring causes a communication breakdown on the CAN bus network. This leads to the failure of other unrelated electronic modules. The root cause is the charging system (P0622).
Lesson: On modern, networked vehicles, a fault in a critical module like the alternator/PCM causes a cascade of seemingly unrelated failures. Don't be distracted by the other symptoms; the root cause is the primary DTC, in this case P0622.
2001 Dodge Grand Caravan with P0622
The battery was not charging and the van threw a P0622 code.
What they tried:
- Instead of buying a new alternator, the owner inspected the alternator's internal components.
Outcome: The owner removed the back cover of the alternator and found the brushes on the voltage regulator assembly were completely worn down. He purchased a new brush/regulator assembly online for $14 and replaced it, solving the problem.
Lesson: For those comfortable with detailed repairs, the cause of P0622 is often a single, inexpensive component inside the alternator, like the brushes or voltage regulator. Rebuilding these parts is much cheaper than a whole new alternator.
How to Prevent This Code From Triggering
- Keep Battery Terminals and Connections Clean (Every 6 months / Every oil change) — Corrosion on battery terminals creates resistance, increasing the electrical load and forcing the alternator to work harder. Cleaning them with a wire brush and a baking soda solution prevents this strain.
- Inspect and Maintain Serpentine/Drive Belt (Every 12,000 miles) — The alternator is powered by the engine via a belt. A loose, cracked, or worn belt slips, causing the alternator to spin improperly and undercharge, which stresses its components.
- Avoid Deeply Discharging the Battery (Daily habit) — Leaving lights on or using electronics with the engine off drains the battery. A deeply discharged battery requires the alternator to run at maximum output for a long period to recharge, generating excessive heat and leading to premature failure.
- Ensure Engine and Chassis Grounds are Secure (Annually) — Inspect main ground straps to ensure they are tight and free of corrosion. A poor ground connection creates unstable voltage references, confusing the PCM and damaging sensitive electronics, including the alternator's regulator.
- Address Oil or Coolant Leaks Promptly (As needed) — Fluids leaking onto the alternator contaminate its internal components, causing short circuits and bearing failure. Fixing leaks that drip onto the alternator protects it from this external damage.
Frequently Asked Questions
Can I drive my car with a P0622 code?
It is strongly advised not to. Your car runs on battery power for a limited time (30-60 minutes) but stalls without warning once the battery depletes. This creates a serious safety risk.
How much does it cost to fix a P0622 code?
A professional diagnosis costs $100-$180. Simple fixes like repairing a corroded wire or replacing a blown fuse cost $100-$250. Replacing the alternator ranges from $350 to $950 for parts and labor.
I replaced the alternator, but the code came back. What now?
The new alternator is likely a low-quality or incompatible aftermarket part. Alternatively, the actual fault is in the wiring, connector, or a broken ground strap that wasn't repaired. Finally, a weak original battery can damage the voltage regulator on the new alternator.
What's the most common mistake when diagnosing P0622?
The biggest mistake is replacing the alternator without performing basic electrical checks first. Always test the battery, inspect all related wiring for damage, check for blown fuses, and verify the engine/chassis grounds are clean and tight.
Can a blown fuse cause a P0622 code?
Yes, many charging systems have a dedicated fuse or fusible link. If this fuse blows, it cuts off the control or sense circuit for the alternator, instantly setting a P0622 code. Always check the fuse box before starting complex repairs.
What is the 'F' terminal on an alternator?
The 'F' terminal stands for 'Field' and connects the field control circuit. The PCM sends a Pulse-Width Modulated (PWM) signal through this circuit to control the magnetic field strength inside the alternator, regulating electrical output.
What's the difference between the 'F' terminal and 'L' terminal?
The 'F' (Field) terminal controls the alternator's output, triggering code P0622 when it fails. The 'L' (Lamp) terminal controls the battery warning light on the dashboard, associated with code P0621.
Is a bad battery causing the P0622 code?
Usually, no, because P0622 specifically points to a fault in the alternator's control circuit. A bad battery typically triggers codes like P0562 (System Voltage Low). However, a severely degraded battery places immense strain on the charging system, potentially contributing to the alternator's internal regulator failure.
Key Takeaways
- Code P0622 indicates the Powertrain Control Module (PCM) has lost control of the alternator's field circuit, stopping the battery from charging.
- A faulty internal alternator voltage regulator causes the majority of P0622 codes, but broken engine ground straps are the primary culprit on Jeep and Dodge vehicles.
- You have a maximum of 30 to 60 minutes of driving time on battery power before the engine stalls and you lose power steering and brakes.
- Test the battery voltage and inspect the 10A-20A charging system fuses before spending $350+ on a replacement alternator.
- Always install an OEM or premium remanufactured alternator, as Ford, GM, and Subaru computers frequently reject cheap aftermarket units and immediately trigger P0622 again.
Helpful Videos

The information in this article is provided for general reference and educational purposes only. Vehicle specifications, procedures, and part compatibility can vary by production date, trim level, and region. Always consult your vehicle's factory service manual and verify part numbers before purchasing or performing repairs. Safety-critical components such as airbags, seat belts, and braking systems should be installed by a qualified professional.
- 🎬 Helpful Videos
- What Does P0622 Mean?
- Can I Drive With P0622?
- Common Causes
- Symptoms
- Diagnostic Flowchart
- Common Fixes & Costs
- DIY vs Professional
- Used vs. New Parts: Buying Guide
- What Happens If You Wait — Timeline
- Cost of Not Fixing It
- Diagnosis Steps
- When This Code Triggers (Freeze-Frame Conditions)
- Related Codes
- Climate & Environmental Factors
- How to Talk to a Mechanic About This Code
- Where to Take It: Dealer vs Independent vs Chain
- When to Walk Away From the Repair
- What Scan Tool You Need for This Code
- How to Clear the Code After You Fix It
- Will This Fail Emissions / State Inspection?
- Most Commonly Affected Vehicles
- Manufacturer-Specific Notes
- Real Owner Stories
- 2011 Jeep Grand Cherokee with No-Start
- 2005 Ford Mustang 4.0L with Intermittent Battery Light
- 2007 Toyota Hilux with Multiple Electrical Failures
- 2001 Dodge Grand Caravan with P0622
- How to Prevent This Code From Triggering
- Frequently Asked Questions
- Can I drive my car with a P0622 code?
- How much does it cost to fix a P0622 code?
- I replaced the alternator, but the code came back. What now?
- What's the most common mistake when diagnosing P0622?
- Can a blown fuse cause a P0622 code?
- What is the 'F' terminal on an alternator?
- What's the difference between the 'F' terminal and 'L' terminal?
- Is a bad battery causing the P0622 code?
- Key Takeaways
- 🎟️ Get 5% Off