

OBD-II Code P0572: Brake Switch 'A' Circuit Low
The Ultimate Guide to P0572: What It Means, Why It Triggers, and How to Fix It for Good
- P0572 indicates a low voltage signal from the primary brake switch, which disables your brake lights and creates an immediate rear-end collision hazard.
- Replacing the brake light switch resolves this code in over 80% of cases and typically costs between $75 and $200 at a repair shop.
- Before buying parts, spend 5 minutes checking the stop lamp fuse and inspecting the switch plunger for a 0mm gap against the pedal arm.
- If your vehicle is stuck in Park due to this code, use a flathead screwdriver in the manual shift lock override slot to shift into Neutral.
What Does P0572 Mean?

P0572 means the Powertrain Control Module (PCM) or Body Control Module (BCM) detects a voltage signal from the primary brake light switch ('A' circuit) that falls below the expected range. This switch tells the computer when you press the brake pedal. Without this signal, the computer disables cruise control, brake lights, and the brake-shift interlock system.
Technical definition: The SAE/OBD-II definition is "Brake Switch 'A' Circuit Low". The PCM or BCM detects continuous low voltage from the brake light switch 'A' circuit. This triggers when voltage drops below a manufacturer threshold (typically under 8V on a 12V circuit, or under 4.5V on a 5V reference circuit), indicating a short to ground, open circuit, or failed switch. The 'A' circuit is the primary feed for brake light activation.
Can I Drive With P0572?
No — Do Not Drive. Driving with this code is illegal and dangerous. It disables your brake lights, creating a critical safety failure that dramatically increases rear-end collision risk. You will also lose cruise control and the ability to shift out of Park. Fix this immediately.
Common Causes

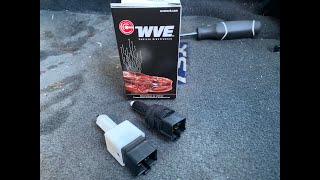
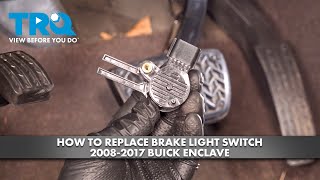
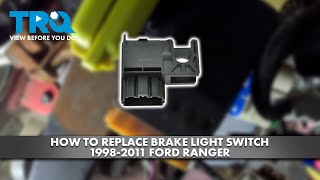
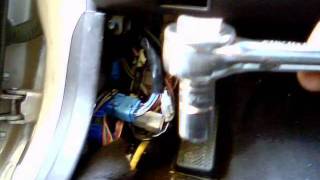
- Faulty Brake Light Switch (Very Common) — The internal contacts of this small electromechanical switch wear out 🎬 Watch: Step-by-step guide on how to replace a brake light switch., corrode, or break, failing to send the correct voltage signal.
- Blown Fuse (Common) — A blown fuse for the stop lamp or cruise control circuit cuts power to the switch, resulting in a zero-voltage reading.
- Wiring or Connector Issues (Common) — Wires leading to the brake switch fray, break, or short to ground from foot movement. Connectors suffer corrosion, moisture intrusion, or loose pins, disrupting the electrical signal.
- Improperly Adjusted Brake Light Switch (Common) — A misaligned switch fails to make full contact with the pedal arm. On some vehicles, the metal pedal bracket bends over time, preventing proper switch plunger travel.
- Faulty Trailer Wiring Harness (Common) — Water intrusion and corrosion in a trailer connector short the brake light circuit to ground, causing a persistent low voltage condition.
- Aftermarket LED Brake Lights (Less Common) — Cheap aftermarket LED bulbs have much lower resistance than incandescent bulbs. The BCM interprets this low resistance as a circuit fault or low voltage condition.
- Low System Voltage (Less Common) — A failing battery or alternator drops overall system voltage. If voltage supplied to the brake switch circuit falls below 10.4V-11.5V, the module flags a fault.
- Failing Body Control Module (BCM) or Powertrain Control Module (PCM) (Rare) — The module's internal driver circuit fails, misinterpreting a perfectly good signal. Consider this only after exhausting all switch and wiring tests.
Symptoms

- Brake lights do not work or are stuck on — Brake lights fail to illuminate when pressing the pedal. On certain European models, a failed switch forces the brake lights to remain on continuously as a failsafe.
- Cannot shift out of Park — The brake-shift interlock requires a valid brake signal to release the gear selector. P0572 traps the vehicle in Park.
- Cruise control is inoperative — The system requires the brake switch signal to disengage safely. Without it, cruise control disables itself.
- ABS and Traction Control warning lights on — ABS and stability control systems require brake application data. A faulty signal triggers dash warning lights and disables these safety features.
- Push-button start attempts to crank without brake press — The system assumes the brake is constantly pressed, causing the engine to crank the moment you push the start button without touching the pedal.
- Check Engine Light illuminated — The Check Engine Light illuminates to alert the driver of the stored PCM fault.
Diagnostic Flowchart
Tap your situation to follow the diagnostic path that matches what you're seeing on this code.
Common Fixes & Costs
- Replace Blown Fuse — Parts: $1-$5, Labor: $0, ~0.1 hr book time (DIY)
- Replace Brake Light Switch — Parts: $15-$80, Labor: $60-$120, ~0.5 hr book time (DIY)
- Adjust Brake Light Switch — Parts: $0, Labor: $0-$50, ~0.3 hr book time (DIY)
- Repair Wiring or Connector — Parts: $5-$25, Labor: $75-$200, ~1.5 hr book time (Intermediate)
- Replace Body Control Module (BCM) — Parts: $300-$600, Labor: $150-$300, ~2.0 hr book time (Professional)
DIY vs Professional
- Replace Brake Light Switch — Beginner: Yes
Tools: Basic hand tools, flashlight. - Replace Blown Fuse — Beginner: Yes
Tools: Fuse puller or small pliers. - Adjust Brake Light Switch — Beginner: Yes
Tools: Basic hand tools. - Repair Wiring or Connector — Beginner: No
Tools: Multimeter, wire strippers, crimpers, soldering iron, heat shrink, wiring diagrams. - Replace Body Control Module (BCM) — Beginner: No
Tools: Advanced diagnostic scan tool for programming, socket set.
Used vs. New Parts: Buying Guide
When a used part is worth it: Never. For an inexpensive, high-wear component like a brake light switch, buying used risks immediate failure.
Donor-vehicle mileage cap: roughly under 20000 miles for the part to have meaningful remaining life.
Donor quality checklist:
- Source only from low-mileage wrecked vehicles.
- Match the part number exactly.
- Avoid parts from flood-damaged regions.
Decision logic:
- If The new part costs less than $100 → Buy new. Repeat labor negates any used part savings.
- If The vehicle is over 10 years old → Buy new OEM or high-quality aftermarket. Used parts are near the end of their service life.
- If The issue is a known recall item → Use only the new, updated OEM replacement part to correct the factory defect.
Warranty tradeoff: Used parts offer 30-day warranties covering only the part. New aftermarket parts offer 1-year to lifetime warranties.
Worst-case if a used part fails: $100-$200 (Repeat labor and a second switch).
What Happens If You Wait — Timeline
- Immediate (First 0-100 miles): Code P0572 sets. Brake lights fail, cruise control disables, and the vehicle sticks in Park. The primary risk is a rear-end collision. (MPG impact: 0%% · Added cost: $150-$1000+ (Traffic ticket or insurance deductible from an accident).)
- 1-4 weeks: If the switch fails 'stuck on', brake lights remain illuminated, confusing drivers and draining the battery. (MPG impact: 0%% · Added cost: $100-$300 (New battery or roadside assistance).)
- 1-6 months: Ignoring a wiring short puts thermal stress on BCM/PCM circuits. The driver for the brake switch circuit overheats. (MPG impact: 0%% · Added cost: $50-$200 (Diagnostic costs for cascading ABS/Traction Control warnings).)
- 6+ months: The intermittent short permanently damages the BCM/PCM. Repair requires a new computer module and programming. (MPG impact: 0%% · Added cost: $500-$1500+ (BCM/PCM replacement).)
Cost of Not Fixing It
- Immediate: Brake lights fail, creating a severe rear-end collision risk. The vehicle may strand you in Park. (Added cost: $150-$1000+ (Traffic ticket or insurance deductible).)
- Short Term (0-1 month): Safety systems like ABS and Traction Control disable. Potential battery drain if the switch sticks on. (Added cost: $100-$300 (New battery or diagnostic charges).)
- Long Term (1-6+ months): Ignoring a wiring short damages the Body Control Module (BCM) or Powertrain Control Module (PCM). (Added cost: $500-$1500+ (Control module replacement).)
Diagnosis Steps

- Read Codes and Freeze Frame Data
Use an OBD-II scanner to confirm P0572 is active. Note related codes (P0571, P0573, P0504, U-codes) and review freeze frame data to see the vehicle's status when the code set.
Tools: OBD-II Scanner (Beginner) - Test the Brake Lights
Have a helper stand behind the car while you press and release the brake pedal. Confirm if the lights are working, delayed, dim, or stuck on.
Tools: A helper or reflective surface (Beginner) - Check the Fuses
Locate the fuse box using your owner's manual. Visually inspect and test the fuses for the stop lamps, brake lights, and cruise control.
Tools: Owner's Manual, Fuse Puller, Multimeter (Beginner) - Visually Inspect the Brake Light Switch and Wiring
Look under the dashboard at the top of the brake pedal arm. Verify the switch mounts securely and the plunger makes firm contact with the pedal arm. Inspect the connector and trailer wiring for corrosion.
Tools: Flashlight (Beginner) - Pro Tip: View Live Data with a Scan Tool
Monitor the 'Brake Pedal Switch' PID on a scan tool. It must change from 'Off/Released' to 'On/Applied' instantly when pressing the pedal. No change confirms the signal fails to reach the module.
Tools: Bi-Directional Scan Tool (Intermediate) - Test the Brake Switch Circuit Voltage
Disconnect the switch connector. With the key on, check for battery voltage (12V) on the power supply wire. Reconnect the switch. Backprobe the signal wire. Voltage must toggle between ~0V and ~12V when pressing and releasing the pedal. A persistent zero reading indicates the fault.
Tools: Multimeter, T-pins (Intermediate) - Check for Shorts to Ground
Disconnect the brake switch and the PCM/BCM connector. Measure resistance between the signal wire terminal and a known good chassis ground. The reading must be open circuit (OL). Continuity (near 0 Ω) confirms a short to ground in the harness.
Tools: Multimeter, Vehicle Wiring Diagram (Advanced) - Advanced: Test Brake Switch Resistance
Disconnect the brake switch. Measure resistance across the power and signal terminals. With the pedal released (plunger out), resistance must be infinite (OL). Pressed (plunger in), resistance drops to near 0 Ω. Higher readings indicate internal failure.
Tools: Multimeter (Advanced) - Pro Tip: Perform a Voltage Drop Test
Set your multimeter to a low DC Volts scale (mV). Place one probe on the negative battery terminal and the other on the ground pin of the brake switch connector. A reading above 100mV indicates excessive ground resistance.
Tools: Multimeter (Advanced) - Advanced: Quantitative Voltage Analysis
Ensure the charging system outputs 13.5-14.5V when running. Low system voltage triggers the code. For 12V systems, the fault triggers if signal voltage drops below 8-9V. For 5V reference systems, the threshold is below 4.5V.
Tools: Multimeter, Advanced Scan Tool (Advanced)
When This Code Triggers (Freeze-Frame Conditions)
- Vehicle Speed: 0 mph (Vehicle is stationary. The computer expects a brake signal to shift from Park but receives none.)
- Vehicle Speed: 30-70 mph (Cruise control is engaged. The system performs a self-test on the brake switch circuit and detects low voltage.)
- Brake Status PID: Off/Released (The computer detects deceleration via wheel speed sensors, but the brake switch status remains 'Off', indicating a mismatch.)
- System Voltage: <11.5V (During engine crank or with a failing alternator, overall system voltage drops, causing the brake switch circuit to fall below the fault threshold.)
Related Codes
- P0571 — Indicates 'Brake Switch 'A' Circuit Performance'. Sets when the signal is erratic. Seeing both P0571 and P0572 strongly points to an unstable low voltage condition like a loose connection.
- P0573 — The opposite of P0572 ('Circuit High'). Indicates voltage is stuck high (shorted to power). P0572 shows low voltage when it should be high.
- P0504 — Indicates 'Brake Switch 'A'/'B' Correlation'. Sets if the primary and redundant switch signals mismatch. Confirms the 'A' circuit failed.
- U0140 — Indicates 'Lost Communication With Body Control Module'. A failing BCM cannot process the brake signal. Diagnose U-codes first.
Climate & Environmental Factors
- Humidity and Salt: Moisture and road salt corrode electrical connectors, increasing resistance and causing voltage drops that trigger P0572.
- Chemical Contaminants: Silicone gas from car cleaners or cosmetics seeps into switch housings, forming an insulating film on contacts (the cause of Subaru recall WUE-90).
- Cold Weather: Extreme cold makes plastic switches brittle and strains aging batteries, dropping system voltage enough to trigger the code.
How to Talk to a Mechanic About This Code
Say this: "I have an OBD-II code P0572 for the 'Brake Switch A Circuit Low'. My brake lights aren't working and I can't shift out of Park. I'd like to schedule a diagnostic to confirm if the issue is the switch, wiring, or a fuse before replacing parts."
Focuses the technician on a logical diagnostic path (fuse, wiring, switch) and prevents them from jumping to expensive conclusions or suggesting unrelated services.
Avoid saying:
- 'My check engine light is on, can you just fix it?'
- 'My car is acting weird, I think it's something with the brakes.'
- 'Just replace the brake switch.'
Questions to ask before authorizing the repair:
- Did you test for voltage at the brake switch connector to confirm it has power?
- Did you check live data on a scan tool to see if the computer recognizes the pedal being pressed?
- If the switch and fuse are good, how will you test for a wiring short or bad ground?
- What is the warranty on the parts and labor for this repair?
Where to Take It: Dealer vs Independent vs Chain
- Dealer:
Recommended only if the vehicle is under warranty/recall, or if an independent shop diagnoses a control module failure.
Best for: Vehicles under warranty., Vehicles with a known recall for the brake light switch (Subaru, Hyundai/Kia)., Complex electrical issues where a Body Control Module (BCM) is suspected.
Downsides: Highest labor rates, typically 1.5-2x more than independent shops., May default to replacing a module when a simpler wiring repair suffices. (Typical cost: +50% vs. baseline) - Independent Shop:
Best fit for most P0572 situations. Offers the best balance of cost and expertise for routine electrical repairs.
Best for: Most out-of-warranty vehicles., Diagnosing and fixing the most common causes: a bad switch, fuse, or wiring issue.
Downsides: Diagnostic skill varies; look for ASE certifications., May lack manufacturer-specific programming tools for module replacement. (Typical cost: +0% vs. baseline) - Chain Shop:
Acceptable for a straightforward switch replacement. Avoid for initial diagnosis.
Best for: Simple, unambiguous part replacement like a fuse or a pre-diagnosed switch.
Downsides: Technician skill varies dramatically., Ill-equipped for electrical diagnosis beyond reading codes., High pressure to upsell services. (Typical cost: -10% vs. baseline)
When to Walk Away From the Repair
If the total estimated repair cost exceeds 50% of your car's current private-party value, consider selling or trading it in.
- Car worth $4000, fix is $350: Fix it. The repair cost is less than 10% of the car's value and restores critical safety.
- Car worth $1500, fix is $800: Walk away. The repair requires replacing a control module and exceeds 50% of the vehicle's value.
- Car worth $8000, fix is $150: Fix it. This is a low-cost, high-value repair.
What Scan Tool You Need for This Code

Minimum: A basic code reader that displays live data for the brake switch status.
A $20 code reader only gives the code. Seeing the live data PID change from 'On' to 'Off' confirms if the signal reaches the computer, essential for diagnosis.
Budget: Ancel BD310 or BlueDriver Pro (~$60) — Connects via Bluetooth to display live data streams, allowing you to watch the brake switch status in real-time.
Mid-range: Innova 5610 or Foxwell NT604 Elite (~$320) — Reads manufacturer-specific codes, accesses BCM modules directly, and graphs voltage data to pinpoint intermittent wiring issues.
Professional: Autel MaxiCOM MK808 / MK906BT (~$500-1200) — Provides professional-level diagnostics. Essential for programming and calibrating a replacement Body Control Module (BCM).
Rent vs buy: Buy a budget pick under $100. Auto parts stores read codes for free but rarely show the critical live data needed for proper diagnosis.
How to Clear the Code After You Fix It
- Use an OBD-II scan tool to clear the P0572 code.
- Reconnect the battery if disconnected.
- Perform a complete drive cycle to run readiness monitors.
Drive cycle (~20 minutes): Idle for 2-3 minutes. Drive in mixed conditions for 15-20 minutes. Press and release the brake pedal 10-15 times to cycle the circuit. Restart the vehicle to confirm the Check Engine Light remains off.
Readiness monitors affected: Comprehensive Component Monitor (CCM)
Before emissions retest: drive at least 50 miles to fully set monitors.
Watch out for:
- Clearing the code without a drive cycle fails to confirm the fix.
- If the underlying short or misadjustment remains, the code returns immediately.
- Disconnecting the battery resets all readiness monitors, delaying emissions testing.
Will This Fail Emissions / State Inspection?
Yes — this code typically fails an OBD-II emissions inspection.
- California: An active P0572 code causes an automatic failure of the smog check's OBD-II system test.
- New York: An illuminated Check Engine Light from code P0572 results in an emissions test failure.
- Texas: In emissions-testing counties, an active P0572 code fails the OBD-II inspection.
Most Commonly Affected Vehicles
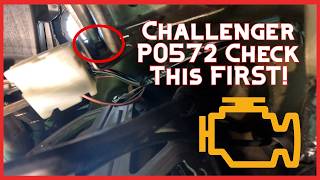
- Dodge/Chrysler/Ram Grand Caravan, Town & Country, Ram 1500, Challenger, Dart (2008-2017) — Extremely common. On Challengers, the metal pedal bracket bends over time. Bend it back rather than replacing the switch.
- Jeep Grand Cherokee, Wrangler (2011-2018) — On push-button start models, a faulty switch causes no-start conditions or allows starting without pressing the brake.
- Chevrolet/GMC Silverado, Sierra, Equinox, Traverse (2007-2014) — The ECM sets P0572 if wheel speed sensors detect deceleration but the BCM reports no brake application.
- Ford F-150, Explorer, Focus (2009-2016) — Switches frequently fail internally or misadjust from driver foot traffic.
- Hyundai/Kia Elantra, Sorento, Optima, Soul (2007-2018) — Subject to large-scale recalls for intermittent switch failures causing ESC warnings and non-functional brake lights.
- Subaru Outback, Forester, Impreza, Crosstrek (2008-2017) — Massive recall (WUE-90) issued for switch failure due to chemical contamination, causing a cascade of dash warning lights.
- Volkswagen/Audi Jetta, Golf, A3, S3 (2010-2018) — Faults force brake lights to stick ON. Some models use master cylinder pressure sensors, complicating diagnosis.
- Honda Accord, Civic, CR-V (2008-2016) — Failing switches trigger the Vehicle Stability Assist (VSA) warning light alongside the Check Engine Light.
Manufacturer-Specific Notes
- Chrysler/Dodge/Jeep: Failing switches illuminate the Electronic Stability Control (ESC) light. TSB 08-053-15 addresses intermittent ESC activation caused by the stop lamp switch.
- General Motors (Chevrolet/GMC): The BCM monitors the switch and sends serial data to the ECM. A data mismatch triggers the code even if the switch functions perfectly.
- Hyundai/Kia: Recalls address deteriorating stopper pads on the brake pedal assembly, causing lights to stay on or allowing shifting from park without braking.
- Subaru: Recall WUE-90 addresses chemical contaminants fouling switch contacts. The fix requires an updated switch with fluorine grease.
Real Owner Stories
2013 Ram 1500 with intermittent ABS/Brake lights
The ABS and brake warning lights illuminated intermittently. A code scan revealed P0572, though the brake lights still functioned.
What they tried:
- Reset the code, but it returned the next day.
- Replaced the brake light switch on the pedal arm.
Outcome: Replacing the $15 switch resolved the issue. The owner noted the new switch required a specific 'one-shot' installation procedure involving flipping an adjustment lever.
Lesson: Even if brake lights work, the switch can fail on its secondary circuits. Read installation instructions carefully for Chrysler/Ram switches, as they cannot be reused once set.
2015 Audi S3 with brake lights stuck ON
Brake lights remained constantly on. Pushing the start button immediately cranked the engine without a foot on the brake pedal. P0572 was stored.
What they tried:
- Researched symptoms pointing to a faulty brake pedal sensor.
- Purchased and installed a new sensor (part 1k0945459c).
Outcome: Replacing the sensor fixed all symptoms. Brake lights and push-start operate normally.
Lesson: On VW/Audi models, a 'circuit low' fault forces brake lights to fail in the 'ON' position as a safety measure, causing bizarre push-start behavior.
2014 Subaru Forester with multiple dash lights
Check Engine, ABS, and Vehicle Dynamics Control (VDC) lights illuminated suddenly. Brake lights stopped working.
What they tried:
- Took the vehicle to a dealer.
- Dealer identified a faulty brake light switch covered under Subaru Recall WUE-90.
Outcome: The dealer replaced the switch with an improved part free of charge, clearing P0572 and all warning lights.
Lesson: For 2008-2017 Subarus, P0572 is a known issue covered by a massive recall. Always check for open recalls before paying for repairs.
2006 Toyota Sienna stuck in Park
The vehicle intermittently stuck in Park, accompanied by codes P0571 and P0504 (Brake Switch 'A'/'B' Correlation).
What they tried:
- Observed live data showing brake switch status not changing.
- Bench-tested the 4-pin switch, confirming intermittent failure.
- Replaced the brake switch (Toyota part 84340-69015).
Outcome: A new switch immediately fixed the shift interlock problem. Codes cleared and did not return.
Lesson: Being stuck in Park is a classic failed brake switch symptom. A P0504 correlation code strongly confirms an internal circuit failure.
How to Prevent This Code From Triggering
- Inspect and clean electrical connectors. (Every 1-2 years in humid or salt-belt regions.) — Moisture and road salt corrode connector pins, increasing resistance. Electronics contact cleaner and dielectric grease prevent voltage drops.
- Check for open recalls. (Annually.) — Subaru and Hyundai/Kia issued massive recalls for faulty brake light switches. A free dealer repair with an updated part is the best fix.
- Inspect trailer wiring harness. (Before each towing season.) — Exposed trailer connectors frequently short and back-feed into the vehicle's brake light circuit, causing P0572.
- Avoid silicone-based interior cleaners near the footwell. (Always.) — Silicone gas forms an insulating film on internal switch contacts, causing failure (the root cause of millions of Subaru recalls).
- Ensure proper switch adjustment during installation. (During replacement.) — Misadjusted switches suffer mechanical stress from the pedal mechanism, leading to premature failure.
Frequently Asked Questions
Is it safe to drive with a P0572 code?
No. Driving without brake lights is illegal and creates a severe rear-end collision hazard. Tow the vehicle or fix it where it sits.
Can I fix a P0572 code myself?
Yes. Replacing a blown fuse or a faulty brake light switch is a straightforward DIY repair requiring basic hand tools. Diagnosing wiring shorts or module failures requires a multimeter and advanced electrical knowledge.
What is the most common mistake when diagnosing P0572?
The most common mistake is replacing the brake switch without checking the fuse first. Always verify the switch receives power using a multimeter. A broken wire, bad ground, or bent pedal bracket mimics a failed switch perfectly.
How do I get my car out of Park if the brake switch failed?
Locate the manual shift lock override slot near your gear selector. Insert a flathead screwdriver or your ignition key into the slot to release the lock. This allows you to shift into Neutral and move the vehicle.
My brake lights work, but I still have the P0572 code. What could be the cause?
Modern brake switches contain multiple independent internal circuits. The circuit powering the brake lights functions correctly, while the separate circuit sending the voltage signal to the PCM has failed. You still need to replace the switch assembly.
Can a bad battery cause a P0572 code?
Yes. A weak battery or failing alternator drops the overall system voltage. If the voltage supplied to the brake circuit falls below the computer's minimum threshold (typically 10.4V), it triggers a P0572 code.
What is the difference between Brake Switch 'A' and 'B'?
Switch 'A' is the primary circuit for the brake lights and the main engine computer. Switch 'B' is a redundant secondary circuit used for ABS, stability control, and cruise control. The computer compares both signals as a safety cross-check.
Key Takeaways
- P0572 indicates a low voltage signal from the primary brake switch, which disables your brake lights and creates an immediate rear-end collision hazard.
- Replacing the brake light switch resolves this code in over 80% of cases and typically costs between $75 and $200 at a repair shop.
- Before buying parts, spend 5 minutes checking the stop lamp fuse and inspecting the switch plunger for a 0mm gap against the pedal arm.
- If your vehicle is stuck in Park due to this code, use a flathead screwdriver in the manual shift lock override slot to shift into Neutral.
Helpful Videos

The information in this article is provided for general reference and educational purposes only. Vehicle specifications, procedures, and part compatibility can vary by production date, trim level, and region. Always consult your vehicle's factory service manual and verify part numbers before purchasing or performing repairs. Safety-critical components such as airbags, seat belts, and braking systems should be installed by a qualified professional.
- 🎬 Helpful Videos
- What Does P0572 Mean?
- Can I Drive With P0572?
- Common Causes
- Symptoms
- Diagnostic Flowchart
- Common Fixes & Costs
- DIY vs Professional
- Used vs. New Parts: Buying Guide
- What Happens If You Wait — Timeline
- Cost of Not Fixing It
- Diagnosis Steps
- When This Code Triggers (Freeze-Frame Conditions)
- Related Codes
- Climate & Environmental Factors
- How to Talk to a Mechanic About This Code
- Where to Take It: Dealer vs Independent vs Chain
- When to Walk Away From the Repair
- What Scan Tool You Need for This Code
- How to Clear the Code After You Fix It
- Will This Fail Emissions / State Inspection?
- Most Commonly Affected Vehicles
- Manufacturer-Specific Notes
- Real Owner Stories
- 2013 Ram 1500 with intermittent ABS/Brake lights
- 2015 Audi S3 with brake lights stuck ON
- 2014 Subaru Forester with multiple dash lights
- 2006 Toyota Sienna stuck in Park
- How to Prevent This Code From Triggering
- Frequently Asked Questions
- Is it safe to drive with a P0572 code?
- Can I fix a P0572 code myself?
- What is the most common mistake when diagnosing P0572?
- How do I get my car out of Park if the brake switch failed?
- My brake lights work, but I still have the P0572 code. What could be the cause?
- Can a bad battery cause a P0572 code?
- What is the difference between Brake Switch 'A' and 'B'?
- Key Takeaways
- 🎟️ Get 5% Off