

P0463 on 2019 Ram ProMaster: Fuel Level Sensor Circuit High Causes and Fixes
This code means the fuel level sensor is sending a higher-than-expected voltage signal, often above 5 volts. It's almost always caused by a faulty fuel level sending unit, which is part of the fuel pump module. Replacing the entire fuel pump module is the common and recommended fix, a job made easier on the ProMaster by an access panel under the driver's side floor.
- P0463 on a 2019 ProMaster points directly to a problem in the fuel level sensor circuit, usually an open or high voltage condition.
- The most likely culprit is a failed fuel level sending unit, which is part of the fuel pump module.
- While you can continue to drive, the fuel gauge will be unreliable, so you must track fuel usage manually.
- On all ProMaster vans, a convenient access panel on the floor between the seats makes replacing the fuel pump much easier than on vehicles where the tank must be dropped.
- Due to the risk of working with fuel, this repair is recommended for professionals or highly experienced DIYers.
What's Unique About the 2019-2019 Ram PROMASTER
For the 2019 ProMaster, Ram issued Technical Service Bulletins (TSBs) indicating a software update. This update changed the diagnostic strategy, making the system set the P0463 code for this specific fault instead of a more generic network code (U0463) used previously. This shows a deliberate effort by the manufacturer to improve the accuracy of diagnosing fuel level sender issues on this platform. [Bulletin #18-104-22, Bulletin #18-090-19] Interestingly, some owners report the check engine light for P0463 only appears when the fuel level drops below half a tank, and it may clear itself after refueling.
Diagnostic Flowchart
Tap your situation to follow the diagnostic path that matches what you're seeing on this vehicle.
Symptoms You May Notice
- Inaccurate or erratic fuel gauge (often stuck on full or empty).
- Check Engine Light is on.
- Low fuel warning light may be on, even with a full tank.
- In some cases, the fuel gauge may appear to work correctly, but the P0463 code is still stored, which can be confusing for diagnosis.
- The Check Engine Light may only illuminate when the tank is less than half full and turn off after refueling.
- Replacing the instrument cluster without diagnosing the sensor circuit.
- Replacing the PCM when the actual fault is in the wiring or the sensor itself.
- Assuming the fuel gauge itself is broken when it is only reporting the faulty signal it receives.
Most Likely Causes
- Faulty Fuel Level Sending Unit 🔴 High Probability The sending unit is a variable resistor with a moving arm, making it susceptible to wear on the contacts or internal wire breaks. It is the most common failure point for this code. Over time, the resistor strip can develop open spots, causing the voltage to spike.
How to confirm: Test the resistance of the sending unit with a multimeter while moving the float arm. The resistance should change smoothly without any jumps or open spots (infinite resistance). A new sensor will show a stable, smooth change in ohms, while a bad one will have erratic readings or open circuits.
Typical fix: Replace the entire fuel pump module, as the sending unit is integrated into it. While the sensor can sometimes be replaced separately, most mechanics replace the whole assembly.
Est. part cost: $540-$940 - Damaged Wiring or Connectors 🟡 Medium Probability As a commercial vehicle, the ProMaster's underbody wiring can be exposed to more wear and tear, potentially leading to corrosion or physical damage to the harness leading to the fuel tank. The connector on top of the fuel pump assembly can also become corroded or have a poor connection.
How to confirm: Visually inspect the wiring harness from the fuel tank to the BCM for any breaks, corrosion, or loose pins. Check for the correct reference voltage (typically 5V or 12V) and ground at the connector with the key on.
Typical fix: Repair or replace the damaged section of the wiring harness or clean/replace the connector.
Est. part cost: $20-$100 - Poor Ground Connection ⚪ Low Probability
How to confirm: Inspect the fuel tank ground strap for corrosion or looseness. Test the ground circuit with a multimeter to ensure there is low resistance to the chassis ground. A bad ground can cause a floating voltage and trigger the code.
Typical fix: Clean the ground contact point and re-secure the connection. Some mechanics clean the ground points as a preventative measure during fuel pump replacement.
Est. part cost: $1-$10
Rare But Worth Checking
- Faulty Powertrain Control Module (PCM): This is extremely rare. The PCM should only be considered after all other possibilities, including the sensor and wiring, have been thoroughly tested and ruled out.
- Faulty Instrument Cluster: In some systems, the instrument cluster processes the fuel level signal. A fault in the cluster could theoretically cause this code, but it is highly unlikely and other gauge-related issues would likely be present.
Diagnosis Steps
- Verify the P0463 code is present using an OBD-II scanner. Note if the code is active or permanent.
- Check the fuel gauge. Note if it is stuck on full, empty, or behaving erratically. Compare the reading to a manual estimate of fuel level.
- Inspect the fuses related to the fuel pump and instrument cluster.
- Visually inspect the wiring harness and connector at the fuel tank for any obvious damage, corrosion, or loose connections. This is accessible via the floor panel.
- Check the fuel tank ground strap for integrity and proper connection.
- Using a scan tool with live data, observe the fuel level sensor voltage, preferably from the Body Control Module (BCM) data list. A reading that is stuck high (e.g., near 5 volts or 12v) points towards an open circuit or faulty sensor.
- If accessible, disconnect the fuel pump connector and test for reference voltage and ground at the harness side. You should see a reference voltage (e.g., 5V or 12V).
- If wiring is confirmed to be good, the fault is almost certainly with the fuel level sending unit. Access the fuel pump module through the floor panel.
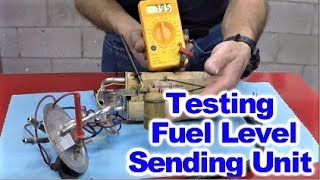
- Remove the fuel pump module and test the sending unit's resistance with a multimeter while manually moving the float arm. The resistance should change smoothly without any jumps or open spots. 🎬 Watch: How to test a fuel sending unit with a multimeter.
- If the sending unit fails the resistance test, replace the fuel pump module assembly. It is recommended to also get a new fuel pump seal/gasket.
Parts You'll Likely Need
- Fuel Pump Module Assembly
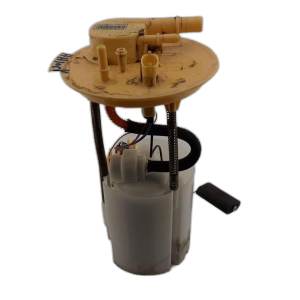
(OEM #68210305AF)— This is the most common cause of P0463. The fuel level sensor (sending unit) is integrated into this assembly and typically fails internally. The part number 68210305AF has superseded previous versions including 68210305AA, AB, AC, AD, and AE, indicating revisions to the part over time.
Trusted brands: Mopar
OEM price range: $600-$940
Aftermarket price range: $450-$700 - Fuel Pump Access Cover Seal/Gasket
(OEM #52029501AA)— It is best practice to replace the seal for the access cover to prevent fuel vapors from entering the cabin after the repair.
Trusted brands: Mopar
OEM price range: $20-$35
Aftermarket price range: $10-$20
Technical Service Bulletins (TSBs) & Recalls
- 18-104-22: Notes a software update that enables DTC P0463 for fuel level sensor circuit high faults.
- 18-090-19: An earlier TSB also mentioning the software calibration change to use P0463 instead of U0463.
Platform-Specific Known Issues
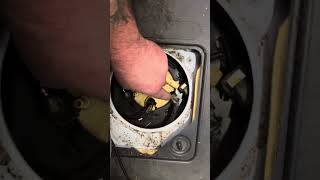
- A notable feature of the Ram ProMaster is an access panel located on the floor between the driver and passenger seats, which allows for fuel pump replacement without having to drop the fuel tank. This significantly reduces labor time compared to vehicles where the tank must be removed. The panel is typically under the flooring and secured by a few screws. 🎬 See how to access and replace the fuel pump module.
- In a documented case on a 2020 ProMaster, the fuel gauge was working perfectly, but the P0463 code was persistently on. Testing the sending unit revealed it had unstable and jumping resistance readings, confirming it was faulty despite the gauge appearing to function. 🎬 Watch: This repair walkthrough shows how to fix code P0463.
Mechanic-Grade Diagnostic Values
- Fuel Level Sensor Resistance — expected: A smooth sweep between approximately 40-250 Ohms is typical for many Ram/Chrysler vehicles (value can be inverted depending on model, e.g., 250 empty, 40 full).. Failure: A reading of infinite resistance (O.L.) indicates an open circuit, which directly causes P0463. Readings that jump or are erratic when moving the float also indicate failure.
- Fuel Level Sensor Signal Voltage (at BCM or sensor connector) — expected: A variable voltage that corresponds to fuel level, typically between 0.5V and 4.5V.. Failure: A voltage that is stuck high (at or near 5V or 12V, depending on system reference) indicates an open in the signal or ground circuit, or a failed sensor.
Scan Tool Commands That Help
- wiTECH or advanced aftermarket (e.g., Autel, Launch): View BCM (Body Control Module) Live Data — Use this to monitor the 'Fuel Level Sensor Voltage' PID directly. Since the sensor reports to the BCM on the ProMaster, viewing this data is more direct than checking the PCM data list, which receives the information over the CAN bus.
- wiTECH or advanced aftermarket: Instrument Cluster Actuator Test — To rule out a faulty fuel gauge in the instrument cluster. This command allows the scan tool to sweep the gauge through its range (Empty, 1/4, 1/2, 3/4, Full), confirming the gauge itself is functional.
Wiring & Ground Locations
- Body Control Module (BCM) Connector C5 (or similar) — The BCM is typically located behind the driver's side of the dashboard, often near the fuse panel.. On many modern Ram vehicles, the fuel level sensor signal does not go directly to the PCM. It is an input to the BCM. A video for a similar Dodge Ram shows the signal wire is Dark Blue/White at pin 17 of the C5 connector on the BCM. The PCM receives the fuel level data from the BCM via the CAN bus network. This makes the BCM and its connector a critical test point.
- Chassis Ground Points — ProMasters have several key ground locations, including under the driver's seat, near the battery negative terminal, and on the frame underneath the underhood fuse box.. While the fuel pump module has a dedicated ground wire in its harness, a poor main chassis or engine ground can cause floating voltages and unpredictable electrical issues across multiple systems, including triggering a P0463. Cleaning known ground points is good practice during diagnosis.
Real Owner Repair Stories
- YouTube channel 'ipartout studio' (2020 Ram ProMaster 1500 3.6L) — Persistent P0463 code, but the fuel gauge was working perfectly, showing the correct level and decreasing with use.
❌ Tried (didn't work) Initially suspected a wiring issue due to the functional gauge.
✅ What actually fixed it Despite the working gauge, testing the original sending unit with a multimeter showed unstable and jumping resistance readings. A new sending unit showed stable readings. Replacing the fuel level sensor (which is attached to the fuel pump assembly but can be swapped separately) resolved the code. The repair was done via the access panel under the driver's seat.
OEM Part Supersession History
68210305AA, 68210305AB, 68210305AC, 68210305AD, 68210305AE→68210305AF— Indicates multiple revisions by the manufacturer, likely to improve the durability and reliability of the integrated fuel level sending unit, which is the most common failure point causing P0463.
Model Year Variations Within This Range
- 2019: A key change for this model year was a software update detailed in TSBs #18-104-22 and #18-090-19. The update altered the diagnostic logic, causing the system to set the specific P0463 code for a high circuit fault, whereas it might have previously set a more generic U0463 (implausible message) code. This makes P0463 the correct and intended code for this fault after the update.
Helpful Videos


Used OEM Parts in Stock

New Aftermarket Parts Available


The information in this article is provided for general reference and educational purposes only. Vehicle specifications, procedures, and part compatibility can vary by production date, trim level, and region. Always consult your vehicle's factory service manual and verify part numbers before purchasing or performing repairs. Safety-critical components such as airbags, seat belts, and braking systems should be installed by a qualified professional.
- Ram PROMASTER:
- 🎬 Helpful Videos
- 🛍️ Shop This Part
- What's Unique About the 2019-2019 Ram PROMASTER
- Diagnostic Flowchart
- Symptoms You May Notice
- Most Likely Causes
- Rare But Worth Checking
- Diagnosis Steps
- Parts You'll Likely Need
- Technical Service Bulletins (TSBs) & Recalls
- Platform-Specific Known Issues
- Mechanic-Grade Diagnostic Values
- Scan Tool Commands That Help
- Wiring & Ground Locations
- Real Owner Repair Stories
- OEM Part Supersession History
- Model Year Variations Within This Range
- 🎟️ Get 5% Off