

P0461 on 2016-2022 Nissan Maxima: Fuel Level Sensor Range/Performance Issues and Fixes
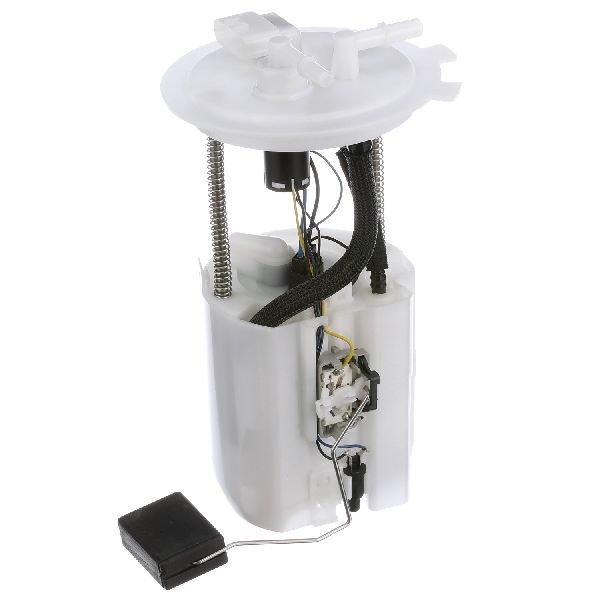
This code almost always means the fuel level sensor in the gas tank has failed. On the 2016-2022 Maxima, Nissan issued a Technical Service Bulletin (NTB22-026) confirming the sensor can be replaced separately from the much more expensive fuel pump assembly. The correct OEM part is typically 25060-4RA0A. Expect to pay around $150-$250 for the sensor part.
- P0461 on a 2016-2022 Maxima points directly to a faulty fuel level sensor.
- Do not replace the entire fuel pump assembly; Nissan issued a TSB (NTB22-026) stating that only the sensor needs to be replaced.
- The primary symptoms are an incorrect or fluctuating fuel gauge and an illuminated Check Engine Light.
- The correct OEM replacement part number is 25060-4RA0A.
- This repair is DIY-friendly for those comfortable with accessing the fuel tank (under the rear seat) and taking basic safety precautions.
- Driving with this code won't harm the engine, but it creates a risk of running out of fuel unexpectedly.
What's Unique About the 2016-2022 Nissan MAXIMA
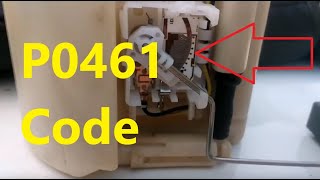
For the 8th generation Maxima, this is a well-documented issue. Nissan released a Technical Service Bulletin (NTB22-026) that specifically addresses P0461 and related codes for the Maxima, as well as the Altima and Murano. The key takeaway from this bulletin is that technicians should replace only the faulty fuel level sensor, not the entire fuel pump assembly, which saves a significant amount of money on parts. The bulletin explicitly states that warranty claims for a full pump replacement for this issue will be charged back, reinforcing that 🎬 Watch: How to fix code P0461 without replacing the whole pump. the sensor is the intended, separate fix.
Diagnostic Flowchart
Tap your situation to follow the diagnostic path that matches what you're seeing on this vehicle.
Symptoms You May Notice
- Check Engine Light is on
- Fuel gauge is inaccurate or fluctuates wildly
- Fuel gauge is stuck on empty, full, or any position in between
- Fuel gauge drops to empty after filling the tank, then may slowly rise over time
- Low fuel warning light is on even with a full tank
- "Distance to Empty" (DTE) reading is unreliable
- Replacing the entire fuel pump assembly. The provided TSB NTB22-026 specifically advises against this, as the fuel level sensor is the common point of failure and is a separate, less expensive part.
- Replacing the instrument cluster without proper diagnosis.
Most Likely Causes
- Faulty Fuel Level Sensor (Sending Unit) 🔴 High Probability This is a known issue acknowledged by Nissan via TSB NTB22-026. The sensor is a variable resistor with a moving arm, which can wear out or develop dead spots on the resistor strip over time, causing erratic readings.
How to confirm: Access the fuel pump module under the rear seat. With a multimeter set to Ohms, measure the resistance across the sensor's pins while manually moving the float arm. The resistance should change smoothly without any jumps or dead spots (e.g., from a low value near empty to a high value near full). An open circuit (infinite resistance) or sudden changes indicate a bad sensor.
Typical fix: Replace the fuel level sensor. The sensor can be purchased separately from the fuel pump assembly. The OEM part number is 25060-4RA0A. 🎬 See this easy walkthrough for replacing the fuel sending unit.
Est. part cost: $150-$250 - Wiring or Connector Issue 🟡 Medium Probability The wiring harness leading to the fuel tank can be susceptible to corrosion or damage over time, especially at the connector on top of the fuel pump assembly.
How to confirm: Visually inspect the wiring harness and connector at the top of the fuel pump assembly for any signs of corrosion, frayed wires, or loose connections. Perform a voltage drop test to check for high resistance in the circuit. Check for corrosion on the fuel tank grounding strap.
Typical fix: Repair the damaged section of wiring or clean/replace the corroded connector.
Est. part cost: $10-$50 - Stuck or Damaged Float Arm ⚪ Low Probability Debris in the fuel tank or physical damage during a previous repair could potentially cause the float arm to get stuck, preventing it from moving with the fuel level.
How to confirm: After removing the fuel pump assembly, visually inspect the float and its arm to ensure it moves freely throughout its entire range of motion and is not bent or obstructed.
Typical fix: Free the stuck float. If the arm or float is damaged, the fuel level sensor assembly must be replaced.
Est. part cost: $0-$250
Rare But Worth Checking
- Instrument Cluster Failure: While rare, a fault within the instrument cluster itself can cause the gauge to read incorrectly. This is unlikely compared to a sensor failure and should be diagnosed only after the sensor and wiring are confirmed to be good.
- Powertrain Control Module (PCM) Fault: In very rare cases, the PCM's internal circuit for reading the fuel level sensor can fail. This should only be considered after all other possibilities have been exhausted.
Diagnosis Steps
- Scan the vehicle's computer for P0461 and any other related codes (like P0460, P0462, P0463).
- Use a scan tool with live data capability to observe the fuel level sensor voltage or percentage. Note if the reading is erratic, stuck, or doesn't match the approximate fuel level.
- Relieve fuel system pressure and disconnect the negative battery terminal for safety.
- Gain access to the top of the fuel tank, which is located under the rear seat cushion on the passenger side.
- Disconnect the electrical connector and inspect it for corrosion or damage.
- Remove the lock ring and carefully lift the fuel pump assembly from the tank.
- With a multimeter set to Ohms, test the resistance of the fuel level sensor while moving the float arm up and down. The reading should change smoothly and consistently. An open circuit (infinite resistance) or sudden jumps/drops indicate a bad sensor.
- If the sensor tests good, check the wiring between the pump assembly and the PCM for continuity and shorts to ground.
- If wiring and sensor are good, the issue may be with the instrument cluster or PCM, which is rare and requires advanced diagnostics.
Parts You'll Likely Need
- Fuel Level Sensor
(OEM #25060-4RA0A)— This is the most common failure point for code P0461 on this vehicle, as confirmed by a manufacturer TSB.
Trusted brands: Nissan OE, Dorman
OEM price range: $200-$270
Aftermarket price range: $150-$220 - Fuel Tank O-Ring / Seal — It is best practice to replace the large O-ring seal for the fuel pump assembly any time it is removed to prevent fuel leaks and evaporative emissions system codes.
Trusted brands: Nissan OE
OEM price range: $15-$25
Aftermarket price range: $10-$20
Related Codes That Often Appear With This One
- P0460 — This code indicates a general fault in the fuel level sensor circuit and is listed in the same TSB as P0461.
- P0462 — This code indicates the fuel level sensor circuit input is low, often appearing with P0461.
- P0463 — This code indicates the fuel level sensor circuit input is high, often appearing with P0461.
Technical Service Bulletins (TSBs) & Recalls
- NTB22-026: Addresses inaccurate fuel gauge readings and associated trouble codes, advising replacement of the fuel level sensor only, not the complete fuel pump assembly. Applies to Maxima, Altima, and Murano.
Platform-Specific Known Issues
- Nissan Technical Service Bulletin NTB22-026 was issued for multiple models, including the Maxima, for inaccurate fuel gauge readings and codes P0460, P0461, P0462, and P0463. The bulletin explicitly states to replace the fuel level sensor separately, not the entire fuel pump assembly, for this issue.
Mechanic-Grade Diagnostic Values
- Fuel Level Sensor Resistance — expected: Approximately 51 Ohms (Full) to 300 Ohms (Empty). The resistance should change smoothly when moving the float arm.. Failure: Readings that are infinite (open circuit), zero (short circuit), or jump erratically as the float arm is moved.
- Fuel Level Sensor Voltage (Live Data) — expected: Approximately 0.5V (Empty) to 4.5V (Full).. Failure: Voltage is stuck at a specific value, does not change when fuel is added, or is outside the expected 0.5V-4.5V range.
Scan Tool Commands That Help
- Manual Procedure (No Tool): Instrument Cluster Self-Test / Gauge Sweep — To quickly verify if the physical fuel gauge needle and its motor in the instrument cluster are working. With the ignition off, press and hold the trip reset button, push the ignition button twice to the 'ON' position (without starting the engine), then press the trip button three times. The gauges should perform a full sweep. This helps rule out a faulty cluster before removing the fuel tank sender.
- Nissan CONSULT or advanced bidirectional scan tool: Active Test: Fuel Gauge Command — To command the fuel gauge to display specific levels (e.g., 0%, 50%, 100%) directly from the scan tool. If the gauge responds correctly to commands, the instrument cluster is good, and the fault lies with the sensor or wiring.
Wiring & Ground Locations
- Fuel Pump / Sensor Ground — While a specific diagram for the 2016-2022 Maxima was not found, Nissan vehicles commonly place the primary ground for the fuel system in the driver or passenger side kick panel area (e.g., G200 on older models) or have a dedicated ground strap near the fuel tank.. A corroded or loose ground connection for the fuel pump assembly can cause erratic voltage and resistance readings, mimicking the symptoms of a failed sensor. This should be inspected before replacing parts.
- Fuel Pump Assembly Connector — On top of the fuel tank, accessible by removing the rear passenger-side seat cushion and a metal access cover.. This is the primary connection point for the fuel level sensor. Corrosion or backed-out pins in this connector are a common cause of intermittent signal loss, leading to a P0461 code. The connector and harness should be inspected carefully when the unit is accessed.
OEM Part Supersession History
25060-4RA0A→
Heads up: This is the most commonly cited part for the 2016-2022 Maxima. However, some parts catalogs also list 25060-3TA0A for 2016-2017 models. It is critical to verify the correct part number using the vehicle's VIN before ordering to avoid incompatibility.
Helpful Videos
We Have This Part in Stock


The information in this article is provided for general reference and educational purposes only. Vehicle specifications, procedures, and part compatibility can vary by production date, trim level, and region. Always consult your vehicle's factory service manual and verify part numbers before purchasing or performing repairs. Safety-critical components such as airbags, seat belts, and braking systems should be installed by a qualified professional.
- Nissan MAXIMA:
- 🎬 Helpful Videos
- 🛍️ Shop This Part
- What's Unique About the 2016-2022 Nissan MAXIMA
- Diagnostic Flowchart
- Symptoms You May Notice
- Most Likely Causes
- Rare But Worth Checking
- Diagnosis Steps
- Parts You'll Likely Need
- Related Codes That Often Appear With This One
- Technical Service Bulletins (TSBs) & Recalls
- Platform-Specific Known Issues
- Mechanic-Grade Diagnostic Values
- Scan Tool Commands That Help
- Wiring & Ground Locations
- OEM Part Supersession History
- 🎟️ Get 5% Off