

P0455 on 2004-2007 Buick Rainier: EVAP Large Leak Causes and Fixes
For a 2004-2007 Buick Rainier, a P0455 code most often points to a loose or faulty gas cap, or a failed EVAP vent solenoid located near the rear axle. Start by checking the gas cap for a good seal; if that doesn't fix it, the vent solenoid is the next most likely culprit, costing around $25-$50 for the part. A cracked hose or a stuck purge solenoid are also common culprits.
- P0455 on your Rainier is an emissions-related code for a large EVAP leak and won't stop you from driving the car.
- Always check the gas cap first. Make sure it's tight and the seal is intact. This solves the problem a surprising amount of the time.
- The two most common parts to fail are the EVAP vent solenoid (at the rear of the truck) and the purge solenoid (in the engine bay). The vent solenoid is more likely to be the culprit due to its exposed location.
- If a new gas cap doesn't fix the issue, a visual inspection of the vent solenoid for corrosion or damage is the next logical step.
- For hard-to-find leaks, a professional smoke test is the quickest and most definitive way to find the source.
What's Unique About the 2004-2007 Buick RAINIER
The Buick Rainier is part of the GM GMT360 platform, which also includes the Chevrolet Trailblazer, GMC Envoy, Oldsmobile Bravada, Isuzu Ascender, and Saab 9-7X. These vehicles share the same basic EVAP system design and components. A common issue across this platform is the placement of the EVAP vent solenoid near the rear axle, where it is exposed to road salt, moisture, and debris, leading to premature corrosion and failure. Additionally, the purge solenoid, located in the engine bay, can sometimes get stuck closed, preventing the system from pulling a vacuum during its self-test. The ECM interprets this inability to draw a vacuum as a large leak, setting a P0455 code even when no physical leak exists.
Diagnostic Flowchart
Tap your situation to follow the diagnostic path that matches what you're seeing on this vehicle.
Symptoms You May Notice
- Check Engine Light is on.
- A faint smell of gasoline, particularly around the rear of the vehicle.
- Potentially a slight decrease in fuel economy over time.
- Difficulty starting the engine, especially right after refueling.
- Rough or unstable engine idle.
- Replacing the purge valve when the vent valve is the actual problem. The vent valve at the rear of the vehicle fails more frequently due to its exposed location.
- Replacing the gas cap repeatedly without checking other components. While a bad cap is common, if a new OEM cap doesn't fix the code, the problem is elsewhere in the system.
- Assuming a leak exists when the purge solenoid is stuck closed. A stuck-closed purge valve will prevent the system from drawing a vacuum during the test, mimicking a large leak.
Most Likely Causes
- Loose, Damaged, or Incorrect Gas Cap 🔴 High Probability This is the most common and simplest cause for a P0455 on any vehicle. The gas cap is a critical sealing point for the EVAP system, and its seal can degrade over time or it may not be tightened correctly after refueling.
How to confirm: Inspect the gas cap for cracks or a worn-out rubber seal. Ensure it clicks at least three times when tightened. If in doubt, it's an inexpensive first part to replace. An OEM ACDelco cap is often recommended to ensure a proper seal.
Typical fix: Tighten the cap or replace it with a new OEM-equivalent cap.
Est. part cost: $15-$35 - Failed EVAP Vent Solenoid 🔴 High Probability On the GMT360 platform, the vent solenoid is mounted above the rear axle, making it highly susceptible to corrosion and damage from road debris and moisture, causing it to stick open. This is a very common failure point on the Rainier and its platform mates.
How to confirm: Locate the solenoid near the charcoal canister above the rear differential. You can test it by applying 12V power and ground to its terminals; it should click and close (it is normally open). If it doesn't actuate, or if it's physically damaged or heavily corroded, it has failed.
Typical fix: Replace the vent solenoid. This is a common DIY repair that takes less than an hour. The OEM part is ACDelco #25950499. 🎬 Watch this walkthrough for replacing both the purge and vent valves.
Est. part cost: $25-$55 - Failed EVAP Purge Solenoid 🟡 Medium Probability The purge solenoid, located on the driver's side of the engine, can get stuck open or closed. If stuck open, it creates a constant vacuum leak. If stuck closed, the system cannot draw a vacuum during its self-test, which the ECM interprets as a large leak, triggering P0455. Owners on forums have reported this as the cause after replacing other more common parts.
How to confirm: With the engine running, disconnect the hose from the purge solenoid that leads to the intake manifold. There should be no vacuum present at idle. You can also remove it and try to blow through it; it should be closed when no power is applied.
Typical fix: Replace the purge solenoid/valve. The OEM part is ACDelco #12597567. 🎬 See how to test and replace the purge valve solenoid.
Est. part cost: $20-$45 - Cracked or Disconnected EVAP Hoses 🟡 Medium Probability Rubber and plastic lines become brittle with age and heat cycles. A hose can crack or a connection can come loose, especially around the charcoal canister, the filler neck, or the purge solenoid itself. A user on GMTNation.com fought the code for a year before a smoke test revealed a crumbled hose near the purge solenoid was the culprit.
How to confirm: A visual inspection may reveal obvious cracks. A user on YouTube found the quick-connector clip on the vent solenoid line was broken, causing the leak. The most effective method is to use an automotive smoke machine to introduce smoke into the EVAP system and see where it escapes.
Typical fix: Replace the damaged section of hose or reconnect the loose line.
Est. part cost: $5-$25
Rare But Worth Checking
- Cracked Charcoal Canister: The plastic housing of the charcoal canister can be damaged by road debris, causing a large leak. This is less common than solenoid failure but should be checked if other components are good. A smoke test is the best way to confirm a crack.
- Rusted Fuel Filler Neck: In areas with heavy road salt use, the metal fuel filler neck can rust through, creating a leak that is often mistaken for a bad gas cap. A visual inspection is necessary to confirm. A user on GMTNation.com reported replacing a rusted filler pipe to resolve their P0455 code.
- Faulty Fuel Tank Pressure Sensor: Less commonly, the fuel tank pressure sensor itself can fail. If the sensor incorrectly reports pressure values to the ECM, it can trigger a P0455 code even if no leak is present. This is often a last resort after all other components have been checked.
Diagnosis Steps
- Check the Gas Cap: Ensure the gas cap is tight and the seal is not cracked or worn. If it's old, consider replacing it with an OEM ACDelco cap as a cheap first step. Clear the code and drive for a few days to see if it returns.
- Visual Inspection: Inspect all visible EVAP hoses in the engine bay and around the fuel tank for obvious cracks, disconnections, or damage. Pay close attention to the lines connected to the purge and vent solenoids.
- Inspect and Test the EVAP Vent Solenoid: Locate the vent solenoid above the rear axle, near the charcoal canister. Check for physical damage or heavy corrosion. Test the solenoid for proper operation by applying 12V power; it should click closed. The OEM part number is 25950499.
- Inspect and Test the EVAP Purge Solenoid: Locate the purge solenoid in the engine bay on the driver's side. Check if it's stuck open or closed by removing it and trying to blow through it (it should be closed with no power). The OEM part number is 12597567.
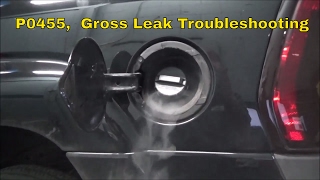
- Perform a Smoke Test: If the leak source is not obvious, the most reliable method is to use an automotive smoke machine. Introduce smoke into the EVAP service port and watch for where it escapes. 🎬 Watch a professional smoke test to find a gross EVAP leak. This will pinpoint the exact location of the leak, whether it's a hose, the filler neck, or the canister itself.
Parts You'll Likely Need
- Gas Cap
(OEM #ACDelco GT281)— This is the most frequent and easiest fix. The seal wears out over time, causing a leak.
Trusted brands: ACDelco, Stant
OEM price range: $20-$35
Aftermarket price range: $15-$25 - Vapor Canister Vent Solenoid
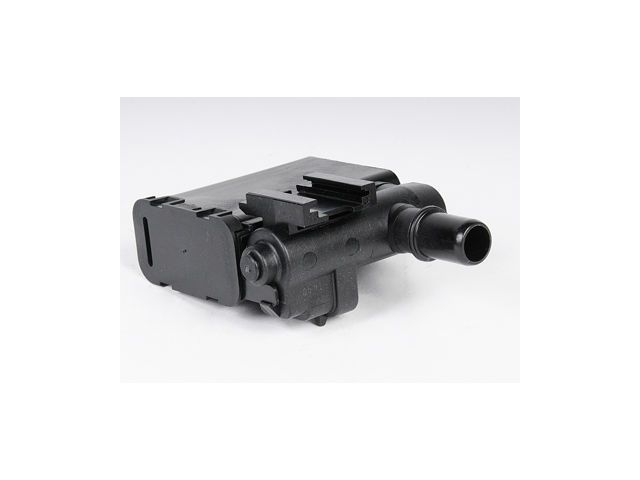
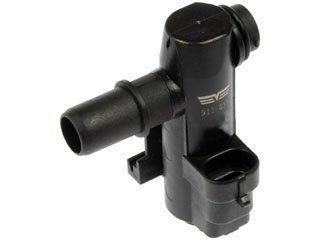
(OEM #ACDelco 25950499)— Its location on the Rainier makes it prone to failure from the elements, causing it to stick open and create a large leak.
Trusted brands: ACDelco, Dorman (911-033), Standard Motor Products (CP422)
OEM price range: $40-$60
Aftermarket price range: $25-$50 - Vapor Canister Purge Solenoid/Valve
(OEM #ACDelco 12597567)— This valve can stick open or, more deceptively, stick closed, causing the system's self-test to fail and report a large leak.
Trusted brands: ACDelco, Bosch, Dorman (911-032)
OEM price range: $30-$50
Aftermarket price range: $20-$45
Related Codes That Often Appear With This One
- P0442 — P0442 indicates a small EVAP leak. Sometimes a failing component can cause intermittent codes, starting as a small leak (P0442) before worsening into a large leak (P0455).
- P0449 — P0449 indicates a fault in the EVAP vent solenoid circuit. Since the vent solenoid is a very common failure point for P0455 on this platform, seeing P0449 alongside it strongly points to the vent solenoid or its wiring as the root cause.
Technical Service Bulletins (TSBs) & Recalls
- Bulletin #21-NA-124: Mentions diagnostic tips for testing EVAP system leaks related to codes P0442 and/or P0455 Set.
- Bulletin #02-06-04-037J: While primarily for code P0446 and slow refueling issues on other GM trucks, it details a procedure to relocate the EVAP vent filter to a less exposed area, a strategy that could prevent future vent solenoid failures on the Rainier due to environmental exposure.
Platform-Specific Known Issues
- Vent Solenoid Location: The EVAP vent solenoid's placement above the rear axle on the GMT360 platform makes it exceptionally vulnerable to road salt, water, and debris, leading to a high failure rate from corrosion.
- Brittle Purge Solenoid Hoses: The small, molded rubber hoses connected to the purge solenoid in the engine bay are known to become brittle and crumble over time, creating a large leak that is easily missed.
Mechanic-Grade Diagnostic Values
- EVAP Vent or Purge Solenoid Coil Resistance — expected: 15 to 50 Ohms. Failure: A reading significantly outside this range, or an open circuit (infinite resistance), indicates a failed solenoid coil.
- Fuel Tank Pressure (FTP) Sensor Voltage — expected: Approximately 1.5V with the gas cap off (atmospheric pressure).. Failure: A reading stuck high (near 5V) or low (near 0V) regardless of actual tank pressure suggests a faulty sensor or wiring issue.
- EVAP Vent Solenoid Power Supply — expected: Approximately 12V (battery voltage) on one of the two wires with the ignition in the ON position.. Failure: No voltage on either wire indicates a problem with the power supply from the fuse block.
Scan Tool Commands That Help
- GM Tech2 / GDS2: EVAP Service Bay Test — This is a crucial diagnostic function to test the entire EVAP system's integrity without needing to perform a full, complex drive cycle. The scan tool commands the vent solenoid to close and the purge solenoid to open, creating a vacuum in the system. It then monitors the fuel tank pressure sensor to see if the system can hold vacuum, quickly identifying if a leak is present.
- GM Tech2 / GDS2: Vent Solenoid Actuation — This bidirectional command allows a technician to manually command the vent solenoid open and closed while listening for the physical click of the solenoid. This confirms if the solenoid is receiving the command and is mechanically capable of moving, helping to isolate a bad solenoid from a wiring issue.
Wiring & Ground Locations
- EVAP Component Ground Circuits — GM vehicles of this era follow a convention where ground identifiers start with 'G'. G1xx grounds are in the engine bay/front of vehicle, G3xx are under the rear seat area, and G4xx are from the rear seat to the back of the vehicle.. The EVAP vent solenoid and fuel tank pressure sensor are located at the rear of the vehicle, so their ground circuits would likely terminate at a G3xx or G4xx ground point, typically on the frame rail near the fuel tank. A corroded or loose ground in this area can cause intermittent or false signals from these components, leading to incorrect EVAP codes.
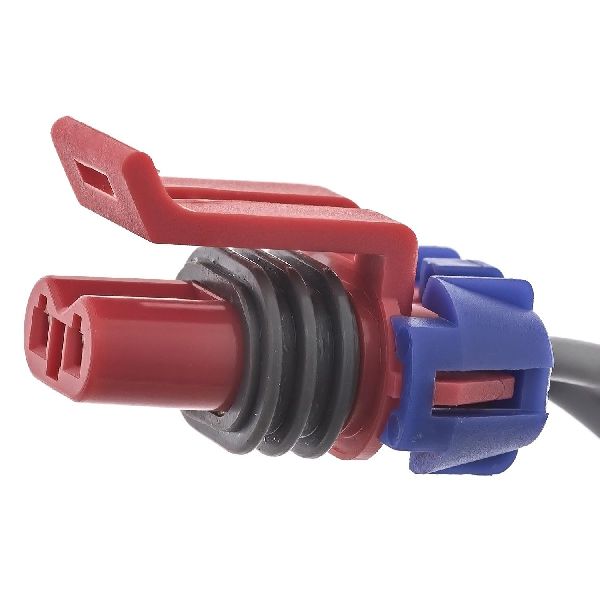
- Vent Solenoid Wiring — The two-wire connector at the EVAP vent solenoid, located above the rear axle near the charcoal canister.. Understanding the wiring logic is key for diagnosis. One wire should have constant 12V power with the key on. The other wire is the ground, which is switched on and off by the Engine Control Module (ECM) to close the valve during a test. If 12V is present but the valve doesn't click when commanded by a scan tool, the fault is likely the valve itself or the ground wire back to the ECM.
Real Owner Repair Stories
- GMTNation.com forum user 'MD_Envoy_Driver' (2003 GMC Envoy (GMT360 Platform)) — Persistent EVAP codes.
❌ Tried (didn't work) The user implies that single-part solutions were not sufficient.
✅ What actually fixed it The user had to replace the entire rear fuel/EVAP system to resolve the codes. This included the Fuel Tank Pressure Sensor, the fuel filler hose, the filler hose extension to the tank, and the EVAP (charcoal) canister.
OEM Part Supersession History
10377196, 21996868, 25658328→ACDelco 25950499 (Vapor Canister Vent Solenoid)— Part has been updated or consolidated by the manufacturer over time.12570469, 12597341, 12597566, 12606684→ACDelco 12597567 (Vapor Canister Purge Solenoid)— Part has been updated or consolidated by the manufacturer. This part itself has also been superseded.
Heads up: Part number 12597567 has been superseded by GM part number 12735397.
Helpful Videos
Used OEM Parts in Stock
New Aftermarket Parts Available


The information in this article is provided for general reference and educational purposes only. Vehicle specifications, procedures, and part compatibility can vary by production date, trim level, and region. Always consult your vehicle's factory service manual and verify part numbers before purchasing or performing repairs. Safety-critical components such as airbags, seat belts, and braking systems should be installed by a qualified professional.
- Buick RAINIER:
- 🎬 Helpful Videos
- 🛍️ Shop This Part
- What's Unique About the 2004-2007 Buick RAINIER
- Diagnostic Flowchart
- Symptoms You May Notice
- Most Likely Causes
- Rare But Worth Checking
- Diagnosis Steps
- Parts You'll Likely Need
- Related Codes That Often Appear With This One
- Technical Service Bulletins (TSBs) & Recalls
- Platform-Specific Known Issues
- Mechanic-Grade Diagnostic Values
- Scan Tool Commands That Help
- Wiring & Ground Locations
- Real Owner Repair Stories
- OEM Part Supersession History
- 🎟️ Get 5% Off