

P0442 on 2019-2023 Cadillac XT4: Causes and Fixes for a Small EVAP Leak
This code indicates a small leak in the evaporative emissions system. The most common cause is a loose or faulty gas cap. If tightening or replacing the cap doesn't work, the next most likely culprits are the EVAP purge or vent valves. A key symptom of a bad purge valve is a long crank time after refueling.
- P0442 on your XT4 means the computer has found a small leak in the fuel vapor system.
- Always start with the simplest fix: check that your gas cap is tight. If that doesn't work, a new gas cap is an inexpensive part to replace.
- If the gas cap isn't the issue, the problem is most likely a faulty EVAP purge valve (in the engine bay) or vent valve (by the rear wheel).
- While you can drive the car without issue, you will not pass an emissions test until the leak is fixed.
- A smoke test is the most reliable way for a mechanic to find the exact location of the leak if it's not obvious.
What's Unique About the 2019-2023 Cadillac XT4

For the 2019-2023 Cadillac XT4 and other modern GM vehicles, there is a specific Technical Service Bulletin (TSB 21-NA-124) that provides dealers with a clear diagnostic procedure for this exact code. This TSB explicitly states the diagnostic order should be: 1) Investigate all EVAP lines for proper seating, 2) Investigate lines for damage, 3) Investigate the vent valve, and 4) Investigate the purge valve. This methodical process suggests that improperly seated lines are a known issue. The EVAP vent solenoid is located behind the passenger-side rear fender liner, a specific location confirmed in DIY repair videos.
Diagnostic Flowchart
Tap your situation to follow the diagnostic path that matches what you're seeing on this vehicle.
Symptoms You May Notice
- Check Engine Light is illuminated.
- A faint smell of gasoline, though this is less common.
- Vehicle will fail an emissions inspection.
- Long crank time or difficulty starting immediately after refueling (strong indicator of a stuck-open purge valve).
- Replacing the oxygen (O2) sensors. O2 sensors are not part of the EVAP system and will not cause a P0442 code.
- Replacing the fuel injectors. While part of the fuel system, injectors are not related to the vapor recovery (EVAP) system.
Most Likely Causes

- Loose or Faulty Gas Cap 🔴 High Probability This is the most common cause for any vehicle, as the cap seal can wear out, crack over time, or the cap may not be tightened correctly after refueling. It is highly recommended to use an OEM replacement cap, as aftermarket caps are sometimes reported to not seal correctly. The XT4 uses a capless fuel filler system, and the internal sealing mechanism can be obstructed by dirt, preventing a proper seal.
How to confirm: For the capless system, inspect the fuel filler neck for any visible debris or damage to the sealing flap. A common DIY fix involves cleaning the sealing surface with a rag and solvent, then inserting and removing the emergency fuel funnel multiple times to dislodge debris.
Typical fix: First, try cleaning the capless filler neck seal. If the code returns, the entire filler neck assembly may need inspection or replacement if the internal spring-loaded door is damaged. After any fix, the code will need to be cleared with a scan tool.
Est. part cost: $15-$30 - Faulty EVAP Canister Purge Valve 🟡 Medium Probability The purge valve can get stuck open, creating a small leak path. This is a very common failure on many GM vehicles. TSB 21-NA-124 lists this as the last component to investigate after checking all lines and the vent valve. Some owners on forums have reported receiving faulty replacement purge valves, even OEM ones, that fail to hold vacuum out of the box.
How to confirm: A primary symptom is the engine cranking for a long time before starting right after you fill up the gas tank. You can also remove the valve (typically on or near the engine) and try to blow through it; if air passes, it is stuck open and has failed. A scan tool can also command it open and closed to test its function.
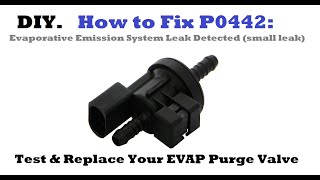
Typical fix: Replace the purge valve assembly. On the XT4, this may be part of an assembly with an adapter. Given reports of faulty replacements, it may be wise to test the new part before installation. 🎬 Watch: How to test and replace the EVAP purge valve.
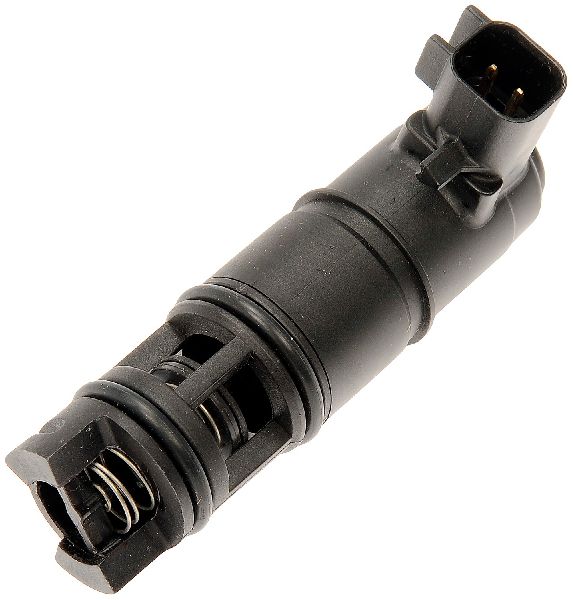
Est. part cost: $50-$100 - Faulty EVAP Vent Valve/Solenoid 🟡 Medium Probability The vent valve, located near the charcoal canister, can fail to seal the system for the pressure test. It's exposed to road debris and moisture underneath the car, and dust intrusion is a known issue in some environments. TSB 21-NA-124 identifies this as a key failure point to check before the purge valve.
How to confirm: The vent valve is located behind the passenger rear fender liner on the XT4. It can be commanded closed with a scan tool during a smoke test to see if it's leaking. Since it is normally open, it must be commanded shut to properly smoke test the rest of the system.
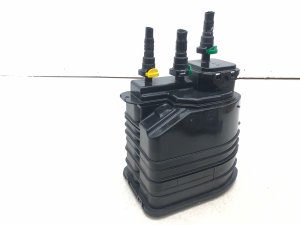
Typical fix: Replace the vent valve/solenoid. On the XT4, this is a twist-off component on the EVAP canister, accessible after removing the wheel and fender liner.
Est. part cost: $40-$80 - Cracked or Disconnected EVAP Hose ⚪ Low Probability Plastic and rubber lines can become brittle over time and crack, especially at connection points. TSB 21-NA-124 specifically advises technicians to first check that all EVAP line connections are properly seated before replacing parts, indicating this is a known issue.
How to confirm: A visual inspection may reveal obvious cracks or disconnected hoses, especially at elbows and connectors. A smoke test is the definitive method, where smoke is injected into the EVAP system to reveal the source of the leak.
Typical fix: Replace the damaged section of hose or reconnect it securely.
Est. part cost: $10-$50
Rare But Worth Checking
- Cracked EVAP Charcoal Canister: The plastic housing of the canister itself can develop a hairline crack, causing a small leak. This is usually found with a smoke test after all other components have been ruled out.
- Leaking Fuel Tank Filler Neck: Corrosion or dirt on the filler neck where the gas cap seals can prevent a proper seal, even with a new cap.
- Dust Ingress into EVAP System: GM issued TSB 23-NA-073 for vehicles operated in extremely dusty environments. Dust can be drawn into the EVAP system, plugging the canister vent solenoid and causing codes like P0442. The fix involves installing an auxiliary filter kit as a customer-paid alteration.
Diagnosis Steps
- Read the code with an OBD-II scanner to confirm P0442 is present.
- Inspect the gas cap. Remove it, check the seal for cracks or debris, and reinstall it, ensuring it clicks several times. Clear the code and drive for a few days to see if it returns.
- If the code returns, consider replacing the gas cap with an OEM part as a low-cost next step.
- Avoid overfilling the fuel tank. Stop at the first click of the pump nozzle, as overfilling can saturate the charcoal canister and trigger EVAP codes.
- Follow the diagnostic order from TSB 21-NA-124: First, perform a thorough visual inspection of all accessible EVAP hoses and lines between the engine bay, the fuel tank, and the charcoal canister. Pay close attention to connection points to ensure they are fully seated.
- If no loose connections are found, inspect the lines for physical damage like cracks or chafing.
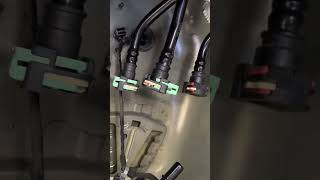
- If lines are intact, the next step is to inspect the EVAP canister vent solenoid. It is located behind the passenger rear wheel fender liner. A DIY video shows removing the wheel and liner for access, then twisting the solenoid to remove it from the canister. 🎬 Watch: See this step-by-step vent solenoid replacement walkthrough.
- If the vent solenoid is functioning, the final component to check is the purge valve in the engine bay. A key symptom is a long crank time after refueling.
- If the leak source is not obvious, the most effective diagnostic method is a smoke test. A mechanic will inject pressurized smoke into the EVAP system's service port and look for where it escapes.
Parts You'll Likely Need

- Fuel Tank Filler Cap
(OEM #13548316)— This is the most frequent and simplest fix. The seal wears out over time, causing a leak that the system detects.
Trusted brands: ACDelco, GM Genuine Parts
OEM price range: $20-$30
Aftermarket price range: $15-$25 - Vapor Canister Purge Valve
(OEM #12666845)— This valve controls the flow of vapors to the engine and is a common failure point, often getting stuck slightly open, which can also cause hard starting after fill-ups.
Trusted brands: ACDelco, GM Genuine Parts, Dorman
OEM price range: $60-$90
Aftermarket price range: $40-$70 - EVAP Vent Valve / Solenoid — This valve is located under the vehicle and is responsible for sealing the EVAP system for leak testing. Its exposure to the elements makes it prone to failure.
Trusted brands: ACDelco, GM Genuine Parts, Standard Motor Products (CVS153)
OEM price range: $50-$80
Aftermarket price range: $30-$60
Related Codes That Often Appear With This One
- P0455 — P0455 indicates a large EVAP leak. If a component fails significantly (e.g., a valve sticks wide open or a hose comes completely off), it may trigger both a small and large leak code at different times. TSB 21-NA-124 covers diagnostics for both P0442 and P0455.
- P0496 — P0496 indicates 'EVAP Flow During a Non-Purge Condition,' often caused by a purge valve that is stuck open. A stuck-open purge valve is also a common cause of a P0442 leak. A separate TSB for the 2019 XT4 (LSY engine) provides a specific smoke test procedure for diagnosing P0496 caused by air leaks in the purge system.
Technical Service Bulletins (TSBs) & Recalls
- 21-NA-124: Diagnostic tip for Malfunction Indicator Lamp (MIL) Illuminated with DTCs P0442 and/or P0455 Set.
- 23-NA-073: Information on EVAP System Dust Intrusion in Severe Dusty Environments.
- PIP5658A: Preliminary information on diagnosing P0496, which is often related to the same components that cause P0442.
Platform-Specific Known Issues
- GM issued Technical Service Bulletin #21-NA-124, which provides specific diagnostic tips for dealers encountering P0442 and P0455 codes on a wide range of GM vehicles, including the Cadillac XT4. The bulletin provides diagnostic tips/steps on testing for possible EVAP leaks in the system.
Mechanic-Grade Diagnostic Values
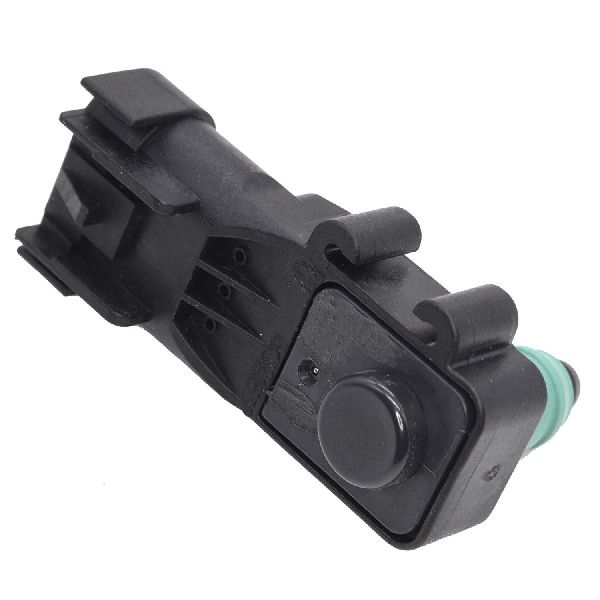
- Fuel Tank Pressure (FTP) Sensor Voltage — expected: 1.3 - 1.7 Volts (typically 1.5V). Failure: A reading significantly outside this range with the fuel cap removed (or on a capless system) indicates a sensor or wiring issue. The voltage should change when pressure/vacuum is applied.
- FTP Sensor 5-Volt Reference Circuit — expected: 4.8 - 5.2 Volts. Failure: No voltage or low voltage between the reference circuit pin and a known good ground points to a problem with the ECM or the wiring from the ECM.
- FTP Sensor Low Reference (Ground) Circuit — expected: < 5 Ohms. Failure: High resistance or an open circuit (OL) between the low reference circuit pin and a known good ground indicates a broken or corroded ground wire.
- EVAP Purge/Vent Solenoid Coil Resistance — expected: 15 - 30 Ohms (General Motors). Failure: A reading far outside this range, or an open (OL) or shorted (near zero) reading, indicates the solenoid's internal coil is damaged and the part needs to be replaced.
Scan Tool Commands That Help
- GDS2 / Tech 2: EVAP Service Bay Test — This is a comprehensive, automated test to force the vehicle's computer to run the entire EVAP monitor sequence. It's used to verify a leak exists or to confirm a repair was successful without waiting for multiple drive cycles. The test will only run if the fuel level is between 15-85% and engine coolant is below 158°F (70°C).
- GDS2 / Tech 2: Purge/Seal — This is a manual bidirectional control used to isolate parts of the EVAP system for diagnosis. A technician can command the vent valve to 'Seal' the system and then command the purge valve to open by a certain percentage to create a vacuum. By monitoring the FTP sensor voltage, the technician can determine if the system is holding vacuum, which helps pinpoint leaks.
- GDS2 / Tech 2: EVAP Vent Solenoid Command — Used during a smoke test to command the normally-open vent valve to the closed position. This seals the system, allowing the smoke machine to build pressure and reveal leaks. If the valve doesn't close when commanded, it is faulty.
Wiring & Ground Locations
- EVAP Vent Solenoid Connector — Behind the passenger-side rear fender liner, connected to the EVAP canister.. This connector and its wiring are exposed to the elements and road debris. A broken wire or corroded pin at this location can cause a P0449 (vent control circuit) code, but can also cause the vent to fail to close, leading to a P0442 leak code. Wires can break inside the insulation near the connector.
- GM Ground Numbering Scheme — Vehicle-wide. G1xx grounds are in the engine bay, G2xx are under the front seat area, G3xx are under the rear seat area, and G4xx are in the rear/cargo area.. A poor ground for the ECM or EVAP components can cause erratic sensor readings and false codes. Knowing the general location helps in diagnostics. For example, a G4xx series ground would be relevant for the rear-mounted vent solenoid and fuel tank pressure sensor.
Real Owner Repair Stories
- YouTube Creator 'quick one' (2019 Cadillac XT4) — Not specified, but the repair is for the EVAP system.
❌ Tried (didn't work) The creator noted difficulty in finding information on this specific repair.
✅ What actually fixed it The video demonstrates the replacement of the EVAP canister vent solenoid. It confirms the location is behind the passenger rear fender liner. The solenoid is a twist-off component on the canister, accessible after removing the wheel and liner.
OEM Part Supersession History
22740537, 84065747, 84802774→85123399— Part has been updated by GM over several revisions.
Heads up: This part is listed as 'SOLENOID ASM-EVAP EMIS CNSTR' and fits the 2019-2024 Cadillac XT4. Using the latest part number is recommended for repairs.
Helpful Videos
Used OEM Parts in Stock
New Aftermarket Parts Available


The information in this article is provided for general reference and educational purposes only. Vehicle specifications, procedures, and part compatibility can vary by production date, trim level, and region. Always consult your vehicle's factory service manual and verify part numbers before purchasing or performing repairs. Safety-critical components such as airbags, seat belts, and braking systems should be installed by a qualified professional.
- Cadillac XT4:
- 🎬 Helpful Videos
- 🛍️ Shop This Part
- What's Unique About the 2019-2023 Cadillac XT4
- Diagnostic Flowchart
- Symptoms You May Notice
- Most Likely Causes
- Rare But Worth Checking
- Diagnosis Steps
- Parts You'll Likely Need
- Related Codes That Often Appear With This One
- Technical Service Bulletins (TSBs) & Recalls
- Platform-Specific Known Issues
- Mechanic-Grade Diagnostic Values
- Scan Tool Commands That Help
- Wiring & Ground Locations
- Real Owner Repair Stories
- OEM Part Supersession History
- 🎟️ Get 5% Off