

OBD-II Code P0387: Crankshaft Position Sensor 'B' Circuit Low
What P0387 means, why it triggers, and how to fix it
- Code P0387 causes unpredictable engine stalling at any speed, creating an immediate safety hazard that requires towing.
- A failed sensor or heat-damaged wiring harness causes 80% of P0387 codes, often accelerated by oil or coolant leaks.
- Test the 5-volt reference circuit before buying parts; replacing the sensor will not fix a 'circuit low' code if the underlying issue is a corroded wire.
- GM and many modern vehicles require a 'Crankshaft Variation Relearn' using a bidirectional scan tool after sensor replacement to prevent false misfire codes.
- Always install an OEM crankshaft position sensor; cheap aftermarket sensors frequently have incorrect internal resistance and fail out of the box.
What Does P0387 Mean?
P0387 means your car's Powertrain Control Module (PCM) is receiving a weak, intermittent, or dead signal from the secondary crankshaft position sensor, designated as sensor 'B'. This sensor tells the computer the exact speed and position of the engine's crankshaft, which is essential for timing the fuel injectors and spark plugs. Without this critical signal, the engine runs poorly, stalls, or refuses to start.
Technical definition: The official SAE/OBD-II definition is "Crankshaft Position Sensor 'B' Circuit Low Input". This indicates the voltage from the sensor's circuit falls significantly below the manufacturer's specified range, typically dropping below the 5-volt reference signal the PCM expects. The code sets when the voltage remains outside the normal operating threshold by more than 10%.
Can I Drive With P0387?
No — Do Not Drive. The engine stalls unpredictably while driving, including at highway speeds, causing a complete loss of power and steering assist. This is a major safety hazard that leaves you stranded in dangerous traffic conditions. Immediate towing and diagnosis are required.
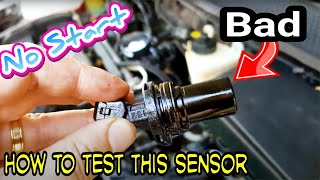
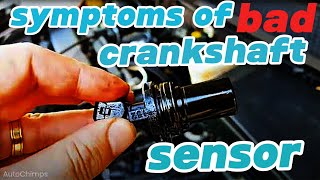
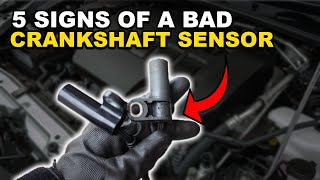
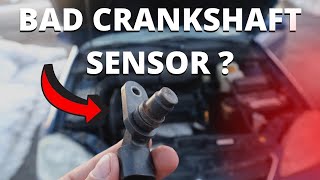
🎬 Watch: 7 common symptoms of a failing crankshaft sensorCommon Causes
- Faulty Crankshaft Position Sensor (Very Common) — The sensor itself is the most frequent culprit. Internal components like the magnetic coil fail from constant heat cycles, engine vibration, or old age, causing it to produce an insufficient voltage signal.
- Damaged Wiring or Corroded Connector (Very Common) — The sensor's wiring harness routes near hot exhaust components and is exposed to the elements. Insulation becomes brittle and cracks, wires break, or connector pins corrode, creating a short to ground or an open circuit that drops the voltage.
- Fluid Contamination from Engine Leaks (Common) — Engine oil or coolant leaks are notorious for destroying sensors and wiring. These fluids saturate the connector, degrade the plastic, and short out the electrical pins, directly causing a 'circuit low' condition.
- Poor Quality Aftermarket Sensor (Common) — Low-quality aftermarket sensors frequently cause recurring issues. They often have incorrect internal resistance or produce a noisy signal that the PCM rejects, triggering the code immediately after replacement. 🎬 Watch: Understanding sensor symptoms and typical replacement costs
- Metal Debris on Sensor Tip (Less Common) — The magnetic sensor attracts fine metallic particles from normal internal engine wear. A thick accumulation of this metallic 'fuzz' on the tip disrupts the magnetic field, weakening the signal sent to the PCM.
- Weak Battery or Failing Starter (Less Common) — If the battery is weak or the starter drags, the engine cranks too slowly. The PCM expects a strong crankshaft signal immediately; if turnover is sluggish, it misinterprets the resulting weak signal as a sensor circuit fault.
- Damaged Reluctor Ring (Rare) — The sensor reads a toothed wheel (reluctor ring) on the crankshaft. If this ring has broken teeth, excessive runout, or slips out of position, the sensor cannot generate a clean voltage signal.
- Faulty Powertrain Control Module (PCM) (Rare) — In rare cases, the internal PCM circuit that reads the sensor fails. A damaged driver transistor or a bad internal ground prevents the computer from interpreting the signal. Consider this only after exhaustively ruling out wiring and sensor faults.
Symptoms
- Engine Cranks But Won't Start — The engine turns over normally but fails to fire up. The PCM lacks the essential timing signal to operate the fuel injectors and ignition coils.
- Intermittent Stalling — The engine shuts off unexpectedly while driving, often when coming to a stop or cruising at highway speeds, as the weak sensor signal drops out completely.
- Check Engine Light On — The Malfunction Indicator Lamp illuminates immediately. It flashes if the missing signal causes severe engine misfires.
- Rough Idle and Misfires — The engine runs unevenly, shakes, or vibrates heavily at low RPMs due to incorrect ignition and fuel timing.
- Poor Acceleration and Power Loss — The vehicle feels sluggish, hesitates, or loses power completely above a certain RPM (e.g., 3,000 RPM) because the PCM cannot accurately advance timing for increased engine load.
- Tachometer Shows 0 RPM While Cranking (also visible on scanner) — When trying to start the engine, the RPM gauge on the dash stays at zero despite the engine audibly turning over. This definitively proves the PCM is blind to the crankshaft's movement. 🎬 See how to diagnose a no-start condition using a scan tool
Diagnostic Flowchart
Tap your situation to follow the diagnostic path that matches what you're seeing on this code.
Common Fixes & Costs
- Replace Crankshaft Position Sensor 'B' — Parts: $50-$150, Labor: $100-$250, ~1.5 hr book time (Intermediate)
- Repair or Replace Wiring Harness/Connector — Parts: $15-$60, Labor: $150-$350, ~2 hr book time (Intermediate)
- Clean Metal Debris from Sensor Tip — Parts: $0, Labor: $75-$150, ~1 hr book time (Beginner)
- Perform Crankshaft Variation Relearn Procedure — Parts: $0, Labor: $50-$150, ~0.5 hr book time (Professional)
- Replace PCM/ECM — Parts: $600-$1500, Labor: $150-$300, ~1.5 hr book time (Professional)
Used vs. New Parts: Buying Guide
When a used part is worth it: Buying a used crankshaft position sensor never makes sense. The risk of premature failure is high because they fail from age and heat cycles. The minimal savings do not justify the risk of being stranded.
Donor-vehicle mileage cap: roughly under 40000 miles for the part to have meaningful remaining life.
Donor quality checklist:
- If absolutely necessary, choose a part from a low-mileage vehicle wrecked in a collision.
- Avoid parts from rust-belt states, as corrosion destroys the connector pins.
- Match the part number exactly; visual similarity is not enough.
Decision logic:
- If The part is a crankshaft position sensor. → Buy a new OEM or top-tier aftermarket (e.g., Bosch, Delphi) part. The risk of failure with a used sensor is too high.
- If Vehicle is known to be sensitive to sensor quality (e.g., Jeep, Chrysler, BMW). → Buy an OEM part directly from the dealer. Owners report constant issues with non-factory sensors.
- If Budget is extremely tight and the sensor is easily accessible. → A high-quality aftermarket part is an acceptable compromise, but avoid the cheapest options.
Warranty tradeoff: Used parts typically have a 30-day warranty that only covers the part, not the labor. New OEM parts offer a 1-2 year warranty.
Worst-case if a used part fails: $250-$500 if a used part fails, factoring in repeat labor and a tow bill when the engine stalls again.
What Happens If You Wait — Timeline
- 0-2 weeks: Check Engine Light illuminates. You notice occasional hard starting or a brief engine stumble, but the vehicle generally runs normally. The code is intermittent. (MPG impact: 0-2%% · Added cost: $0)
- 2 weeks - 2 months: Symptoms escalate. Hard starting becomes common when the engine is hot. Intermittent stalling at idle or low speeds begins, accompanied by a noticeable drop in fuel economy. (MPG impact: 5-10%% · Added cost: $30-$70 in wasted fuel.)
- 2-6 months: Stalling becomes a severe safety risk, occurring unpredictably at highway speeds. Heavy misfires dump unburnt fuel into the exhaust, rapidly overheating and damaging the catalytic converter. (MPG impact: 10-15%% · Added cost: $1200-$2800 (catalytic converter replacement).)
- 6+ months: The vehicle is completely unreliable and fails to start entirely. If forced to run, severe misfires destroy the catalytic converter and risk internal engine damage. (MPG impact: 15-25%% · Added cost: $2500+ (catalytic converter and potential engine repairs).)
Cost of Not Fixing It
- Immediate: High risk of engine stalling while driving, leading to a loss of power steering and brakes. This is a major safety hazard. (Added cost: Towing costs ($100-$300+).)
- 0-1 month: Continued hard starting, rough idle, poor acceleration, and a noticeable drop in fuel economy (5-15%) as the engine runs in default mode. (Added cost: $20-$60 per month in extra fuel.)
- 1-6 months: Incorrect timing causes unburnt fuel to enter the exhaust, rapidly overheating and melting the catalytic converter. (Added cost: $1200-$2800 for catalytic converter replacement.)
- 6+ months: Chronic misfires lead to internal engine damage, such as fouled spark plugs or washed-out cylinder walls. (Added cost: $2500+ for major engine repairs.)
Diagnosis Steps
- Read Codes and Review Freeze Frame Data
Use an OBD-II scanner to confirm P0387 is active. Check for related codes (e.g., P0335, P0340). Review the freeze frame data to see the exact engine RPM and load at the moment the fault triggered.
Tools: OBD-II Scanner (Beginner) - Check Live Data for RPM Signal
Connect your scanner and view the live data stream for Engine RPM. Have an assistant crank the engine. If the scanner shows 0 RPM while the engine audibly turns over, the PCM is definitively not receiving a signal from the crank sensor circuit.
Tools: OBD-II Scanner with Live Data (Beginner) - Inspect the Wiring and Connector
Visually inspect the entire wiring harness for sensor 'B'. Look for melted insulation, broken wires, and oil or coolant contamination. Unplug the connector and check for bent, loose, or green corroded pins.
Tools: Flashlight, Mirror (optional) (Beginner) - Test the Sensor Circuit Voltages
Disconnect the sensor. Turn the key ON (engine off). Use a multimeter to probe the connector terminals. You must find a 5-volt reference signal from the PCM on one wire and a solid ground on another. If the reference voltage is below 4.75V, the wiring harness or PCM is faulty.
Tools: Multimeter, Vehicle-specific wiring diagram (Intermediate) - Test the Sensor's Internal Resistance
With the sensor disconnected, set your multimeter to Ohms (Ω). Measure the resistance between the sensor's signal and ground pins. A healthy magnetic sensor reads between 200 and 1,000 Ohms. An 'OL' (infinite) reading means the sensor is dead.
Tools: Multimeter, Service manual (Intermediate) - Perform a Harness 'Wiggle Test'
If the engine starts and idles, carefully wiggle the crankshaft sensor wiring harness and connector. If the engine stumbles, stalls, or the RPM reading drops out on your scanner, you have located an intermittent short or open wire.
Tools: Gloves (Intermediate) - Perform a Voltage Drop Test on the Ground Circuit
Connect the black multimeter lead to the battery's negative terminal and the red lead to the ground pin on the connected sensor (engine running if possible). A reading above 100mV indicates excessive resistance in the ground circuit causing the low signal.
Tools: Multimeter (Advanced) - Check the Sensor Signal with an Oscilloscope
Connect an oscilloscope to the sensor's signal and ground wires. While cranking, you should see a clean, consistent square or sine wave with an amplitude of at least 5 volts. A flat line or very low amplitude confirms the 'circuit low' condition.
Tools: Oscilloscope (Advanced) - Check Fuel Pressure
Connect a fuel pressure gauge to the fuel rail. While a bad fuel pump won't set a P0387 code directly, low fuel pressure mimics the exact 'crank no-start' and stalling symptoms. This rules out overlapping mechanical failures.
Tools: Fuel Pressure Gauge, Service Manual (Advanced)
When This Code Triggers (Freeze-Frame Conditions)
- Engine State: Cranking / No Start (The PCM expects a valid RPM signal during engine cranking but receives a low or absent voltage signal.)
- Engine RPM: 0-250 RPM (During a no-start condition, the engine turns over but the PCM registers zero RPM from sensor 'B'.)
- Vehicle Speed: 0 MPH or 45-65 MPH (The fault occurs either from a dead stop (no-start) or during steady cruising when the sensor signal drops out, causing an immediate stall.)
- Engine Load: 15-40% (Occurs under light to moderate load where a weak signal suddenly drops below the PCM's minimum threshold.)
Related Codes
- P0335 — This is the code for Crankshaft Position Sensor 'A' Circuit. P0387 points to sensor 'B'. If both are present, it suggests a shared problem like a damaged reluctor ring or a major wiring harness short.
- P0385 — This is a generic fault for the 'B' circuit, defined as 'Circuit Malfunction'. P0387 is more specific, indicating 'Circuit Low' due to a short to ground or a completely dead sensor.
- P0386 — Indicates a 'Range/Performance' issue. P0387 means the signal is weak or missing, while P0386 means the signal is present but erratic, noisy, or implausible.
- P0340 — Camshaft Position Sensor 'A' Circuit. The PCM compares crank and cam signals to verify timing. If the crankshaft signal is missing (P0387), the PCM cannot correlate it, triggering P0340 as a secondary fault. Fix P0387 first.
Climate & Environmental Factors
- High Humidity & Moisture: High humidity accelerates corrosion on wiring connectors and ground points. Moisture penetrates weathered wire insulation, leading to shorts or increased resistance that directly triggers a 'circuit low' fault.
- Extreme Cold: In freezing weather, wiring insulation becomes brittle and cracks, creating intermittent shorts. Additionally, reduced battery power causes slower cranking speeds, producing a weak sensor signal the PCM misinterprets as a fault.
- Road Salt: Salty winter road spray coats under-engine components. This highly corrosive mixture rapidly degrades connector pins and wiring, destroying electrical connections.
How to Talk to a Mechanic About This Code
Say this: "I have a P0387 code for the Crankshaft Position Sensor 'B' Circuit Low, and the car is stalling. I'd like to schedule a diagnostic. Please test the sensor circuit for the 5-volt reference and ground, and inspect the wiring harness before recommending a sensor replacement."
This directs the technician to perform a proper electrical diagnosis instead of just firing the parts cannon, saving you money if the problem is a broken wire.
Avoid saying:
- 'Just replace the crank sensor.'
- 'My check engine light is on, can you look at it?'
- 'The internet said it's the crankshaft sensor.'
Questions to ask before authorizing the repair:
- Did you test the 5-volt reference and ground at the sensor connector? What were the readings?
- Was the wiring harness inspected for heat damage, oil saturation, or corrosion?
- Does my vehicle require a crankshaft variation relearn procedure, and is that included in the quote?
- What is the warranty on the parts and labor for this repair?
Where to Take It: Dealer vs Independent vs Chain
- Dealer:
Recommended if the vehicle requires a specific, proprietary relearn procedure or if it is a complex model known for difficult repairs.
Best for: Vehicles still under powertrain or emissions warranty., Complex vehicles (e.g., German brands) where sensor access is very difficult., When a specific manufacturer software update or recall is involved.
Downsides: Highest labor rate., May be less willing to perform a wiring repair versus replacing an entire expensive harness. (Typical cost: +50% vs. baseline) - Independent Shop:
Best fit for most situations. A good independent shop easily diagnoses the circuit, replaces the sensor, and performs a relearn procedure on most common vehicles.
Best for: Most out-of-warranty vehicles., Diagnosing and repairing common electrical faults., Cost-effective repairs on common vehicle models.
Downsides: Quality varies greatly; ensure the shop has ASE-certified technicians specializing in diagnostics., May lack the latest scan tools for all manufacturer-specific relearn functions. (Typical cost: +0% vs. baseline) - Chain Shop:
Use with caution. Acceptable if you are certain only the sensor needs replacing and it is easily accessible. AVOID for initial diagnosis of a 'circuit' code.
Best for: Simple, straightforward part replacements where the diagnosis is already 100% certain.
Downsides: Technician skill varies dramatically., Often lack the advanced diagnostic tools for in-depth electrical circuit testing., Frequently default to replacing the sensor without confirming the root cause. (Typical cost: -10% vs. baseline)
When to Walk Away From the Repair
If the estimated repair cost exceeds 40-50% of the car's private-party value, seriously consider selling or trading it in rather than repairing it.
- Car worth $4000, fix is $750: Fix it. The repair cost is well below the 50% threshold and resolves a critical safety issue.
- Car worth $3000, fix is $1600: Walk away. The repair cost is over 50% of the car's value. This assumes other issues may also be present on an older vehicle.
- Car worth $15000, fix is $900: Fix it. This is a relatively low-cost repair compared to the vehicle's value and is necessary for operation.
What Scan Tool You Need for This Code
Minimum: A scanner that reads and clears codes, and displays live engine data, specifically Engine RPM.
A basic $20 code reader only gives you the P0387 code. It cannot display live RPM data, which is essential for the '0 RPM while cranking' test to confirm a dead circuit.
Budget: BlueDriver Pro (~$100) — Connects to your smartphone, provides detailed code descriptions, and graphs live data like Engine RPM to confirm the diagnosis.
Mid-range: Foxwell NT510 Elite (~$180) — Offers live data plus bidirectional controls. This is critical for performing a 'Crankshaft Variation Relearn' on GM and Honda vehicles after sensor replacement.
Professional: Autel MaxiCOM MK808S (~$400) — A full-featured diagnostic tablet with extensive bidirectional controls and guided crankshaft position sensor relearn procedures for a wide variety of manufacturers.
Rent vs buy: For a one-time diagnosis, auto parts stores offer a 'Loan-A-Tool' program where you can borrow a basic scanner for free. However, to perform a required relearn procedure, you must buy a mid-range or pro-level tool.
How to Clear the Code After You Fix It
- Reconnect the battery if it was disconnected for the repair.
- Use an OBD-II scan tool to clear the P0387 code from the PCM's memory.
- Perform a complete OBD-II drive cycle to allow the vehicle's readiness monitors to run and complete.
Drive cycle (~30 minutes): A generic drive cycle includes: 1) Cold start the engine and idle for 3 minutes. 2) Accelerate to and maintain 55 mph for 10 minutes. 3) Coast down to 20 mph without braking. 4) Perform stop-and-go driving for 5 minutes. 5) Allow the vehicle to cool completely overnight.
Readiness monitors affected: Catalyst Monitor, Oxygen (O2) Sensor Monitor, EVAP System Monitor, EGR System Monitor
Before emissions retest: drive at least 100 miles to fully set monitors.
Watch out for:
- Disconnecting the battery clears the code but resets all readiness monitors to 'incomplete', causing an automatic emissions test failure.
- The code returns immediately if the underlying electrical short or open wire has not been repaired.
- Monitors like the EVAP system take several individual drive cycles over multiple days to complete.
Will This Fail Emissions / State Inspection?
Yes — this code typically fails an OBD-II emissions inspection.
- California: An active P0387 code results in an automatic smog check failure. After repair, you must complete a full drive cycle to set all readiness monitors before re-testing.
- New York: The NYS DMV inspection includes an OBD-II scan. An illuminated Check Engine Light and a P0387 code causes an immediate emissions failure.
- Texas: In emissions-testing counties, a vehicle with code P0387 fails the OBD portion of the annual safety inspection.
Most Commonly Affected Vehicles
- Chevrolet / GMC Silverado / Sierra with Duramax Diesel (2001-2010) — The sensor is located on the driver's side of the block, behind the starter, making access tight. Wiring harness connectors frequently fail due to heat and vibration.
- Dodge / Ram 2500 / 3500 with Cummins Diesel (2003-2012) — The 5V reference circuit is highly sensitive; even a small voltage drop triggers the code, making wiring and connection integrity crucial.
- Ford F-150 5.0L V8 (2011-2017) — Crankshaft sensor issues are common on the 5.0L. Repair costs for a sensor replacement typically range from $130 to $280.
- Jeep Wrangler (TJ), Grand Cherokee (WJ) (1997-2006) — On the 4.0L inline-6, the sensor mounts on the transmission bell housing. It is notoriously difficult to access, requiring multiple long extensions and a swivel socket.
- BMW 3-Series (E46, E90), 5-Series (E39, E60) (2002-2010) — The sensor is located under the starter motor. On xDrive (AWD) models, the intake manifold must be removed for access. A failing sensor causes a distinct loss of power above 3,000 RPM.
- Hyundai / Kia Accent, Elantra, Rio (1.6L) (2012-2017) — Owners report intermittent stalling and hard starting traced back to a failing sensor. The sensor is prone to corrosion.
- Subaru Outback, Legacy, Forester (2.5L) (2010-2014) — The sensor is located on the front of the engine, below the alternator. Replacement requires removing the serpentine belt and alternator.
Manufacturer-Specific Notes
- General Motors (Chevrolet, GMC, Cadillac): After replacing the crankshaft sensor on most models since 1996, a 'Crankshaft Variation Relearn' (CASE learn) must be performed with a professional scan tool. Failing to do this results in poor performance and sets a P1336 code.
- General Motors (V6 Engines): On 3.0L and 3.6L V6 engines, timing chain codes are often caused by a crankshaft reluctor wheel that has slipped out of position. A technician must use a borescope through the crank sensor hole to verify the wheel's position before condemning the sensor.
- Duramax Diesel (GM): The sensor's ground is a 'controlled ground' supplied by the ECM, not a simple chassis ground. Do not attempt to wire a new ground to the engine block, as this damages the ECM.
- Chrysler / Ram / Jeep: Recall 66A (NHTSA 23V-411) was issued for 2014-2020 3.0L diesel engines for a tone wheel that delaminates, causing an engine stall. The remedy involves a PCM software update.
Real Owner Stories
2007 GMC Sierra 2500HD (Duramax) at 165K miles
Truck cranked but would not start. The tachometer showed 0 RPM during cranking. The problem was intermittent for a week before becoming permanent.
What they tried:
- Suspected a clogged fuel filter, but fuel pressure tested good.
- Scanned codes and found P0387.
- Visually inspected the crank sensor wiring harness near the starter and found no obvious damage.
Outcome: Replaced the crankshaft position sensor with an OEM GM part. The truck started immediately. A CASE relearn procedure was performed with a high-end scan tool to ensure accurate misfire detection.
Lesson: A 'crank no-start' with 0 RPM on the tachometer is the classic symptom of a failed crank sensor. Always perform the CASE relearn after replacement on GM vehicles to avoid secondary codes.
2005 Jeep Grand Cherokee 4.0L at 120K miles
Engine stalled intermittently at stoplights and was hard to restart when hot. The check engine light showed P0387.
What they tried:
- Replaced the crankshaft position sensor with a cheap aftermarket part. The stalling persisted.
- Inspected the wiring harness and found heavy oil contamination on the connector from a leaky valve cover gasket.
- Cleaned the connector with electrical contact cleaner, but the issue remained.
Outcome: The aftermarket sensor was faulty out of the box. It was replaced with an OEM Mopar sensor. The connector was thoroughly cleaned again, and the valve cover gasket was replaced to stop the oil leak. The stalling stopped permanently.
Lesson: Fix the root cause before replacing parts. Oil leaks destroy these sensors and their connectors. Furthermore, many engines are highly sensitive to aftermarket sensors; always use OEM.
2010 BMW 328i (E90) at 95K miles
Car suffered from long crank times (5-10 seconds) and a sudden loss of power above 3,000 RPM. Code P0387 was active.
What they tried:
- A shop quoted $650 for the repair due to difficult access under the starter.
- Owner decided to DIY the repair to save money.
- Removed the intake manifold to gain access to the sensor.
Outcome: Successfully replaced the sensor with an OEM Bosch unit. The long crank and power loss issues vanished. Total cost was $90 for the sensor and $30 for new intake manifold gaskets.
Lesson: On modern German engines, the sensor is cheap but the labor is expensive due to poor accessibility. DIY saves hundreds of dollars but requires removing major components like the intake manifold.
How to Prevent This Code From Triggering
- Fix Engine Fluid Leaks Promptly (As soon as detected) — Engine oil and coolant break down plastic wire insulation and connector seals, causing shorts and corrosion that lead to a P0387 fault. Fixing a minor $150 leak prevents a major electrical repair later.
- Install Protective Wiring Sleeves (During any repair near the sensor harness) — The sensor harness routes near high-heat exhaust manifolds. Installing a high-temperature heat shield sleeve protects the wires from becoming brittle, maintaining signal integrity.
- Maintain a Healthy Battery and Charging System (Test annually after 3 years) — A weak battery causes slow engine cranking, producing an erratic signal from the crankshaft sensor. The PCM misinterprets this as a sensor circuit fault. Proper cranking voltage prevents this misdiagnosis.
Frequently Asked Questions
What is the difference between Crankshaft Sensor 'A' and 'B'?
Some engines use two crankshaft sensors for redundancy or precise measurements. Sensor 'A' (P0335) is the primary sensor, while sensor 'B' (P0387) is the secondary. They are physically separate sensors in different locations.
Can a bad battery cause a P0387 code?
Yes, indirectly. A weak battery causes the engine to crank too slowly, producing a weak signal from the crankshaft sensor. The PCM misinterprets this low signal as a sensor circuit fault.
What are the most common mistakes when diagnosing P0387?
The single most common mistake is replacing the sensor without testing the circuit. A 'circuit low' code is frequently caused by damaged wiring, a corroded connector, or fluid contamination. Always verify the 5-volt reference signal before buying parts.
Can I perform a crankshaft relearn without a scan tool?
For some older vehicles, a manual relearn is possible by disconnecting the battery and performing a specific drive cycle. However, this is unreliable for modern cars. Most manufacturers, especially GM, require a professional bidirectional scan tool to guarantee accuracy.
Are aftermarket crankshaft sensors reliable?
Reliability varies greatly by brand, and cheap aftermarket sensors frequently fail out of the box. For a critical component that leaves you stranded, professional technicians strongly recommend using OEM parts. This ensures correct internal resistance and reliable signal output.
Can I replace the crankshaft position sensor myself?
This depends entirely on the sensor's location and your mechanical skill. On some vehicles it is easily accessible, while on others (like BMWs and Subarus) it requires removing the intake manifold or starter. Always research your specific vehicle's procedure and remember a scan tool relearn is often required.
How much does it cost to fix code P0387?
A professional repair typically costs between $150 and $400. The OEM sensor ranges from $50 to $150, while labor runs $100 to $250 depending on accessibility. Wiring repairs or fixing oil leaks that caused the failure will add $150 to $350 to the total bill.
Key Takeaways
- Code P0387 causes unpredictable engine stalling at any speed, creating an immediate safety hazard that requires towing.
- A failed sensor or heat-damaged wiring harness causes 80% of P0387 codes, often accelerated by oil or coolant leaks.
- Test the 5-volt reference circuit before buying parts; replacing the sensor will not fix a 'circuit low' code if the underlying issue is a corroded wire.
- GM and many modern vehicles require a 'Crankshaft Variation Relearn' using a bidirectional scan tool after sensor replacement to prevent false misfire codes.
- Always install an OEM crankshaft position sensor; cheap aftermarket sensors frequently have incorrect internal resistance and fail out of the box.
Helpful Videos

The information in this article is provided for general reference and educational purposes only. Vehicle specifications, procedures, and part compatibility can vary by production date, trim level, and region. Always consult your vehicle's factory service manual and verify part numbers before purchasing or performing repairs. Safety-critical components such as airbags, seat belts, and braking systems should be installed by a qualified professional.
- 🎬 Helpful Videos
- What Does P0387 Mean?
- Can I Drive With P0387?
- Common Causes
- Symptoms
- Diagnostic Flowchart
- Common Fixes & Costs
- Used vs. New Parts: Buying Guide
- What Happens If You Wait — Timeline
- Cost of Not Fixing It
- Diagnosis Steps
- When This Code Triggers (Freeze-Frame Conditions)
- Related Codes
- Climate & Environmental Factors
- How to Talk to a Mechanic About This Code
- Where to Take It: Dealer vs Independent vs Chain
- When to Walk Away From the Repair
- What Scan Tool You Need for This Code
- How to Clear the Code After You Fix It
- Will This Fail Emissions / State Inspection?
- Most Commonly Affected Vehicles
- Manufacturer-Specific Notes
- Real Owner Stories
- 2007 GMC Sierra 2500HD (Duramax) at 165K miles
- 2005 Jeep Grand Cherokee 4.0L at 120K miles
- 2010 BMW 328i (E90) at 95K miles
- How to Prevent This Code From Triggering
- Frequently Asked Questions
- What is the difference between Crankshaft Sensor 'A' and 'B'?
- Can a bad battery cause a P0387 code?
- What are the most common mistakes when diagnosing P0387?
- Can I perform a crankshaft relearn without a scan tool?
- Are aftermarket crankshaft sensors reliable?
- Can I replace the crankshaft position sensor myself?
- How much does it cost to fix code P0387?
- Key Takeaways
- 🎟️ Get 5% Off