

P0366 on 2009-2010 Pontiac G3: Exhaust Cam Sensor Causes and Fixes
On a 2009-2010 Pontiac G3, code P0366 almost always means the exhaust camshaft position sensor has failed. This is a known issue confirmed by GM Technical Service Bulletin #PIP5329C. Replacing the sensor is an easy, low-cost DIY fix, typically costing $20-$60 for a new part. Owners and the TSB strongly suggest using a genuine GM/ACDelco part to prevent premature failure.
- P0366 on a 2009-2010 Pontiac G3 specifically points to a problem with the exhaust camshaft position sensor.
- The most likely cause is a failed sensor, a known issue backed by a GM Technical Service Bulletin (PIP5329C).
- This is a very DIY-friendly repair that can be done in under 30 minutes with basic tools (10mm socket, 5mm Allen key).
- Before replacing the sensor, check its electrical connector for oil contamination from a leaky valve cover gasket, a common secondary issue on this engine.
- Using a quality OEM or reputable aftermarket brand like ACDelco or Delphi is strongly recommended by other owners to ensure a lasting repair.
What's Unique About the 2009-2010 Pontiac G3
The 2009-2010 Pontiac G3 is a rebadged Chevrolet Aveo, sharing the same 1.6L Ecotec (LXV) engine and its common issues. This specific problem is so well-known that General Motors issued a Technical Service Bulletin (PIP5329C) for the G3, Aveo, and other models with this engine family. The bulletin acknowledges a high failure rate for the camshaft position sensors and directs technicians to replace the sensor as the primary fix, confirming this is a component-level weakness rather than a more complex issue.
Diagnostic Flowchart
Tap your situation to follow the diagnostic path that matches what you're seeing on this vehicle.
Symptoms You May Notice
- Check Engine Light is on
- Engine is difficult to start, takes longer to crank, or cranks but won't start
- Engine stalls or runs rough, especially when coming to a stop
- Hesitation or lack of power during acceleration, sometimes described as being most noticeable above 2,000 RPM
- Reduced fuel economy
- Engine may misfire, potentially triggering a P0300 (Random Misfire) code
- Replacing the crankshaft position sensor instead of the camshaft position sensor.
- Replacing the intake camshaft position sensor ('A') when the code is for the exhaust sensor ('B'). The intake sensor is located toward the firewall, while the exhaust sensor is toward the radiator.
- Assuming a major timing belt issue before replacing the inexpensive and high-failure-rate camshaft sensor.
Most Likely Causes
- Failed Exhaust Camshaft Position Sensor 🔴 High Probability This is a well-documented failure item on this platform, as confirmed by GM Technical Service Bulletin #PIP5329C, which recommends replacing the sensor as the first step. Owners on forums for the identical Chevrolet Aveo strongly advise using OEM ACDelco parts, as aftermarket sensors have a reputation for failing quickly.
How to confirm: After visually inspecting the wiring, the most common and practical diagnostic step is to replace the sensor due to its high failure rate and low cost. An oscilloscope can be used to confirm an erratic or missing waveform, but this is often unnecessary for a DIY diagnosis of this specific, well-known fault.
Typical fix: Replace the exhaust camshaft position sensor. It is located on the passenger side of the engine, toward the front of the vehicle (exhaust manifold side), and is held by a single 10mm bolt. 🎬 Watch: This walkthrough shows how to replace the G3 sensor.
Est. part cost: $25-$80 - Wiring or Connector Issue 🟡 Medium Probability Oil leaks from the valve cover gasket are extremely common on this engine and can drip directly onto the sensor's electrical connector, saturating it and causing a poor connection or short. The wiring harness is also exposed to significant heat and vibration, which can lead to chafing or brittle insulation over time.
How to confirm: Visually inspect the sensor's wiring harness and connector for signs of physical damage, corrosion, or oil saturation. Unplug the connector and check for oil inside the pins. Wiggling the connector with the engine running may cause the idle to change, indicating a bad connection.
Typical fix: Clean the oil from the connector and sensor using electrical contact cleaner. If the connector, locking tab, or wiring is damaged, it will need to be repaired or replaced. The source of any oil leak (e.g., valve cover gasket) should also be fixed to prevent a repeat failure.
Est. part cost: $5-$30 - Slipped or Worn Timing Belt ⚪ Low Probability The 1.6L LXV is an interference engine with a timing belt that has a recommended replacement interval. While belt failure is possible, issues on this engine are often traced to failed tensioners or idler pulleys. If the belt is past its service interval (typically 60,000-100,000 miles or 6-10 years), it can stretch or slip, causing cam/crank correlation to be off.
How to confirm: Check service records for the last timing belt replacement. The manufacturer's interval is a critical reference. If timing is suspect, a visual inspection of the belt and timing marks is required. This code will often be accompanied by P0016 (Crank/Cam Correlation) if timing is the root issue.
Typical fix: Replace the timing belt, tensioner, and idler pulleys as a kit. On the 2009+ models, the water pump is not driven by the timing belt. This is an involved repair that can lead to catastrophic engine damage if done incorrectly.
Est. part cost: $100-$250
Rare But Worth Checking
- Magnetized Cylinder Head Components: Extremely rare, but mentioned specifically in TSB #PIP5329C. This can occur after improper welding procedures during a front-end collision repair, causing metal components in the head (like camshafts or valve train parts) to become magnetized and interfere with the Hall-effect sensor reading. The TSB directs technicians to replace the entire cylinder head assembly if this is confirmed.
- Failing Engine Control Module (ECM): This is very uncommon. The ECM should only be considered after all other possibilities, including the sensor, wiring, and mechanical timing, have been thoroughly ruled out.
Diagnosis Steps
- Read the trouble codes with an OBD-II scanner and note any other codes present, such as P0341 or P0016.
- Remove the plastic engine cover (typically held by four 5mm Allen head bolts 🎬 See a quick demonstration of diagnosing the P0366 exhaust code.).
- Locate the exhaust camshaft position sensor on the passenger side of the engine, toward the radiator.
- Visually inspect the sensor, its connector, and wiring for any obvious damage, oil leaks from the valve cover, or loose connections.
- If oil is present in the connector, clean it thoroughly with electrical contact cleaner, clear the code, and re-test.
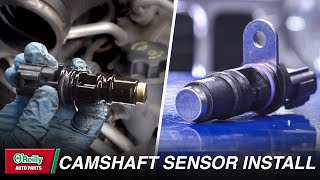
- Given the high failure rate and low cost, the most common next step is to replace the exhaust camshaft position sensor. Be sure to use a quality OEM or reputable aftermarket part. 🎬 Watch: A helpful guide on general camshaft position sensor replacement.
- If the code returns after replacing the sensor, check the engine's mechanical timing. Verify the timing belt has not slipped and is properly tensioned.
- If timing is correct, perform electrical tests on the sensor circuit. Check for a 5V reference signal, a good ground, and a clean signal wire back to the ECM.
- As a final, rare step, consider the possibility of a faulty ECM or magnetized head components as described in TSB PIP5329C, especially if the vehicle has a history of collision repair.
Parts You'll Likely Need
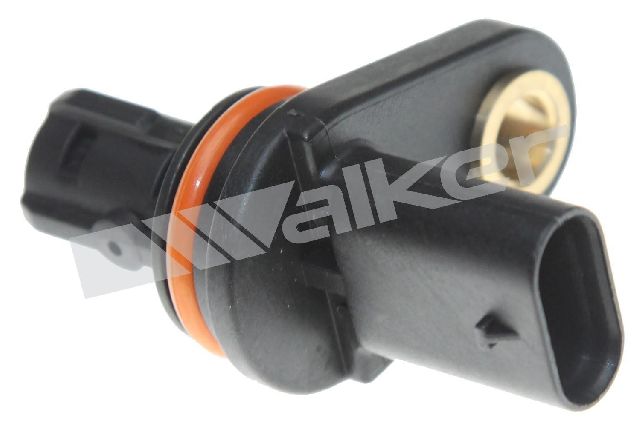
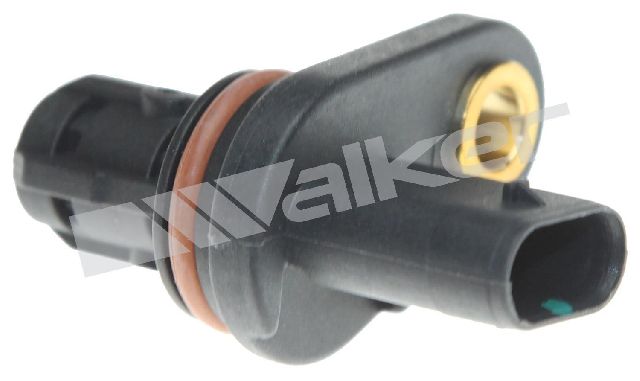
- Exhaust Camshaft Position Sensor
(OEM #96253544)— This is the most common failure part for code P0366 on this vehicle, as confirmed by GM TSB #PIP5329C. Note that some parts catalogs show this number fitting up to 2008 models, while later models may use a different number (like 25195556 or 55565709). Always verify with your VIN.
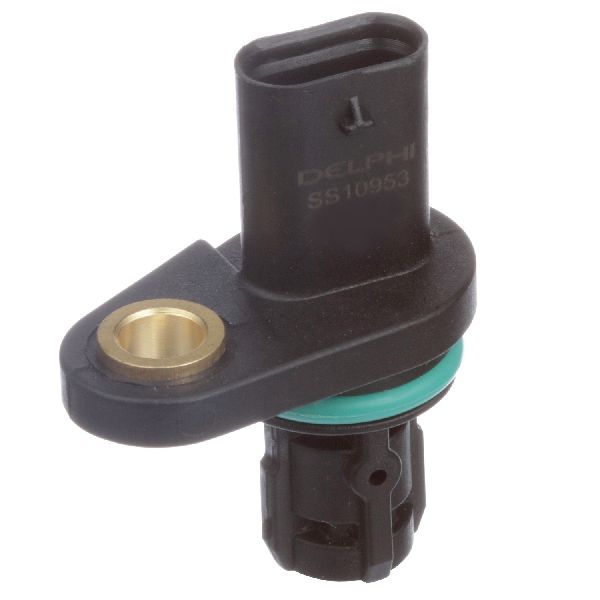
Trusted brands: ACDelco (GM Genuine), Delphi, Standard Motor Products (SMP), Walker Products
OEM price range: $45-$80
Aftermarket price range: $25-$50
Related Codes That Often Appear With This One
- P0341 — This is the code for the intake camshaft position sensor ('A'). TSB #PIP5329C notes that P0341 and P0366 can appear together. The sensors are often the same part number and fail around the same time. It is common practice to replace both sensors simultaneously for preventative maintenance.
- P0016 — This code indicates a crankshaft/camshaft timing correlation error. If you see P0366 along with P0016, it points much more strongly towards a mechanical timing issue like a slipped timing belt or a problem with the variable cam phasers, rather than just a sensor failure.
- P0368 — Indicates the exhaust camshaft position sensor circuit is reading high, often due to a short to voltage.
- P0369 — Indicates an intermittent signal from the exhaust camshaft position sensor, which aligns with the 'Range/Performance' nature of P0366 and could be caused by a loose connection or failing sensor.
Technical Service Bulletins (TSBs) & Recalls
- PIP5329C: Addresses Service Engine Soon lamp with DTC P0341 and/or P0366. Recommends replacement of the camshaft position sensor as the primary fix. Also provides advanced diagnostics for rare cases involving magnetized cylinder head components from improper collision repair.
Platform-Specific Known Issues
- GM Technical Service Bulletin #PIP5329C was issued for the 2009-2010 Pontiac G3 (and related models) specifically for codes P0341 and P0366, recommending the replacement of the camshaft position sensor as the primary fix.
- A leaking valve cover gasket is a very common issue on the 1.6L LXV engine and is a frequent secondary cause of P0366 due to oil contaminating the sensor connector.
Mechanic-Grade Diagnostic Values
- Camshaft Position Sensor Power Supply Voltage — expected: 5 Volts DC at the sensor connector (Gray wire) with key on, engine off.. Failure: No voltage or significantly lower voltage indicates a wiring or ECM issue.
- Camshaft Position Sensor Ground Circuit — expected: Good continuity to ground at the sensor connector (White wire).. Failure: High resistance or an open circuit indicates a bad ground connection.
- Camshaft Position Sensor Signal — expected: A square wave signal that toggles between approximately 0V and 5V when the engine is running, best viewed with an oscilloscope.. Failure: A missing, erratic, or flat-lined signal indicates a failed sensor or reluctor wheel issue.
Scan Tool Commands That Help
- Tech2 / GDS2 (or advanced aftermarket scanner): Crankshaft Position Variation Learn (CASE Relearn) — This procedure may be required after replacing a camshaft or crankshaft position sensor, or after timing components have been serviced. It synchronizes the signals from the crank and cam sensors with the ECM. Failure to perform this relearn can sometimes cause persistent codes or rough running even after parts are replaced.
Wiring & Ground Locations
- Exhaust Camshaft Position Sensor Connector — On the sensor itself, located on the front (radiator side) of the valve cover on the passenger side of the engine.. This 3-pin connector is the primary interface for the sensor. Pin 1 (Gray) is the 5V power supply, Pin 2 (Green) is the signal, and Pin 3 (White) is the ground. It is highly susceptible to oil contamination from a leaking valve cover gasket.
- ECM Connector X2, Pin 26 — At the Engine Control Module (ECM), which is typically on the driver's side of the engine bay.. This is the terminal where the signal from the exhaust camshaft position sensor (L-BU/BK wire) arrives at the ECM. It can be back-probed to verify signal integrity directly at the computer.
- G103 — On the engine block, below the Engine Control Module (ECM).. This is a primary ground for the engine control system. A loose or corroded G103 ground can cause erratic voltage and false signals from multiple sensors, including the camshaft position sensor.
- G104 — On the engine block, next to the starter motor.. This is another critical engine ground. A poor connection here can introduce electrical noise that may interfere with sensor readings.
OEM Part Supersession History
96253544→55565709 / 25195556— Part update/revision by the manufacturer.
Heads up: Part number 96253544 is primarily listed for the pre-2009 Chevrolet Aveo with the older E-TEC II engine. The 2009-2010 Pontiac G3 uses the newer LXV Ecotec engine, which typically requires part 55565709 or 25195556. While they may look similar, using the wrong sensor can result in continued issues. Always verify the correct part number with the vehicle's VIN.
Model Year Variations Within This Range
- 2009-2010: For the 1.6L LXV engine and the P0366 code, there are no significant mechanical or electrical differences reported between the 2009 and 2010 model years. The engine received an update for the 2009 model year, but was largely unchanged for 2010.
Helpful Videos

We Have This Part in Stock



The information in this article is provided for general reference and educational purposes only. Vehicle specifications, procedures, and part compatibility can vary by production date, trim level, and region. Always consult your vehicle's factory service manual and verify part numbers before purchasing or performing repairs. Safety-critical components such as airbags, seat belts, and braking systems should be installed by a qualified professional.
- Pontiac G3:
- 🎬 Helpful Videos
- 🛍️ Shop This Part
- What's Unique About the 2009-2010 Pontiac G3
- Diagnostic Flowchart
- Symptoms You May Notice
- Most Likely Causes
- Rare But Worth Checking
- Diagnosis Steps
- Parts You'll Likely Need
- Related Codes That Often Appear With This One
- Technical Service Bulletins (TSBs) & Recalls
- Platform-Specific Known Issues
- Mechanic-Grade Diagnostic Values
- Scan Tool Commands That Help
- Wiring & Ground Locations
- OEM Part Supersession History
- Model Year Variations Within This Range
- 🎟️ Get 5% Off