

OBD-II Code P0366: Camshaft Position Sensor 'B' Circuit Range/Performance (Bank 1)
What P0366 means, why it triggers, and how to fix it
- P0366 triggers when the Powertrain Control Module (PCM) receives an erratic or out-of-sync signal from the Bank 1 exhaust camshaft position sensor.
- Inspect the sensor connector for oil contamination first; a leaking valve cover gasket causes over 30% of these sensor signal failures.
- Do not replace the sensor if P0366 is paired with P0017; this combination guarantees a mechanical timing issue like a stretched timing chain.
- Always verify the sensor receives a steady 5-volt reference and a solid ground using a multimeter before spending $50-$150 on a replacement part.
What Does P0366 Mean?

The Powertrain Control Module (PCM) is receiving an erratic or intermittent signal from the Bank 1 'B' (exhaust) camshaft position sensor. This sensor reports the exact rotational position of the exhaust camshaft. The PCM relies on this precise data to control variable valve timing (VVT), fuel injection, and ignition timing.
Technical definition: The official SAE/OBD-II definition is "Camshaft Position Sensor 'B' Circuit Range/Performance (Bank 1)". This means the PCM detects the Bank 1 exhaust camshaft position sensor signal is intermittent, irrational, or out of its expected range compared to the crankshaft position sensor. The PCM logs this code when the signal is present but contradicts the current engine state, indicating a performance problem rather than a dead circuit.
🎬 Watch: A breakdown of P0366 causes and common fixes.Can I Drive With P0366?
Yes, But With Caution. You can drive, but expect hard starting, rough idling, stalling, and poor acceleration. Fix this immediately to avoid getting stranded or causing severe engine damage. Ignoring the resulting misfires overheats and destroys the catalytic converter, a repair costing over $2,000.
Common Causes

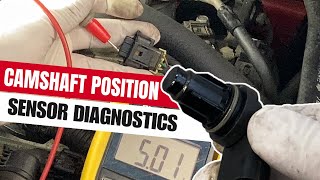
- Failing Camshaft Position Sensor (Very Common) — The most frequent cause. The sensor's internal Hall-effect element or magnetic pickup degrades from heat cycles and vibration, sending a weak or erratic signal. 🎬 See how to perform a professional camshaft sensor diagnostic.
- Oil Contamination (Leaking Valve Cover) (Very Common) — A leaking valve cover gasket frequently seeps oil into the sensor's connector, blocking the electrical signal. Oil can also coat the sensor tip, preventing accurate camshaft readings.
- Damaged Wiring or Corroded Connector (Common) — Engine heat melts wire insulation, and rodents chew through harnesses. The electrical connector also corrodes or fills with debris, disrupting the 5-volt reference signal.
- Low, Dirty, or Incorrect Engine Oil (Uncommon) — The variable valve timing (VVT) system uses hydraulic oil pressure to adjust camshaft timing. Low, dirty, or incorrect viscosity oil causes VVT phasers to respond slowly, creating a timing mismatch that triggers the code.
- Failing VVT Solenoid or Cam Phaser (Less Common) — A stuck VVT solenoid (oil control valve) or faulty camshaft phaser prevents the camshaft from adjusting timing correctly. This creates a discrepancy between expected and actual cam position.
- Stretched Timing Chain or Belt (Less Common) — If the timing chain or belt stretches or jumps a tooth, the camshaft falls out of sync with the crankshaft. This forces the sensor's reading outside the expected range.
- Damaged Tone Ring (Reluctor Wheel) (Less Common) — The sensor reads a toothed reluctor wheel on the camshaft. Dirty, damaged, or broken teeth prevent the sensor from generating a consistent square wave signal.
- Electromagnetic Interference (EMI) (Rare) — Improperly routed spark plug wires or a failing ignition coil create an electromagnetic field that interferes with the sensitive camshaft sensor signal.
- Failing Powertrain Control Module (PCM) (Very Rare) — In extremely rare cases, a damaged PCM fails to process the signal from a perfectly good sensor. Rule out all other hardware and wiring first.
Symptoms

- Check Engine Light is On — The light illuminates and stays on as long as the fault is active.
- Hard Start or No-Start — The engine cranks longer than usual before firing. If the PCM receives a completely unusable signal, the engine refuses to start.
- Rough Idle and Stalling — The engine shakes, runs unevenly, or stalls unexpectedly when stopped at a light or driving at low speeds.
- Poor Acceleration and Limp Mode — The vehicle feels sluggish and hesitates during acceleration. The PCM often triggers 'limp mode,' severely restricting engine RPMs to prevent damage.
- Engine Surging or Misfiring — The engine bucks or misfires during acceleration as the PCM struggles with inconsistent timing data, often triggering secondary P0300-P0308 misfire codes.
- Reduced Fuel Economy — Incorrect valve timing forces the engine to burn fuel inefficiently, causing a sudden and noticeable drop in gas mileage.
- Rattling on Cold Start — A loud rattle on cold starts that disappears after a few seconds points directly to failing VVT actuators or timing chain tensioners.
Diagnostic Flowchart
Tap your situation to follow the diagnostic path that matches what you're seeing on this code.
Common Fixes & Costs
- Replace Camshaft Position Sensor — Parts: $30-$120, Labor: $80-$160, ~0.8 hr book time (DIY)
- Replace Valve Cover Gasket — Parts: $40-$120, Labor: $150-$350, ~2.5 hr book time (Intermediate)
- Repair Wiring or Replace Connector Pigtail — Parts: $15-$50, Labor: $100-$250, ~1.5 hr book time (Intermediate)
- Replace VVT Solenoid (Oil Control Valve) — Parts: $40-$150, Labor: $80-$200, ~1 hr book time (DIY)
- Engine Oil and Filter Change — Parts: $40-$90, Labor: $20-$50, ~0.5 hr book time (DIY)
- Replace Timing Chain and Tensioners — Parts: $200-$600, Labor: $800-$1800, ~8.5 hr book time (Professional)
DIY vs Professional
- Replace Camshaft Position Sensor — Beginner:
Tools: Basic socket set, ratchet, flashlight. - Replace VVT Solenoid — Beginner:
Tools: Basic socket set, ratchet, torque wrench, shop towels. - Repair Wiring or Replace Connector Pigtail — Beginner:
Tools: Multimeter, wire strippers, wire crimpers, soldering iron, heat shrink tubing. - Replace Valve Cover Gasket — Beginner:
Tools: Socket set, torque wrench, gasket scraper, RTV sealant. - Replace Timing Chain — Beginner:
Tools: Engine-specific timing tools, pullers, torque wrenches.
Used vs. New Parts: Buying Guide
When a used part is worth it: For a simple electronic part like a camshaft position sensor, never buy used. The $10-$30 savings do not justify the risk of installing a degraded component.
Donor-vehicle mileage cap: roughly under 40000 miles for the part to have meaningful remaining life.
Donor quality checklist:
- Verify the donor vehicle's mileage is low.
- Ensure the part number is an exact match, as visually identical sensors have different internal calibrations.
- Avoid sensors from engines showing signs of oil sludge.
Decision logic:
- If The OEM sensor is under $100. → Buy a new OEM sensor. The peace of mind is worth the cost.
- If The vehicle is >15 years old and budget is critical. → Buy a high-quality aftermarket sensor (e.g., Bosch, Denso, NTK).
- If The part has a high failure rate on your specific vehicle model. → Buy OEM only, as aftermarket versions rarely correct the original design flaw.
Warranty tradeoff: Used parts offer a 30-90 day warranty. New aftermarket parts include a 1-year to limited lifetime warranty. New OEM parts carry a 12-month/12,000-mile warranty.
Worst-case if a used part fails: $100-$200 if a cheap aftermarket part fails shortly after installation, requiring repeat labor costs and diagnostic time.
What Happens If You Wait — Timeline
- 0-1 month: Check Engine Light illuminates. Minor hesitation when accelerating. (MPG impact: 0-5%% · Added cost: $0-$20 in wasted fuel)
- 1-3 months: Rough, unstable idle. Noticeable loss of power and stalling at low speeds. (MPG impact: 5-15%% · Added cost: $50-$150 in wasted fuel)
- 3-6 months: Incorrect timing causes severe misfires, dumping unburnt fuel into the exhaust and melting the catalytic converter. (MPG impact: 15-25%% · Added cost: $1200-$2800 (Catalytic converter replacement becomes likely))
- 6+ months: If caused by a stretched timing chain, the chain snaps, causing pistons to smash into valves and destroying the engine. (MPG impact: 25%+% · Added cost: $3000-$7000+ (Engine replacement or major rebuild))
Cost of Not Fixing It
- 0-1 month: Noticeable 5-15% drop in fuel economy, rough idling, and stalling. Immediate damage risk is low. (Added cost: $0-$50)
- 1-6 months: Persistent misfires send unburnt fuel into the exhaust, overheating and melting the catalytic converter. (Added cost: $1200-$2800)
- 6+ months: If a stretched timing chain caused the code, continued driving snaps the chain, causing pistons to smash into valves and destroying the engine. (Added cost: $3000-$7000)
Diagnosis Steps

- Read Code and Freeze Frame Data
Use an OBD-II scanner to confirm P0366. Note any paired codes (like P0017, which guarantees a mechanical timing issue). Review freeze frame data to identify the exact RPM and engine load when the fault occurred.
Tools: OBD-II Scanner (Beginner) - Visually Inspect Sensor, Connector, and Wiring
Locate the Bank 1 'B' exhaust camshaft position sensor. Inspect for oil leaking from the valve cover onto the sensor, loose connector pins, and melted wiring.
Tools: Flashlight, Inspection Mirror (Beginner) - [PRO TIP] Perform a 'Wiggle Test'
With the engine idling, carefully wiggle the sensor's wiring harness and connector. If the idle stumbles or stalls, you have found a broken wire or loose pin.
Tools: Hands, Safety Glasses (Beginner) - Clean the Connector and Check for Oil Intrusion
Disconnect the battery. Unplug the sensor and spray the connector pins heavily with electrical contact cleaner to remove oil or corrosion. Apply dielectric grease to the weather seal and reconnect.
Tools: Electrical Contact Cleaner, Dielectric Grease, Socket Set (Intermediate) - Test Sensor Circuit Voltages
Unplug the sensor and turn the key ON (engine off). Using a multimeter, verify the reference wire has 5V and the ground wire reads under 0.1V. Missing voltage guarantees a wiring or PCM issue, not a bad sensor.
Tools: Multimeter, Vehicle-specific Repair Manual (Intermediate) - Test Sensor Internal Resistance
For 2-wire variable reluctance sensors, measure internal resistance across the terminals with a multimeter. Readings of infinity (OL) or zero confirm a dead sensor. (Skip this for 3-wire Hall-effect sensors).
Tools: Multimeter, Vehicle-specific Repair Manual (Intermediate) - [ADVANCED] Analyze Live Data
Monitor the Camshaft Position Sensor B PID with an advanced scan tool while the engine runs. The angle or count must remain stable and change smoothly with RPM. Erratic jumps confirm a signal failure.
Tools: Advanced Scan Tool (Advanced) - [ADVANCED] Analyze Signal with Oscilloscope
Connect an oscilloscope to the sensor's signal wire. A healthy 3-wire sensor produces a crisp 0V to 5V square wave. Misshapen waves or dropouts confirm a failing sensor or damaged tone ring.
Tools: Oscilloscope, Back-probe Pins (Advanced) - Inspect Mechanical Timing Components
If the sensor and wiring pass all tests, the failure is mechanical. Inspect the timing chain for stretch, verify alignment marks, and check VVT solenoids for sludge.
Tools: Advanced Hand Tools, Socket Set, Torque Wrench (Advanced)
When This Code Triggers (Freeze-Frame Conditions)
- Engine Coolant Temp: 180-210°F (The fault typically registers once the engine reaches full operating temperature and enters closed-loop fuel control.)
- Engine RPM: 1500-2500 RPM (Sets during steady-state cruising or light acceleration, rarely at idle.)
- Engine Load: 25-50% (Occurs under moderate load when the VVT system actively adjusts cam timing.)
- Vehicle Speed: 40-65 mph (Consistent with highway or suburban driving speeds.)
Related Codes
- P0365 — P0365 means the PCM sees NO signal (dead sensor or cut wire). P0366 means the signal exists but is erratic or out of sync.
- P0341 — P0341 covers the 'A' (intake) sensor. If both P0341 and P0366 appear, suspect a shared ground wire or a jumped timing chain affecting both camshafts.
- P0017 — P0017 means the sensor signal is clean, but its timing relative to the crankshaft is wrong. Paired with P0366, this guarantees a mechanical timing failure.
- P0367 / P0368 — P0367 (Short to Ground) and P0368 (Short to Power) pinpoint specific electrical shorts. P0366 is a broader performance fault.
Climate & Environmental Factors
- High Humidity / Moisture: Moisture penetrates damaged wire insulation, corroding pins and increasing resistance. This disrupts the sensitive 5V signal.
- Extreme Cold: Cold, thick oil takes longer to build pressure, exacerbating VVT phaser and timing chain tensioner issues on startup.
- High Altitude: Reduced air density forces extreme air-fuel adjustments, unmasking intermittent VVT sluggishness.
How to Talk to a Mechanic About This Code
Say this: "I have a P0366 code. Before replacing the sensor, please inspect the connector for oil contamination from the valve cover and test the 5V reference circuit."
This directs the mechanic to perform a thorough diagnosis, preventing a useless part swap if the root cause is a bad wire or oil leak.
Avoid saying:
- 'Just fix whatever's wrong'
- 'My check engine light is on, can you look at it?'
- 'Whatever you recommend'
Questions to ask before authorizing the repair:
- Did you find any oil inside the sensor connector or see a leak from the valve cover gasket?
- Did you test the sensor's 5V reference and ground at the connector, and were they good?
- If you're recommending a sensor replacement, can you confirm you've ruled out wiring and mechanical timing issues?
- Is a 'relearn' procedure required after replacing this sensor on my car?
Where to Take It: Dealer vs Independent vs Chain
- Dealer:
Recommended for vehicles under warranty or complex mechanical timing diagnoses.
Best for: Vehicles still under powertrain or emissions warranty., Known manufacturer-specific issues addressed by a TSB., Complex diagnoses that require software updates or point to a mechanical timing issue.
Downsides: Typically the highest labor rate., May recommend replacing a larger assembly when a smaller component has failed. (Typical cost: +50% vs. baseline) - Independent Shop:
Best fit for out-of-warranty vehicles. A certified shop handles electrical and mechanical diagnostics at a lower cost.
Best for: Out-of-warranty vehicles where cost is a factor., Diagnosing common codes like P0366, which experienced technicians see frequently., Getting a second opinion on a costly dealer quote.
Downsides: Quality and diagnostic capabilities vary widely; vet shops based on reviews and ASE certifications., May not have access to the very latest manufacturer software updates. (Typical cost: +0% vs. baseline) - Chain Shop:
Acceptable only for a straightforward sensor replacement if you have already diagnosed the issue yourself.
Best for: Simple, clear-cut part replacements when you are certain of the diagnosis.
Downsides: Technicians may be less experienced with in-depth electrical or mechanical diagnostics., May be incentivized to sell parts rather than diagnose complex root causes. (Typical cost: -10% vs. baseline)
When to Walk Away From the Repair
If the estimated repair cost exceeds 40-50% of the car's private-party value, consider selling.
- Car worth $3000, fix is $1800: Walk away. A timing chain repair costing 60% of the car's value is a poor investment.
- Car worth $10000, fix is $250: Fix it. A simple sensor replacement is well below the threshold.
- Car worth $6000, fix is $1800: Borderline. Get a second opinion from an independent shop.
What Scan Tool You Need for This Code
Minimum: A scanner that can read and clear codes, and crucially, display live sensor data.
A basic code reader cannot display live camshaft sensor data, which is essential for diagnosing a 'Range/Performance' fault.
Budget: BlueDriver Pro (~$90) — Connects via Bluetooth to graph live sensor data and spot signal dropouts.
Mid-range: Foxwell NT510 Elite / Autel MK808S (~$150) — Offers bidirectional controls to test VVT solenoids and performs sensor relearn procedures.
Professional: Autel MaxiCOM MK906BT or higher (~$500-1200) — Provides full OEM-level functions, advanced graphing, and PCM programming.
Rent vs buy: For a one-time diagnosis, many auto parts stores like AutoZone have a tool loaner program where you can borrow a scanner for free after leaving a refundable deposit. Buy a scanner only if you plan to do your own car diagnostics more than once a year.
How to Clear the Code After You Fix It
- Reconnect the battery if it was disconnected for the repair.
- Use a standard OBD-II scan tool to select the 'Clear/Erase Codes' function.
- Perform a complete drive cycle to allow the vehicle's readiness monitors to run and self-test.
Drive cycle (~30 minutes): Start with a cold engine (left sitting for 8+ hours). Idle for 2-3 minutes. Drive at a steady highway speed (around 55 mph) for 5-10 minutes. Perform 15-20 minutes of stop-and-go city driving. Allow the vehicle to cool down completely.
Readiness monitors affected: Comprehensive Component Monitor, Misfire Monitor, Catalyst Monitor, Oxygen (O2) Sensor Monitor
Before emissions retest: drive at least 100 miles to fully set monitors.
Watch out for:
- Simply disconnecting the battery clears the code but resets all readiness monitors to 'Not Ready', guaranteeing an automatic emissions test failure.
- The code returns immediately if the root cause (e.g., bad wiring, oil leak) remains unfixed.
Will This Fail Emissions / State Inspection?
Yes — this code typically fails an OBD-II emissions inspection.
- California: An illuminated Check Engine Light results in an automatic smog check failure. All required readiness monitors must be 'Ready', so you must complete a full drive cycle after the repair before re-testing.
- New York: The NYS DMV inspection includes an OBD-II scan. An active P0366 code is an automatic failure.
- Texas: In counties requiring emissions testing (like Harris, Dallas, Tarrant), an illuminated Check Engine Light from code P0366 causes an automatic inspection failure.
Most Commonly Affected Vehicles
- Chevrolet / Pontiac Cruze, Aveo, Sonic, G3 (1.4L, 1.6L, 1.8L) (2009-2017) — GM TSB #PIP5329C directly blames a failed exhaust camshaft position sensor. Valve cover oil leaks are the primary trigger.
- Chevrolet / GMC / Buick Various models with 2.4L Ecotec & 3.6L V6 (2007-2017) — TSB 08-06-01-011K addresses excessive camshaft end play on 3.6L V6s. 2.4L engines suffer from stretched timing chains.
- Hyundai / Kia Sonata, Elantra, Tucson, Optima, Sportage (2.4L & 2.0L Turbo) (2010-2019) — Extremely common failure. Often pairs with P0365-P0369 due to a failed sensor or wiring harness degradation near the connector.
- Dodge / Chrysler / Jeep Various models with 3.6L Pentastar V6 (2011-2018) — Often an early indicator of a failing rocker arm or camshaft lobe, a notorious issue on the Pentastar V6.
- Volkswagen / Audi Jetta, Golf, GTI, A4, Q5 (2005-2017) — Audi TSB 2012630 blames a jammed VVT solenoid due to oil debris, not a bad sensor.
- Ford Focus, Fusion, Escape (2012-2018) — Wiring harness chafing and clogged VVT solenoids are the most frequent culprits.
- Honda Accord, Civic, CR-V (2013-2023) — Highly sensitive to aftermarket sensors. Always use OEM Honda sensors to prevent the code from returning.
- Subaru / Scion BRZ, FR-S, Toyota 86 (2013-2020) — Triggered by low oil levels or oil pressure fluctuations affecting the VVT system after high-RPM driving.
- Land Rover Range Rover Sport 5.0L (2010-2013) — Frequently appears after a timing chain replacement due to a faulty new VVT phaser or incorrect timing alignment.
Manufacturer-Specific Notes
- General Motors (GM): TSB #PIP5329C recommends replacing the exhaust cam sensor on 1.4L/1.8L engines. 3.6L V6s often require mechanical repair for camshaft end play.
- Audi/Volkswagen: TSBs point to contaminated VVT solenoids or require a PCM software update to fix intermittent low-RPM codes.
- Honda: Honda PCMs frequently reject aftermarket sensors. Installing an OEM sensor is mandatory for a permanent fix.
- Various: Many modern vehicles require a digital 'camshaft position sensor relearn' using an advanced scan tool after replacement.
Real Owner Stories
2012 Chevrolet Cruze 1.4L with a no-start condition
The engine cranked but would not start. However, if the exhaust camshaft position sensor was unplugged, the engine started and ran smoothly. The active code was P0366.
What they tried:
- Replaced both intake and exhaust camshaft position sensors.
- Verified the engine timing was correct.
- Checked for power at the connectors with a multimeter.
Outcome: The owner discovered a previous issue of low oil pressure caused by a broken oil bypass valve. The no-start issue persisted even with new sensors, pointing towards a complex underlying issue with the cam phasers requiring a relearn procedure.
Lesson: A no-start resolved by unplugging the sensor proves the PCM is receiving a signal so corrupt it prevents ignition. This points to timing correlation or wiring, not a dead sensor.
Hyundai Sonata with recurring P0366 after sensor replacement
A mechanic replaced the camshaft position sensor to fix a P0366 code, but the check engine light returned with the same code shortly after.
What they tried:
- Replacing the camshaft position sensor (by a mechanic).
Outcome: The problem was not solved by replacing the sensor. The next steps required investigating the wiring harness for shorts, checking for oil contamination in the connector, and looking into mechanical VVT issues.
Lesson: Replacing the sensor without checking the wiring harness or VVT system is the most common misdiagnosis for P0366.
Subaru BRZ / Scion FR-S with intermittent P0366 after high-speed driving
After driving at a high speed for 10 minutes, the check engine light came on with code P0366. The engine sounded and ran fine otherwise.
What they tried:
- Cleared the code with a scanner.
- Drove the car normally afterward.
Outcome: The code did not return after being cleared. The cause was a temporary VVT system anomaly due to high engine temperatures and RPMs thinning the oil and affecting the hydraulic operation of the cam phasers.
Lesson: Intermittent codes after high-RPM driving indicate oil pressure drops affecting the VVT phasers. Always check oil level first.
How to Prevent This Code From Triggering
- Perform regular oil changes with manufacturer-specified oil (Every 5,000-7,500 miles or as per owner's manual) — The hydraulic VVT system relies on clean oil. Sludge clogs VVT solenoids, causing the timing mismatch that triggers P0366.
- Use high-quality engine oil and filters (Every oil change) — Detergents prevent sludge buildup, and quality filters trap debris before it jams the VVT screens.
- Inspect for and repair oil leaks promptly (During every oil change or service) — Leaking valve cover gaskets seep oil directly into the sensor connector, shorting the signal.
- Adhere to timing belt/chain replacement intervals (As specified by the manufacturer (e.g., 90,000-120,000 miles)) — Replacing worn timing components prevents the camshaft from falling out of sync with the crankshaft.
Frequently Asked Questions
What does 'Bank 1' and 'Sensor B' mean?
'Bank 1' is the side of the engine that contains cylinder #1. On inline engines (like a 4-cylinder), there is only one bank. 'Sensor B' refers to the exhaust camshaft position sensor, while 'Sensor A' refers to the intake camshaft.
What are the most common mistakes when diagnosing P0366?
The biggest mistake is immediately replacing the sensor without diagnosis. Technicians and DIYers overlook common causes like oil leaking from a valve cover gasket onto the connector, corroded pins, or damaged wiring. Using cheap aftermarket sensors also causes the code to return.
Can low engine oil cause a P0366 code?
Yes. The VVT system relies on proper oil pressure to function. If oil is low, dirty, or the wrong viscosity, the camshaft phasers fail to adjust timing correctly, triggering a P0366 code.
How much does it cost to fix P0366?
A professional diagnostic fee runs $100-$150. Replacing the sensor costs $150-$300 total, including parts and labor. Wiring repairs or timing chain replacements cost significantly more, often exceeding $1,000.
I replaced the sensor but the code came back. What now?
If a new, quality sensor fails to clear the code, the problem lies in the wiring, VVT system, or mechanical timing. Meticulously test the wiring for continuity and shorts back to the PCM. If the circuit is perfect, investigate the VVT solenoids or check for a stretched timing chain.
What happens if I don't fix P0366?
Ignoring P0366 leads to progressively worse symptoms like stalling and poor power. The most significant financial risk comes from engine misfires, which send unburnt fuel into the exhaust and destroy the catalytic converter.
Is there a fuse for the camshaft position sensor?
Yes, the camshaft position sensor circuit is protected by a fuse, often shared with other engine sensors. If the sensor and its neighbors all lose power at once, a blown fuse is the culprit. Check your owner's manual for its location.
Can I replace just the sensor myself?
Yes, on most cars, the camshaft position sensor is held by a single bolt and is easily accessible on the top or side of the engine. It is a common DIY repair that saves over $100 in labor.
Key Takeaways
- P0366 triggers when the Powertrain Control Module (PCM) receives an erratic or out-of-sync signal from the Bank 1 exhaust camshaft position sensor.
- Inspect the sensor connector for oil contamination first; a leaking valve cover gasket causes over 30% of these sensor signal failures.
- Do not replace the sensor if P0366 is paired with P0017; this combination guarantees a mechanical timing issue like a stretched timing chain.
- Always verify the sensor receives a steady 5-volt reference and a solid ground using a multimeter before spending $50-$150 on a replacement part.
Helpful Videos

The information in this article is provided for general reference and educational purposes only. Vehicle specifications, procedures, and part compatibility can vary by production date, trim level, and region. Always consult your vehicle's factory service manual and verify part numbers before purchasing or performing repairs. Safety-critical components such as airbags, seat belts, and braking systems should be installed by a qualified professional.
- 🎬 Helpful Videos
- What Does P0366 Mean?
- Can I Drive With P0366?
- Common Causes
- Symptoms
- Diagnostic Flowchart
- Common Fixes & Costs
- DIY vs Professional
- Used vs. New Parts: Buying Guide
- What Happens If You Wait — Timeline
- Cost of Not Fixing It
- Diagnosis Steps
- When This Code Triggers (Freeze-Frame Conditions)
- Related Codes
- Climate & Environmental Factors
- How to Talk to a Mechanic About This Code
- Where to Take It: Dealer vs Independent vs Chain
- When to Walk Away From the Repair
- What Scan Tool You Need for This Code
- How to Clear the Code After You Fix It
- Will This Fail Emissions / State Inspection?
- Most Commonly Affected Vehicles
- Manufacturer-Specific Notes
- Real Owner Stories
- 2012 Chevrolet Cruze 1.4L with a no-start condition
- Hyundai Sonata with recurring P0366 after sensor replacement
- Subaru BRZ / Scion FR-S with intermittent P0366 after high-speed driving
- How to Prevent This Code From Triggering
- Frequently Asked Questions
- What does 'Bank 1' and 'Sensor B' mean?
- What are the most common mistakes when diagnosing P0366?
- Can low engine oil cause a P0366 code?
- How much does it cost to fix P0366?
- I replaced the sensor but the code came back. What now?
- What happens if I don't fix P0366?
- Is there a fuse for the camshaft position sensor?
- Can I replace just the sensor myself?
- Key Takeaways
- 🎟️ Get 5% Off