

P0365 on 2015-2018 Ram Promaster City: Exhaust Camshaft Sensor 'B' Causes and Fixes
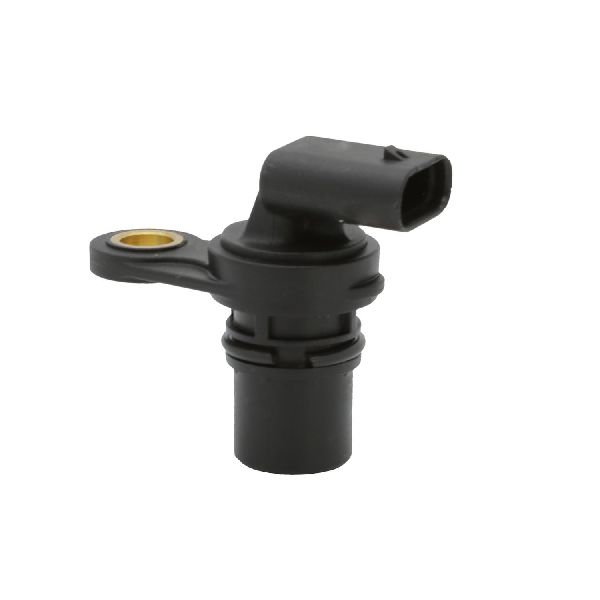
This code points to a problem with the exhaust camshaft position sensor (Sensor 'B'). The most common fix is replacing the sensor itself (Mopar Part #05149141AF), which is easily accessible on the driver's side of the valve cover. Always check the wiring for damage first. A new sensor is relatively inexpensive.
- P0365 on a Promaster City specifically points to the exhaust camshaft position sensor circuit ('Sensor B').
- The most likely cause is a failed sensor (OEM part #05149141AF), which is an affordable and accessible part to replace for a DIYer, located on the driver's side of the valve cover.
- Always inspect the wiring and connector for damage before buying a new sensor.
- A manufacturer TSB exists for this issue, suggesting it's a known problem that FCA was investigating.
- Ensure your engine oil is clean and at the correct level, as the 2.4L MultiAir engine is sensitive to oil level and condition.
What's Unique About the 2015-2018 Ram PROMASTER CITY
The 2015-2018 Ram Promaster City uses the 2.4L Tigershark MultiAir engine. Unlike a standard engine, the MultiAir system uses engine oil pressure to control the intake valves, making the camshaft position signals especially important for proper operation. A specific Technical Service Bulletin (TSB #05149141A) was issued for a range of camshaft sensor codes, including P0365. Unusually, it instructed technicians to contact a specific factory representative by name before replacing the sensor, which suggests a known, complex issue or a required special procedure that dealers were investigating early in the vehicle's life cycle.
Diagnostic Flowchart
Tap your situation to follow the diagnostic path that matches what you're seeing on this vehicle.
Symptoms You May Notice
- Check Engine Light is on
- Engine is hard to start or cranks but won't start
- Engine stalling, especially at low speeds or when warm
- Rough idling
- Hesitation or sputtering during acceleration
- Reduced fuel economy
- Replacing the intake camshaft position sensor ('A' sensor) instead of the exhaust ('B' sensor). The intake sensor is much harder to access, located under the intake manifold.
- Replacing the crankshaft position sensor, which is a different part with its own codes (e.g., P0335).
- Replacing the sensor without first checking the wiring harness for obvious damage or oil contamination in the connector.
Most Likely Causes
- Failed Exhaust Camshaft Position Sensor 🔴 High Probability Sensors are electronic components that can fail over time due to heat cycles and vibration. The existence of a TSB specifically for this code family points to a higher-than-normal focus on this part from the manufacturer.
How to confirm: After checking wiring, this is the most likely component. It can be tested with a multimeter for resistance or with an oscilloscope for a proper signal waveform. The easiest confirmation for a DIYer is often replacing the part, as it's inexpensive and accessible.
Typical fix: Replace the exhaust camshaft position sensor. The Mopar OEM part number is 05149141AF.
Est. part cost: $25-$75 - Wiring Harness or Connector Issue 🟡 Medium Probability The wiring harness in the engine bay is exposed to heat, vibration, and potential oil leaks, which can cause wires to fray, insulation to crack, or connectors to become loose or contaminated with oil.
How to confirm: Visually inspect the wiring harness leading to the exhaust camshaft sensor for any signs of damage, chafing, or melting. Check that the connector is securely plugged in and free of corrosion or oil contamination. A multimeter can be used to check for a 5V reference, ground, and signal continuity back to the PCM.
Typical fix: Repair the damaged section of wiring or clean/replace the connector.
Est. part cost: $5-$50 - Low or Dirty Engine Oil ⚪ Low Probability The 2.4L MultiAir engine is known for oil consumption issues, and the valvetrain system is highly sensitive to oil level and quality. While this more commonly causes other codes, severe oil level/pressure issues can contribute to erratic valve and cam timing that may trigger a sensor fault.
How to confirm: Check the engine oil level and condition using the dipstick. If the oil is very low or appears dirty/sludgy, it could be a contributing factor.
Typical fix: Perform an oil and filter change using the manufacturer-specified oil type.
Est. part cost: $40-$80
Rare But Worth Checking
- Timing Chain Issue: If the timing chain has stretched or a tensioner has failed, the correlation between the camshaft and crankshaft can be off, leading the PCM to flag a sensor circuit fault. This is less common and would usually be accompanied by other codes or significant engine noise (rattling).
- Damaged Reluctor Wheel: The sensor reads a toothed wheel (reluctor) on the camshaft. If this wheel is bent, cracked, or has missing teeth, the sensor cannot produce an accurate signal, which can trigger P0365 even if the sensor and wiring are good.
- Faulty Powertrain Control Module (PCM): This is a very rare cause. The PCM is the last thing to suspect after all other possibilities, including the sensor, wiring, and timing components, have been thoroughly checked and ruled out.
Diagnosis Steps
- Use an OBD-II scanner to confirm P0365 is the active code and check for any other codes.
- Check engine oil level and condition. This is critical on the 2.4L MultiAir engine. Top off or change if necessary.
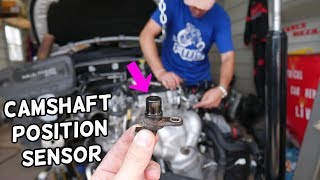
- Locate the exhaust camshaft position sensor ('B' sensor). It is on the driver's side of the valve cover, held by a single 10mm bolt. 🎬 Watch: This video shows the exact location and replacement steps.
- Visually inspect the wiring harness and connector for any signs of damage, melting, or oil contamination.
- Ensure the connector is seated firmly on the sensor and the locking tab is engaged.
- If the wiring looks good, the most practical step for a DIYer is to replace the sensor. It is relatively inexpensive and easy to access.
- For advanced diagnosis, use a multimeter to check for 5V reference power, ground, and a signal at the connector with the key on, engine off.
- Use an oscilloscope to view the sensor's square waveform, comparing it to a known-good pattern.
- If a new sensor and confirmed good wiring do not resolve the code, the issue may be with the timing system (chain, tensioner, reluctor wheel) or the PCM. A cam-crank relearn procedure with a capable scan tool may also be required after sensor replacement.
Parts You'll Likely Need
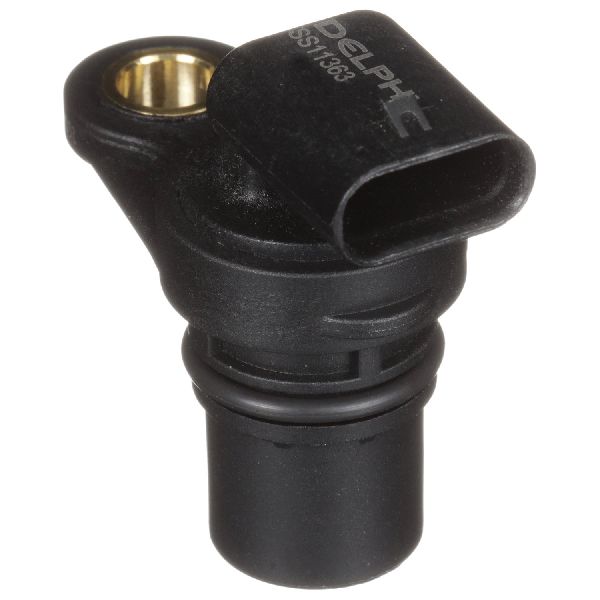
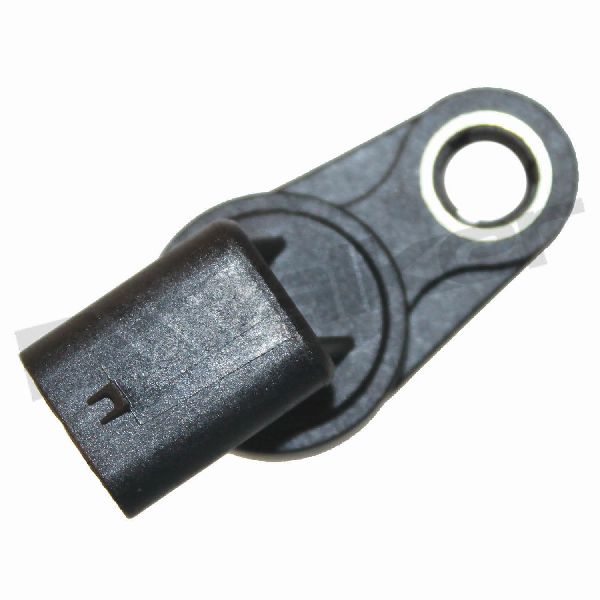
- Exhaust Camshaft Position Sensor
(OEM #05149141AF)— This is the most common component to fail and trigger the P0365 code.
Trusted brands: Mopar, NTK/NGK, Delphi, Bosch
OEM price range: $45-$70
Aftermarket price range: $25-$50
Related Codes That Often Appear With This One
- P0340 — This code is for the intake camshaft position sensor ('A'). If both appear, it could point to a common wiring issue (shared power or ground), a more serious base timing problem, or simply that both sensors are failing around the same time, which is common.
- P0369 — This code indicates an intermittent signal from the same sensor (Camshaft Position Sensor 'B'). P0365 is for a complete circuit failure, while P0369 is for a signal that comes and goes. They point to the same root causes like a failing sensor or loose connection.
Technical Service Bulletins (TSBs) & Recalls
- Bulletin #05149141A (2015 ENGINE, dated 2015-08-04): Mentions P0365 and advises technicians to contact a factory representative before replacing the camshaft position sensor.
Platform-Specific Known Issues
- A Technical Service Bulletin (TSB #05149141A) was issued by the manufacturer regarding several camshaft position sensor fault codes, including P0365. It instructs dealers to contact a specific factory representative before replacing the sensor, indicating a known pattern of issues that may require a specific diagnostic approach or part.
- The 2.4L MultiAir engine is known for oil consumption. Low oil levels can cause a variety of timing-related codes, so the oil level should be the first check when diagnosing P0365.
Mechanic-Grade Diagnostic Values
- Camshaft Position Sensor 5V Supply — expected: 4.5 - 5.2 Volts with key on, engine off.. Failure: Voltage below 4.5V or absent suggests a problem with the wiring or the PCM.
- Camshaft Position Sensor Ground Circuit Resistance — expected: Less than 5.0 Ohms between the ground pin at the connector and a known good chassis ground.. Failure: Resistance higher than 5.0 Ohms points to a poor ground connection.
- Camshaft Position Sensor Signal (Hall-Effect) — expected: A square-wave digital pulse switching between approximately 0V and 5V as the engine rotates.. Failure: No signal, a signal stuck high (constant 5V), or stuck low (constant 0V) indicates a failed sensor or circuit fault.
Scan Tool Commands That Help
- wiTECH, Appcar DiagFCA, or equivalent professional scanner: Cam/Crank Relearn (or Variation Learn) — This procedure is often required after replacing a camshaft or crankshaft position sensor, or after timing chain service. It synchronizes the PCM's learned values with the new sensor's signal to prevent correlation codes and ensure smooth engine operation.
- wiTECH or equivalent: ECU Reset — According to some service information, this should be performed before the Cam/Crank Relearn to clear old adaptive values, ensuring the new relearn data stores correctly.
Wiring & Ground Locations
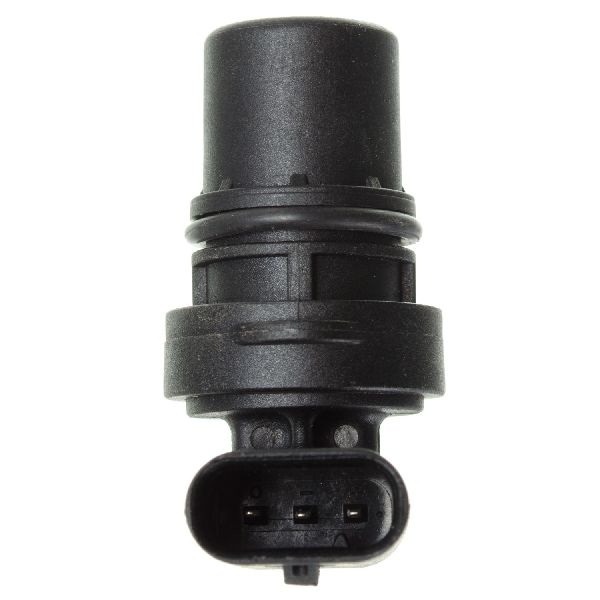
- Exhaust Camshaft Position Sensor Connector — On the driver's side of the valve cover, towards the firewall. It is a 3-pin connector.. This is the primary connection point for the sensor. Pin 1 is the 5V power supply, Pin 2 is the signal wire, and Pin 3 is the ground. Testing for voltage, ground integrity, and signal at these pins is a core diagnostic step. The connector's proximity to heat can make it brittle.
- Primary Engine Ground Strap — On the Promaster, a critical braided ground strap connects the transmission case to a bolt on the transmission mount, which then grounds to the chassis.. This is the main ground path for the engine and transmission. A corroded or loose ground strap can cause intermittent and unusual electrical issues, including faulty sensor readings, as the sensor's ground reference becomes unstable. Symptoms can include slow cranking or a variety of data-related error codes.
Real Owner Repair Stories
- promasterforum.com Thread #92138 (2017 Ram Promaster City) — Check Engine Light with codes P0365 and P0369, engine stalling when warm.
❌ Tried (didn't work) Initial diagnosis by a shop was inconclusive.
✅ What actually fixed it The owner replaced the exhaust camshaft position sensor (Sensor 'B') located on the driver's side of the valve cover. This resolved the codes and the stalling issue.
OEM Part Supersession History
Unknown, multiple prior revisions likely exist.→05149141AF— Standard part evolution for improved reliability or manufacturing changes.
Heads up: Part number 05149141AF is specified for a wide range of FCA/Stellantis vehicles with both the 2.4L and 3.6L engines, indicating broad compatibility. No specific incompatibility notes were found for the specified vehicle range.
Helpful Videos

We Have This Part in Stock


The information in this article is provided for general reference and educational purposes only. Vehicle specifications, procedures, and part compatibility can vary by production date, trim level, and region. Always consult your vehicle's factory service manual and verify part numbers before purchasing or performing repairs. Safety-critical components such as airbags, seat belts, and braking systems should be installed by a qualified professional.
- Ram PROMASTER CITY:
- 🎬 Helpful Videos
- 🛍️ Shop This Part
- What's Unique About the 2015-2018 Ram PROMASTER CITY
- Diagnostic Flowchart
- Symptoms You May Notice
- Most Likely Causes
- Rare But Worth Checking
- Diagnosis Steps
- Parts You'll Likely Need
- Related Codes That Often Appear With This One
- Technical Service Bulletins (TSBs) & Recalls
- Platform-Specific Known Issues
- Mechanic-Grade Diagnostic Values
- Scan Tool Commands That Help
- Wiring & Ground Locations
- Real Owner Repair Stories
- OEM Part Supersession History
- 🎟️ Get 5% Off