

OBD-II Code P0365: Exhaust Camshaft Position Sensor 'B' Circuit Malfunction
The Ultimate 2026 Guide to Diagnosing and Fixing P0365
- Always inspect the wiring harness for chafing and the connector for oil contamination before spending $50 to $150 on a replacement sensor.
- If P0365 appears alongside P0016 or P0017, prioritize diagnosing a mechanical timing issue like a stretched timing chain rather than an electrical fault.
- Driving with an active P0365 code reduces fuel economy by up to 15% and risks a $1,200+ catalytic converter replacement from unburnt fuel.
- Check for Technical Service Bulletins (TSBs) first; GM trucks frequently chafe wires (TSB 18-NA-307), and Subarus often require a $30 sensor shim (TSB 11-130-13R).
What Does P0365 Mean?

P0365 indicates the Powertrain Control Module (PCM) detects an electrical circuit failure for the 'B' (exhaust) camshaft position sensor on engine bank 1. This sensor monitors the exhaust camshaft to control valve timing. Without this signal, the PCM cannot precisely manage fuel injection, ignition timing, or the variable valve timing (VVT) system.
Technical definition: Camshaft Position Sensor 'B' Circuit Bank 1. The PCM sets this DTC when it receives no signal, an erratic signal, or an out-of-range voltage from the Bank 1 exhaust camshaft position sensor for a calibrated duration.
Can I Drive With P0365?
yes_but_not_recommended. You can drive, but it carries significant risk. The engine stalls without warning, struggles to start, or enters 'limp mode' with severely reduced power, creating a safety hazard in traffic. Extended driving with incorrect timing destroys the catalytic converter via unburnt fuel, a repair costing $1,200 to $2,800. Diagnose the issue immediately to prevent catastrophic damage.
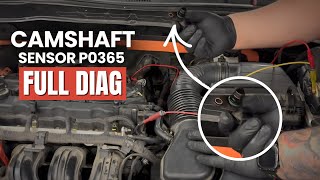
🎬 Watch: A professional guide to diagnosing P0365 the right way.Common Causes

- Faulty Camshaft Position Sensor (Very Common) — Internal electronics degrade from heat and age, sending incorrect or zero signals to the PCM. Cheap aftermarket sensors also frequently fail right out of the box.
- Wiring or Connector Issues (Very Common) — Wires fray, break, or short from rubbing against engine components (a known issue on GM trucks). Connectors suffer from corrosion, oil contamination, or loose pins, disrupting the 5-volt signal.
- Engine Oil Contamination (Common) — Oil leaking from a failing valve cover gasket seeps into the sensor's connector, causing corrosion and signal interruption. On VVT vehicles, low or dirty oil affects cam phasing and indirectly triggers this code.
- Faulty Variable Valve Timing (VVT) Solenoid (Less Common) — A stuck VVT solenoid (oil control valve) prevents the camshaft from moving to the commanded position. This timing mismatch forces the PCM to log a sensor circuit fault, even if the sensor works perfectly.
- Timing Chain or Belt Problems (Less Common) — A stretched timing chain, jumped belt tooth, or failed tensioner throws the camshaft out of sync with the crankshaft. This mechanical timing failure triggers a circuit code because the signal arrives at the wrong time.
- Mechanical Interference or Clearance Issues (Rare) — The sensor reads a toothed reluctor ring on the camshaft. If this ring cracks, loses teeth, or has an improper air gap (common after timing work or on specific Subarus), the sensor cannot generate a valid signal.
- Faulty Powertrain Control Module (PCM) (Very Rare) — The vehicle's main computer rarely fails. However, it occasionally requires a software update to fix known logic glitches that falsely trigger P0365.
Symptoms

- Check Engine Light is On — The PCM illuminates the Malfunction Indicator Lamp (MIL) immediately after logging the P0365 fault.
- Hard to Start or Won't Start — The engine cranks for an extended period or fails to start entirely because the PCM lacks the camshaft position data required for ignition timing.
- Rough Idle and Stalling — The engine runs unevenly, shakes, or stalls at low speeds and stops due to incorrect timing adjustments.
- Reduced Engine Power (Limp Mode) — The vehicle feels sluggish and hesitates during acceleration. The PCM restricts speed and RPM to prevent internal engine damage.
- Decreased Fuel Economy — Inefficient combustion from poor timing forces the engine to consume 5% to 15% more fuel than normal.
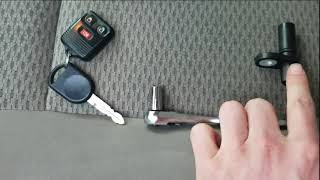
- Engine Misfires (also visible on scanner) — Incorrect cam timing causes misfires, felt as a distinct shudder or stumble during driving. 🎬 Watch: How to replace the Bank 1 sensor on Ford trucks.
Diagnostic Flowchart

Tap your situation to follow the diagnostic path that matches what you're seeing on this code.
Common Fixes & Costs
- Replace Camshaft Position Sensor
— Parts: $50-$150, Labor: $100-$200, ~1.1 hr book time
(DIY)
Ford F-150 (5.4L 3V): OEM
Chevrolet/GMC Trucks (5.3L): OEM
Honda/Acura (V6): OEM - Repair Wiring Harness or Connector — Parts: $10-$50, Labor: $125-$300, ~1.5 hr book time (Intermediate)
- Replace VVT Solenoid (Oil Control Valve)
— Parts: $50-$180, Labor: $75-$150, ~1.0 hr book time
(DIY)
Ford F-150 (5.4L 3V): OEM - Replace Valve Cover Gasket — Parts: $30-$100, Labor: $150-$400, ~2.5 hr book time (Intermediate)
- Replace Timing Chain and Tensioners — Parts: $300-$900, Labor: $900-$2000, ~8.0 hr book time (Professional)
DIY vs Professional
- Replace Camshaft Position Sensor — Beginner:
Tools: Basic socket/wrench set, flashlight. - Repair Wiring Harness or Connector — Beginner:
Tools: Multimeter, wire strippers, crimpers, heat shrink tubing, soldering iron. - Replace VVT Solenoid — Beginner:
Tools: Basic socket/wrench set, torque wrench, shop towels. - Replace Timing Chain/Belt — Beginner:
Tools: Extensive mechanical tool set, engine-specific timing tools, torque wrenches, service manual.
Used vs. New Parts: Buying Guide
When a used part is worth it: Buying a used camshaft position sensor is never recommended. The low cost of a new OEM part outweighs the high risk of a used electronic component failing prematurely.
Donor-vehicle mileage cap: roughly under 50000 miles for the part to have meaningful remaining life.
Donor quality checklist:
- Verify the part number exactly matches the original.
- Inspect the plastic connector for brittleness, cracking, or heat stress.
- Avoid parts from engines showing heavy oil leaks or overheating.
Decision logic:
- If The part is a camshaft position sensor or VVT solenoid → Buy a new OEM or reputable Tier-1 aftermarket part (Bosch, Denso). Used sensors fail too frequently to justify the $20 savings.
- If The required part is a cylinder head or camshaft (due to reluctor ring damage) → A used component from a low-mileage, verified running engine is a highly cost-effective option.
Warranty tradeoff: Used parts carry a 30-day warranty at best. New OEM sensors offer 1-year to lifetime warranties, ensuring long-term reliability.
Worst-case if a used part fails: $150-$350 if a used sensor fails shortly after installation, requiring repeat labor and a new part purchase.
What Happens If You Wait — Timeline
- 0-2 weeks: Check Engine Light illuminates. The vehicle experiences slightly longer crank times to start, but otherwise drives normally. (MPG impact: 0-5%% · Added cost: $0)
- 2 weeks - 3 months: Hard starting becomes consistent. The engine idles roughly, hesitates during acceleration, and suffers a noticeable drop in fuel economy. (MPG impact: 5-10%% · Added cost: $50-$150 in wasted fuel)
- 3-6 months: Engine stalling at low speeds becomes frequent, posing a safety risk. Inefficient combustion from poor timing begins overheating the catalytic converter. (MPG impact: 10-15%% · Added cost: $1,200-$2,800 (risk of catalytic converter damage))
- 6+ months: If caused by a stretched timing chain, continued operation causes the chain to jump a tooth or break, resulting in catastrophic internal engine damage. (MPG impact: 15-25%+% · Added cost: $3,000-$8,000+ (risk of catastrophic engine failure))
Cost of Not Fixing It
- 0-1 month: Noticeable drop in fuel economy, hard starting, and stalling in traffic, creating an immediate safety risk. (Added cost: $50-$150 in wasted fuel.)
- 1-6 months: Continued misfires and incorrect timing force unburnt fuel into the exhaust, overheating and destroying the catalytic converter. (Added cost: $1,200-$2,800 for catalytic converter replacement.)
- 6+ months: If triggered by a failing timing chain, ignoring the code leads to the chain breaking or jumping time, causing catastrophic internal engine damage. (Added cost: $3,000-$8,000 for major engine repair or replacement.)
Diagnosis Steps
- Read Codes and Check TSBs
Use an OBD-II scanner to confirm P0365 and note freeze-frame data. Immediately search for Technical Service Bulletins (TSBs) for your specific vehicle, as manufacturers frequently issue bulletins for known wiring chafing or sensor air gap issues.
Tools: OBD-II Scanner, Internet Access (Beginner) - Perform a Thorough Visual Inspection
Locate the Bank 1 Exhaust Camshaft Position Sensor. Inspect the sensor, connector, and visible wiring harness for frayed wires, melted insulation, corroded pins, or oil contamination from valve cover leaks.
Tools: Flashlight (Beginner) - Monitor Live Data PIDs
Using an advanced scan tool, monitor the live data PID for the Bank 1 Exhaust Camshaft Position. While cranking or running, the value must change or toggle. A stuck value confirms the PCM receives no signal.
Tools: Advanced OBD-II Scan Tool (Intermediate) - Test the Sensor Circuit (Multimeter)
Disconnect the sensor and turn the ignition 'ON' (engine off). Probe the connector terminals: verify a 5-volt reference signal from the PCM and a solid ground (<0.1 volts). Missing voltage or ground isolates the fault to the wiring or PCM.
Tools: Multimeter, Vehicle Service Manual (Intermediate) - Test Sensor Signal Voltage (Dynamic)
Reconnect the sensor. Back-probe the signal wire with a multimeter set to DC volts. While cranking the engine, the voltage must fluctuate rapidly (typically 0V to 5V for Hall-effect). A stuck voltage indicates a dead sensor.
Tools: Multimeter, T-pins (Advanced) - Check the VVT System
Inspect the VVT solenoid (oil control valve) for the exhaust camshaft. Check its resistance with a multimeter against factory specs. Apply battery voltage to verify it clicks. A stuck solenoid causes timing correlation issues mimicking P0365.
Tools: Multimeter, Power Probe/Jumper Wires (Intermediate) - Analyze the Waveform (Oscilloscope)
Back-probe the signal wire with an oscilloscope. A healthy Hall-effect sensor produces a sharp square wave. A flat line, erratic pattern, or reduced amplitude confirms sensor or reluctor wheel failure.
Tools: Oscilloscope, T-pins (Advanced) - Inspect Mechanical Timing Components
If electrical tests pass, the fault is mechanical. Remove timing covers to inspect the chain/belt for slack, check tensioners for wear, and verify base engine timing marks align perfectly.
Tools: Mechanical Tool Set, Service Manual (Professional)
When This Code Triggers (Freeze-Frame Conditions)
- Engine Coolant Temp: 175-210°F (Engine at normal operating temperature.)
- RPM: 500-1200 (During engine cranking or shortly after startup.)
- Engine Load: 15-40% (Light to moderate load, not under heavy acceleration.)
- Vehicle Speed: 0-20 mph (Occurs at low speeds or when coming to a stop.)
Related Codes
- P0369 — Indicates the Camshaft Position Sensor 'B' circuit is 'Intermittent.' P0365 is a constant fault, while P0369 means the signal cuts in and out, strongly pointing to a loose connection or chafing wire.
- P0340 — The equivalent code for the 'A' (intake) sensor. Seeing both P0340 and P0365 suggests a shared power/ground wire failure or a major mechanical timing jump affecting the entire engine bank.
- P0016 / P0017 — Mechanical timing correlation codes. If P0365 appears alongside P0016/P0017, the root cause is almost certainly mechanical (e.g., stretched chain), and the electrical code is secondary.
- P0366 / P0367 / P0368 — Provide specific electrical details. P0367 (Circuit Low) indicates a short to ground. P0368 (Circuit High) indicates a short to voltage. P0366 (Performance) suggests a damaged reluctor wheel.
Climate & Environmental Factors
- Extreme Cold: Freezing temperatures make wiring insulation brittle and prone to cracking, causing shorts. Cold also thickens engine oil, slowing VVT system response and triggering timing codes before the engine warms up.
- High Humidity and Moisture: Moisture penetrates weathered connector seals, causing rapid corrosion on electrical pins. This increases resistance, corrupts the 5-volt signal, and triggers a circuit fault.
How to Talk to a Mechanic About This Code
Say this: "I have an OBD-II code P0365 for the Camshaft Position Sensor 'B' Circuit on Bank 1. Before replacing the sensor, please test the sensor's circuit for power, ground, and signal, and perform a visual inspection of the wiring harness for chafing or oil contamination."
This signals that you understand the code refers to the entire circuit, not just the sensor. It directs the mechanic to perform a proper diagnosis, saving you money if the fault is simply a chafed wire.
Avoid saying:
- 'Just replace the cam sensor.'
- 'My check engine light is on, can you look at it?'
- 'The internet said to replace this part.'
Questions to ask before authorizing the repair:
- Did you test the circuit, and were the 5-volt reference, ground, and signal wires all good?
- Did you find any physical damage, chafing, or oil on the wiring or connector?
- If the sensor needs replacement, are you using an OEM or a top-tier aftermarket part?
- If the problem is mechanical, what was the specific point of failure (e.g., stretched chain, bad tensioner)?
- What is the warranty on the parts and labor for this repair?
Where to Take It: Dealer vs Independent vs Chain
- Dealer:
Recommended for complex mechanical issues (timing chains) or if your vehicle has a known TSB pointing to a non-obvious fix.
Best for: Vehicles still under a powertrain or emissions warranty., Complex mechanical timing chain repairs., Diagnosing known manufacturer-specific quirks covered by TSBs.
Downsides: Highest labor rates., Frequently recommends replacing a larger assembly when a smaller component repair is possible. (Typical cost: +50% vs. baseline) - Independent Shop:
Best fit for the majority of P0365 repairs. A reputable independent shop easily handles sensor, wiring, and VVT solenoid issues.
Best for: Out-of-warranty vehicles where cost is a factor., Most common P0365 scenarios like sensor replacement, wiring repair, or VVT solenoid replacement.
Downsides: Diagnostic capabilities vary widely; vet shops based on reviews and ASE certifications., May lack expensive, vehicle-specific tools for major timing jobs. (Typical cost: +0% vs. baseline) - Chain Shop:
Use with caution. Acceptable for a straightforward sensor swap, but avoid for initial diagnosis, intermittent faults, or suspected mechanical issues.
Best for: Simple, accessible sensor replacements when you have already diagnosed the issue yourself.
Downsides: Technician skill varies dramatically., High pressure to upsell unnecessary services., Lacks the diagnostic depth to differentiate between a sensor failure and a complex wiring problem. (Typical cost: -10% vs. baseline)
When to Walk Away From the Repair
If the estimated repair cost exceeds 40-50% of the car's private-party value, seriously consider selling or trading it in instead of repairing it.
- Car worth $4000, fix is $2500: Walk away. A $2500 timing chain job on a $4000 car is 62.5% of its value and a poor investment.
- Car worth $12000, fix is $350: Fix it. A $350 sensor replacement is well below the threshold and is a routine repair.
- Car worth $3000, fix is $1500: Borderline. This is exactly 50% of the car's value. Get a second opinion and evaluate the car's overall health before proceeding.
What Scan Tool You Need for This Code
Minimum: A scanner that reads and graphs live data for the camshaft position sensor PID.
A basic $20 code reader only shows the P0365 code. It cannot display the live sensor signal, which is essential to determine if the sensor is working, intermittent, or dead. Without live data, you are blindly guessing.
Budget: BlueDriver Pro (~$100) — Connects to your smartphone to read/clear codes, view freeze-frame data, and graph live data from the camshaft position sensor to verify signal production.
Mid-range: Autel MaxiCOM MK808S / Xtool D7 (~$300-400) — Offers full system diagnostics, superior live data graphing, and bidirectional controls. Allows you to command components like the VVT solenoid to test its function.
Professional: Autel MaxiSys MS906BT / Innova 5610 (~$350-1200) — Provides OEM-level functions, advanced bidirectional controls, 'crankshaft position sensor learn' procedures, and scope-like data detail essential for complex timing issues.
Rent vs buy: Auto parts stores read codes for free but lack live data viewing. If this is a one-time diagnosis, buying a $100 scanner with live data is cheaper than a shop's diagnostic fee. Buy a mid-range tool only if you regularly perform your own repairs.
How to Clear the Code After You Fix It
- Use an OBD-II scan tool to clear the P0365 fault code.
- Perform a complete drive cycle to allow the ECU to run its self-diagnostics.
- Check for pending codes after the drive cycle to confirm the repair.
Drive cycle (~30 minutes): A generic drive cycle includes a cold start (after sitting 8+ hours), 3 minutes of idling, 15 minutes of mixed city/highway driving at steady speeds, and several stop-and-go periods.
Readiness monitors affected: Comprehensive Component Monitor, Misfire Monitor, Catalyst Monitor, Evaporative System Monitor
Before emissions retest: drive at least 50 miles to fully set monitors.
Watch out for:
- Disconnecting the battery clears the code but resets all readiness monitors, guaranteeing an automatic emissions test failure.
- The code returns immediately if the underlying electrical short or mechanical timing fault remains unfixed.
Will This Fail Emissions / State Inspection?
Yes — this code typically fails an OBD-II emissions inspection.
- California: P0365 is an automatic smog check failure. The check engine light must be off and all readiness monitors set to 'Ready'.
- New York: The NYS DMV inspection includes an OBD-II scan. An active P0365 code results in an immediate emissions failure.
- Texas: In the 17 emissions-testing counties, a vehicle with an illuminated check engine light and active P0365 fails the OBD inspection.
Most Commonly Affected Vehicles
- Ford F-150, Explorer, Mustang (2004-2020) — The 5.4L 3V Triton (2004-2010) is notorious for timing chain failures causing P0365. On 2017-2020 3.5L EcoBoost models, excessive oil consumption triggers the code (TSBs 20-2423 and 20-2132). Always check oil levels first.
- Chevrolet / GMC Silverado, Sierra, Colorado, Canyon (2015-2022) — P0365 is frequently caused by the wiring harness chafing against the cylinder head, not a bad sensor. Documented in TSB 18-NA-307 (Colorado) and TSB 21-NA-149 (Silverado).
- Honda / Acura Accord, Civic, CR-V, MDX (2003-2024) — A faulty VTEC oil pressure switch or failing VTEC solenoid prevents cam phasing, triggering P0365 even if the camshaft sensor is flawless.
- BMW 3-Series, 5-Series, X3, X5 (2001-2013) — Oil leaking from the valve cover gasket onto the sensor connector is the primary cause of failure, destroying the electrical connection.
- Hyundai / Kia Sonata, Santa Fe, Optima (2011-2018) — The plastic electrical connector pigtail becomes brittle from heat cycles, failing to make a solid connection and triggering a circuit code.
- Dodge / Chrysler / Jeep Vehicles with 3.6L Pentastar V6 (2011-2024) — Throws P0365 alongside P0340. While often a failed sensor, wiring issues near the rear of the cylinder head must be inspected.
- Nissan / Infiniti Altima, 350Z, Maxima, G35 (2003-2008) — Commonly caused by a failed sensor (part 23731-AL606). If the code returns, inspect the wiring harness or check for a damaged reluctor wheel.
- Subaru Impreza, WRX/STI, Forester, Crosstrek (2003-2014) — TSB 11-130-13R addresses incorrect sensor air gaps on 2012-13 Impreza/Crosstrek models, requiring a specific shim kit (10130AA060). Clogged AVCS oil screens also trigger this code on turbos.
- Toyota Camry, Sienna, RAV4 (2008-2017) — Technicians report the wiring harness connector frequently fails. In some cases, replacing both cam and crank sensors simultaneously is required for the PCM to correlate signals.
Manufacturer-Specific Notes
- Ford: On 3.5L EcoBoost engines (2017-2020), always check the oil level first. Low oil from consumption is the primary cause of P0365 (TSB 20-2423). On 5.4L 3V engines, it points to failing timing chains.
- Chevrolet / GMC: Inspect the wiring harness for chafing before replacing parts. TSB 18-NA-307 and 21-NA-149 detail specific locations where the harness rubs against the cylinder head, causing a short.
- Honda: A failing VTEC solenoid or low oil pressure prevents the camshaft from phasing correctly, triggering P0365 even if the cam sensor works perfectly.
- BMW: Oil leaks from the valve cover gasket are the most common cause of failure, contaminating the exhaust camshaft sensor and its electrical connector.
- Hyundai / Kia: The plastic pigtail connector for the sensor becomes brittle from engine heat, causing an intermittent connection that triggers the code more often than a bad sensor.
- Subaru: For 2012-2013 Impreza/Crosstrek models, TSB 11-130-13R notes an incorrect air gap causes P0365, requiring a $30 shim kit (10130AA060) rather than a new sensor.
Real Owner Stories
2012 Subaru Impreza 2.0L with P0365
Check Engine Light appeared. Owner replaced the camshaft position sensor twice with aftermarket parts, but the P0365 code returned immediately.
What they tried:
- Replaced camshaft position sensor (aftermarket)
- Replaced sensor again with a different aftermarket brand
Outcome: The actual problem was an incorrect air gap between the sensor and the camshaft, addressed by Subaru TSB #11-130-13R. The fix required installing a specific $30 shim (p/n 10130AA060). After installing the shim with the original sensor, the code cleared permanently.
Lesson: Always check for Technical Service Bulletins (TSBs) before replacing parts. A cheap part replacement cannot fix a manufacturing or design-related clearance problem.
2019 Chevy Colorado with P0365 and intermittent stalling
Vehicle intermittently hesitated, ran rough, and stalled. The P0365 code was active.
What they tried:
- Initially suspected a faulty camshaft position sensor.
Outcome: Following TSB 18-NA-307, the owner inspected the wiring harness. They found a spot where the harness rubbed against a metal bracket on the cylinder head, causing wires to short out. Repairing the wires with solder and heat shrink, then rerouting the harness, resolved all symptoms for under $20.
Lesson: On GM trucks, P0365 is frequently a wiring issue rather than a sensor failure. A thorough visual inspection at known chafe points saves the cost of an unnecessary sensor replacement.
2008 Ford F-150 5.4L 3V with P0365, P0340, and rattling noise
Engine developed a rattling noise on startup, ran rough, and threw codes for both camshaft sensors (P0365 and P0340).
What they tried:
- The owner knew from forum research that these symptoms on the 5.4L Triton engine rarely point to the sensors themselves.
Outcome: The root cause was a failed timing chain tensioner and stretched timing chains. The owner opted for a full timing job, replacing chains, guides, tensioners, and VVT solenoids at an independent shop for $2,200. This extensive repair fixed the noise and cleared all codes.
Lesson: When electrical circuit codes appear alongside mechanical symptom codes or audible rattling noises, the problem is mechanical. On Ford 5.4L engines, these codes are a classic sign of timing component failure.
How to Prevent This Code From Triggering
- Perform regular oil changes with high-quality, manufacturer-specified oil. (Every 5,000-7,500 miles) — Clean oil is critical for hydraulic timing chain tensioners and VVT solenoids. Sludgy or low oil causes these components to malfunction, leading to timing errors that trigger P0365.
- Address engine oil leaks promptly. (As soon as noticed) — Oil leaking from the valve cover gasket seeps into the camshaft position sensor's electrical connector, causing rapid corrosion and signal failure.
- Inspect and clean VVT solenoids. (Every 60,000-80,000 miles) — VVT solenoids clog with oil sludge, causing them to stick. A stuck solenoid prevents proper camshaft adjustment, which the PCM misinterprets as a sensor circuit fault.
- Inspect wiring harnesses for security and chafing. (During major services) — Ensuring wiring harnesses are properly secured prevents the chafing and short circuits that are a primary cause of P0365 on GM trucks.
- Proactively replace timing chains on known problematic engines. (100,000-150,000 miles) — On engines notorious for timing issues (like the Ford 5.4L 3V), proactive replacement prevents the chain from jumping time, avoiding catastrophic engine damage.
Frequently Asked Questions
What does 'Bank 1' and 'Sensor B' mean?
'Bank 1' refers to the side of the engine containing cylinder #1. 'Sensor B' universally designates the exhaust camshaft position sensor, while 'Sensor A' is the intake sensor. Consult your service manual to identify Bank 1 on V6 or V8 engines.
Where is the camshaft position sensor B bank 1 located?
The sensor mounts on the cylinder head for Bank 1, typically inserted into the valve cover or the front/rear of the head near the exhaust camshaft. Exact placement varies by engine design. A quick online search for your specific make and model reveals the precise location.
Can I just replace the sensor to fix P0365?
Replacing the sensor is the most common fix, but it does not guarantee a cure. The code indicates a 'circuit' problem, meaning damaged wiring, a corroded connector, or a mechanical timing issue triggers the same fault. Always inspect the wiring and connector for oil or damage before buying parts.
I replaced the sensor, but the P0365 code came back. What now?
If a new OEM sensor fails to clear the code, meticulously inspect the wiring harness for chafing and the connector for corrosion. Next, test the VVT solenoid and verify mechanical timing is perfect. Avoid cheap aftermarket sensors, as they frequently fail right out of the box.
What is the difference between an OEM and aftermarket sensor?
OEM sensors are manufactured by the original supplier, while aftermarket parts vary wildly in quality. For critical timing components, always use an OEM or top-tier equivalent like Denso or Bosch. Cheap aftermarket sensors frequently cause persistent P0365 codes and premature failures.
What are the most common misdiagnosis mistakes for P0365?
The biggest mistake is immediately replacing the sensor without diagnosing the circuit. Technicians frequently see money wasted because the actual problem was a chafed wire, a corroded connector, or an underlying mechanical timing issue. Failing to check for Technical Service Bulletins (TSBs) also leads to hours of wasted diagnostic time.
How much does it cost to fix P0365?
A simple sensor replacement by a professional typically costs between $150 and $350. Repairing a damaged wiring harness ranges from $125 to $300 depending on the location. If the root cause is a stretched timing chain, expect a major repair bill ranging from $1,200 to over $2,500.
Can a bad battery cause a P0365 code?
A bad battery does not directly cause the sensor to fail. However, low system voltage during cranking causes the PCM to receive erratic signals from various sensors, potentially triggering a secondary P0365 code. Test your battery and alternator if the vehicle struggles to crank.
Can low or dirty oil cause a P0365 code?
Yes, low or dirty oil directly impacts vehicles with Variable Valve Timing (VVT). The VVT system uses oil pressure to adjust the camshafts; sludgy or low oil causes sluggish camshaft response. The PCM misinterprets this timing delay as a sensor circuit fault, a well-documented issue on Ford 3.5L EcoBoost engines.
Key Takeaways
- Always inspect the wiring harness for chafing and the connector for oil contamination before spending $50 to $150 on a replacement sensor.
- If P0365 appears alongside P0016 or P0017, prioritize diagnosing a mechanical timing issue like a stretched timing chain rather than an electrical fault.
- Driving with an active P0365 code reduces fuel economy by up to 15% and risks a $1,200+ catalytic converter replacement from unburnt fuel.
- Check for Technical Service Bulletins (TSBs) first; GM trucks frequently chafe wires (TSB 18-NA-307), and Subarus often require a $30 sensor shim (TSB 11-130-13R).
Helpful Videos

The information in this article is provided for general reference and educational purposes only. Vehicle specifications, procedures, and part compatibility can vary by production date, trim level, and region. Always consult your vehicle's factory service manual and verify part numbers before purchasing or performing repairs. Safety-critical components such as airbags, seat belts, and braking systems should be installed by a qualified professional.
- 🎬 Helpful Videos
- What Does P0365 Mean?
- Can I Drive With P0365?
- Common Causes
- Symptoms
- Diagnostic Flowchart
- Common Fixes & Costs
- DIY vs Professional
- Used vs. New Parts: Buying Guide
- What Happens If You Wait — Timeline
- Cost of Not Fixing It
- Diagnosis Steps
- When This Code Triggers (Freeze-Frame Conditions)
- Related Codes
- Climate & Environmental Factors
- How to Talk to a Mechanic About This Code
- Where to Take It: Dealer vs Independent vs Chain
- When to Walk Away From the Repair
- What Scan Tool You Need for This Code
- How to Clear the Code After You Fix It
- Will This Fail Emissions / State Inspection?
- Most Commonly Affected Vehicles
- Manufacturer-Specific Notes
- Real Owner Stories
- 2012 Subaru Impreza 2.0L with P0365
- 2019 Chevy Colorado with P0365 and intermittent stalling
- 2008 Ford F-150 5.4L 3V with P0365, P0340, and rattling noise
- How to Prevent This Code From Triggering
- Frequently Asked Questions
- What does 'Bank 1' and 'Sensor B' mean?
- Where is the camshaft position sensor B bank 1 located?
- Can I just replace the sensor to fix P0365?
- I replaced the sensor, but the P0365 code came back. What now?
- What is the difference between an OEM and aftermarket sensor?
- What are the most common misdiagnosis mistakes for P0365?
- How much does it cost to fix P0365?
- Can a bad battery cause a P0365 code?
- Can low or dirty oil cause a P0365 code?
- Key Takeaways
- 🎟️ Get 5% Off