

P0341 on 2015-2020 Chevrolet Suburban: Causes, Symptoms, and Fixes
On a 2015-2020 Suburban, code P0341 is most often caused by a chafed or pinched engine wiring harness near the front of the engine, as noted in multiple GM Technical Service Bulletins. Specifically, the harness is often damaged where it is pinched between the X154 connector bracket and the front engine cover on the lower left (driver's) side of the engine. Before replacing the camshaft position sensor, thoroughly inspect this specific area. A new sensor costs between $30 and $70.
- For a P0341 code on a 2015-2020 Suburban, your first step should always be to inspect the engine wiring harness for chafing or pinching, especially near the front of the engine.
- This code indicates a serious issue that can cause the vehicle to stall, presenting a safety hazard. Do not ignore it.
- Do not automatically replace the camshaft position sensor. The root cause is very often the wiring, and replacing the sensor will not fix a wiring problem.
- This code frequently appears with other codes (P0335, P0011, P06DA). This cluster of codes is a strong indicator of the common wiring harness issue, not multiple simultaneous part failures.
What's Unique About the 2015-2020 Chevrolet SUBURBAN
For this specific generation of Chevrolet Suburban (and its K2XX platform mates like the Tahoe, Silverado, and Sierra), the P0341 code is frequently not a sensor failure. General Motors has released several Technical Service Bulletins (TSBs) highlighting a common problem where a specific engine wiring jumper harness gets pinched or chafes. TSBs PIP5724 and PIP5553A pinpoint the failure location as being pinched between the X154 connector bracket and the front engine cover on the lower-left side of the engine. This wiring damage is the root cause in many cases, making a thorough visual inspection of the harness a critical first step before any parts are replaced.
Diagnostic Flowchart
Tap your situation to follow the diagnostic path that matches what you're seeing on this vehicle.
Symptoms You May Notice
- Check Engine Light is on
- Engine stalling or cutting out, sometimes intermittently
- Engine cranks but will not start (extended crank time)
- Hard starting, especially when the engine is warm
- Rough idling or surging
- Hesitation or poor acceleration
- Reduced engine power mode
- Stabilitrak/Traction Control warning lights may appear
- Replacing the camshaft position sensor without first thoroughly inspecting the wiring harness at the front of the engine, specifically where it can be pinched by the X154 bracket. The TSBs strongly indicate the wiring is the most likely culprit.
- Replacing the crankshaft position sensor (related to codes P0335/P0336) instead of the camshaft sensor or its circuit. Note that the same chafed harness can also cause crankshaft sensor codes.
Most Likely Causes
- Chafed or Pinched Engine Wiring Harness 🔴 High Probability Multiple manufacturer TSBs (#PIP5724, #PIP5553A) confirm a vulnerability where a wiring jumper harness is pinched or chafes. The specific location is often between the X154 connector bracket and the front engine cover on the lower left side of the engine, near the A/C compressor. Engine vibration causes the bracket to rub through the harness loom and damage the wires inside.
How to confirm: Carefully inspect the wiring harness at the front lower-left (driver's side) of the engine. Focus on the area where the harness passes the A/C compressor and the X154 connector bracket near the front timing cover. Look for any signs of rubbing, pinching, exposed copper wires, or a flattened harness loom. Wiggling the harness in this area with the engine running may cause it to stumble or stall, confirming an intermittent connection.
Typical fix: Repair the damaged section of the harness. This involves cutting out the damaged wires, soldering in new wire, and using heat-shrink tubing for insulation. The harness should then be wrapped in protective anti-abrasion tape and re-routed or secured with zip ties to prevent future contact with the bracket or engine block.
Est. part cost: $10-$30 for wire, solder, and protective loom tape. - Failing Camshaft Position Sensor 🟡 Medium Probability While less common than the wiring issue on this platform, the sensor can still fail from heat cycles and age. However, it is often replaced unnecessarily when the true fault lies in the wiring.
How to confirm: If the wiring is confirmed to be intact, test the sensor. Use a scan tool to monitor the sensor's output signal for dropouts. With a multimeter, check for a 5V reference, good ground, and a fluctuating signal on the third wire at the connector with the engine running. Many DIYers choose to replace it as a diagnostic step due to its relatively low cost after inspecting the wiring.
Typical fix: Replace the camshaft position sensor. It is located on the front of the engine's timing cover and is held in by a single bolt. An OEM ACDelco part is recommended, as some aftermarket sensors have been reported to be faulty out of the box. A cam/crank correlation relearn procedure with a capable scan tool may be required after replacement.
Est. part cost: $30-$70 - Poor Electrical Connection ⚪ Low Probability
How to confirm: Inspect the camshaft position sensor connector for corrosion, bent/loose pins, or a broken locking tab. Also inspect the main harness connector X154 (located on the front cover near the vacuum pump) for corrosion, as noted in TSB #PIP5335C.
Typical fix: Clean the connector terminals with electrical contact cleaner. If pins are loose, they may need to be re-tensioned. If the connector housing is damaged, replace the pigtail connector.
Est. part cost: $15-$40
Rare But Worth Checking
- Timing Chain or Cam Phaser Issue: A stretched timing chain or a faulty cam phaser (VVT actuator) can cause the physical camshaft timing to be incorrect, which the sensor will report, triggering P0341. This is more common on higher-mileage engines (over 100k miles) and is usually accompanied by other codes like P0011 or a distinct rattling noise from the front of the engine on startup.
- Faulty Engine Control Module (ECM): This is extremely rare and should only be considered after all other possibilities (wiring, sensor, mechanical timing) have been professionally diagnosed and ruled out. One owner on a forum reported this as the ultimate fix after many other parts were replaced.
Diagnosis Steps
- Read all diagnostic trouble codes with an OBD-II scanner. Note all codes present, as a cluster of codes (P0341, P0336, P06DA, etc.) strongly points to the known wiring issue.
- CRITICAL: Thoroughly inspect the engine wiring harness at the front, lower-left (driver's) side of the engine. Specifically check where the harness passes the A/C compressor and may be pinched between the X154 connector bracket and the engine front cover. Look for a flattened loom, chafing, or exposed wires. This is the most common cause per GM TSBs.
- If wiring damage is found, repair it by soldering and heat-shrinking the affected wires. Wrap the repaired section in anti-abrasion tape and secure it away from the bracket with zip ties.
- If wiring appears intact, inspect the camshaft position sensor connector and the larger X154 harness connector for damage, corrosion, or loose pins.
- Using a scan tool with live data, monitor the camshaft position sensor signal (Camshaft Position Counter) while the engine is running. Look for dropouts or an erratic signal, especially while wiggling the harness.
- If the signal is faulty and wiring is confirmed good, test the sensor's circuit. At the sensor connector with the key on, you should find a 5V reference wire, a ground wire, and the signal wire.
- If the circuit tests good, replace the camshaft position sensor. Using an OEM part like ACDelco is recommended.
- After sensor replacement, a cam/crank correlation relearn may be necessary using a capable scan tool.
- If the code persists, the issue may be mechanical. Investigate the timing chain for stretching and the camshaft phaser for proper operation. This is a more advanced diagnosis, often accompanied by engine rattle.
- As a final, unlikely step, consider a faulty ECM.
Parts You'll Likely Need
- Camshaft Position Sensor
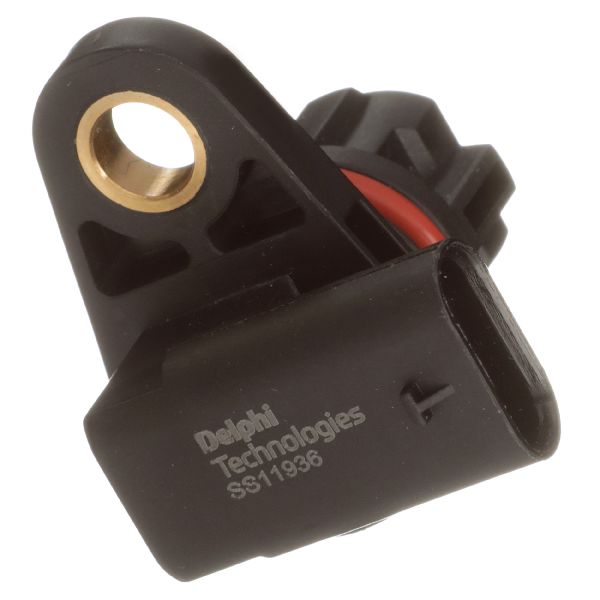
(OEM #12674702)— This is the sensor that generates the signal. While often not the root cause on this platform, it is the part associated with the code and is replaced frequently. Note: Some parts catalogs incorrectly list this as a crankshaft sensor, but it is used for the camshaft position on these engines.
Trusted brands: ACDelco (GM Genuine), Delphi, Bosch, NTK
OEM price range: $45-$70
Aftermarket price range: $30-$55 - Camshaft Position Sensor Connector Pigtail — If the connector itself is corroded, melted, or has broken locking tabs, it will need to be replaced to ensure a solid electrical connection. A common aftermarket part number is Dorman 645-919.
Related Codes That Often Appear With This One
- P0340 — P0340 indicates a general circuit malfunction (no signal), while P0341 points to a performance/range issue (erratic signal). They often appear together as they relate to the same sensor and circuit.
- P0335 / P0336 — These codes are for the crankshaft position sensor. The ECM compares cam and crank signals to verify timing. The TSBs for the chafed wiring harness also list these codes, as the same damaged harness section can affect both sensor circuits.
- P0011 — This code for 'Camshaft Position 'A' - Timing Over-Advanced' can appear if there is a mechanical timing issue or if the wiring fault noted in the TSBs is affecting multiple components, like the VVT solenoid.
- P06DA / P06DB — These codes for the oil pressure control solenoid are also listed in the same TSBs (#PIP5724, #PIP5553A) and can be triggered by the same damaged wiring harness, as the wires run in the same loom.
Technical Service Bulletins (TSBs) & Recalls
- PIP5724 (April 21, 2020): Mentions P0341 in a list of DTCs caused by a wiring jumper harness being pinched between the X154 connector bracket and the front engine cover on the lower left side of the engine.
- PIP5553A (September 11, 2018): Cites P0341 as a possible DTC resulting from a chafed wiring jumper harness at the bolt for the X154 connector on the lower left side of the engine front cover.
- PIP5335C (June 19, 2019): Specifically calls out P0340 and P0341 and advises inspecting for corrosion in connector X154 if normal diagnostics do not isolate the concern.
Platform-Specific Known Issues
- TSB #PIP5724 and #PIP5553A specifically mention that a wiring jumper harness can be pinched or chafed between the X154 connector bracket and the front engine cover on the lower left side of the engine, leading to a group of codes including P0341, and may cause a crank/no-start or stall condition.
- TSB #PIP5335C notes that codes P0340 and P0341 can set due to corrosion in the X154 connector itself, located on the front cover next to the vacuum pump.
- Owner forums are filled with accounts of this exact wiring issue. A common story involves replacing the sensor with no change, only to later find the chafed wires near the A/C compressor as the true cause.
Mechanic-Grade Diagnostic Values
- Camshaft Position Sensor 5V Reference Voltage — expected: 4.8-5.2 Volts DC with Key On, Engine Off (KOEO).. Failure: Voltage significantly below 4.8V or at 0V indicates an open/short in the wiring or an issue with the ECM's 5V reference circuit.
- Camshaft Position Sensor Ground Circuit Resistance — expected: Less than 1.0 Ohm of resistance between the sensor's ground pin and a clean chassis ground.. Failure: High resistance (greater than 1.0 Ohm) indicates a corroded or broken ground wire, which can cause an erratic signal.
- Camshaft Position Sensor Signal Voltage (Oscilloscope) — expected: A clean digital square wave, toggling between approximately 0V (low) and 5V (high) as the engine is cranked or running.. Failure: A missing wave, a wave with noise/glitches, or a wave that does not toggle cleanly between 0V and 5V indicates a faulty sensor or wiring issue.
- Camshaft Position Sensor Signal Voltage (Multimeter) — expected: When manually passing a metal object (like a wrench) back and forth in front of the sensor tip (while it's powered on), the signal wire voltage should switch between ~5V and 0V.. Failure: If the voltage does not change, or is stuck high or low, the sensor is likely faulty.
Scan Tool Commands That Help
- GDS2 / Tech2: Live Data / Data Display — Monitor the 'CMP Active Counter' or 'Camshaft Position Counter' parameter while running the engine or wiggling the harness. Any dropouts or failures to increment indicate a loss of signal.
- GDS2 / High-End Scan Tool: Crankshaft Position Variation Learn (Cam/Crank Relearn) — This procedure is required after replacing the camshaft position sensor, crankshaft position sensor, or ECM to synchronize the signals and prevent misfire detection issues. Failure to perform this can sometimes lead to persistent codes.
Wiring & Ground Locations
- Camshaft Position Sensor Connector (at sensor) — On the front engine timing cover, part of a small jumper harness.. This is the primary connection point for the sensor. The three pins are 5V Reference, Low Reference (Ground), and Signal.
- Connector X154 — On the front engine cover, near the vacuum pump. This is the connector for the front jumper harness that includes the cam sensor.. This connector and its bracket are the specific locations mentioned in GM TSBs where the harness chafes or gets pinched, causing P0341 and other codes.
- ECM Connector X3 (Gray) — At the Engine Control Module (ECM).. This is where the cam sensor signals terminate. Pin 33 (Yellow/Violet wire) is the Camshaft Position Sensor Signal. Pin 34 (Gray/Dark Blue wire) is the sensor control/reference voltage. Checking for signal at these pins can rule out the entire engine harness.
- G101 / G106 — G101 is on the lower front of the engine block. It is often jumpered to G106 on the frame cross rail under the crank pulley.. This is a primary engine block to frame ground. A poor connection here can cause electrical noise and erratic behavior from various engine sensors, including the cam and crank sensors.
- G102 — Located at the left rear of the engine, grounds the ignition coils.. A bad ground for the ignition coils can introduce electrical interference into nearby sensor circuits, potentially disrupting the cam sensor signal.
Real Owner Repair Stories
- LS1Tech Forum User (2015 Chevrolet Silverado 5.3L L83) — Extended crank with no start, especially when the engine was warm. Would eventually start after 3-4 tries and set codes P0340 and P0341.
❌ Tried (didn't work) Replaced camshaft position sensor twice with new OEM ACDelco parts., Replaced the entire front engine sub-harness that connects the cam sensor.
✅ What actually fixed it The user noted that prior to this issue, they had found and fixed a problem where coolant had leaked into an unrelated electrical connector, causing a widespread 5-volt reference signal issue. While not the final fix in this specific thread, it highlights that a short on the shared 5V reference circuit can manifest as a P0341 code, even if the cam sensor and its direct wiring are good.
OEM Part Supersession History
12627185, 12632872→12674702— Part has been updated or consolidated by the manufacturer.
Heads up: The current part number 12674702 is the correct replacement for the earlier numbers on this platform.
Model Year Variations Within This Range
- 2017-2020: While the P0341 causes are generally consistent, be aware that 2017+ and especially 2019+ Gen V engines (L84/L87) use different ECMs and have wiring pinout changes compared to the 2014-2016 models. This is critical information for anyone performing an engine swap or using a harness from a different year, as incompatibilities can cause numerous DTCs.
We Have This Part in Stock


The information in this article is provided for general reference and educational purposes only. Vehicle specifications, procedures, and part compatibility can vary by production date, trim level, and region. Always consult your vehicle's factory service manual and verify part numbers before purchasing or performing repairs. Safety-critical components such as airbags, seat belts, and braking systems should be installed by a qualified professional.
- Chevrolet SUBURBAN:
- 🛍️ Shop This Part
- What's Unique About the 2015-2020 Chevrolet SUBURBAN
- Diagnostic Flowchart
- Symptoms You May Notice
- Most Likely Causes
- Rare But Worth Checking
- Diagnosis Steps
- Parts You'll Likely Need
- Related Codes That Often Appear With This One
- Technical Service Bulletins (TSBs) & Recalls
- Platform-Specific Known Issues
- Mechanic-Grade Diagnostic Values
- Scan Tool Commands That Help
- Wiring & Ground Locations
- Real Owner Repair Stories
- OEM Part Supersession History
- Model Year Variations Within This Range
- 🎟️ Get 5% Off