

P0340 on 2012-2019 Cadillac Escalade: Camshaft Sensor Circuit Causes and Fixes
On a 2012-2019 Cadillac Escalade, code P0340 is most often caused by a faulty camshaft position sensor or a chafed wiring harness. A sensor replacement is relatively inexpensive, while a wiring repair may be more involved. For 2018 models specifically, TSB #PIP5553A points to a known wiring chafe issue near the front of the engine.
- P0340 on a 2012-2019 Escalade indicates a fault in the camshaft position sensor circuit.
- Before replacing the sensor, thoroughly inspect the wiring harness for chafing or damage, as this is a known issue (TSB #PIP5553A).
- For 2012-2013 models, a faulty sensor is a very likely cause (TSB #PIP5099A).
- Symptoms can be severe, including a no-start or stalling, so addressing the code promptly is recommended.
- The repair is generally straightforward for a DIYer, with the sensor being accessible on the front of the engine.
What's Unique About the 2012-2019 Cadillac ESCALADE

For this generation of Escalade, the P0340 code is frequently linked to specific, documented issues. On 2012-2013 models built in Sept/Oct 2012, a batch of faulty camshaft position sensors was common enough to warrant a Technical Service Bulletin (TSB #PIP5099A). For later models, particularly 2018, another TSB (#PIP5553A) points directly to a chafed wiring jumper harness at the X154 connector on the lower-left side of the engine front cover as the culprit. This wiring issue often causes a cluster of seemingly unrelated electrical codes along with P0340. TSB #PIP5335A also notes that for 2015-2017 models, corrosion in this same X154 connector can be a cause.
Diagnostic Flowchart

Tap your situation to follow the diagnostic path that matches what you're seeing on this vehicle.
Generation note: This range covers the end of the third generation (2012-2014) and the fourth generation (2015-2019). TSB #PIP5099A specifically addresses faulty sensors on 2012-2013 models. TSB #PIP5553A, regarding a chafed wiring harness, applies to 2018 models but the issue may be present on other fourth-generation years. TSB #PIP5335A points to connector corrosion on 2015-2017 models. General engine harness chafing is also a known issue on these platforms per TSB #21-NA-149.
Symptoms You May Notice
- Check Engine Light is on
- Engine is hard to start or cranks but won't start
- Engine stalls or idles erratically
- Noticeable loss of power and acceleration
- Possible transmission shifting issues
- Engine surging at idle
- Replacing the crankshaft position sensor. While related, the crankshaft sensor has its own specific codes (P0335, P0336). TSB #PIP5553A shows they can be triggered together by a shared wiring issue, but P0340 alone points to the camshaft circuit.
Most Likely Causes

- Chafed or Damaged Wiring Harness 🔴 High Probability TSB #PIP5553A specifically calls out a chafed wiring jumper harness on 2018 models, which can cause P0340 along with many other codes. The harness can rub against the bolt for the X154 connector bracket on the lower left side of the engine front cover, leading to shorts or open circuits. A similar issue is noted in TSB #21-NA-149 for 2019+ models where the harness can rub on the ECM/TCM bracket or upper control arm.
How to confirm: Visually inspect the wiring harness leading to the camshaft position sensor. For 2018+ models, pay extremely close attention to the harness near the X154 connector bracket on the front of the engine. For other years, follow the harness from the sensor back towards the firewall, looking for rubbing against engine brackets, the bell housing, or power steering lines. In a YouTube video by "PineHollowAutoDiagnostics" on a similar GM truck, rodent damage to the harness was found to be the cause.
Typical fix: Repair the damaged section of the wiring harness. This may involve soldering, using butt connectors with heat shrink, and re-routing or protecting the harness with loom to prevent future damage. TSB #PIP5553A advises adjusting the harness routing to prevent it from being pinched by the bracket.
Est. part cost: $5-$50 - Faulty Camshaft Position Sensor 🔴 High Probability TSB #PIP5099A notes that for 2012-2013 models (built Sept/Oct 2012), the sensor itself is a likely cause and recommends replacement if other diagnostics are inconclusive. The sensor is exposed to high heat and vibration, leading to eventual failure.
How to confirm: After confirming the wiring is intact, test the sensor. This can be done by checking for voltage at the connector or using an oscilloscope to view the sensor's signal pattern. A simpler method is to replace it, as it's a relatively low-cost part. A user on Tahoe Yukon Forum noted that metal filings can collect on the magnetic tip and disrupt the signal.
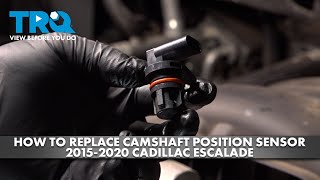
Typical fix: Replace the camshaft position sensor. It is located on the front of the engine, below the water pump, and is held in by a single 10mm bolt. 🎬 Watch: Step-by-step camshaft sensor replacement for 2015-2020 models
Est. part cost: $25-$75 - Damaged Connector or Terminals 🟡 Medium Probability TSB #PIP5335A specifically calls out corrosion in connector X154 on 2015-2017 models due to water intrusion. The connector is exposed to heat and vibration, which can cause the plastic to become brittle or the pins to lose connection over time. Coolant or oil leaks can also contaminate the connector.
How to confirm: Unplug the sensor and inspect the connector and the sensor's pins for corrosion (especially green or white powder), moisture, or damage. For 2015-2017 models, specifically inspect the 16-pin X154 connector on the front cover. Ensure the pins are making a tight connection.
Typical fix: Clean the connector and pins with electrical contact cleaner. If the connector housing or terminals are damaged, a new pigtail connector will need to be spliced in.
Est. part cost: $15-$40
Rare But Worth Checking
- Timing Chain Issue: While less common, a stretched or loose timing chain can cause the camshaft and crankshaft signals to be out of sync, potentially triggering a P0340 code. This is usually accompanied by other timing-related codes (like P0011, P0016, etc.) and audible engine noise like rattling. A user on a Cadillac forum with a high-mileage vehicle suspected this as a potential cause.
- Failing Engine Control Module (ECM): This is a rare cause. The ECM is the computer that receives the signal from the sensor. Before condemning the ECM, all other possibilities (sensor, wiring, connections) must be exhaustively ruled out. A user on the Tahoe Yukon Forum mentioned this as a last resort after replacing the sensor and harness without success.
Diagnosis Steps
- Read all stored trouble codes with an OBD-II scanner. Note any codes that appear alongside P0340, as they can provide important clues (e.g., codes from TSB #PIP5553A).
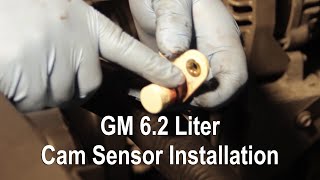
- Perform a thorough visual inspection of the camshaft position sensor wiring and connector. The sensor is on the front of the engine block, below the water pump. 🎬 Watch: Professional guide to installing a GM 6.2L cam sensor
- Specifically inspect the known chafe points. For 2018 models, check the harness where it passes the X154 connector bracket on the front engine cover. For 2015-2017 models, check the X154 connector itself for corrosion. For all years, check where the harness routes near the back of the engine and transmission bell housing.
- Inspect the sensor connector for damage, corrosion, or loose pins. Ensure it clicks securely into place.
- If wiring appears good, test the circuit. Using a multimeter, check for 5-volt reference and a good ground at the connector with the key on.
- If power and ground are present, the next step is to check the signal wire. The best tool is an oscilloscope to see the square wave pattern from the sensor while the engine is running. A missing or erratic pattern points to a bad sensor.
- If you don't have a scope and the wiring is confirmed to be good, replacing the sensor is a reasonable next step due to its relatively low cost, especially on 2012-2013 models per TSB #PIP5099A.
- If a new sensor does not fix the issue, the wiring harness needs a more in-depth continuity and short-to-ground test, or the problem may be mechanical (timing chain) or a faulty ECM.
Parts You'll Likely Need
- Camshaft Position Sensor
(OEM #12674702)— This is the most common component to fail in the circuit and is specifically called out in TSB #PIP5099A for early models. Note: Part number 12674702 is often listed as a Crankshaft sensor but may be used for both applications; always verify fitment with VIN.
Trusted brands: ACDelco, Delphi, Bosch
OEM price range: $50-$80
Aftermarket price range: $25-$50 - Wiring Pigtail Connector
(OEM #12663001)— If the connector itself is damaged or corroded (per TSB #PIP5335A), replacing it is necessary to ensure a solid connection to the sensor.
Trusted brands: ACDelco, Dorman
OEM price range: $25-$40
Aftermarket price range: $15-$30
Related Codes That Often Appear With This One
- P0341 — This code indicates a range/performance issue with the same sensor circuit, often appearing with P0340. TSB #PIP5335D mentions them together.
- P0335 / P0336 — These are codes for the crankshaft position sensor. TSB #PIP5553A lists them alongside P0340 as being caused by a common chafed wiring harness at the X154 connector.
- P06DA, P06DB, P06DC, P0011 — These and other codes are also listed in TSB #PIP5553A. Their appearance with P0340 strongly suggests the specific chafed wiring harness issue identified by GM for 2018 models.
Technical Service Bulletins (TSBs) & Recalls
- PIP5335D: Notes that DTCs P0340 and P0341 may set and advises normal diagnostics.
- PIP5553A: Links P0340 with numerous other codes to a possible chafed wiring jumper harness at the X154 connector bracket, causing a stall or no-start on 2018 models.
- PIE0416A: Mentions data collection for DTCs P0335, P0340, or P0365.
- PIP5099A: Advises replacing the cam position sensor on 2012-2013 models (built Sept/Oct 2012) if diagnostics are inconclusive.
- 21-NA-149: A general bulletin for 2019+ models describing various engine wiring harness chafe points that can cause a multitude of electrical issues, including P0340.
Platform-Specific Known Issues
- TSB #PIP5553A: On 2018 models, a chafed wiring jumper harness at the X154 connector bracket can cause P0340 along with a wide array of other DTCs, potentially leading to a crank/no-start or stalling condition.
- TSB #PIP5099A: For 2013 models (and some 2012s) built in September or October 2012, an intermittent P0340 may be due to a faulty sensor from the factory. The bulletin advises replacing the sensor if standard diagnostics do not find another cause.
Mechanic-Grade Diagnostic Values
- Camshaft Position Sensor 5V Reference Circuit — expected: 4.8 - 5.2 volts. Failure: Voltage below 4.8V or above 5.2V indicates an open, short to ground, or short to voltage in the supply wire or a faulty ECM.
- Camshaft Position Sensor Ground Circuit — expected: Less than 1 ohm of resistance to a known good ground.. Failure: High or infinite resistance (OL) indicates an open in the ground circuit back to the PCM.
- Camshaft Position Sensor Signal Waveform — expected: A clean, repeating square wave pattern when viewed on an oscilloscope while the engine is running.. Failure: A missing, erratic, or distorted waveform points to a faulty sensor or a damaged reluctor wheel.
- Alternator Charging Voltage — expected: Stable voltage between 13.2V and 14.5V while the engine is running.. Failure: Voltage dropping to 12.5V or lower, or erratic voltage spikes, can induce a false P0340 code.
Scan Tool Commands That Help
- GDS2 / Tech2Win: Cam/Crank Relearn — After replacing the camshaft sensor, crankshaft sensor, ECM, or performing any timing chain service. This procedure synchronizes the signals for the ECM.
Wiring & Ground Locations

- Camshaft Position Sensor Connector — On the front of the engine, below the water pump.. This is the primary connection point. A typical 3-wire pinout is: Pin 1 - 5V Reference from ECM, Pin 2 - Signal to ECM, Pin 3 - Ground from ECM.
- Connector X154 — Lower-left side of the engine front cover.. This is a major harness connector. TSB #PIP5553A identifies the harness chafing on the X154 bracket as a cause for 2018 models, and TSB #PIP5335A points to corrosion within this connector for 2015-2017 models.
- Sensor Ground Path — The ground for the camshaft position sensor is not a direct chassis ground; it is provided by the Engine Control Module (ECM).. This means a continuity test for the ground wire must be performed all the way back to the ECM connector, not just to the engine block or chassis.
Real Owner Repair Stories
- Mustang Forums at StangNet (2002 Ford Mustang GT (different vehicle, but same code and relevant electrical principle)) — Check Engine Light with P0340, intermittent start-and-stall condition.
❌ Tried (didn't work) Replacing the camshaft position sensor
✅ What actually fixed it The alternator was failing. A bad diode or regulator was sending erratic electrical signals to the PCM, which induced a false P0340 code. Replacing the alternator resolved all issues. - Ford Truck Enthusiasts Forums (2002 Ford Explorer 4.6L (different vehicle, but relevant mechanical cause)) — Persistent P0340 code that stumped technicians.
❌ Tried (didn't work) Multiple electrical and external engine checks
✅ What actually fixed it After a month at the dealer, the root cause was found to be mechanical: the engine timing was off by one tooth, and incorrect timing chain tensioners had been installed during a previous repair. - JK-Forum.com (Jeep Wrangler JK) — P0340 code, stumbling, and limp mode.
❌ Tried (didn't work) Replacing the camshaft position sensor (multiple times)
✅ What actually fixed it The wiring pigtail connector attached to the sensor was bad. Replacing the pigtail (part # 68148103-AA for that vehicle) provided a secure connection and fixed the problem.
"I Checked Everything" — The Actual Cause
- A common pattern for unresolved P0340 codes, after the sensor and wiring appear to test good, is a failing alternator. A bad diode can introduce electrical noise or voltage instability into the system, which the ECM misinterprets as a fault in the camshaft sensor circuit. Monitoring live system voltage is key to catching this.
- In high-mileage engines or those with a questionable service history, the issue can be purely mechanical. If electrical diagnostics find no fault, the problem may be a stretched timing chain or a damaged reluctor wheel on the camshaft, causing the cam signal to be out of sync with the crank signal.
When the Usual Fixes Don't Work
- While replacing the camshaft position sensor is the most common fix, numerous owner reports confirm that this often does not resolve the issue. In many cases, the code returned until a secondary, less obvious cause was found. The most frequently cited 'actual fixes' after a sensor replacement failed were repairing a damaged wiring connector/pigtail, replacing a failing alternator that was creating electrical noise, or addressing a mechanical timing issue.
OEM Part Supersession History
12627185, 12632872→12674702— Standard part evolution for improved reliability or manufacturing changes.
Heads up: The replacement part 12674702 is often listed as requiring programming or a special setup procedure, which likely refers to the 'Cam/Crank Relearn' function that should be performed with a GM scan tool after installation.
Model Year Variations Within This Range
- 2012-2014: These 3rd generation (GMT900) Escalades use a port-injected 6.2L V8 (L94). TSB #PIP5099A specifically targets 2012-2013 models for having a higher probability of a faulty sensor from the factory.
- 2015-2019: These 4th generation (K2XX) Escalades use a redesigned, direct-injected 6.2L V8 (L86). This generation is subject to TSBs for wiring harness chafing (2018) and connector corrosion (2015-2017) that are not documented for the earlier generation.
Helpful Videos
We Have This Part in Stock


The information in this article is provided for general reference and educational purposes only. Vehicle specifications, procedures, and part compatibility can vary by production date, trim level, and region. Always consult your vehicle's factory service manual and verify part numbers before purchasing or performing repairs. Safety-critical components such as airbags, seat belts, and braking systems should be installed by a qualified professional.
- Cadillac ESCALADE:
- 🎬 Helpful Videos
- 🛍️ Shop This Part
- What's Unique About the 2012-2019 Cadillac ESCALADE
- Diagnostic Flowchart
- Symptoms You May Notice
- Most Likely Causes
- Rare But Worth Checking
- Diagnosis Steps
- Parts You'll Likely Need
- Related Codes That Often Appear With This One
- Technical Service Bulletins (TSBs) & Recalls
- Platform-Specific Known Issues
- Mechanic-Grade Diagnostic Values
- Scan Tool Commands That Help
- Wiring & Ground Locations
- Real Owner Repair Stories
- "I Checked Everything" — The Actual Cause
- When the Usual Fixes Don't Work
- OEM Part Supersession History
- Model Year Variations Within This Range
- 🎟️ Get 5% Off