

OBD-II Code P0337: Crankshaft Position Sensor 'A' Circuit Low
The Ultimate Guide to What P0337 Means, Why It Triggers, and How to Fix It for Good
- Code P0337 indicates the Powertrain Control Module detects a voltage signal near 0 volts from the crankshaft position sensor, instantly disabling ignition timing.
- Do not drive with this code; the engine will stall unexpectedly or refuse to start, requiring a $100 to $300 tow.
- Before spending $200 to $400 on a sensor replacement, test the 3-wire harness for a 5-volt reference signal to rule out a simple wiring short.
- If replacing the sensor on a GM, Nissan, or Chrysler vehicle, you must perform a 'crankshaft variation relearn' using an advanced scan tool to clear the code permanently.
What Does P0337 Mean?

The Powertrain Control Module (PCM) is not receiving the correct voltage signal from the Crankshaft Position Sensor (CKP). This sensor acts as the engine's master clock, tracking rotational speed and exact piston position. Without this data, the PCM cannot time ignition spark and fuel injection, causing immediate running problems or a complete no-start condition.
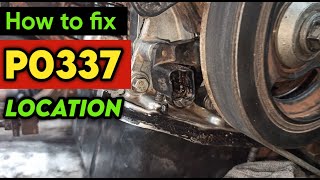
Technical definition: The SAE/OBD-II definition is "Crankshaft Position Sensor 'A' Circuit Low Input". The PCM detects the voltage signal from the sensor is below the specified threshold (often near zero volts) or missing entirely. 🎬 Watch: A quick overview of P0337 causes and solutions. An open circuit, short to ground, or internal sensor failure typically causes this.
Can I Drive With P0337?
No — Do Not Drive. Do not drive. The engine will stall unexpectedly at any speed, refuse to start, or suffer severe performance problems, creating a significant safety risk. Continuing to drive causes expensive secondary damage. Misfires from the erratic signal send unburned fuel into the exhaust, destroying the catalytic converter—a repair costing $1,200 to $2,800.
Common Causes

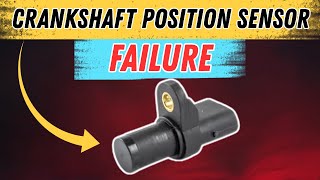
- Faulty Crankshaft Position Sensor (CKP) (Very Common) — The sensor itself is the most frequent point of failure. Internal electronics or the magnetic coil degrade from years of exposure to extreme engine heat and vibration.
- Damaged Wiring or Corroded Connector (Common) — Wires damaged by engine heat, chafing, or road debris cause a short to ground or an open circuit. Connector pins also corrode or loosen, preventing a solid electrical connection.
- Damaged Tone Ring (Reluctor Wheel) (Less Common) — The sensor reads a toothed wheel mounted on the crankshaft. If this wheel is bent, has broken teeth, or is covered in heavy rust, the sensor cannot generate a consistent signal.
- Incorrect Air Gap Between Sensor and Tone Ring (Less Common) — A specific air gap (often 0.02 to 0.06 inches) is required. If the sensor is not mounted flush, is loose, or is the wrong part, the gap is too large, resulting in a weak signal.
- Weak Battery or Faulty Starting System (Rare) — During cranking, a weak battery or failing starter causes a massive system-wide voltage drop. The PCM misinterprets this low voltage as a fault in the CKP sensor circuit.
- Use of Low-Quality Aftermarket Sensor (Rare) — Cheap aftermarket sensors fail to meet required resistance specifications or lack proper electromagnetic interference (EMI) filtering, causing the code to return immediately.
- Timing Belt or Chain Issues (Rare) — A severely stretched or jumped timing chain causes erratic crankshaft motion, destabilizing the sensor signal and triggering a circuit fault code in some systems.
- Faulty Powertrain Control Module (PCM) (Very Rare) — The vehicle's main computer has an internal fault in the specific circuit processing the CKP signal. Consider this only after exhaustively ruling out all other causes.
Symptoms

- Engine Cranks But Won't Start — The starter motor turns the engine over, but it never fires up because the PCM has no crankshaft signal to time the spark and fuel injection.
- Engine Stalling Intermittently — The engine dies unexpectedly while driving, often when coming to a stop. It may restart after cooling down, or leave you stranded.
- Rough Idle, Misfires, and Vibration — The engine runs poorly and shakes at idle because ignition and fuel timing is erratic or operating on a backup strategy.
- Loss of Power and Hesitation — The vehicle feels sluggish and stumbles during acceleration because the PCM cannot accurately command timing adjustments under load.
- Erratic or Non-Functioning Tachometer — The crankshaft position sensor provides data for the tachometer. If the signal is lost, the tachometer drops to zero or bounces erratically.
- Decreased Fuel Economy — Missing timing data forces the engine into an inefficient 'limp-home' mode, noticeably increasing fuel consumption. 🎬 See this breakdown of common bad crankshaft sensor symptoms.
- Check Engine Light On (also visible on scanner) — The PCM illuminates the Malfunction Indicator Lamp immediately upon detecting the signal is below the acceptable threshold.
Diagnostic Flowchart
Tap your situation to follow the diagnostic path that matches what you're seeing on this code.
Common Fixes & Costs
- Replace Crankshaft Position Sensor — Parts: $50-$150, Labor: $100-$250, ~1.5 hr book time (Intermediate)
- Repair Wiring or Replace Connector Pigtail — Parts: $15-$50, Labor: $120-$300, ~2 hr book time (Intermediate)
- Clean and Repair Ground Connections — Parts: $5-$10, Labor: $50-$150, ~0.8 hr book time (Beginner)
- Perform Crankshaft Position Variation Relearn — Parts: $0, Labor: $50-$120, ~0.5 hr book time (Professional)
- Clean or Replace Damaged Tone Ring — Parts: $50-$250, Labor: $400-$1200, ~6.5 hr book time (Professional)
- Replace Powertrain Control Module (PCM) — Parts: $600-$1000, Labor: $200-$300, ~2 hr book time (Professional)
Used vs. New Parts: Buying Guide
When a used part is worth it: Never buy a used crankshaft position sensor. The part is relatively inexpensive new, and a failed used part carries a high risk of leaving you stranded and paying for labor twice.
Donor quality checklist:
- Prioritize new OEM (Original Equipment Manufacturer) parts from a dealer.
- If buying aftermarket, choose reputable OE suppliers like Bosch, Denso, or NTK.
- Avoid unbranded, 'white-box' parts; they have a high failure rate and cause the code to return immediately.
Decision logic:
- If The sensor is difficult to access (high labor cost) → Buy a new OEM part to eliminate the risk of premature failure and repeat labor costs.
- If The sensor is easily accessible and budget is the top priority → A new, mid-grade aftermarket sensor from a known brand is viable, but OEM is still preferred.
- If Considering a used sensor from a junkyard → Do not do it. The potential savings do not outweigh the risks of immediate failure.
Warranty tradeoff: Used parts offer a 30-day warranty at best. New aftermarket parts offer 1-year to limited lifetime warranties. New OEM parts carry a 12-month manufacturer's warranty.
Worst-case if a used part fails: $250-$600 if a cheap or used part fails, including towing, buying another sensor, and paying for installation labor again.
What Happens If You Wait — Timeline
- Immediate: Engine cranks but will not start, or stalls immediately after starting. Vehicle is undrivable. (MPG impact: N/A% · Added cost: $100-$300 for a tow.)
- 0-1 month (for intermittent fault): Occasional hard starting, intermittent stalling at low speeds, and rough idle. Engine runs in inefficient 'limp-home' mode. (MPG impact: 10-25%% · Added cost: $50-$100 in wasted fuel.)
- 1-3 months (for intermittent fault): Misfires caused by erratic timing send unburned fuel to the catalytic converter, causing it to overheat and degrade. (MPG impact: 15-30%% · Added cost: $200-$400 in wasted fuel and initial catalyst damage.)
- 3+ months (for intermittent fault): Complete failure of the catalytic converter. The substrate melts, causing a major exhaust blockage and severe power loss. (MPG impact: 25-50% (with severe power loss)% · Added cost: $1200-$2800 for catalytic converter replacement.)
Cost of Not Fixing It
- Immediate: High risk of engine stalling in traffic, creating a severe safety hazard. The vehicle will not restart, leaving you stranded. (Added cost: $100-$300 for a tow.)
- 0-1 Month: Engine misfires caused by erratic timing send unburned fuel into the exhaust, overheating and degrading the catalytic converter. (Added cost: $50-$100 in wasted fuel.)
- 1-6 Months: The catalytic converter substrate melts from the unburned fuel, causing a complete exhaust blockage, severe power loss, and triggering P0420. (Added cost: $1200-$2800 for catalytic converter replacement.)
Diagnosis Steps

- Read the Code and Review Freeze Frame Data
Use an OBD-II scanner to confirm P0337. Document any other codes (e.g., P0335, P0340). Review freeze frame data to see engine conditions (RPM, temperature) when the fault triggered. Clear codes and attempt to start the engine to see if P0337 returns immediately.
Tools: OBD-II Scanner (Beginner) - Thorough Visual Inspection
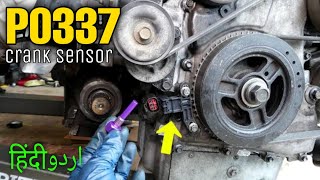
Locate the crankshaft position sensor (often near the main pulley, engine block side, or bell housing). Inspect the sensor, connector, and visible wiring harness for melted plastic, frayed wires, or oil contamination.
Tools: Flashlight, Mechanic's Mirror (Beginner) - Inspect the Electrical Connector
Disconnect the sensor. Look inside both ends for green corrosion, bent pins, or moisture. A loose or corroded connection is a primary cause of a 'low circuit' code. Clean terminals and apply dielectric grease on reassembly.
Tools: Electrical Contact Cleaner, Dielectric Grease (Beginner) - Check for Voltage and Ground at the Harness
With the connector unplugged and key 'ON' (engine off), test the harness terminals. A 3-wire Hall-effect sensor requires a reference voltage (usually 5V), a ground (<0.1V), and a signal wire. Missing reference voltage or ground indicates a wiring or PCM issue.
Tools: Digital Multimeter, Vehicle Service Manual (Intermediate) - [ADVANCED] Check Live Data PIDs
Monitor the 'Engine Speed' (RPM) PID while cranking. With a P0337 fault, this PID reads 0, even though the engine is physically turning. This confirms the PCM is not receiving a signal.
Tools: Advanced OBD-II Scan Tool (Advanced) - [PRO TIP] Perform a 'Wiggle Test'
While monitoring the sensor's signal wire, have a helper crank the engine while you carefully wiggle the wiring harness at the connector and along its path. If the signal cuts in and out, you have an intermittent open or short in the wiring.
Tools: Digital Multimeter or Oscilloscope (Intermediate) - Test the Sensor's Internal Resistance (Magnetic Sensors Only)
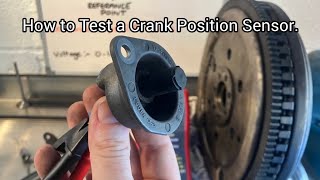
For 2-wire magnetic (VR) sensors, disconnect the sensor and measure resistance between the two pins. Compare to the service manual spec (typically 200-1500 Ohms). An infinite reading (OL) means the internal coil is broken. This test does not work for 3-wire Hall-effect sensors.
Tools: Digital Multimeter, Vehicle Service Manual (Intermediate) - [PRO TIP] Analyze the Sensor Signal with an Oscilloscope
Backprobe the signal wire at the sensor connector. While cranking, a Hall-effect sensor produces a clean 0V to 5V square wave. A magnetic sensor produces an AC sine wave. A P0337 fault typically shows a flat line near 0 volts, confirming no signal is produced.
Tools: Oscilloscope, Vehicle Service Manual (Advanced) - Inspect the Tone Ring
If wiring and sensor tests pass, inspect the mechanical tone ring. Remove the sensor and look through the mounting hole while rotating the engine by hand. Look for missing teeth, heavy rust, or wobble.
Tools: Flashlight, Socket Set (Advanced) - [ADVANCED] Verify Fuel System Pressure
If the PCM does not see an RPM signal, it will not command the fuel pump to run. Connect a fuel pressure gauge. With key on, engine off, pressure should prime to spec (50-60 PSI). 0 PSI alongside P0337 strongly suggests the PCM disabled the fuel pump due to the missing crank signal.
Tools: Fuel Pressure Gauge, Vehicle Service Manual (Advanced)
When This Code Triggers (Freeze-Frame Conditions)
- Engine RPM: 0-200 RPM (During a crank-no-start event. The engine physically turns, but the PCM registers 0 RPM.)
- Vehicle Speed: 0-10 MPH (When the engine stalls at idle, at a stoplight, or during low-speed deceleration.)
- Engine State: Running then Stalled (The fault logs at the exact millisecond the signal drops below the threshold and the engine shuts off.)
- Engine Coolant Temp: 190°F - 220°F (Highly common after the engine is fully warmed up and experiences 'heat soak' upon shutting down.)
Related Codes
- P0335 — P0335 is the general code for 'Crankshaft Position Sensor 'A' Circuit Malfunction'. P0337 is a specific subset indicating the voltage is 'Low'. Solving P0337 solves P0335.
- P0336 — Indicates a 'Range/Performance' issue. The PCM sees a signal that is erratic or has missing pulses, but isn't completely absent like P0337. Points to a damaged tone ring tooth or electrical interference.
- P0340 — Indicates a 'Camshaft Position Sensor Malfunction'. A missing crank signal (P0337) causes the PCM to flag the cam sensor secondarily. Always fix P0337 first.
- P0016 — Indicates a 'Crankshaft/Camshaft Position Correlation' issue. P0016 sets when the PCM receives valid signals from both sensors, but their timing is incorrect (e.g., jumped timing chain). Fix P0337 first to restore the primary signal.
Climate & Environmental Factors
- High Engine Temperature / Heat Soak: As the engine bay gets hot, the internal electronics of the sensor fail or the coil resistance goes out of spec. The problem appears after driving and shutting the engine off for 15-30 minutes, leading to a no-start condition that resolves once cooled.
- Cold Weather: Extreme cold causes moisture to freeze within the sensor connector, leading to a temporary short. Thermal contraction stresses wiring, causing intermittent issues that disappear as the engine warms up.
- High Humidity / Moisture: Moisture accelerates corrosion on connector pins and seeps into cracks in the wiring harness, causing shorts. The code appears more frequently on rainy or damp days.
How to Talk to a Mechanic About This Code
Say this: "I have a P0337 code causing a crank-no-start and intermittent stalling. I'd like to book a diagnostic appointment. Please check the crankshaft sensor's wiring, connector, and signal before recommending a replacement part."
This signals you understand the cause isn't always the sensor itself. It directs the technician to perform a proper circuit diagnosis rather than just swapping parts, saving you money if the issue is a simple wiring fault.
Avoid saying:
- 'My check engine light is on, can you look at it?' (Too vague; leads to a broad, expensive diagnostic process.)
- 'Just replace the crankshaft sensor.' (Prevents proper diagnosis; you might replace a good part and ignore a wiring issue.)
- 'I think it's the...' (Avoid guessing. State the code and the exact symptoms.)
Questions to ask before authorizing the repair:
- Did you test the sensor's circuit, including the voltage and ground at the connector?
- Did you inspect the wiring harness for any signs of damage, heat exposure, or oil contamination?
- What specific test confirmed the old sensor failed (e.g., no signal on an oscilloscope, incorrect resistance)?
- Does my vehicle require a crankshaft position relearn procedure after replacement?
- What is the warranty on the parts and labor for this repair?
Where to Take It: Dealer vs Independent vs Chain
- Dealer:
Best for: Vehicles still under a powertrain or emissions warranty., Complex electrical issues on newer or German vehicles (e.g., BMW, Audi)., Repairs requiring manufacturer-specific software for a mandatory crank relearn procedure.
Downsides: Highest labor rates., Defaults to replacing parts rather than repairing wiring. (Typical cost: +50% vs. baseline) - Independent Shop:
Best fit for most situations. A reputable independent shop easily diagnoses and repairs a P0337 code and is more likely to perform a cost-effective wiring repair if needed.
Best for: Most out-of-warranty vehicles., Standard diagnosis and sensor replacement on common domestic and Asian makes.
Downsides: Diagnostic capabilities vary; look for ASE certifications., May lack advanced tools like oscilloscopes for tricky intermittent problems. (Typical cost: +0% vs. baseline) - Chain Shop:
Use with caution. Acceptable if you are certain the sensor itself is the problem and it's easily accessible. AVOID for initial diagnosis.
Best for: Simple part replacements when you have already diagnosed the problem yourself.
Downsides: Technician skill varies widely., High pressure to upsell services., Lacks expertise for in-depth electrical diagnostics. (Typical cost: -10% vs. baseline)
When to Walk Away From the Repair
If the estimated repair cost exceeds 40-50% of the car's private-party value, seriously consider selling or trading it in rather than repairing it.
- Car worth $4000, fix is $450: Fix it. The repair cost is well below the 40% threshold.
- Car worth $12000, fix is $1200: Fix it. This is a reasonable cost for a higher-value vehicle.
- Car worth $2500, fix is $1400: Walk away. The repair cost is over 50% of the car's value.
What Scan Tool You Need for This Code

Minimum: A code reader that displays live data, specifically the Engine RPM (PID 0x0C).
A basic $20 code reader only shows the P0337 code. To diagnose effectively, you must see live RPM data while cranking. If the scanner shows 0 RPM while the engine turns, it confirms the PCM is not getting a signal.
Budget: BlueDriver Pro or MOTOPOWER MP69033 (~$20) — Reads and clears P0337, shows freeze frame data, and displays live data streams (including Engine RPM) on your smartphone or built-in screen.
Mid-range: Innova 5610 or XTOOL D7 (~$320) — Offers graphing for live data to visualize signal dropouts. Includes the 'Crankshaft Variation Relearn' function required for GM, Chrysler, and Nissan vehicles.
Professional: Autel MaxiCOM MK808 / XTOOL D8S (~$500) — Provides full bidirectional control, all manufacturer-specific functions (including crank relearns), and displays waveform data to definitively test the sensor's output signal.
Rent vs buy: Auto parts stores read codes for free. However, to see live data or perform a relearn procedure, you must own a capable scanner. If your car requires a crank relearn, investing in a mid-range tool is cheaper than paying for one hour of shop labor.
How to Clear the Code After You Fix It
- Use an OBD-II scan tool to clear the P0337 code from the PCM's memory.
- Perform a complete drive cycle to allow the vehicle's readiness monitors to run and reset.
- For GM, Nissan, and Chrysler vehicles, perform a 'Crankshaft Variation Relearn' procedure with a capable scan tool.
Drive cycle (~20 minutes): 1) Cold start (engine off for 8+ hours). 2) Idle for 3 minutes with A/C and defroster on. 3) Drive 10 minutes in stop-and-go traffic. 4) Drive 10 minutes at a steady 55-65 mph. 5) Let the vehicle cool down completely.
Readiness monitors affected: Misfire Monitor, Fuel System Monitor, Comprehensive Component Monitor, Catalyst Monitor
Before emissions retest: drive at least 100 miles to fully set monitors.
Watch out for:
- Clearing the code with a scanner does not set the readiness monitors; a full drive cycle is mandatory.
- Disconnecting the battery clears the code but resets all monitors to 'Not Ready', guaranteeing an emissions test failure.
- The code returns immediately if a required 'relearn' procedure is skipped.
Will This Fail Emissions / State Inspection?
Yes — this code typically fails an OBD-II emissions inspection.
- California: An illuminated Check Engine Light from P0337 is an automatic failure. If recently cleared, the test fails due to 'Not Ready' monitors. A 100+ mile drive cycle is required before re-testing.
- New York: The NYS DMV inspection includes an OBD-II scan. An active P0337 code results in an immediate emissions test failure.
- Texas: In the 17 counties requiring emissions testing, an active P0337 code is an automatic failure. Clearing the code right before the test results in a failure due to incomplete readiness monitors.
Most Commonly Affected Vehicles
- Ford F-150, Focus, Fiesta, Explorer (2004-2016) — On F-150 V8 engines (e.g., 5.4L), the sensor is on the passenger side of the block with tight access. Wiring damage from road debris is common. Repair costs average $250-$450.
- Chevrolet / GMC Silverado, Cruze, HHR, Equinox (2007-2017) — Failures are very common. A 'crank relearn' procedure is mandatory after replacement. On some Silverado V8s, the starter must be removed to access the sensor.
- Honda Civic, Accord, CR-V (2001-2012) — Oil leaks from the VTEC solenoid or valve cover gasket drip directly onto the sensor and connector, causing premature failure. Repair costs average $180-$350.
- Hyundai / Kia Sonata, Elantra, Santa Fe, Optima (2006-2016) — Frequently cited for P0337 due to internal sensor failure. The sensor is located on the front of the engine block, making it easy to access on 4-cylinder models.
- Jeep Grand Cherokee, Wrangler (3.8L, 4.0L) (1999-2011) — The sensor is located on top of the transmission bell housing, making it highly susceptible to heat damage from the exhaust.
- Volkswagen / Audi Golf, Jetta, Passat, A4 (2005-2015) — Frequently reported, often traced back to a failed sensor or a chafed wiring harness near the engine block or transmission.
- BMW 3 Series (E90), 5 Series (E60), X3, X5 (2006-2016) — The sensor is located low on the driver's side of the engine block with difficult access. Using an OEM sensor is absolutely critical for BMWs.
- Subaru Forester, Impreza, Outback (2005-2014) — Owners frequently report stalling and no-start issues. The sensor is located on the top or front of the engine near the main crank pulley.
Manufacturer-Specific Notes
- General Motors (Chevrolet, GMC, Buick, Cadillac): GM vehicles absolutely require a 'crankshaft variation relearn' procedure using a professional scan tool after sensor replacement. Skipping this results in a rough idle, misfire codes, or the P0337 code returning.
- Nissan / Infiniti: Requires a 'Crankshaft Position Sensor Relearn' procedure. A recall (NHTSA 07V-527) was issued for 2002-2006 models for sensors that overheat and cause sudden stalling.
- Chrysler / Dodge / Jeep / Ram: On older models, the sensor is mounted on the transmission bell housing, making heat soak a primary cause of failure. A recall (NHTSA 23V-411) was issued for 2014-2020 3.0L diesels for a tone wheel that delaminates.
- Mazda (SKYACTIV Engines): When P0337 is detected, the PCM actively restricts engine torque and inhibits systems like EGR, i-stop, and diesel particulate filter regeneration as a protective measure.
Real Owner Stories
2009 Hyundai Accent - Crank No-Start
The car cranked but refused to start. The owner replaced the crankshaft position sensor.
What they tried:
- Replaced the crankshaft position sensor.
Outcome: The car started, but immediately threw a P0337 code. The root cause was a damaged wiring harness that was initially missed.
Lesson: If a code returns immediately after replacing a part, the root cause is in the wiring or connector. Always inspect the harness carefully before buying parts.
2013 Audi Q5 3.0T - Persistent P0337 in Limp Mode
Car was permanently in limp mode with a P0337 code. The issue started intermittently but became constant.
What they tried:
- Replaced the sensor with an OEM part.
- Replaced the battery and alternator.
- Tested voltage at the connector.
Outcome: The problem remained unresolved until a technician found a damaged reluctor wheel altering the sensor's air gap.
Lesson: A 'Circuit Low' code isn't always electrical. Mechanical issues like a damaged reluctor wheel or improper sensor mounting cause the exact same fault.
2010 Toyota Camry - Intermittent Stalling After Rain
After heavy rain, a Camry with 142,000 miles began misfiring and stalling at stoplights, triggering P0337.
What they tried:
- Cleaned all electrical connectors related to the sensor.
Outcome: Cleaning moisture and corrosion from the electrical connectors resolved the issue completely.
Lesson: Heavy rain introduces moisture into aging connectors, causing intermittent shorts. Inspect and clean connectors with contact cleaner before replacing sensors.
How to Prevent This Code From Triggering
- Fix valve cover and timing cover oil leaks immediately (As soon as noticed) — Engine oil saturates connectors and breaks down wire insulation over time, causing direct sensor failure and circuit shorts.
- Perform visual wiring harness checks (During every oil change) — Inspect sensor harnesses near heat sources or moving parts for chafing, melting, or cracking. Catching damage early prevents sudden stalling.
- Maintain a healthy battery and starting system (Test annually) — A strong battery prevents system-wide voltage drops during cranking that the PCM misinterprets as a sensor-specific fault.
- Use dielectric grease on connectors (When replacing a sensor) — Applying a thin layer of dielectric grease to the connector seal (not the metal pins) blocks moisture and prevents corrosion.
Frequently Asked Questions
Can I drive my car with a P0337 code?
No, do not drive. The engine will stall at any moment without warning, creating an extreme safety hazard in traffic. You also risk being stranded and paying for a tow when the engine refuses to restart.
How much does it cost to fix a P0337 code?
Replacing the crankshaft position sensor at a professional shop typically costs between $200 and $400. If you perform the repair yourself, the OEM sensor part usually costs between $50 and $150. Luxury brands or engines with difficult access will increase labor costs significantly.
What is the most common mistake when diagnosing P0337?
The biggest mistake is immediately replacing the sensor without testing the circuit. Always inspect the wiring and connector first. A loose connection, corroded pin, or chafed wire is a common cause and much cheaper to fix.
I replaced the sensor, but the P0337 code came back. What now?
If the code returns, you likely missed an underlying wiring short or installed a faulty aftermarket sensor. Your vehicle might also require a mandatory 'crankshaft relearn' procedure using a scan tool. In rare cases, a damaged tone ring or faulty PCM is the culprit.
Can a bad starter or battery cause a P0337 code?
Yes, a failing starter or a weak battery causes a severe voltage drop while cranking the engine. The PCM misinterprets this system-wide voltage drop as a specific fault within the crankshaft sensor's circuit. Always test your battery and starting system if the engine cranks slowly.
Will a P0337 code cause my car to fail an emissions test?
Yes, a P0337 code results in an illuminated Check Engine Light, triggering an automatic failure for any emissions inspection. The fault prevents the engine's monitoring systems from running correctly, leading to a 'Not Ready' status. You must fix the issue and complete a full drive cycle before retesting.
Where is the crankshaft position sensor located?
The location varies widely, but it is commonly found near the main crankshaft pulley at the bottom-front of the engine. It is also frequently mounted on the side of the engine block or in a port on the transmission bell housing. Always consult a repair manual for your specific vehicle's exact location.
Key Takeaways
- Code P0337 indicates the Powertrain Control Module detects a voltage signal near 0 volts from the crankshaft position sensor, instantly disabling ignition timing.
- Do not drive with this code; the engine will stall unexpectedly or refuse to start, requiring a $100 to $300 tow.
- Before spending $200 to $400 on a sensor replacement, test the 3-wire harness for a 5-volt reference signal to rule out a simple wiring short.
- If replacing the sensor on a GM, Nissan, or Chrysler vehicle, you must perform a 'crankshaft variation relearn' using an advanced scan tool to clear the code permanently.
Helpful Videos
![What is P0337 Engine Code [Quick Guide]](https://img.youtube.com/vi/Z-m-DxmY2cE/mqdefault.jpg)

The information in this article is provided for general reference and educational purposes only. Vehicle specifications, procedures, and part compatibility can vary by production date, trim level, and region. Always consult your vehicle's factory service manual and verify part numbers before purchasing or performing repairs. Safety-critical components such as airbags, seat belts, and braking systems should be installed by a qualified professional.
- 🎬 Helpful Videos
- What Does P0337 Mean?
- Can I Drive With P0337?
- Common Causes
- Symptoms
- Diagnostic Flowchart
- Common Fixes & Costs
- Used vs. New Parts: Buying Guide
- What Happens If You Wait — Timeline
- Cost of Not Fixing It
- Diagnosis Steps
- When This Code Triggers (Freeze-Frame Conditions)
- Related Codes
- Climate & Environmental Factors
- How to Talk to a Mechanic About This Code
- Where to Take It: Dealer vs Independent vs Chain
- When to Walk Away From the Repair
- What Scan Tool You Need for This Code
- How to Clear the Code After You Fix It
- Will This Fail Emissions / State Inspection?
- Most Commonly Affected Vehicles
- Manufacturer-Specific Notes
- Real Owner Stories
- 2009 Hyundai Accent - Crank No-Start
- 2013 Audi Q5 3.0T - Persistent P0337 in Limp Mode
- 2010 Toyota Camry - Intermittent Stalling After Rain
- How to Prevent This Code From Triggering
- Frequently Asked Questions
- Can I drive my car with a P0337 code?
- How much does it cost to fix a P0337 code?
- What is the most common mistake when diagnosing P0337?
- I replaced the sensor, but the P0337 code came back. What now?
- Can a bad starter or battery cause a P0337 code?
- Will a P0337 code cause my car to fail an emissions test?
- Where is the crankshaft position sensor located?
- Key Takeaways
- 🎟️ Get 5% Off