

P0336 on 2011-2015 Chevrolet Volt: Crankshaft Sensor Range/Performance Issues
P0336 on a Chevy Volt indicates a problem with the crankshaft position sensor's signal for the gasoline range-extender engine. This is often due to a faulty sensor or wiring issues. Diagnosis is complex because the code can be stored in the engine computer (ECM) or the hybrid power inverter module (HPCM), which requires a professional-level scan tool to properly diagnose. Professional diagnosis is highly recommended.
- P0336 on a Volt means the crankshaft sensor signal for the gas engine is unreliable.
- Before replacing any parts, use a scan tool to see if the code is stored in the Engine Control Module (ECM) or the Hybrid Power Inverter Module (HPCM), as the diagnostic path differs.
- Wiring and connector issues are a common cause, not just the sensor itself.
- After replacing the sensor, a 'crankshaft variation relearn' procedure with a bidirectional scan tool is mandatory.
What's Unique About the 2011-2015 Chevrolet VOLT
On a Chevrolet Volt, the P0336 code is more complex than on a conventional vehicle. Because the Volt is an Extended-Range Electric Vehicle (EREV), the crankshaft position sensor's data is used by both the standard Engine Control Module (ECM) and the T6 Power Inverter Module (HPCM). [Bulletin #PIP4880E, Bulletin #PIP4880F] General Motors has issued Technical Service Bulletins (TSBs) specifically addressing diagnostics when this code appears in the HPCM, indicating that the problem may not be a simple sensor failure but could involve the intricate communication between the vehicle's hybrid control systems. The first diagnostic step is always to use a scan tool capable of reading manufacturer-specific codes from all modules to determine if the DTC is stored in the ECM, HPCM, or both.
Diagnostic Flowchart
Tap your situation to follow the diagnostic path that matches what you're seeing on this vehicle.
Symptoms You May Notice
- Check Engine Light is on
- Gasoline engine is hard to start or cranks but won't start
- Engine stalls, especially at idle or when coming to a stop
- Rough running or misfiring engine
- Reduced engine power and hesitation during acceleration
- Erratic tachometer reading or RPM gauge bouncing to zero while driving
- Replacing the crankshaft position sensor without first thoroughly inspecting the wiring harness and connector, which is a frequent point of failure.
- Replacing the camshaft position sensor, as its symptoms can sometimes be similar.
- Failing to perform the crankshaft position variation relearn procedure after replacing the sensor, leading to the code returning.
Most Likely Causes
- Faulty Crankshaft Position Sensor 🔴 High Probability Sensors are electronic components that can fail over time due to extreme heat cycles from the engine and potential oil contamination from leaks. They are a common failure point for this code across many GM vehicles.
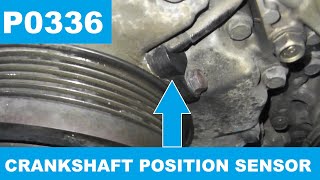
How to confirm: Test the sensor's resistance with a multimeter to see if it's within the manufacturer's specified range (typically 200-900 ohms for similar sensors). A more definitive test involves monitoring the sensor's output signal with an oscilloscope or a high-end scan tool for dropouts, noise, or an inconsistent waveform while the engine is cranking or running. 🎬 See three easy ways to test for a bad sensor
Typical fix: Replace the crankshaft position sensor and perform the crankshaft position variation relearn procedure.
Est. part cost: $80-$115 - Wiring Harness or Connector Issues 🟡 Medium Probability The wiring harness can be damaged by engine heat, oil leaks, or vibrations, leading to corrosion on the connector pins, loose connections, or short/open circuits. The connector itself can become brittle and fail.
How to confirm: Visually inspect the wiring and connector between the sensor and the control modules for any signs of damage, melting, corrosion, or looseness. Perform a "wiggle test" on the harness while monitoring the sensor's signal on a scan tool to check for intermittent faults. Check for proper voltage and ground at the sensor connector.
Typical fix: Repair the damaged section of the wiring harness or replace the connector pigtail.
Est. part cost: $15-$50 - Module Communication or Software Issue ⚪ Low Probability As highlighted by GM TSBs #PIP4880E and #PIP4880F, the code can be stored in the Power Inverter Module (HPCM), suggesting a more complex diagnostic path than a simple sensor fault. This indicates a potential data communication error between the engine and hybrid control systems. [Bulletin #PIP4880F]
How to confirm: Use a professional scan tool to determine which module (ECM or HPCM) has stored the P0336 code. Follow the specific diagnostic steps outlined in TSB #PIP4880F if the code is present in the HPCM. This is not possible with a basic code reader.
Typical fix: May require a software update or following a specific diagnostic procedure to resolve communication errors between modules. In rare cases, a control module may need replacement.
Est. part cost: $100-$1000+
Rare But Worth Checking
- Damaged Reluctor Wheel: The tone ring on the crankshaft that the sensor reads can become damaged, bent, or covered in metallic debris, causing an erratic signal. This is less common but should be inspected if a new sensor and good wiring do not resolve the issue. This requires more significant engine disassembly to inspect.
- Crankshaft Position Variation Not Learned: After replacing the sensor, PCM, or certain engine components, a "Crankshaft Position System Variation Learn Procedure" must be performed with a bidirectional scan tool. Failure to do this can cause a P0336 or related P1336 code to set, as the PCM has not calibrated to the new sensor's specific signal.
Diagnosis Steps
- Use an OBD-II scanner to confirm P0336 is present and check for any other codes. Crucially, use a tool that can read codes from all modules to see if the code is in the ECM, HPCM, or both, as per TSB #PIP4880F. [Bulletin #PIP4880F]
- Visually inspect the crankshaft position sensor, its connector, and the entire wiring harness for any signs of damage, melting, corrosion, or oil contamination. Pay close attention to the connector for bent or corroded pins.
- With a scan tool, monitor the live engine RPM data while cranking or running. An erratic, jumping, or absent RPM signal points to a problem in the CKP circuit.
- If the signal is faulty, disconnect the sensor and test its internal resistance with a multimeter. Compare the reading to the specifications in the service manual. A reading outside the expected range indicates a faulty sensor.
- Test the sensor's circuit. Check for the correct reference voltage (usually 5V or 12V) and a good ground at the connector with the key on.
- If the sensor and wiring test good, the issue may be with the reluctor wheel or a control module. At this point, professional service is strongly advised.
- If the sensor is replaced, perform the Crankshaft Position System Variation Learn Procedure using a compatible bidirectional scan tool. This procedure requires revving the engine to a specific RPM (often ~4000 RPM) to allow the PCM to calibrate. 🎬 Watch: How to perform the crankshaft variation relearn procedure
Parts You'll Likely Need
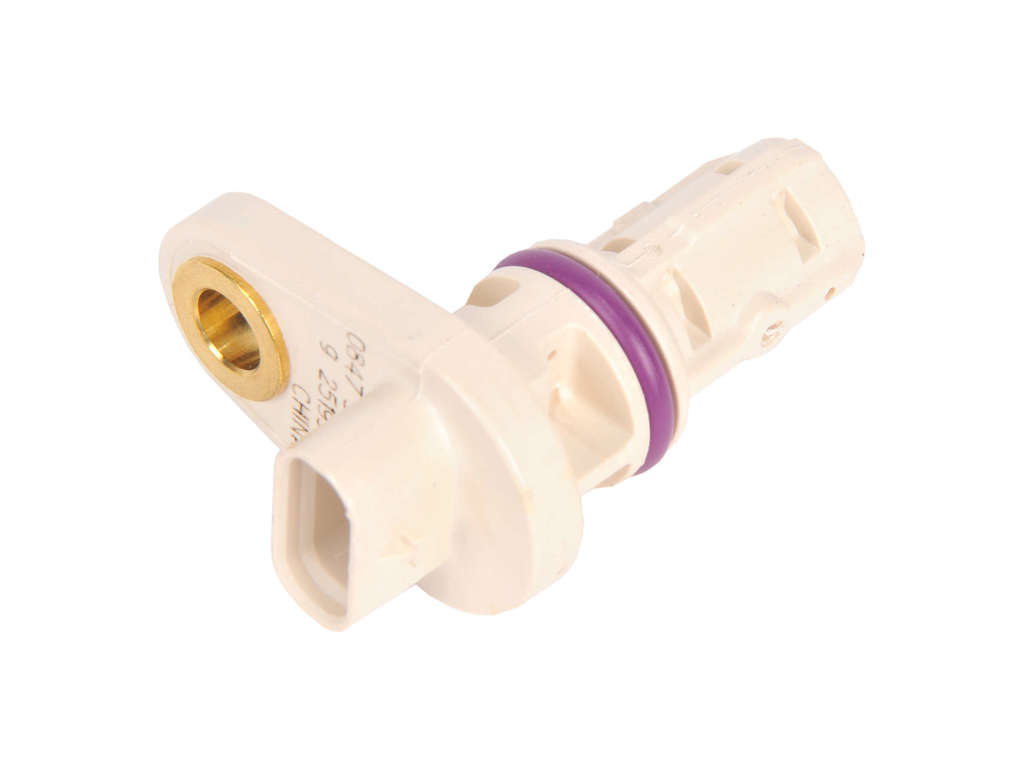
- Crankshaft Position Sensor
(OEM #25195551)— This sensor is the most common component to fail, causing the P0336 code.
Trusted brands: ACDelco (GM Genuine), Carquest Premium
OEM price range: $90-$120
Aftermarket price range: $30-$70
Related Codes That Often Appear With This One
- P0335 — P0335 indicates a complete circuit malfunction (no signal), while P0336 indicates a performance issue (erratic signal). They are often related, and TSB #PIP4880F mentions them appearing together, as an intermittent wiring fault could trigger both codes at different times. [Bulletin #PIP4880F, 31]
- P1336 — This is a GM-specific code for "Crankshaft Position System Variation Not Learned." It often appears if the CKP sensor is replaced but the mandatory relearn procedure is not completed with a scan tool.
Technical Service Bulletins (TSBs) & Recalls
- PIP4880F: Preliminary information regarding DTC P0335 and/or P0336 stored in the Power Inverter Module and/or Engine Control Module.
- PIP4880E: Preliminary information regarding (EREV) DTC P0336 stored in the T6 Power Inverter Module (HPCM).
- PI1237A: Diagnostic tip for an intermittent crank/no start after removal of camshaft sprockets, which could present similar symptoms.
Platform-Specific Known Issues
- GM Technical Service Bulletin #PIP4880F provides specific diagnostic steps for technicians when P0336 and/or P0335 are stored in the Power Inverter Module (HPCM), highlighting the unique complexity of this fault on the Volt platform. [Bulletin #PIP4880F]
- A crankshaft position system variation relearn procedure is mandatory after replacing the sensor to ensure accurate timing communication with the ECM. This requires a bidirectional scan tool and cannot be done by simply disconnecting the battery.
- Another TSB, PI1237A, notes that an intermittent crank/no-start condition on the 1.4L engine can be caused by im
Mechanic-Grade Diagnostic Values
- CKP Sensor Reference Voltage (Hall-Effect Type) — expected: 5V DC (typically) with key on, engine off.. Failure: Voltage significantly lower than 5V or absent suggests a wiring or ECM issue.
- CKP Sensor Ground Circuit Voltage Drop — expected: Less than 100 mV with key on, engine running.. Failure: A reading higher than 100 mV indicates high resistance in the ground circuit, which can cause an erratic signal.
- CKP Sensor Signal Voltage (using a Multimeter) — expected: An average reading of 400-600 mV DC while cranking the engine.. Failure: A reading of 0V or a steady, non-fluctuating voltage indicates a failed sensor or circuit. This is a limited test; an oscilloscope is definitive.
- CKP Sensor AC Voltage Output (Inductive Type Test) — expected: Approximately 200 mV AC or higher when cranking.. Failure: No AC voltage generated while cranking indicates a failed sensor coil.
Scan Tool Commands That Help
- GM Tech2 or GDS2: Crankshaft Position System Variation Learn Procedure (CASE Learn) — This procedure is mandatory after replacing the CKP sensor, ECM, crankshaft, or harmonic balancer. It calibrates the ECM to minor variations in the crankshaft reluctor wheel to ensure accurate misfire detection. Failure to perform this procedure will often set a P1336 or P0315 trouble code and can cause the P0336 to return.
- GM Tech2 or GDS2: Special Functions > Crankshaft Position Variation Learn — To execute the relearn: warm the engine to operating temperature (>158°F/70°C), apply and hold the brake, ensure A/C is off, and use the scan tool to initiate the test. You will be prompted to accelerate to wide-open throttle until the tool indicates fuel cut-off (around 4000 RPM), then release the throttle. The tool will then display 'Learn Status: Learned' if successful.
Wiring & Ground Locations
- Engine Ground Strap — Located on the engine block, above the air conditioning compressor.. A poor engine ground can cause a variety of electrical issues and erratic sensor readings, including those from the crankshaft position sensor. Ensuring this strap is clean, tight, and free of corrosion is a critical step in diagnosing electrical faults.
- CKP Sensor Connector — On the engine block, where the crankshaft position sensor is installed.. The 3-pin connector provides the sensor with power, ground, and a path for the signal to the ECM. The pins are: Pin 1 - 5V Reference, Pin 2 - Low Reference (Ground), Pin 3 - Signal. These specific pins must be tested for correct voltage and continuity.
When the Usual Fixes Don't Work
- While replacing the crankshaft position sensor is the most common fix, a technician or DIYer may find the P0336 code persists. This is often because the fault is not with the sensor itself, but with the vehicle's unique hybrid architecture. As noted in TSB #PIP4880F, the code can be stored exclusively in the Power Inverter Module (HPCM). In such cases, replacing the sensor will not resolve the issue. The true cause is a communication or diagnostic logic issue between the engine and hybrid control systems, which requires following the manufacturer's specific TSB diagnostic path using a scan tool that can differentiate between modules. [Bulletin #PIP4880F]
OEM Part Supersession History
55571994→25195551— Standard part lifecycle update, likely for improved reliability or manufacturing process.
Heads up: None. The new part number 25195551 is the correct and direct replacement for the original. GM parts catalogs explicitly state that this part requires a special setup procedure, which is the Crankshaft Variation Relearn.
Helpful Videos

We Have This Part in Stock


The information in this article is provided for general reference and educational purposes only. Vehicle specifications, procedures, and part compatibility can vary by production date, trim level, and region. Always consult your vehicle's factory service manual and verify part numbers before purchasing or performing repairs. Safety-critical components such as airbags, seat belts, and braking systems should be installed by a qualified professional.
- Chevrolet VOLT:
- 🎬 Helpful Videos
- 🛍️ Shop This Part
- What's Unique About the 2011-2015 Chevrolet VOLT
- Diagnostic Flowchart
- Symptoms You May Notice
- Most Likely Causes
- Rare But Worth Checking
- Diagnosis Steps
- Parts You'll Likely Need
- Related Codes That Often Appear With This One
- Technical Service Bulletins (TSBs) & Recalls
- Platform-Specific Known Issues
- Mechanic-Grade Diagnostic Values
- Scan Tool Commands That Help
- Wiring & Ground Locations
- When the Usual Fixes Don't Work
- OEM Part Supersession History
- 🎟️ Get 5% Off