

P0335 on 2004-2010 Toyota Prius: Crank Sensor, Battery, and No-Start Fixes
On a 2004-2010 Toyota Prius, code P0335 is often caused by a weak 12V auxiliary battery, not just a bad crankshaft sensor. Always test the 12V battery first before replacing the sensor, which costs about $25-$50 for an aftermarket part or $105-$150 for OEM. A loose, oil-fouled connector is also a common, simple fix.
- For a P0335 on a Prius, **always test the 12V auxiliary battery first.** A weak battery is a very common and documented cause for this code. [⭐ TSB #T-TT-0010-10 Rev]
- Symptoms are severe and typically include the engine cranking but not starting, or stalling immediately after starting.
- If the battery is healthy, the next most likely cause is a failed crankshaft position sensor itself. [ ODI #10482058]
- The vehicle is unsafe to drive with this code, as it can stall without warning.
- The location and part number for the sensor are different for the 2004-2009 (Gen 2) and 2010 (Gen 3) models.
What's Unique About the 2004-2010 Toyota PRIUS
On the Toyota Prius, a weak 12V auxiliary battery is a surprisingly common cause for a P0335 code. A Toyota Technical Service Bulletin (TSB T-TT-0010-10 Rev) confirms that low battery voltage (specifically below 11 volts) can cause inconsistent crankshaft speed readings during startup, triggering the code. Many owners on forums like PriusChat have confirmed that replacing the sensor did not fix the issue, while a new 12V battery did. This makes checking the 12V battery health the most important first step in diagnosis for a Prius.
Diagnostic Flowchart
Tap your situation to follow the diagnostic path that matches what you're seeing on this vehicle.
Generation note: This range covers two Prius generations. The 2004-2009 models are the 2nd Generation (XW20) with a 1.5L 1NZ-FXE engine. The 2010 model is the first year of the 3rd Generation (XW30) with a 1.8L 2ZR-FXE engine. While the P0335 code has the same meaning for both, the crankshaft sensor location and part numbers differ. The weak 12V battery issue noted in the TSB applies to both generations and a wide range of other Toyota vehicles.
Symptoms You May Notice
- Check Engine Light is on
- Engine cranks but will not start, or fails to crank at all
- Engine starts and then stalls after a few seconds
- Vehicle will not enter 'Ready' mode
- Engine runs rough or misfires
- Sudden loss of power while driving, sometimes forcing the car into limp mode
- Multiple warning lights on the dashboard (e.g., 'Check Hybrid System', Red Triangle of Death)
- Engine shakes hard when shutting off at a stop
- Replacing the crankshaft position sensor when the 12V auxiliary battery is the actual fault.
- Replacing the hybrid battery pack when the issue is related to the engine's starting components.
- Replacing the transaxle due to related codes (like P0A0F) without first confirming if the engine crankshaft is actually turning during a start attempt.
Most Likely Causes
- Weak or Failing 12V Auxiliary Battery 🔴 High Probability A Toyota TSB (T-TT-0010-10 Rev) explicitly states that low voltage (below 11V) can cause inconsistent rotational speed readings, leading to P0335. The Prius's complex electronics are sensitive to voltage drops, making this a primary diagnostic step. 🎬 Watch: How a low auxiliary battery prevents your Prius from starting.
How to confirm: Perform a load test on the 12V auxiliary battery, located in the trunk on the passenger side. A simple voltage check may not be sufficient. Check the freeze-frame data with a scan tool to see what the battery voltage was at the moment the code was set.
Typical fix: Replace the 12V auxiliary battery.
Est. part cost: $150-$250 - Faulty Crankshaft Position Sensor 🔴 High Probability Like any electronic sensor, it can fail over time due to heat and vibration. Some owners have reported the sensor failing internally and leaking oil through the electrical connector itself, which can force the connector off.
How to confirm: After confirming the 12V battery is good, test the sensor. With the engine cold, its internal resistance should be 985 to 1,600 Ω. When hot, it should be 1,265 to 1,890 Ω. An oscilloscope can also be used to check for a proper signal waveform while cranking.
Typical fix: Replace the crankshaft position sensor.
Est. part cost: $25-$150 - Damaged Wiring or Loose/Contaminated Connector 🟡 Medium Probability The sensor is located low on the engine, exposing its wiring to potential damage from road debris, oil, and heat. Several owners on PriusChat have fixed the code simply by finding the connector had come loose or was full of oil, preventing a good connection.
How to confirm: Visually inspect the wiring harness leading to the crankshaft position sensor for any signs of fraying, melting, or corrosion. Unplug the connector and check for oil contamination or bent pins. Ensure it is securely plugged in with the locking tab engaged.
Typical fix: Clean the connector with electrical contact cleaner and ensure it is securely reconnected. Repair any damaged section of the wiring harness.
Est. part cost: $5-$50
Rare But Worth Checking
- Damaged Reluctor Ring / Sensor Plate: The sensor reads teeth on a plate attached to the crankshaft. If this plate is damaged, has broken teeth, or is excessively rusty, it will send an erratic signal. This is uncommon but can happen, especially if other engine work was recently performed.
- Faulty Engine Control Module (ECM): While rare, the ECM itself can fail, causing it to misinterpret a good sensor signal. This should only be considered after all other possibilities (battery, sensor, wiring, reluctor ring) have been exhaustively ruled out with tools like an oscilloscope.
- Broken Internal Transmission Shaft / Damper: In a Prius, the engine is started by the MG1 motor-generator in the transaxle. If the input shaft or damper plate connecting MG1 to the engine is broken, MG1 will spin (often making a horrible grinding noise) but the engine's crankshaft will not. This causes a P0335 because the crank sensor correctly reports zero RPM. This is a catastrophic failure often discussed on PriusChat forums.
Diagnosis Steps
- Read all fault codes from all vehicle modules (Engine, Hybrid, Brakes, etc.). Note any accompanying codes like P0A0F or P0340.
- Crucial First Step for Prius: Fully charge and load test the 12V auxiliary battery. A weak battery is a known cause of P0335 on this vehicle. If possible, check freeze frame data to see the battery voltage when the code was set. Replace if it fails the load test.
- Visual Confirmation: Have a helper attempt to start the car while you visually inspect the crankshaft pulley on the passenger side of the engine. If it does not spin, but you hear a whirring or grinding noise, you may have a catastrophic internal transaxle failure.
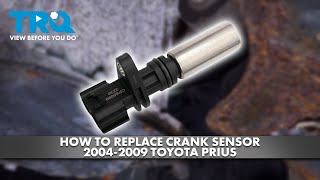
- If the engine spins, locate the crankshaft position sensor. On the Gen 2 (2004-2009), it's on the passenger side of the engine block, above the oil pan, accessible after removing the passenger wheel and a splash guard. 🎬 Watch: Step-by-step crankshaft sensor replacement for 2004-2009 models. On the Gen 3 (2010), it's in a similar location at the rear of the engine.
- Inspect the sensor's connector and wiring. Unplug it and check for oil inside the connector, a sign of an internally leaking sensor. Ensure the connection is clean and tight.
- Using a scan tool, monitor Engine RPM while attempting to start the engine. If the reading is zero or erratic while the engine is audibly cranking, it confirms the ECM is not getting a good signal.
- If you have a multimeter, check the sensor's resistance. It should be between 985-1,600 Ω when cold. If the resistance is out of spec, the sensor is bad.
- If wiring, battery, and resistance test are good, replace the crankshaft position sensor.
- If the code persists, advanced diagnostics are needed to check the reluctor ring for damage and test the ECM.
Parts You'll Likely Need
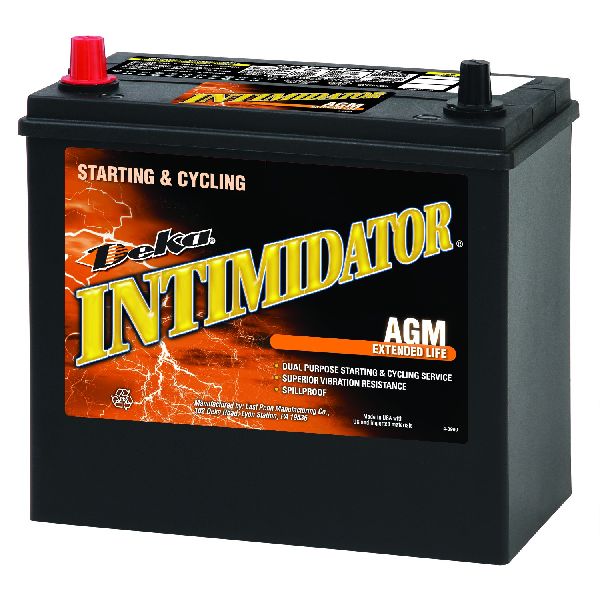
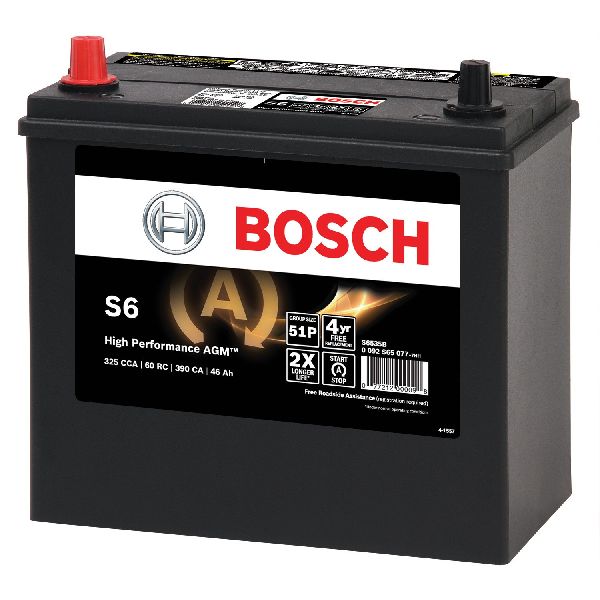
- 12V Auxiliary Battery — A weak 12V battery is a documented cause of P0335 on the Prius, as noted in Toyota TSB T-TT-0010-10 Rev.
Trusted brands: Toyota TrueStart, Optima (YellowTop), Bosch
OEM price range: $200-$275
Aftermarket price range: $150-$250 - Crankshaft Position Sensor
(OEM #90919-05060 (Gen 2, 2004-2009, also seen as 90919-T5005). 90919-05070 or 90919-A5004 (Gen 3, 2010).)— This is the primary component indicated by the code and a common failure point leading to a no-start condition.
Trusted brands: Denso (OEM manufacturer), NTK, Holstein, Walker Products
OEM price range: $105-$150
Aftermarket price range: $25-$75
Related Codes That Often Appear With This One
- P0340 — This is the code for the Camshaft Position Sensor. The TSB T-TT-0010-10 Rev mentions that low battery voltage can trigger both P0335 and P0340 simultaneously as the ECM sees inconsistent signals from both sensors.
- P0A0F — This code means "Engine Failed to Start." It is often a secondary code triggered as a result of the P0335. The hybrid control module sets P0A0F because the primary engine management system (which relies on the crank sensor) has reported a critical fault preventing the engine from running.
- C1259 — This code indicates the brake ECU has received a fault signal from the hybrid system. It's a downstream effect of the primary engine problem and will typically clear once the P0335/P0A0F codes are resolved. It does not indicate a problem with the brakes themselves.
Technical Service Bulletins (TSBs) & Recalls
- T-TT-0010-10 Rev: Notes that low battery voltage (below 11 volts) can contribute to a MIL "ON" for P0335 and/or P0340 due to inconsistent rotational speed of the crankshaft. Recommends checking freeze frame data for battery voltage at the time of the fault.
Platform-Specific Known Issues
- TSB Confirms 12V Battery Link: A Technical Service Bulletin (T-TT-0010-10 Rev) was issued stating that low 12V battery voltage (below 11V) can cause this code due to inconsistent rotational speed readings during startup.
- Owner Experience: Loose, Oily Connector: A user on PriusChat reported their car was missing, not charging the HV battery, and eventually failed to stay in 'Ready' mode. The codes were P0335, C1259, and others. The fix was discovering the crankshaft sensor connector was loose and full of oil. After cleaning it with electrical spray and securely reconnected it, the car ran perfectly.
- Owner Experience: Sensor vs. Battery: A Reddit user with a 2006 Prius reported a P0335 code and a no-start
Mechanic-Grade Diagnostic Values
- Crankshaft Position Sensor Resistance (Gen 2, 1NZ-FXE) — expected: 985 to 1,600 Ω (Cold), 1,265 to 1,890 Ω (Hot). Failure: A reading of 0 Ω indicates a short, while a very high or infinite (MΩ) reading indicates an open circuit.
- Crankshaft Position Sensor Resistance (Gen 3, 2ZR-FXE) — expected: 1,630 to 2,740 Ω (Cold), 2,065 to 3,225 Ω (Hot). Failure: Readings outside of this range indicate a faulty sensor.
- ECM Pin Voltage Check (Gen 2, 1NZ-FXE) — expected: Pulsing AC voltage at pins E4-33 (NE+) and E4-34 (NE-) while cranking.. Failure: No voltage or a steady DC voltage indicates a wiring or sensor fault.
- Scan Tool Live Data - Engine Speed — expected: A stable RPM reading above 200 RPM while cranking.. Failure: A reading of 0 RPM or an erratic RPM value while the engine is physically turning indicates the ECM is not receiving a valid signal.
Scan Tool Commands That Help
- Toyota Techstream: Data List -> Engine Speed — Use this to monitor the RPM signal the ECM is receiving while cranking the engine. If it reads 0 while the engine is turning, it confirms a fault in the crank sensor circuit.
- Toyota Techstream: Utility -> All Readiness — After a repair, this function can be used to check the DTC judgment result for P0335 to confirm if the monitor has run and passed, verifying the fix without extensive driving.
Wiring & Ground Locations
- E4 (Gen 2) — The main Engine Control Module (ECM) connector, located behind the glove box.. Pins E4-33 (NE+, red wire) and E4-34 (NE-, green wire) are the direct inputs from the crankshaft position sensor. Testing for continuity and shorts between these pins and the sensor connector (C7) is a critical diagnostic step.
- C7 (Gen 2) — The connector for the crankshaft position sensor itself, on the lower passenger side of the engine.. This is the starting point for any circuit test. Checking for oil contamination, corrosion, or damage here is essential. Pin 1 is NE+ and Pin 2 is NE-.
- EE (Gen 2) — An engine ground point located on the left rear of the engine block.. A poor engine ground can cause a variety of electrical issues and signal noise. While not a direct cause, ensuring this ground is clean and tight is good practice when diagnosing sensor circuit faults.
- J14 (Gen 2) — A junction connector located behind the glovebox.. The wiring for the crankshaft and camshaft position sensors passes through this junction. A fault within this connector could potentially affect both circuits.
Real Owner Repair Stories
- PriusChat forum user (2012 Toyota Prius, 140,000 miles) — Car stopped on the road, would not start the gasoline engine, only runs on HV battery. Codes P0335 and P0A0F present. Rattling/knocking noise was present before the failure.
❌ Tried (didn't work) Replaced crankshaft position sensor, Traced wiring harness to ECM, found no damage, Opened engine to inspect reluctor wheel, found it in good condition, Checked timing, found it to be correct
✅ What actually fixed it The final diagnosis pointed towards a mechanical failure inside the transaxle (input shaft/damper), preventing the engine from being spun by the MG1 motor. The P0335 code was a symptom, not the cause, as the sensor was correctly reporting that the crankshaft was not turning. The resolution required transaxle repair/replacement. - PriusChat forum user (2005 Toyota Prius) — P0335 code, Red Triangle of Death warning light.
❌ Tried (didn't work) Replaced the crankshaft position sensor.
✅ What actually fixed it The owner found 0 volts at the sensor connector. The problem was traced to the wiring harness. The wires for the crank and cam sensors split at a junction connector (J14) behind the glovebox. The final fix involved repairing the wiring between the ECM and the sensor. - Reddit user r/prius (2021 Prius with 230k miles (Note: newer model, but demonstrates a relevant failure mode)) — P0335 and P3191 codes, no-start condition.
❌ Tried (didn't work) Replaced the crankshaft position sensor.
✅ What actually fixed it The old sensor was found to be physically damaged (scraped/chewed up). This strongly suggested the reluctor wheel on the crankshaft was damaged or had come loose, striking the sensor. The root cause was internal engine damage, not a simple sensor failure.
OEM Part Supersession History
90919-05060→90919-T5005— Standard part update/revision.
Heads up: These parts are generally interchangeable for the Gen 2 Prius. However, 90919-05060 is also listed for some Gen 3 models as a 'No. 2' sensor, which can cause confusion. Always verify by VIN.90919-05070→90919-A5004— Standard part update/revision.
Model Year Variations Within This Range
- 2004-2009 (Gen 2): Uses 1.5L 1NZ-FXE engine. Crank sensor P/N is 90919-05060 (or supersession). Resistance specs are 985-1,600 Ω cold. ECM pins are E4-33 and E4-34.
- 2010 (Gen 3): Uses 1.8L 2ZR-FXE engine. Crank sensor P/N is 90919-05070 (or supersession). Resistance specs are higher (approx. 1,630-2,740 Ω cold). ECM pinouts and connector designations are different from Gen 2.
Helpful Videos


Used OEM Parts in Stock


New Aftermarket Parts Available


The information in this article is provided for general reference and educational purposes only. Vehicle specifications, procedures, and part compatibility can vary by production date, trim level, and region. Always consult your vehicle's factory service manual and verify part numbers before purchasing or performing repairs. Safety-critical components such as airbags, seat belts, and braking systems should be installed by a qualified professional.
- Toyota PRIUS:
- 🎬 Helpful Videos
- 🛍️ Shop This Part
- What's Unique About the 2004-2010 Toyota PRIUS
- Diagnostic Flowchart
- Symptoms You May Notice
- Most Likely Causes
- Rare But Worth Checking
- Diagnosis Steps
- Parts You'll Likely Need
- Related Codes That Often Appear With This One
- Technical Service Bulletins (TSBs) & Recalls
- Platform-Specific Known Issues
- Mechanic-Grade Diagnostic Values
- Scan Tool Commands That Help
- Wiring & Ground Locations
- Real Owner Repair Stories
- OEM Part Supersession History
- Model Year Variations Within This Range
- 🎟️ Get 5% Off