

P0335 on 2005-2012 Toyota Corolla: Crankshaft Sensor Causes and Fixes
P0335 on a 2005-2012 Toyota Corolla most often means the crankshaft position sensor is failing. This can cause a no-start or stalling. Replacing the sensor is a common fix, costing around $30-$60 for an aftermarket part and $90-$150 for an OEM Denso part. It's a DIY-friendly repair for many owners.
- P0335 on a 2005-2012 Corolla usually points to a bad crankshaft position sensor, which is a critical part for engine operation.
- Symptoms are serious and include the engine not starting or stalling unexpectedly. Do not drive the vehicle until it is repaired.
- Before replacing the sensor, check your battery. A weak battery can trigger this code on a Toyota. [TSB #T-TT-0010-10 Rev]
- If you have a Corolla XRS with the 2.4L (2AZ-FE) engine, be aware of a TSB that links this code to a faulty intake camshaft gear, not the crank sensor.
- Replacement is generally straightforward for a DIYer, requiring access through the passenger side wheel well.
What's Unique About the 2005-2012 Toyota COROLLA

For the 2005-2012 Corolla, which spans the 9th and 10th generations, the cause of P0335 can be engine-specific. Models with the 2.4L 2AZ-FE engine (found in XRS trims) are subject to a Technical Service Bulletin (TSB T-SB-0192-12) where an intermittent P0335, especially at idle, is caused by a faulty intake camshaft gear assembly, not the crank sensor itself. [TSB #T-SB-0192-12] For the more common 1.8L engines (1ZZ-FE and 2ZR-FE), the issue is more typically a standard sensor failure due to age and heat, or related wiring issues.
Diagnostic Flowchart
Tap your situation to follow the diagnostic path that matches what you're seeing on this vehicle.
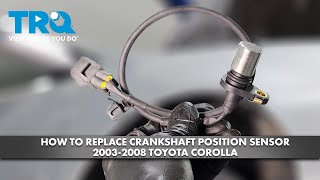
Generation note: This range covers two Corolla generations: the 9th (2005-2008) and 10th (2009-2013). The 9th gen primarily used the 1.8L 1ZZ-FE engine 🎬 Watch: Step-by-step sensor replacement for 2003-2008 Corolla models., while the 10th gen used the 1.8L 2ZR-FE. Both generations offered an optional 2.4L 2AZ-FE engine in the XRS trim, which has a specific TSB related to this code. [TSB #T-SB-0192-12]
Symptoms You May Notice
- Engine will crank but not start
- Extended crank time, especially on first start of the day.
- Intermittent starting issues
- Engine stalling, sometimes unexpectedly while driving or at idle.
- Rough idling or engine misfires
- Reduced fuel economy
- Check Engine Light is on.
- Replacing the camshaft position sensor instead of the crankshaft position sensor.
- Replacing the starter motor when a no-start is caused by the lack of a crank signal.
- On 2AZ-FE engines, repeatedly replacing the crankshaft sensor when the actual issue is the intake camshaft gear per TSB T-SB-0192-12.
- Using cheap aftermarket sensors that fail quickly or are dead on arrival, leading to repeat codes. Forum users strongly recommend using OEM Denso parts.
Most Likely Causes

- Failed Crankshaft Position Sensor 🔴 High Probability Over time, heat and vibration cause the sensor's internal electronics to fail. This is a common failure point on many vehicles as they age. One owner of a 2009 Corolla noted the original sensor failed after 17 years and 141,000 miles.
How to confirm: Test the sensor's resistance with a multimeter. For the 2AZ-FE engine, the resistance should be 985-1,600 Ohms when cold and 1,265-1,890 Ohms when hot. You can also monitor the RPM signal on a scan tool while cranking; a reading of 0 RPM points to a bad sensor or circuit issue.
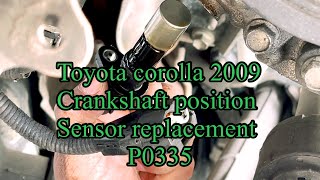
Typical fix: Replace the crankshaft position sensor. On most Corolla engines, this involves removing the front passenger wheel and a plastic splash shield for access. The sensor is held by a single 10mm bolt. 🎬 See this walkthrough for replacing the sensor on 2009-2013 models.
Est. part cost: $30 - $150 - Damaged Wiring or Connector 🟡 Medium Probability The sensor's location low on the engine block exposes its wiring to road debris, oil leaks, and heat from the exhaust or AC compressor, which can cause corrosion or breaks in the circuit.
How to confirm: Visually inspect the wiring harness from the sensor to the ECM for any signs of damage, melting, or corrosion at the connector pins. Perform a continuity test on the wires if a visual inspection is inconclusive. Check for reference voltage (typically 5V) and ground at the connector with the key on.
Typical fix: Repair the damaged section of wire or replace the connector pigtail. Ensure the wiring is properly secured away from heat sources.
Est. part cost: $10 - $40 - Low Battery Voltage ⚪ Low Probability A Toyota TSB notes that low battery voltage can cause inconsistent crankshaft rotational speed during startup, which the ECM may misinterpret as a sensor fault, triggering a P0335 code. [TSB #T-TT-0010-10 Rev]
How to confirm: Test the battery voltage with a multimeter. A reading below 12.4V at rest suggests a weak battery. Also, check the charging system to ensure the alternator is functioning correctly.
Typical fix: Charge or replace the battery. Diagnose the charging system if the battery is not being properly charged.
Est. part cost: $100 - $250
Rare But Worth Checking
- Faulty Intake Camshaft Gear Assembly (2AZ-FE Engine Only): A specific Toyota TSB (T-SB-0192-12) points to this as a cause for intermittent P0335 on 2009-2010 Corollas with the 2.4L 2AZ-FE engine. The TSB applies when the code is stored near idle speed at normal operating temperature. [TSB #T-SB-0192-12] The repair involves replacing the camshaft timing gear assembly with an improved part.
- Damaged Reluctor Ring: The reluctor ring (or sensor plate) on the crankshaft has teeth that the sensor reads. If this ring is damaged, cracked, or has broken teeth, it will send an erratic signal, triggering the code. This is rare and typically requires significant engine disassembly to inspect and repair.
- Faulty Engine Control Module (ECM): This is very rare. The ECM itself can fail, but all other possibilities (sensor, wiring, battery, reluctor ring) should be exhaustively ruled out before considering ECM replacement.
Diagnosis Steps

- Check for other stored DTCs to see if other codes are present that might provide more clues.
- Check battery voltage. Ensure the battery is fully charged (above 12.4V) and the charging system is working correctly. [TSB #T-TT-0010-10 Rev]
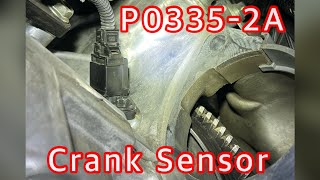
- Use a scan tool to monitor engine RPM while cranking. 🎬 Watch: A helpful breakdown of the P0335 circuit malfunction code. If the RPM reads 0, it strongly suggests a problem with the crank sensor or its circuit.
- Visually inspect the crankshaft position sensor connector and wiring harness for any obvious damage, corrosion, or loose connections. Pay close attention to areas near heat sources like the exhaust or AC compressor.
- If wiring appears okay, disconnect the sensor and test its internal resistance using a multimeter. For the 2AZ-FE engine, spec is 985-1,600 Ohms (cold). For the 1ZZ-FE, the spec is similar. For 2ZR-FE engines, owner-reported values for a good sensor are higher, around 2100-2700 Ohms. Refer to a service manual for your specific year and engine.
- If the sensor tests good, check for reference voltage (typically 5V) and ground at the sensor connector with the key on.
- If the circuit is good and the sensor tests good, but the problem persists, inspect the reluctor ring for damage (this may require significant disassembly).
- For 2.4L 2AZ-FE engines, if the P0335 is intermittent and occurs at idle, investigate the possibility of a faulty intake camshaft gear assembly as described in TSB T-SB-0192-12. [TSB #T-SB-0192-12]
Parts You'll Likely Need
- Crankshaft Position Sensor
(OEM #90919-A5004 (for 2ZR-FE), 90919-05042 (for 1ZZ-FE))— This is the most frequent point of failure for this code. The sensor's electronics fail from age and heat cycles, leading to a loss of signal. Owners strongly recommend using an OEM Denso part to avoid premature failure of aftermarket alternatives.
Trusted brands: Denso (OEM), NTK, Carquest Premium
OEM price range: $90-$150
Aftermarket price range: $30-$60
Related Codes That Often Appear With This One
- P0340 — P0340 is for the Camshaft Position Sensor. Since the crank and cam sensors work together for engine timing, a fault in one can sometimes trigger a code for the other, especially during cranking with low battery voltage. [TSB #T-TT-0010-10 Rev]
Technical Service Bulletins (TSBs) & Recalls
- T-SB-0192-12: Intermittent MIL 'ON' DTC P0335 on 2AZ-FE engines due to intake camshaft gear assembly.
- T-TT-0010-10 Rev: Low battery voltage contributing to P0335 and/or P0340.
Platform-Specific Known Issues
- TSB T-SB-0192-12: Intake Camshaft Gear Fault (2.4L 2AZ-FE): Some 2009–2010 Corolla models with the 2.4L 2AZ-FE engine may exhibit an intermittent MIL 'ON' with DTC P0335 stored, particularly at idle. This is caused by a faulty intake camshaft gear assembly, which was later improved. The fix is to replace the gear assembly, not the crank sensor. [TSB #T-SB-0192-12]
- TSB T-TT-0010-10 Rev: Low Battery Voltage: Low battery voltage can cause a P0335 code due to inconsistent engine cranking speed, which the ECM may misinterpret as a sensor fault. This is a simple check that should be performed early in the diagnosis.
- Owner Experience: Intermittent No-Start: A 2009 Corolla owner on YouTube described a classic failure pattern: an intermittent no-start that happened once, then not again for six months, before slowly becoming more frequent until the car wouldn't start at all. Replacing the sensor fixed the issue.
- Owner Experience: Crank-No-Start Solved: On the Car Talk Community forum, a 2006 Corolla owner reported the car would crank but not attempt to start, throwing code P0335. After initially suspecting other issues, they confirmed that 'I replaced the crankshaft position sensor and it solved the problem. ... Replaced the sensor and it fired right up and ran perfect again.'
Mechanic-Grade Diagnostic Values
- Crankshaft Position Sensor Resistance (2AZ-FE Engine) — expected: 985 to 1,600 Ω (Cold), 1,265 to 1,890 Ω (Hot). Failure: A resistance reading outside of this range indicates a faulty sensor.
- Crankshaft Position Sensor Resistance (1ZZ-FE Engine) — expected: 1,630 to 2,740 Ω (Cold), 2,065 to 3,225 Ω (Hot). Failure: A resistance reading outside of this range suggests a faulty sensor. Note: This spec is from a similar Toyota engine and serves as a strong reference.
- Crankshaft Position Sensor AC Voltage Output (Inductive Type) — expected: Fluctuating between 0.4 and 1.2 Volts AC while cranking the engine.. Failure: A reading of 0V AC while cranking points to a dead sensor or open circuit.
- ECM Freeze Frame Data for DTC Set Conditions — expected: Data will show engine state at the moment of the fault. For P0335, the ECM may look for fewer than 132 or more than 174 signal pulses during a specific engine revolution check.. Failure: This data doesn't indicate failure itself, but provides critical context (engine temp, speed, etc.) for when the signal was lost.
Scan Tool Commands That Help
- Toyota Techstream: Data List Navigation: DIAGNOSIS / ENHANCED OBD II / DATA LIST / PRIMARY / ENGINE SPD — This is the most direct way to confirm if the ECM is receiving an engine speed signal from the crankshaft sensor. While cranking, if 'ENGINE SPD' remains at 0, it confirms a total loss of signal from the sensor or its circuit.
Wiring & Ground Locations

- ECM (Engine Control Module) - 2009-2012 1.8L (2ZR-FE) — Located in the engine bay, on the passenger side, mounted near the air cleaner assembly box.. Knowing the ECM's location is essential for testing the crankshaft sensor circuit continuity from the sensor connector all the way to the module's pins.
- ECU (Engine Control Unit) - 2005-2008 (e.g., 2006 XRS) — Located inside the cabin, behind the glove box.. The different location on earlier models affects diagnostic strategy, as wiring must be traced into the cabin rather than just within the engine bay.
- Crank Sensor ECU Pins (2009-2014 Corolla) — In a video demonstration, the black and white wires from the crankshaft position sensor were traced to pins 5 and 6 on one of the main ECU connectors.. This allows for precise pin-to-pin testing of the wiring harness to rule out an open or short between the sensor and the computer, which is a critical step before condemning the ECM.
Real Owner Repair Stories
- YouTube channel 'jimsgaragetoys' (2009 Toyota Corolla S (2ZR-FE engine), 141,000 miles) — Intermittent crank-no-start that occurred once, disappeared for six months, then gradually became more frequent until the car would not start at all.
✅ What actually fixed it Replacing the original crankshaft position sensor with a new OEM Denso sensor (Part # 90919-A5004) resolved the no-start condition immediately. - Reddit user on r/cars (2009 Toyota Corolla) — Recurring P0335 code and extended crank time, even after replacing the sensor.
❌ Tried (didn't work) Replacing the crankshaft sensor multiple times with what were likely aftermarket parts.
✅ What actually fixed it The thread did not have a final confirmation from the original poster, but the overwhelming consensus from other technicians and owners was that the problem was either the use of non-OEM sensors (which are known to fail or be DOA for this application) or a fault in the wiring/connector that was being overlooked. The key takeaway was to use a genuine Denso/Toyota part and thoroughly inspect the circuit.
"I Checked Everything" — The Actual Cause
- A common pattern for this code (where the electrical circuit tests fine) is a mechanical issue fooling the sensor. On 2.4L 2AZ-FE engines, the sensor and wiring can be perfect, but a faulty intake camshaft gear (per TSB T-SB-0192-12) creates a timing discrepancy that the ECM interprets as a crank sensor signal fault. Another example is a slightly bent or damaged tooth on the crankshaft reluctor ring, often caused by a previous transmission or clutch repair, which creates an inconsistent signal that the sensor correctly reports as faulty. [14, TSB #T-SB-0192-12]
When the Usual Fixes Don't Work
- While a failed sensor is the most common cause, numerous owner accounts stress the importance of not overlooking secondary causes. In one case, a user replaced the sensor multiple times with aftermarket parts to no avail, pointing to either a persistent wiring issue or the incompatibility/poor quality of non-OEM sensors for this specific application. In another documented scenario on a different vehicle, a P0335 code that appeared after a transmission repair was ultimately traced to a single bent tooth on the flywheel's reluctor ring, a mechanical issue that no amount of electrical part replacement could fix.
OEM Part Supersession History
90919-05070→90919-A5004— Part has been updated by the manufacturer.
Heads up: Applies to 2ZR-FE engines (typically 2009+). 90919-A5004 is the current recommended OEM replacement.90919-05030 / 90080-19013→90919-05042 (Toyota) or Denso 229600-0170— Part has been updated by the manufacturer.
Heads up: Applies to 1ZZ-FE engines (typically 2005-2008). Using the wrong sensor between engine types will result in failure.
Model Year Variations Within This Range
- 2005-2008 vs 2009-2012: The primary 1.8L engine changed from the 1ZZ-FE to the 2ZR-FE. These engines use different crankshaft position sensors with different part numbers and resistance specifications. The ECM location also changed, moving from behind the glovebox in many earlier models to the engine bay in later models.
- 2009-2010 (XRS Trim): Models with the 2.4L 2AZ-FE engine are subject to TSB T-SB-0192-12, where an intermittent P0335 is often caused by the intake camshaft gear assembly, a problem not seen on the 1.8L engines. [TSB #T-SB-0192-12]
Helpful Videos
We Have This Part in Stock


The information in this article is provided for general reference and educational purposes only. Vehicle specifications, procedures, and part compatibility can vary by production date, trim level, and region. Always consult your vehicle's factory service manual and verify part numbers before purchasing or performing repairs. Safety-critical components such as airbags, seat belts, and braking systems should be installed by a qualified professional.
- Toyota COROLLA:
- 🎬 Helpful Videos
- 🛍️ Shop This Part
- What's Unique About the 2005-2012 Toyota COROLLA
- Diagnostic Flowchart
- Symptoms You May Notice
- Most Likely Causes
- Rare But Worth Checking
- Diagnosis Steps
- Parts You'll Likely Need
- Related Codes That Often Appear With This One
- Technical Service Bulletins (TSBs) & Recalls
- Platform-Specific Known Issues
- Mechanic-Grade Diagnostic Values
- Scan Tool Commands That Help
- Wiring & Ground Locations
- Real Owner Repair Stories
- "I Checked Everything" — The Actual Cause
- When the Usual Fixes Don't Work
- OEM Part Supersession History
- Model Year Variations Within This Range
- 🎟️ Get 5% Off