

P0335 on 2000-2007 Toyota Avalon: Crankshaft Sensor Causes and Fixes
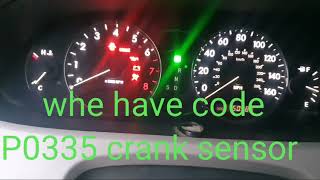
P0335 on a Toyota Avalon most often means a failed crankshaft position sensor. On 2000-2004 models, it's a simple DIY fix (~$80 for an OEM sensor). On 2005-2007 models, the sensor is behind the A/C compressor, making replacement much more difficult and costly.
- P0335 means your Avalon's engine computer has lost the signal from the crankshaft sensor, which can cause a no-start or sudden stalling.
- Before replacing parts, check that your battery is healthy, as low voltage is a known cause for this code on Toyotas. [Bulletin #T-TT-0010-10 Rev]
- The repair difficulty varies greatly by year: it's a simple job on 2000-2004 models but requires removing the A/C compressor on 2005-2007 models.
- Always inspect the wiring to the sensor for damage before replacing the sensor itself, as this is a common point of failure.
- Use a quality replacement sensor, preferably from the OEM supplier Denso, to ensure a lasting repair.
What's Unique About the 2000-2007 Toyota AVALON
The 2000-2007 Avalon spans two distinct generations, and the repair for a P0335 is drastically different between them. The earlier 2000-2004 model (with the 1MZ-FE engine) has an easily accessible sensor near the crankshaft pulley, making for a straightforward repair. In contrast, the 2005-2007 model (with the 2GR-FE engine) has the sensor buried behind the A/C compressor, turning a simple sensor swap into a much more labor-intensive job.
Diagnostic Flowchart
Tap your situation to follow the diagnostic path that matches what you're seeing on this vehicle.
Generation note: This guide covers the second generation (2000-2004, XX20) with the 3.0L 1MZ-FE engine and the third generation (2005-2007, XX30) with the 3.5L 2GR-FE engine. The primary difference for this code is the location and replacement difficulty of the crankshaft position sensor.
Symptoms You May Notice
- Engine cranks but will not start
- Engine stalls unexpectedly, sometimes when warm, coming to a stop, or during turns
- Check Engine Light is on
- Rough or unstable idle, engine may feel shaky
- Engine hesitation, misfires, or loss of power, especially under load
- Noticeable decrease in fuel efficiency
- Jerky or uneven acceleration
- Replacing the camshaft position sensor instead of the crankshaft sensor. While they work together, P0335 specifically points to the crankshaft sensor circuit.
- Replacing the starter motor. While a no-start can be a starter issue, the presence of code P0335 strongly indicates a problem in the crankshaft sensor system.
- Replacing the fuel pump. A no-start condition can be caused by a fuel pump, but this should be diagnosed by checking fuel pressure, not just assumed because of the no-start symptom.
Most Likely Causes
- Failed Crankshaft Position Sensor 🔴 High Probability Heat, vibration, and oil contamination over many years cause the sensor's internal electronics to fail. This is the most common point of failure for this code. Aftermarket sensors are also known to fail prematurely, making an OEM/Denso part highly recommended.
How to confirm: Use a scan tool to check for an 'Engine Speed' or 'RPM' signal while cranking. If the reading is zero, the sensor or its circuit is faulty. A mechanic can also test the sensor's output signal with an oscilloscope for a definitive diagnosis or measure its internal resistance.
Typical fix: Replace the crankshaft position sensor and its O-ring. Using a Denso (OEM) part is strongly advised to avoid repeat failure.
Est. part cost: $70-$110 for OEM, $20-$60 for aftermarket - Damaged Wiring or Connector 🟡 Medium Probability The wiring harness can become brittle and crack from engine heat, or connections can corrode. On the 2005-2007 models, the harness is in a tight spot near the A/C compressor and exhaust, making it susceptible to heat damage and chafing. Forum users and repair videos frequently report finding melted or frayed wires near 🎬 See how to find and repair common sensor wiring issues the sensor connector.
How to confirm: Visually inspect the wiring leading to the sensor for any signs of melting, chafing, or broken wires. Wiggle the harness while the engine is running (if possible) to see if it causes stalling. Check the connector for corrosion or loose pins.
Typical fix: Repair the damaged section of wire or replace the connector pigtail.
Est. part cost: $10-$30 for a pigtail connector - Low Battery Voltage ⚪ Low Probability A weak or failing battery can cause inconsistent voltage to engine sensors during cranking, which the ECU may interpret as a sensor fault. [Bulletin #T-TT-0010-10 Rev]
How to confirm: Test the battery's voltage and cranking amps. A healthy battery should read above 12.4 volts at rest and not drop below 10 volts 🎬 Watch this before you buy a new crankshaft sensor during cranking.
Typical fix: Charge or replace the vehicle's battery.
Est. part cost: $150-$250 for a new battery
Rare But Worth Checking
- Damaged Reluctor Ring: The reluctor ring (or tone wheel) on the crankshaft has teeth that the sensor reads. If teeth are broken, bent, or covered in metallic debris, it can cause an erratic signal. This is uncommon but should be considered if a new sensor and good wiring don't solve the problem.
- Faulty Engine Control Unit (ECU): In very rare cases, the ECU itself can fail. This should only be considered after all other possibilities (sensor, wiring, battery, reluctor ring) have been exhaustively ruled out.
Diagnosis Steps
- Read the code with an OBD-II scanner to confirm P0335 is present. Check for an RPM reading on the scanner's live data screen while cranking the engine. A reading of '0' strongly points to a failed sensor or circuit.
- Check battery voltage. Ensure the battery is fully charged and in good health before proceeding. [Bulletin #T-TT-0010-10 Rev]
- Visually inspect the crankshaft position sensor wiring and connector for obvious damage, melting, or corrosion. Pay close attention to the harness section near hot engine components.
- For 2000-2004 models: The sensor is accessible after removing the passenger-side wheel and splash shield. Given the high failure rate and low cost, replacing the sensor with a DENSO part is often the most efficient next step.
- For 2005-2007 models: The sensor is very difficult to access. Before committing to the labor-intensive replacement, a mechanic may use an oscilloscope to test the sensor signal at the ECU connector to confirm the sensor is indeed the fault. Some experienced DIYers have managed to replace it by unbolting the A/C compressor and shifting it aside without 🎬 Watch: See the 3.5L sensor location behind the A/C compressor disconnecting the refrigerant lines, which saves time and money.
- If a new sensor does not fix the issue, re-inspect the wiring for intermittent breaks. Check for continuity between the sensor connector and the ECU pins.
- If all else fails, inspect the reluctor ring for damage (this is a labor-intensive step). As a final resort, the ECU may need to be tested by a specialist.
Parts You'll Likely Need
- Crankshaft Position Sensor (2000-2004)
(OEM #90080-19014)— This is the correct sensor for the 1MZ-FE engine in the second-generation Avalon and is the most common failure part for P0335. This part number supersedes 90919-05026.
Trusted brands: Denso (OEM supplier), NTK/NGK, Bosch
OEM price range: $70-$90
Aftermarket price range: $20-$50 - Crankshaft Position Sensor (2005-2007)
(OEM #90919-A5003)— This is the correct sensor for the 2GR-FE engine in the third-generation Avalon. It is the most likely part to have failed. This part number supersedes 90919-05057.
Trusted brands: Denso (OEM supplier), NTK/NGK, Delphi
OEM price range: $75-$110
Aftermarket price range: $30-$60
Related Codes That Often Appear With This One
- P0340 — This code is for the Camshaft Position Sensor. The ECU uses both crank and cam signals to verify engine timing. A fault in the crank signal can sometimes cause the ECU to flag the cam signal as well, especially during cranking. [Bulletin #T-TT-0010-10 Rev]
- P0300, P0301-P0306 — These are random or specific cylinder misfire codes. Without a proper crankshaft signal, the ECU cannot time the ignition spark correctly, leading to misfires.
Technical Service Bulletins (TSBs) & Recalls
- T-TT-0010-10 Rev: Notes that low battery voltage can cause a P0335 code due to inconsistent crankshaft speed during startup.
- EG003-06 (for 2AZ-FE engine): While not for the Avalon's V6 engines, this TSB shows a pattern of Toyota addressing intermittent P0335 codes on other models by releasing improved camshaft gear assemblies, indicating potential design sensitivities in the valve timing system that can trigger this code.
Platform-Specific Known Issues
- On 2005-2007 models, the sensor is located behind the A/C compressor, requiring its removal for access. This significantly increases labor time and cost compared to the earlier generation. Many owners report that the compressor can be unbolted and carefully moved aside without discharging the A/C system, saving considerable expense.
- Wiring harness damage from heat and age is a common secondary cause, especially on the 2005-2007 models where the harness is in a confined, high-heat area near the exhaust manifold.
Mechanic-Grade Diagnostic Values
- Crankshaft Sensor Resistance (2GR-FE Engine) — expected: Cold (-10 to 50°C / 14 to 122°F): 1630 - 2740 Ohms. Hot (50 to 100°C / 122 to 212°F): 2065 - 3225 Ohms.. Failure: A resistance reading outside of the specified range for the sensor's temperature indicates a faulty sensor.
- Crankshaft Sensor Circuit Continuity (2GR-FE Engine) — expected: Less than 1 Ohm between sensor connector pin 1 and ECM pin B30-110 (NE+). Less than 1 Ohm between sensor connector pin 2 and ECM pin B30-111 (NE-).. Failure: Resistance higher than 1 Ohm indicates a break or high resistance in the wiring harness.
- Crankshaft Sensor Circuit to Ground (2GR-FE Engine) — expected: 10 kOhms or higher between sensor connector pins (NE+, NE-) and the vehicle body ground.. Failure: Resistance less than 10 kOhms indicates a short to ground in the wiring harness.
- Live Data 'Engine Speed' (All Engines) — expected: A non-zero RPM value that increases while cranking the engine.. Failure: A value of '0' RPM while the engine is cranking strongly suggests a complete failure of the crankshaft position sensor or its circuit.
Scan Tool Commands That Help
- Toyota Techstream: Data List -> Engine Speed (RPM) — This is the first and most crucial diagnostic step after reading the P0335 code. Use this while cranking the engine. If the RPM reads '0', it confirms the ECU is not receiving a signal from the crank sensor or its circuit, immediately focusing the diagnosis.
- Toyota Techstream: Freeze Frame Data — Use this to review the engine conditions (coolant temp, engine speed, load) at the exact moment the P0335 code was triggered. This can provide clues, for example, if the fault only occurs when the engine is hot or at idle.
Wiring & Ground Locations
- NE+ and NE- wires — These are the two wires in the crankshaft position sensor connector. On the 2GR-FE (2005-2007), they run from the sensor connector (B46) to the ECM connector (B30) at pins 110 (NE+) and 111 (NE-).. These are the specific wires that carry the sensor's signal. Testing for continuity and shorts on these exact wires is the definitive way to rule out a wiring problem between the sensor and the computer.
- Ground Point EC — On the 1MZ-FE engine (2000-2004), this ground point is located on the rear side of the surge tank (intake manifold).. Poor engine-related ground connections can cause erratic sensor behavior and trigger false codes. While not directly for the crank sensor, ensuring all engine grounds are clean and tight is a critical step in diagnosing electrical issues.
- Harness Chafe Point (2GR-FE) — The wiring harness leading to the crankshaft position sensor on the 2005-2007 models is routed in a tight, high-heat area near the A/C compressor and exhaust.. This area is a common failure point where wires can melt or chafe, causing an intermittent or total loss of the crank signal. A visual and physical inspection of this specific harness section is critical.
Real Owner Repair Stories
- YouTube video by 'Pakistan Car Doctor' (2006 Toyota Avalon (3.5L 2GR-FE)) — Crank but no start, P0335 code present. Scan tool showed 0 RPM during cranking.
❌ Tried (didn't work) Initial diagnosis pointed towards a bad sensor, but the mechanic decided to check the wiring first due to the difficult sensor location and common wiring failures on this model.
✅ What actually fixed it A broken wire was found in the harness near the sensor connector. Wiggling the harness caused the car to start intermittently. Repairing the broken wire resolved the P0335 code and the no-start condition. - YouTube video by 'Auto technician' (Toyota Camry (shares engine architecture)) — Intermittent Check Engine Light with P0335. Engine would stall when the sensor wiring was wiggled.
❌ Tried (didn't work) The sensor itself was not the primary suspect due to the immediate reaction from moving the wires.
✅ What actually fixed it The mechanic opened the harness boot at the sensor connector and found one of the wires was cut/broken internally. Splicing in a new piece of wire and re-soldering the connection provided a permanent fix.
OEM Part Supersession History
90919-05026→90080-19014— Standard part update/revision by Toyota.
Heads up: Applies to the 2000-2004 Avalon with the 1MZ-FE engine. While the old part number is still widely referenced by aftermarket suppliers, the new number is the correct one to order from a Toyota dealer.90919-05057→90919-A5003— Standard part update/revision by Toyota.
Heads up: Applies to the 2005-2007 Avalon with the 2GR-FE engine. The new part number is the current OEM replacement.
Helpful Videos



We Have This Part in Stock


The information in this article is provided for general reference and educational purposes only. Vehicle specifications, procedures, and part compatibility can vary by production date, trim level, and region. Always consult your vehicle's factory service manual and verify part numbers before purchasing or performing repairs. Safety-critical components such as airbags, seat belts, and braking systems should be installed by a qualified professional.
- Toyota AVALON:
- 🎬 Helpful Videos
- 🛍️ Shop This Part
- What's Unique About the 2000-2007 Toyota AVALON
- Diagnostic Flowchart
- Symptoms You May Notice
- Most Likely Causes
- Rare But Worth Checking
- Diagnosis Steps
- Parts You'll Likely Need
- Related Codes That Often Appear With This One
- Technical Service Bulletins (TSBs) & Recalls
- Platform-Specific Known Issues
- Mechanic-Grade Diagnostic Values
- Scan Tool Commands That Help
- Wiring & Ground Locations
- Real Owner Repair Stories
- OEM Part Supersession History
- 🎟️ Get 5% Off