

P0335 on 2011-2015 Chevrolet Volt: Crank Sensor, Grounds, and Fixes
On a 2011-2015 Chevy Volt, P0335 is often more than a bad crankshaft sensor. A key cause is a poor ground connection at the drive unit or engine block, as noted in GM Technical Service Bulletin #PIP4880F. Before replacing the sensor, inspect grounds G106 and G113, as a loose or corroded connection is a very common and vehicle-specific cause.
- For a 2011-2015 Volt, P0335 is not a straightforward sensor replacement. **Check your grounds first.**
- GM Technical Service Bulletin #PIP4880F is essential. It points to poor grounds at G106 (engine block) and G113 (drive unit) as a primary cause.
- Note which module stores the code. If it's only in the Power Inverter Module (HPCM), the TSB's ground-check procedure is the first step.
- Do not drive the vehicle. A stalling engine is a significant safety hazard.
- Due to the high-voltage systems in the Volt, professional service is recommended if you are not comfortable working on complex electrical systems.
What's Unique About the 2011-2015 Chevrolet VOLT
The Chevrolet Volt is not a typical car; it's a range-extended electric vehicle. The crankshaft position sensor's data is critical for both the gas engine (ECM) and the electric drive system (Power Inverter Module, or HPCM). A specific GM Technical Service Bulletin (TSB #PIP4880F) points out that this code can appear solely in the HPCM due to poor ground connections, a unique issue for this platform. This means a simple sensor swap might not fix the problem, and diagnosis must include checking specific ground points (G106, G113) and module software before condemning the sensor.
🎬 Watch: Why you shouldn't replace the sensor without testing first.Diagnostic Flowchart
Tap your situation to follow the diagnostic path that matches what you're seeing on this vehicle.
Symptoms You May Notice
- Check Engine Light is on
- Engine fails to start or has a long crank time
- Engine stalls unexpectedly, especially when transitioning between gas and electric
- Rough idling or hesitation from the gas engine
- Reduced power or inability to use the gas range extender
- RPM gauge drops to zero while the engine is still running
- Immediately replacing the crankshaft position sensor without first checking the ground connections (G106 and G113) as specified in TSB #PIP4880F.
- Replacing the sensor but failing to perform the mandatory Crankshaft Variation Relearn procedure, leading to persistent issues.
Most Likely Causes
- Poor Ground Connection 🔴 High Probability Documented in GM TSB #PIP4880F, a poor ground at G113 (drive unit case) or G106 (engine block) can cause this code to set in the Power Inverter Module (HPCM). The TSB specifically notes the G113 bolt hole may be improperly drilled or have debris, preventing the bolt from fully seating and securing the ground eyelet.
How to confirm: Inspect ground locations G113 and G106. Ensure they are clean, tight, and free of corrosion. For G113, remove the bolt and verify it is not bottoming out in the hole before the eyelet is tight. Clean the contact surfaces with a wire brush.
Typical fix: Clean the ground contact surfaces and tighten the bolts to the correct torque. If the G113 bolt bottoms out, it must be replaced with a slightly shorter M8x1.25x20mm bolt (GM Part # 11515758) to achieve proper clamping force, as specified in the TSB.
Est. part cost: $0-$15 - Faulty Crankshaft Position Sensor 🟡 Medium Probability
How to confirm: After confirming grounds are good, test the sensor's output with an oscilloscope or multimeter. A visual inspection for physical damage or oil contamination is also recommended.
Typical fix: Replace the crankshaft position sensor and perform the crankshaft variation relearn procedure.
Est. part cost: $25-$75 - Wiring or Connector Issue 🟡 Medium Probability The wiring harness to the sensor can be susceptible to heat damage or chafing, particularly near the engine block and transmission.
How to confirm: Visually inspect the wiring harness between the CKP sensor and the control modules for any signs of damage, chafing, melting, or corrosion. Check for a secure connection and clean contacts at the sensor and module connectors.
Typical fix: Repair the damaged section of wiring or replace the connector pigtail.
Est. part cost: $15-$50 - Power Inverter Module (HPCM) Software Issue ⚪ Low Probability Specific to 2013-2014 models as per TSB #PIP4880F. If the code is stored only in the HPCM and grounds are good, a software update may be required.
How to confirm: A GM dealer or qualified shop must check the current software version of the HPCM and compare it to the latest available updates in the TIS-2-Web system.
Typical fix: Update the T6 Power Inverter Module (HPCM) with the latest software.
Est. part cost: $0-$200 (dealer labor)
Rare But Worth Checking
- Failing 12V Battery: A weak or failing 12V auxiliary battery can cause a host of random electrical issues and fault codes in modern, computer-heavy vehicles like the Volt. This is a common first suggestion from other owners for any electrical gremlin.
- Damaged Reluctor Ring: The ring on the crankshaft that the sensor reads can be damaged, have broken teeth, or have a sheared keyway, though this is uncommon.
- Faulty Engine Control Module (ECM) or Power Inverter Module (HPCM): This is a last resort. The control module itself can fail, but this should only be considered after all other possibilities have been exhausted.
Diagnosis Steps
- Scan for codes in ALL modules. Note if P0335 is present in the ECM, the HPCM, or both. This is critical for the Volt.
- If the code is ONLY in the HPCM (for 2011, 2012, 2015 models), proceed to step 3. If it's in both, or if the code is current, proceed to step 4. For 2013-2014 models with the code only in HPCM, consult a dealer about a software update after checking grounds.
- Inspect Grounds (TSB #PIP4880F): Locate and inspect ground G106 on the top left rear of the engine and G113 on the rear of the transmission assembly. Disassemble, clean all contact surfaces until shiny, and reassemble securely. Confirm the G113 bolt is not bottomed out. Repair as needed. Clear codes and test drive.
- Inspect Sensor and Wiring: Visually inspect the crankshaft position sensor and its wiring harness for obvious damage, loose connections, or oil contamination.
- Test the Sensor Circuit: Using a multimeter or oscilloscope, back-probe the ECM connector. Check for 5V reference, good ground (low reference), and a clean square wave signal from the sensor while cranking the engine. (See 'Specific Diagnostic Values' for pin numbers).
- Check Live Data: Using a scan tool, monitor engine RPM while cranking. A reading of 0 RPM while the engine is turning strongly indicates a fault in the CKP sensor circuit. A healthy reading should be between 100-500 RPM.
- Check the 12V Battery: Test the health of the 12V auxiliary battery to rule out low-voltage issues that can cause spurious codes.
- Replace the Sensor: If grounds are good and tests point to a faulty sensor, replace the crankshaft position sensor with a quality OEM part like ACDelco (PN 25195551).
- Perform Crankshaft Variation Relearn: After replacement, a crankshaft position variation relearn procedure MUST be performed. This requires a professional scan tool (like GM GDS2) with GM-specific software. Failure to do so may result in rough running, misfires, or a P1336 code. 🎬 Watch: How to perform the mandatory crankshaft variation relearn procedure.
- If the problem persists, further diagnosis of the wiring harness for intermittent shorts/opens or potential module failure is required.
Parts You'll Likely Need
- Crankshaft Position Sensor
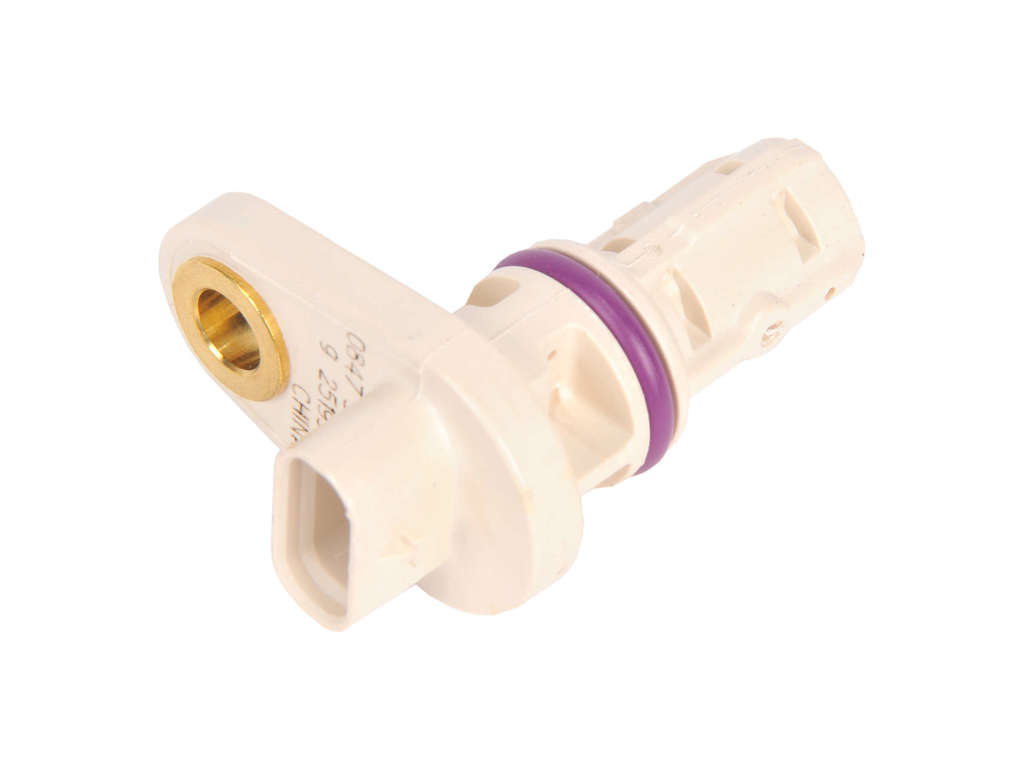
(OEM #25195551)— This sensor is a common failure point for P0335 after grounds and wiring have been ruled out. This part number fits the Volt, ELR, Cruze, Sonic, and Encore with the 1.4L engine. It supersedes the older part number 55571994.
Trusted brands: ACDelco (GM Original Equipment), Delphi, Bosch
OEM price range: $40-$60
Aftermarket price range: $25-$45
Related Codes That Often Appear With This One
- P0336 — P0336 (Crankshaft Position Sensor 'A' Circuit Range/Performance) is a related code often triggered by the same underlying electrical issues, and is mentioned alongside P0335 in the relevant TSB.
- P1336 — This code can appear if the Crankshaft Variation Relearn procedure has not been performed or was unsuccessful after a sensor or ECM replacement.
Technical Service Bulletins (TSBs) & Recalls
- PIP4880F: Addresses DTC P0335 and/or P0336 stored in the Power Inverter Module (HPCM), advising technicians to check specific ground locations or perform a software update before replacing parts.
Platform-Specific Known Issues
- TSB #PIP4880F Grounding Issue: This bulletin is the most critical issue for this code on this vehicle. It states that for a P0335 code stored only in the Power Inverter Module (HPCM), the primary suspects are poor grounds at G106 and G113, or a software issue (on 2013-2014 models), not necessarily a bad sensor.
Mechanic-Grade Diagnostic Values
- Scan Tool Engine RPM during Crank — expected: 100-500 RPM. Failure: A reading of 0 RPM while the engine is physically cranking.
- CKP Sensor 5V Reference Voltage at ECM Connector (Key On) — expected: ~5.0 Volts DC. Failure: 0V or significantly lower voltage indicates a wiring or ECM issue.
- CKP Sensor Low Reference at ECM Connector — expected: Near 0V DC, with good continuity to ground.. Failure: Voltage present or high resistance to ground indicates a wiring issue.
- CKP Sensor Signal (Oscilloscope) — expected: Clean square wave pattern that changes frequency with engine speed.. Failure: Missing, erratic, or malformed waveform.
Scan Tool Commands That Help
- GDS2 (Global Diagnostic System 2): Crankshaft Position Variation Relearn — This is a mandatory procedure after replacing the crankshaft position sensor or the ECM. It calibrates the new sensor to the minor variations in the crankshaft reluctor ring.
- SPS (Service Programming System) via TIS2Web: HPCM Programming/Update — Specifically for 2013-2014 models where P0335 is stored only in the HPCM and grounds are confirmed good, as per TSB #PIP4880F.
Wiring & Ground Locations
- G106 — Top left rear of the engine block.. This is a primary engine ground referenced in TSB #PIP4880F. A poor connection here can cause erratic signals and trigger P0335 in the HPCM.
- G113 — Rear of the transmission assembly/drive unit case.. This is the second critical ground in TSB #PIP4880F. The TSB notes the bolt hole may be improperly drilled, preventing a tight connection and causing the code.
- K20 ECM Connector X2 (2012 Volt) — Engine Control Module, Connector X2.. Provides direct test points for the CKP circuit. Pin 56: Signal (L-GN wire), Pin 36: 5V Reference (VT/L-BU wire), Pin 20: Low Reference (BK/VT wire).
- K20 ECM Connector X1 (2011 Volt) — Engine Control Module, Connector X1.. Provides a direct test point for the CKP signal wire. Pin 48: Signal (L-GN wire). Note that the reference and ground pins are on a different connector for this model year, highlighting a design change.
Real Owner Repair Stories
- DF Kit Car Forum user (Vehicle with GM 1.4L engine (same family as Volt)) — Persistent P0335 code.
❌ Tried (didn't work) Replacing the crankshaft position sensor, Checking the wiring between the sensor and the ECM
✅ What actually fixed it The final resolution was replacing the Engine Control Module (ECM/PCM). This should be considered a last resort after all other diagnostics (grounds, wiring, sensor) have been exhausted.
"I Checked Everything" — The Actual Cause
- In the context of P0335, the equivalent of a 'smoke test clean' scenario is when the sensor is replaced and the wiring and grounds (per TSB #PIP4880F) are all confirmed to be good, yet the code persists. In one documented case involving the same engine family, the actual root cause was a faulty Engine Control Module (ECM), which was unable to correctly process the signal from a known-good sensor and circuit.
OEM Part Supersession History
55571994→25195551— Standard part revision and improvement by the manufacturer.
Heads up: The newer part number (25195551) is the correct and current replacement for the original. Using old stock of 55571994 is not recommended.
Model Year Variations Within This Range
- 2013-2014: A software issue in the Power Inverter Module (HPCM) can cause P0335. TSB #PIP4880F advises a software update via TIS-2-Web as a potential fix for these years if the code is only in the HPCM.
- 2011 vs 2012: The ECM pin locations for the crankshaft position sensor circuit are different. On a 2012 model, all three wires (signal, power, ground) are on connector X2. On a 2011 model, the signal wire is on connector X1, with power and ground located elsewhere. This is critical for anyone performing pin-level diagnostics.
Helpful Videos




We Have This Part in Stock



The information in this article is provided for general reference and educational purposes only. Vehicle specifications, procedures, and part compatibility can vary by production date, trim level, and region. Always consult your vehicle's factory service manual and verify part numbers before purchasing or performing repairs. Safety-critical components such as airbags, seat belts, and braking systems should be installed by a qualified professional.
- Chevrolet VOLT:
- 🎬 Helpful Videos
- 🛍️ Shop This Part
- What's Unique About the 2011-2015 Chevrolet VOLT
- Diagnostic Flowchart
- Symptoms You May Notice
- Most Likely Causes
- Rare But Worth Checking
- Diagnosis Steps
- Parts You'll Likely Need
- Related Codes That Often Appear With This One
- Technical Service Bulletins (TSBs) & Recalls
- Platform-Specific Known Issues
- Mechanic-Grade Diagnostic Values
- Scan Tool Commands That Help
- Wiring & Ground Locations
- Real Owner Repair Stories
- "I Checked Everything" — The Actual Cause
- OEM Part Supersession History
- Model Year Variations Within This Range
- 🎟️ Get 5% Off