

Ultimate Guide to OBD-II Code P0335: Crankshaft Position Sensor 'A' Circuit Malfunction
The Most Comprehensive P0335 Resource: What It Means, In-Depth Diagnosis, and Pro-Level Fixes
- Code P0335 triggers when the Engine Control Module (ECM) registers 0 RPM from the crankshaft position sensor during cranking or running.
- Expect immediate drivability issues, including a crank-no-start condition, sudden stalling at operating temperature (175-210°F), and a dead tachometer.
- Do not drive with an active P0335; sudden engine shut-offs at highway speeds cause a total loss of power steering and braking assist.
- Test the sensor connector for a 5V or 12V reference voltage and a solid ground (under 100mV) before spending $50-$150 on a replacement sensor.
- Always install an OEM sensor (like Denso or Bosch) and perform a mandatory bidirectional scan tool 'crankshaft relearn' procedure on GM, Chrysler, and Honda vehicles.
What Does P0335 Mean?

Code P0335 means the Engine Control Module (ECM) detects a complete loss of signal from the crankshaft position sensor (CKP). The ECM relies on this sensor to monitor crankshaft rotational speed and position. Without this data, the ECM cannot time spark plug firing or fuel injection, causing severe engine failure.
Technical definition: The SAE/ISO definition for P0335 is "Crankshaft Position Sensor 'A' Circuit Malfunction." This indicates the Powertrain Control Module (PCM) receives no voltage signal from the primary crankshaft sensor during engine cranking or operation.
Can I Drive With P0335?
No — Do Not Drive. Do not drive. The engine stalls without warning, causing a complete loss of power steering and braking assist in traffic. It also fails to restart, leaving you stranded. Continuing to drive with erratic timing destroys the catalytic converter.
Common Causes

- Faulty Crankshaft Position Sensor (CKP) (Very Common) — The sensor fails internally from years of thermal stress, engine vibration, and age.
- Damaged Wiring or Connectors (Common) — Wires melt against the exhaust, chafe against pulleys, or soak in engine oil. Connectors suffer from broken locking clips or corroded pins, causing open circuits.
- Aftermarket Sensor Incompatibility (Common) — Honda, Hyundai, and Kia PCMs are highly sensitive to signal quality. Cheap aftermarket sensors produce incorrect voltage waves, causing P0335 to persist after replacement.
- Damaged Reluctor Ring (Less Common) — The toothed wheel the sensor reads breaks, rusts heavily, or slips on the crankshaft, preventing the sensor from generating a valid signal.
- Incorrect Sensor Air Gap (Less Common) — If installed without required shims or on a dirty mounting surface, the distance between the sensor and reluctor ring is too large to read the magnetic field.
- Timing Belt or Chain Issues (Less Common) — A jumped or broken timing chain damages the reluctor ring or sensor. This usually sets P0016, but severe damage triggers P0335.
- Faulty Starter Motor or Weak Battery (Rare) — A failing starter creates electromagnetic interference (EMI), or a dead battery causes a severe voltage drop during cranking, disrupting the sensor output.
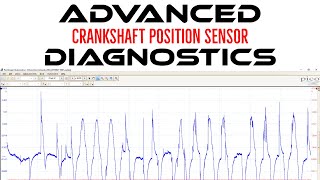
- Faulty Powertrain Control Module (PCM) (Very Rare) — The PCM's internal driver circuit fails and cannot process the incoming sensor signal. Requires professional diagnosis. 🎬 See this advanced walkthrough for deep crankshaft sensor circuit testing.
Symptoms

- Engine Cranks But Will Not Start — The starter turns the engine, but it refuses to fire. Without a crank signal, the PCM disables spark and fuel delivery.
- Engine Stalls Intermittently — The engine shuts off suddenly while driving or idling. This occurs when the sensor gets hot, fails, and then works again after cooling down.
- Tachometer Reads Zero — The dashboard RPM gauge reads 0 while cranking or drops to 0 while driving, directly confirming the loss of the CKP signal.
- Rough Idle, Misfires, and Reduced Power — If the sensor signal is intermittent, the engine runs poorly, misfires, and loses fuel efficiency due to incorrect ignition timing.
- Check Engine Light Illuminates (also visible on scanner) — The PCM logs P0335 and turns on the Check Engine Light within seconds of losing the crank signal.
Diagnostic Flowchart

Tap your situation to follow the diagnostic path that matches what you're seeing on this code.
Common Fixes & Costs
- Replace Crankshaft Position Sensor — Parts: $50 - $150, Labor: $100 - $250, ~1.5 hr book time (Intermediate)
- Repair Wiring or Replace Connector Pigtail — Parts: $20 - $60, Labor: $100 - $250, ~1.2 hr book time (Intermediate)
- Perform Crankshaft Position Relearn Procedure — Parts: $0, Labor: $50 - $150, ~0.5 hr book time (Beginner)
- Replace Timing Belt/Chain and Reluctor Ring — Parts: $200 - $600, Labor: $600 - $1500+, ~8.0 hr book time (Professional)
- Replace Powertrain Control Module (PCM) — Parts: $800 - $1500, Labor: $150 - $300, ~1.5 hr book time (Professional)
Used vs. New Parts: Buying Guide
When a used part is worth it: Never buy a used crankshaft position sensor. The risk of repeat failure is high, and savings are minimal compared to the labor cost of replacing it twice.
Donor-vehicle mileage cap: roughly under 30000 miles for the part to have meaningful remaining life.
Donor quality checklist:
- Match the OEM part number exactly.
- Avoid parts from rust-belt regions due to connector corrosion.
- Only source from low-mileage, collision-totaled vehicles.
Decision logic:
- If The vehicle is a Honda, Hyundai, Kia, or Chrysler/Jeep. → Buy a new OEM part. These brands reject aftermarket sensor voltage signals.
- If The sensor requires removing the starter or harmonic balancer (high labor). → Buy a new OEM or premium supplier (Denso, NTK, Bosch) part to guarantee longevity.
- If The budget is extremely tight and the sensor is easily accessible. → Buy a new aftermarket part, but expect a shorter lifespan.
Warranty tradeoff: Used parts offer 30-day warranties that exclude labor. New OEM parts offer 12-month warranties with maximum reliability. Aftermarket parts offer lifetime warranties but fail frequently.
Worst-case if a used part fails: $200 - $500 for repeat labor and diagnostics when a cheap part fails.
What Happens If You Wait — Timeline
- 0-4 weeks (Intermittent Fault): The signal drops out intermittently when hot. Symptoms include longer crank times, occasional hesitation, and a flickering Check Engine Light. (MPG impact: 0-5%% · Added cost: $0-50 in wasted fuel)
- 1-3 months (Frequent Failure): Stalling becomes frequent at operating temperature. The car refuses to restart until cooled down. Rough idling and misfires are obvious. (MPG impact: 5-15%% · Added cost: $50-150 in wasted fuel and potential towing)
- 3+ months (Complete Failure): The circuit fails completely. The engine cranks but will not start. The tachometer reads 0 RPM. The vehicle requires a tow. (MPG impact: 100% (undrivable)% · Added cost: $75 - $250 for a mandatory tow)
- Contingent on driving in Stage 1/2: Prolonged driving with intermittent signals dumps unburned fuel into the exhaust, melting the catalytic converter. (MPG impact: N/A% · Added cost: $1200 - $2800 for catalytic converter replacement)
Cost of Not Fixing It
- Immediate: Being stranded in traffic. The engine shuts off unexpectedly and refuses to restart, requiring a tow. (Added cost: $75 - $250 (for towing))
- Short-Term (days to weeks): Intermittent sensor signals cause severe misfires. Unburned fuel dumps into the exhaust, overheating and melting the catalytic converter. (Added cost: $1200 - $2800 (for catalytic converter replacement))
- Long-Term (months): Prolonged driving with erratic ignition timing causes catastrophic internal engine damage (piston or valve failure). (Added cost: $3000+)
Diagnosis Steps
- Verify Code and Check Live RPM Data
Connect an OBD-II scanner and monitor the 'Engine RPM' PID while cranking the engine. A reading of 0 RPM confirms the PCM receives no signal. A healthy signal shows 200+ RPM during cranking.
Tools: OBD-II Scanner with Live Data (Beginner) - Visually Inspect Sensor and Harness
Locate the CKP sensor. Inspect the connector and visible wiring for melted plastic, chafed insulation, oil contamination, and loose pins. Wiggle the harness while the engine runs to see if it induces a stall.
Tools: Flashlight, Mirror (Beginner) - Test Circuit Power and Ground at Connector
Disconnect the sensor. Turn ignition 'ON' (engine off). Use a multimeter to test the harness connector. You must find a reference voltage (typically 5V or 12V) and a solid ground (under 100mV). Missing voltage indicates a broken wire or bad PCM.
Tools: Multimeter, Vehicle-specific wiring diagram (Intermediate) - Test Sensor Resistance (Inductive Sensors Only)
For two-wire sensors, set a multimeter to Ohms (Ω) and measure across the sensor pins. Compare to manufacturer specs (typically 500-1,200 Ω). A reading of zero (short) or OL (open) means the sensor is dead. Test while the sensor is hot.
Tools: Multimeter, Repair manual for specs (Intermediate) - Check for AC Voltage Output (Inductive Sensors Only)
Reconnect the sensor. Set multimeter to AC Volts. Back-probe the signal and ground wires. Crank the engine. You should see a small AC voltage (starting around 0.2V) that increases with RPM. No voltage means a dead sensor or broken reluctor ring.
Tools: Multimeter with back-probes (Advanced) - Check Sensor Air Gap
If a new sensor fails, the air gap is likely wrong (spec is typically 0.020" - 0.060"). Remove the sensor O-ring, put modeling clay on the tip, install, and remove. Measure the compressed clay thickness with calipers. Add or remove shims as needed.
Tools: Feeler gauge, Calipers, Modeling clay (Advanced) - Inspect the Reluctor Ring
Remove the sensor and use a borescope to inspect the toothed reluctor ring inside the engine. Look for missing teeth, heavy rust, or debris blocking the magnetic signal.
Tools: Basic hand tools, Borescope (Advanced) - Test Signal Output with an Oscilloscope
Connect an oscilloscope to the signal and ground wires. Crank the engine. Hall-effect sensors produce a 0V to 5V square wave; inductive sensors produce an AC sine wave. Missing pulses or flat lines confirm a fault.
Tools: Oscilloscope (Professional) - Check Fuel Pump Activation
Listen for the fuel pump to prime for 2 seconds when turning the key 'ON'. If the PCM detects no crank signal, it disables the fuel pump. If the pump primes but RPM is 0, check fuel pressure to rule out a dual failure.
Tools: Fuel Pressure Gauge (Advanced)
When This Code Triggers (Freeze-Frame Conditions)
- Engine Coolant Temp: 175-210°F (80-99°C) (Faults frequently occur when the engine reaches operating temperature, as heat expands components and breaks internal sensor connections.)
- RPM: 0 RPM (during crank) (The primary trigger condition is during engine cranking when the PCM expects an RPM signal but receives 0.)
- Engine State: Running or Cranking (Sets during a crank-no-start event or if the signal drops out while driving, causing an immediate stall.)
- Vehicle Speed: 0 mph or steady cruise (Stalling at idle (0 mph) or during steady highway cruising are the most common failure points.)
Related Codes
- P0336 — P0335 means a total loss of signal. P0336 means the signal is present but erratic. P0336 points to a damaged reluctor wheel or incorrect air gap, while P0335 points to a dead sensor or broken wire.
- P0340 — P0340 is the Camshaft Position Sensor code. If the tachometer reads 0 RPM while cranking, P0335 is the primary fault. If the tachometer shows RPM but the car won't start, P0340 is the culprit.
- P0016 — P0016 means crank and cam signals are present but out of sync, indicating a jumped timing chain. P0335 means the crank signal is missing entirely.
- P1336 — A GM-specific code indicating the Crankshaft Position Variation is not learned. It triggers if a mechanic forgets to perform the relearn procedure after replacing the sensor.
Climate & Environmental Factors
- High Temperature: Engine bay heat causes thermal stress on the sensor's internal windings. Stalling when hot, followed by a successful restart after cooling down, is the classic indicator of a heat-failed sensor.
- Engine Oil Contamination: Valve cover leaks drip oil directly onto the sensor. Oil degrades the plastic housing, destroys the O-ring seal, and ruins the electrical connection at the pins.
- Humidity and Moisture: High humidity accelerates corrosion on connector pins if the weather seal breaks, creating high resistance that blocks the 5V signal.
- Extreme Cold: Freezing temperatures make wiring insulation brittle and prone to cracking, exposing wires to short circuits against the engine block.
How to Talk to a Mechanic About This Code
Say this: "My car has a P0335 code and stalls. Please verify the scan tool shows zero RPMs while cranking, and test the sensor connector for 5V reference, ground, and signal before replacing the sensor."
This directs the technician to perform a proper electrical diagnosis, preventing you from paying for a new sensor when the real problem is a melted wire.
Avoid saying:
- 'Just replace the crank sensor.'
- 'My check engine light is on, can you look at it?'
- 'Whatever you recommend.'
Questions to ask before authorizing the repair:
- Did you confirm the sensor failed, or is the issue in the wiring?
- Did the scan tool show 0 RPM during cranking?
- Does my vehicle require a 'crankshaft relearn' procedure, and is it included in the quote?
- What is the warranty on the new sensor and labor?
Where to Take It: Dealer vs Independent vs Chain
- Dealer:
Recommended if your vehicle is under warranty or has a known manufacturer quirk associated with P0335.
Best for: Vehicles under powertrain warranty., Complex manufacturer quirks (e.g., Ford coolant wicking)., Vehicles sensitive to aftermarket parts (Honda, Hyundai, Kia).
Downsides: Highest labor rates, typically 20-35% more than independent shops. (Typical cost: +35% vs. baseline) - Independent Shop:
Best overall fit. P0335 is a standard repair for competent independent shops, offering the best balance of cost and expertise.
Best for: Out-of-warranty vehicles., Standard diagnosis and sensor replacement.
Downsides: Diagnostic capabilities vary; vetting through ASE certifications is crucial. (Typical cost: +0% vs. baseline) - Chain Shop:
Avoid for initial diagnosis. Acceptable only if you know the sensor is dead and no relearn is required.
Best for: Simple part replacements when you are 100% certain of the diagnosis.
Downsides: High pressure to upsell., Often lack bidirectional scanners required for relearn procedures. (Typical cost: -10% vs. baseline)
When to Walk Away From the Repair
If the repair cost exceeds 50% of the car's private-party value, reconsider the repair.
- Car worth $4000, fix is $2000: Walk away. The repair cost is 50% of the car's value. Put this money toward a reliable vehicle.
- Car worth $12000, fix is $400: Fix it. A standard P0335 repair is well below the threshold and is a critical safety repair.
- Car worth $3000, fix is $1800: Walk away. If P0335 is caused by a major timing system failure, the cost is too high relative to value.
What Scan Tool You Need for This Code
Minimum: A code reader that displays Live Data, specifically the 'Engine RPM' PID.
A basic $20 reader only shows the code. It cannot display live engine RPM data, which is the critical first step to confirm the computer receives no signal.
Budget: BlueDriver Pro / Motopower MP69033 (~$70) — Reads P0335, clears it, and displays live RPM data to confirm the '0 RPM while cranking' symptom.
Mid-range: Foxwell NT710 / CGSULIT SC530 (~$250) — Adds bidirectional control to perform the mandatory 'Crankshaft Position Relearn' procedure required by GM, Chrysler, and Honda.
Professional: Autel MaxiCOM MK808 / Topdon ArtiDiag Pro (~$450-700) — Offers full bidirectional controls for relearns on all vehicles, detailed live data graphing, and access to manufacturer-specific codes.
Rent vs buy: Buy a mid-range scanner. Rental tools lack the bidirectional capability required to perform mandatory crank relearn procedures.
How to Clear the Code After You Fix It
- Use an OBD-II scan tool to clear the P0335 code from the PCM memory.
- Perform a 'crankshaft position relearn' procedure using a bidirectional scanner (mandatory for GM, Chrysler, Honda).
- Perform a drive cycle to reset vehicle readiness monitors.
Drive cycle (~20 minutes): Start the engine and idle for 10 minutes to reach operating temperature. Drive a mix of stop-and-go city traffic and steady highway speeds (35-55 mph) for 10 minutes.
Readiness monitors affected: Misfire Monitor, Comprehensive Component Monitor, Catalyst Monitor, Oxygen (O2) Sensor Monitor
Before emissions retest: drive at least 50 miles to fully set monitors.
Watch out for:
- Disconnecting the battery clears the code but deletes readiness monitors, causing an automatic emissions test failure.
- The code returns immediately if you skip a mandatory crankshaft relearn procedure, often triggering a secondary P1336 code.
- Installing a cheap aftermarket sensor causes the code to return instantly on sensitive vehicles (Honda, Hyundai, Kia).
Will This Fail Emissions / State Inspection?
Yes — this code typically fails an OBD-II emissions inspection.
- California: An active P0335 triggers an automatic smog check failure. After repair, a full drive cycle must complete to set readiness monitors before re-testing.
- New York: The NYS DMV OBD-II scan fails any vehicle with an active P0335 code.
- Texas: In emissions-testing counties, P0335 fails the OBD inspection. The Check Engine Light must be off and monitors set to 'Ready'.
Most Commonly Affected Vehicles

- Chevrolet Silverado, Tahoe, Suburban (2000-2013) — Extremely common. The sensor sits behind the starter on V8s, making access difficult. A scan-tool crank relearn is mandatory after replacement to prevent P1336 and P0300 codes.
- Nissan Altima, Frontier, Xterra (2002-2012) — High failure rate due to heat exposure. TSB NTB03-074a addresses this. Sensors are often located at the bottom of the transmission bell housing.
- Ford Fiesta, Fusion, Focus (2002-2014) — A leaking coolant temperature sensor wicks coolant through the wiring harness directly into the ECU connector, triggering a false P0335 and destroying the computer.
- Toyota Camry, Corolla, Solara (2000-2010) — A weak battery causes inconsistent cranking speeds, which the ECU misinterprets as a P0335 fault. Always load-test the battery before replacing the sensor.
- Honda Civic, Accord, Pilot, Odyssey (2001-2016) — Highly sensitive to aftermarket sensors. Non-OEM parts cause the code to return instantly. P0335 also frequently appears after DIY timing belt jobs due to pinched wires.
- Hyundai / Kia Elantra, Sonata, Optima, Sorento (2011-2019) — Frequent intermittent stalling at stoplights. Sensors are inexpensive and accessible, but must be OEM. May be covered under Theta II engine warranty extensions.
- Chrysler / Dodge / Jeep Grand Cherokee, Ram 1500 (2004-2015) — Requires a mandatory 'CKP Sync' procedure using a bidirectional scan tool after replacement to synchronize the new sensor with the PCM.
Manufacturer-Specific Notes
- General Motors (GM): A 'Crankshaft Position Variation Relearn' is mandatory after replacing the sensor or PCM. Skipping this triggers P1336 and disables misfire detection.
- Honda / Acura: V6 models reject aftermarket sensors. Installing anything other than an OEM or Denso sensor guarantees the P0335 code returns immediately.
- Ford: Coolant wicking from a leaking temperature sensor travels through the wiring harness and floods the ECU, causing a false P0335.
- Toyota: A failing battery drops voltage during cranking, tricking the ECU into logging a false P0335. Test the battery before touching the sensor.
Real Owner Stories
2013 Hyundai Elantra - Intermittent No-Start & Hesitation
Car intermittently cranked but would not start. When running, it hesitated violently during highway acceleration.
Outcome: The owner traced the issue to a degraded wiring harness unable to carry a load, requiring a harness repair.
Lesson: Replacing the sensor does not fix broken wires. You must test the wires for continuity and load-carrying ability before assuming the sensor is the culprit.
1997 Toyota 4Runner - Inconsistent Warm Start Issue
Started fine cold, but struggled to start when the engine was warm, eventually throwing P0335.
Outcome: The warm start problem persisted because the oil had already degraded the internal sensor seals.
Lesson: Oil leaks destroy crankshaft sensors. Cleaning a contaminated sensor is a temporary band-aid; you must fix the oil leak and replace the sensor for a permanent repair.
2000 Hyundai XG300 - P0335 Immediately After DIY Timing Belt Change
Check Engine Light illuminated with P0335 immediately after a DIY timing belt replacement.
Outcome: The owner discovered the sensor wiring harness was misrouted and pinched behind a pulley during reassembly.
Lesson: If P0335 appears immediately after engine work, re-inspect your work. Pinched wires or unplugged connectors are the most likely cause.
2007 Nissan 350Z - Sudden Stall and Hard Start When Warm
Car died during a highway pull. Ran fine cold, but struggled to restart warm and threw P0335.
Outcome: Discovered the plastic locking clip on the sensor connector was broken, allowing the plug to vibrate loose when hot. Fixed with a $15 connector pigtail.
Lesson: Heat expands plastic components. A broken connector clip separates just enough when hot to break the circuit. Always verify connectors lock tightly.
How to Prevent This Code From Triggering
- Fix Oil Leaks Promptly (As soon as detected) — Engine oil degrades the plastic sensor housing, destroys O-rings, and ruins wire insulation, causing short circuits.
- Protect Wiring Harness from Heat (During any engine work) — Exhaust heat melts wiring insulation. Use high-temperature wire loom or heat-reflective tape on harness sections near the exhaust.
- Maintain a Healthy Battery (Annually) — A weak battery causes a severe voltage drop during cranking, triggering false P0335 codes on sensitive ECUs.
- Adhere to Timing Belt Service Intervals (Per manufacturer schedule (e.g., 90k-120k miles)) — A worn timing belt or tensioner causes crank and cam signals to go out of sync, triggering P0335 and P0016.
Frequently Asked Questions
How much does it cost to fix a P0335 code?
Replacing the crankshaft position sensor at a shop typically costs between $150 and $400 total. The OEM part costs $50 to $150, and labor runs $100 to $250 depending on accessibility.
Can I drive my car with a P0335 code?
No, it is not safe to drive. The engine stalls without warning, causing a dangerous loss of power steering and braking in traffic. You also risk being stranded when the engine fails to restart.
Where is the crankshaft position sensor located?
Location varies by engine design. Common spots include the front of the engine block near the main pulley, the lower side of the engine block, or on the transmission bell housing. Consult a vehicle-specific repair manual to pinpoint the exact location.
Will a P0335 code clear itself?
No, P0335 indicates a hard fault in a critical engine management circuit. The Check Engine Light remains on and the code stays stored until the underlying problem is repaired. You must manually clear the code with an OBD-II scanner after fixing the issue.
Can a bad starter cause a P0335 code?
Yes, though it is uncommon. A failing starter motor produces electromagnetic interference (EMI) or a severe voltage drop during cranking. This disrupts the sensitive signal from the crankshaft sensor, causing the PCM to log a false P0335 code.
I replaced the crankshaft sensor, but the P0335 code came back. What now?
First, verify you used a high-quality OEM sensor, as many cars reject aftermarket parts. Second, meticulously re-inspect the wiring and connector for hidden damage or broken clips. Finally, check if your specific vehicle requires a scan-tool 'crankshaft relearn' procedure to sync the new sensor.
What is a crankshaft sensor relearn procedure?
It is a software calibration process that syncs the PCM to the specific signal of a new crankshaft sensor. The PCM learns the minor manufacturing variations in the reluctor wheel to accurately detect misfires. This requires a bidirectional scan tool and is mandatory on many GM and Chrysler vehicles.
What is the most common misdiagnosis for P0335?
The most common mistake is replacing the crankshaft sensor without testing the wiring circuit first. Often, the true problem is a melted wire or corroded connector. Another frequent error is installing a cheap aftermarket sensor that the vehicle's PCM rejects.
Can P0335 be caused by a recent timing belt change?
Yes, this is a highly common scenario. The sensor's wiring harness often gets accidentally pinched, damaged, or misrouted during a timing belt job. It also occurs if the connector is not fully seated upon reassembly.
Key Takeaways
- Code P0335 triggers when the Engine Control Module (ECM) registers 0 RPM from the crankshaft position sensor during cranking or running.
- Expect immediate drivability issues, including a crank-no-start condition, sudden stalling at operating temperature (175-210°F), and a dead tachometer.
- Do not drive with an active P0335; sudden engine shut-offs at highway speeds cause a total loss of power steering and braking assist.
- Test the sensor connector for a 5V or 12V reference voltage and a solid ground (under 100mV) before spending $50-$150 on a replacement sensor.
- Always install an OEM sensor (like Denso or Bosch) and perform a mandatory bidirectional scan tool 'crankshaft relearn' procedure on GM, Chrysler, and Honda vehicles.
Helpful Videos
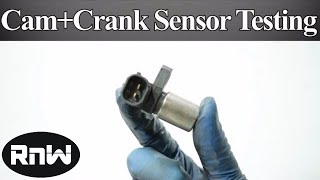

The information in this article is provided for general reference and educational purposes only. Vehicle specifications, procedures, and part compatibility can vary by production date, trim level, and region. Always consult your vehicle's factory service manual and verify part numbers before purchasing or performing repairs. Safety-critical components such as airbags, seat belts, and braking systems should be installed by a qualified professional.
- 🎬 Helpful Videos
- What Does P0335 Mean?
- Can I Drive With P0335?
- Common Causes
- Symptoms
- Diagnostic Flowchart
- Common Fixes & Costs
- Used vs. New Parts: Buying Guide
- What Happens If You Wait — Timeline
- Cost of Not Fixing It
- Diagnosis Steps
- When This Code Triggers (Freeze-Frame Conditions)
- Related Codes
- Climate & Environmental Factors
- How to Talk to a Mechanic About This Code
- Where to Take It: Dealer vs Independent vs Chain
- When to Walk Away From the Repair
- What Scan Tool You Need for This Code
- How to Clear the Code After You Fix It
- Will This Fail Emissions / State Inspection?
- Most Commonly Affected Vehicles
- Manufacturer-Specific Notes
- Real Owner Stories
- 2013 Hyundai Elantra - Intermittent No-Start & Hesitation
- 1997 Toyota 4Runner - Inconsistent Warm Start Issue
- 2000 Hyundai XG300 - P0335 Immediately After DIY Timing Belt Change
- 2007 Nissan 350Z - Sudden Stall and Hard Start When Warm
- How to Prevent This Code From Triggering
- Frequently Asked Questions
- How much does it cost to fix a P0335 code?
- Can I drive my car with a P0335 code?
- Where is the crankshaft position sensor located?
- Will a P0335 code clear itself?
- Can a bad starter cause a P0335 code?
- I replaced the crankshaft sensor, but the P0335 code came back. What now?
- What is a crankshaft sensor relearn procedure?
- What is the most common misdiagnosis for P0335?
- Can P0335 be caused by a recent timing belt change?
- Key Takeaways
- 🎟️ Get 5% Off