

OBD-II Code P0333: Knock Sensor 2 Circuit High (Bank 2)
The Ultimate Guide to Meaning, Causes, Symptoms, and Fixes
- P0333 is an electrical fault code indicating a short-to-voltage or open circuit, not necessarily active engine knock.
- Always check manufacturer Technical Service Bulletins (TSBs) first, as GM vehicles have a known 5V bleed issue and Subarus require a specific updated sensor (P/N 22060AA180).
- Do not drive more than 50-100 miles with this code; the engine's protective 'limp mode' slashes fuel economy by 15% and risks $2,000+ in catalytic converter damage.
- Expect repair costs between $400 and $1,500 if the sensor is located under the intake manifold, as labor requires 3 to 5 hours of disassembly.
What Does P0333 Mean?
P0333 means the Powertrain Control Module (PCM) detects voltage from the Bank 2 knock sensor exceeding the manufacturer's maximum threshold. The knock sensor acts as a microphone tuned to listen for engine detonation. This specific code indicates an electrical fault—like a short to voltage or an open circuit—not necessarily that the engine is actively knocking.
Technical definition: The PCM registered a continuous Bank 2 knock sensor voltage above the upper threshold (typically 4.8V-5.0V). A 'Circuit High' fault almost always means an electrical short to a voltage source, an open circuit pulling the voltage high, or a completely failed piezoelectric element inside the sensor.
Can I Drive With P0333?
Yes, But With Caution. You can drive, but do not exceed 50-100 miles. The engine's primary defense against harmful detonation is compromised. To protect itself, the PCM enters 'limp mode,' retarding ignition timing and slashing power. Ignoring a real knock condition destroys pistons, bearings, or valves, and causes catastrophic catalytic converter failure costing $800-$2500.
Common Causes
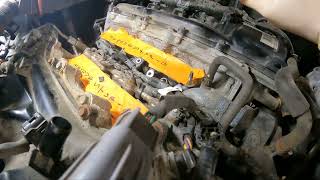
- Damaged Wiring or Brittle Connectors (Very Common) — Engine heat bakes the wiring harness and plastic connectors, making them brittle enough to crack and short against a power source or break open. Rodents frequently chew soy-based wiring harnesses routed through the warm, sheltered engine valley, particularly on Toyota V6/V8 models. 🎬 See how rodents can damage a Toyota knock sensor harness
- Faulty Knock Sensor (Very Common) — The internal piezoelectric crystal cracks or fails due to prolonged exposure to extreme heat and engine vibration. This causes the sensor to send a continuous high voltage signal or fail open, which the PCM interprets as high voltage.
- Signal Interference / Voltage Bleed (GM Specific) (Common) — On 2014-2019 GM trucks and SUVs, voltage from the adjacent transmission park/neutral switch circuit bleeds into the knock sensor signal wire within the ECM's X2 connector. This creates a false high voltage reading when shifting out of Park.
- Loose or Improperly Torqued Knock Sensor (Less Common) — The knock sensor requires a precise torque specification (commonly 15-18 ft-lbs). A loose bolt prevents the sensor from grounding properly, while an overtightened bolt crushes the internal crystal, causing an open circuit.
- Powertrain Control Module (PCM) Fault (Very Rare) — An internal fault in the PCM's driver circuit causes it to misinterpret the signal from a perfectly healthy sensor. Consider this only after exhaustively ruling out wiring and sensor failures.
Symptoms
- Reduced Engine Power (Limp Mode) — The vehicle feels sluggish and accelerates poorly. The PCM retards ignition timing and restricts transmission shifting to prevent engine damage, severely limiting power output.
- Poor Fuel Economy — Retarded ignition timing and inefficient engine operation in limp mode cause a 10% to 15% decrease in gas mileage.
- Audible Engine Knocking or Pinging — You hear a metallic pinging or rattling sound under acceleration or when climbing hills. This is uncontrolled combustion (detonation) occurring because the PCM cannot properly adjust timing.
- Hesitation or Rough Idle — The engine hesitates during acceleration or runs unevenly at idle due to the PCM's safe-mode timing strategy.
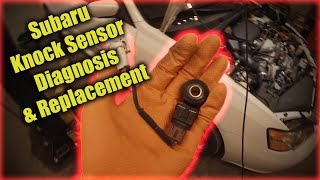
- Check Engine Light On (also visible on scanner) — The Malfunction Indicator Lamp (MIL) illuminates immediately. On Toyota and Lexus models, 🎬 Watch: Learn how to identify common knock sensor symptoms the VSC and TRAC lights typically illuminate simultaneously.
Common Fixes & Costs
- Repair or Replace Wiring Harness/Connector — Parts: $30-$120, Labor: $150-$900, ~3.0 hr book time (Intermediate)
- Replace Knock Sensor 2 — Parts: $40-$150, Labor: $150-$900, ~3.0 hr book time (Intermediate)
- Inspect and Clean ECM Connector (GM) — Parts: $10-$20, Labor: $130-$180, ~1.0 hr book time (DIY)
- Secure and Torque Loose Knock Sensor — Parts: $0, Labor: $130-$260, ~1.0 hr book time (DIY)
- Update ECU Software (Hyundai/Kia) — Parts: $0, Labor: $130-$200, ~1.0 hr book time (Professional)
- Replace Powertrain Control Module (PCM) — Parts: $800-$1500, Labor: $150-$300, ~1.5 hr book time (Professional)
Used vs. New Parts: Buying Guide
When a used part is worth it: A used OEM knock sensor from a low-mileage vehicle is safer than a cheap aftermarket sensor due to strict sensitivity tolerances. A used OEM wiring harness is practical for older vehicles where new parts are discontinued.
Donor-vehicle mileage cap: roughly under 80000 miles for the part to have meaningful remaining life.
Donor quality checklist:
- Verify the donor vehicle was not scrapped for an engine fire or flood.
- Check that wiring insulation is flexible and not cracking.
- Ensure all connector locking tabs are intact.
- Match the part number exactly.
Decision logic:
- If The part is a knock sensor for a turbocharged engine → Buy new OEM. The risk of engine damage from an out-of-spec sensor is too high.
- If The part is a wiring harness under the intake manifold → Buy new OEM. The labor is too intensive to risk using a questionable used part.
- If Vehicle is >150K miles and the part is easily accessible on the block → A used OEM part from a reputable salvage yard is a cost-effective choice.
Warranty tradeoff: Used parts typically come with a 30-90 day warranty. New aftermarket parts offer 1-year to lifetime warranties. New OEM parts carry a 1-year/12,000-mile warranty.
Worst-case if a used part fails: $500-$1500 if a used part installed under the intake manifold fails, requiring you to pay for labor twice.
Cost of Not Fixing It
- 0-1 month: Persistent 'limp mode' results in poor acceleration and a noticeable 10-15% drop in fuel economy. (Added cost: $20-$60 per month in extra fuel costs.)
- 1-6 months: The PCM defaults to a rich fuel mixture and incorrect timing, causing the catalytic converter to overheat and melt internally from unburnt fuel. (Added cost: $1200-$2800 for catalytic converter replacement.)
- 6+ months: If the sensor circuit fault is intermittent, prolonged unchecked detonation destroys pistons, rings, and rod bearings. (Added cost: $3000-$8000 for major engine replacement.)
Diagnosis Steps
- Verify Code and Check for TSBs
Use an OBD-II scanner to confirm P0333 is active. Immediately research Technical Service Bulletins (TSBs) for your specific make and model. GM, Subaru, and Hyundai have well-documented, specific fixes for this exact code that bypass standard diagnostics.
Tools: OBD-II Scanner, Internet Access for TSB Database (Beginner) - Visual Inspection of Sensor Area
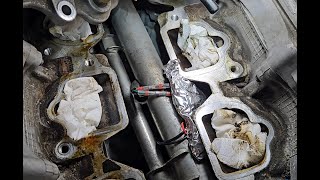
Locate knock sensor 2 on Bank 2. Inspect for cracked sensor housings, loose bolts, and signs of rodents (droppings, chewed wires, nesting material). On V-type engines, this requires a borescope or removing the intake manifold.
Tools: Flashlight, Inspection Mirror, Borescope (Intermediate) - Test Harness Connector for Bias Voltage
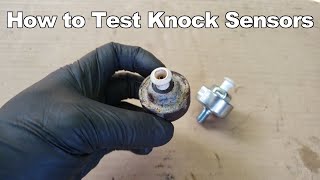
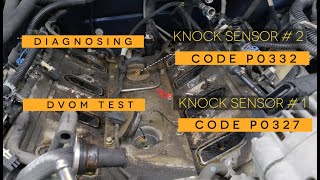
Disconnect the sensor. With the Key On, Engine Off (KOEO), measure the DC voltage between the signal wire terminal on the harness and a good ground. A healthy circuit shows a 2.5V bias. A 5V reading indicates an open circuit. 🎬 Watch: How to test knock sensor voltage with a multimeter A 12V reading indicates a short to battery power.
Tools: Digital Multimeter, Vehicle-specific Wiring Diagram (Advanced) - Test the Knock Sensor's Internal Resistance
With the sensor disconnected, measure the resistance (Ohms) between the sensor's pins. Compare this to the manufacturer's specification (e.g., Toyota sensors read 120-280 kΩ). An open circuit (infinite resistance/OL) confirms a dead sensor.
Tools: Digital Multimeter, Repair Manual (Intermediate) - Perform a Sensor AC Voltage Output Test
Reconnect the sensor and back-probe the signal wire with your multimeter set to AC voltage. With the engine running, lightly tap the engine block near the sensor with a wrench. You must see a small AC voltage spike (100-300mV). No voltage means the sensor is dead.
Tools: Digital Multimeter with back-probe pins, Small Wrench (Advanced) - Check for Continuity and Shorts in the Harness
Disconnect the sensor and the PCM. Check for continuity on the signal wire from the sensor connector to the PCM pin (must be <1 ohm). Check for continuity between the signal wire and ground. Any continuity to ground indicates a shorted wire.
Tools: Digital Multimeter, PCM Pinout Diagram (Advanced) - Analyze with Live Data or Oscilloscope
Monitor the knock sensor PID with an advanced scan tool. The value should fluctuate when revving the engine. A value stuck at 5V confirms a circuit fault. For definitive proof, an oscilloscope will show a flat 5V line instead of the normal low-voltage AC waveform.
Tools: Advanced OBD-II Scan Tool or Oscilloscope (Professional) - Inspect PCM and Connections
If all wiring and sensor tests pass, inspect the main PCM connector for corrosion, pushed-out pins, or water intrusion. If the connector is pristine, the PCM itself requires replacement.
Tools: Contact Cleaner, Dielectric Grease (Professional)
When This Code Triggers (Freeze-Frame Conditions)
- Engine Coolant Temp: 180-210°F (Engine at full operating temperature.)
- Engine RPM: 1500-2500 RPM (Steady state cruise or light acceleration, not typically at idle.)
- Engine Load: 20-50% (The fault sets under normal driving conditions as the PCM runs continuous circuit checks.)
- Vehicle Speed: 40-65 mph (Constant highway or city cruising speed.)
Related Codes
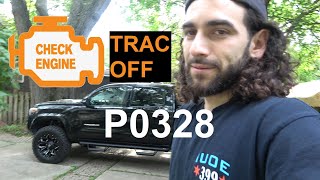
- P0328 — The identical 'Circuit High' fault for Bank 1. If both P0328 and P0333 are present, it guarantees a shared wiring problem, a bad PCM ground, or a failed PCM, rather than two simultaneously failed sensors.
- P0332 — The opposite code: 'Circuit Low Input'. P0333 indicates a short-to-voltage or open circuit, while P0332 points to a short-to-ground or a sensor failing in a shorted state.
- P0330 — A general 'Circuit Malfunction' code. P0333 is specific to high voltage. If you only have P0330, the PCM detects an erratic signal but cannot pinpoint if it is high or low.
- P1326 — Specific to Hyundai/Kia. While P0333 is an electrical circuit code, P1326 triggers when the system detects persistent vibrations indicative of catastrophic connecting rod bearing wear.
Climate & Environmental Factors
- Rodent Infestation: Rodents seek shelter in the warm engine valley and chew soy-based wiring insulation (common on Toyota and Honda). This severs the signal wire, creating an open circuit that triggers a permanent P0333.
- High Humidity / Moisture: Moisture promotes corrosion inside the knock sensor harness and main PCM connectors. This corrosion increases resistance, causing intermittent P0333 codes that appear during heavy rain and vanish when dry.
- Extreme Cold: Freezing temperatures turn aged wiring insulation and plastic connectors brittle. Normal engine vibrations shatter these brittle components, leading to an open circuit.
How to Clear the Code After You Fix It
- Reconnect the battery if it was disconnected for the repair.
- Use an OBD-II scan tool to clear the P0333 fault code from the PCM's memory.
- Perform a complete OBD-II drive cycle to allow the readiness monitors to run.
Drive cycle (~30 minutes): A generic drive cycle includes a cold start (engine off for 8+ hours), a 2-3 minute idle, 10-15 minutes of mixed city driving (stop-and-go), and 5-10 minutes of steady highway speed (around 55 mph).
Readiness monitors affected: Comprehensive Component Monitor, Misfire Monitor, Catalyst Monitor, Oxygen (O2) Sensor Monitor
Before emissions retest: drive at least 100 miles to fully set monitors.
Watch out for:
- Clearing the code without performing a drive cycle leaves readiness monitors 'Not Ready', causing an automatic emissions test failure.
- The code returns immediately if the underlying electrical fault (wiring, connector, sensor) was not properly fixed.
Will This Fail Emissions / State Inspection?
Yes — this code typically fails an OBD-II emissions inspection.
- California: An active P0333 code is an automatic failure. All readiness monitors must be 'Ready' for the test to proceed after repair.
- New York: A P0333 code causes the vehicle to fail the OBD-II emissions portion of the NYS DMV inspection.
- Texas: An illuminated Check Engine Light from a P0333 code is an automatic failure. After repair, you can have at most one monitor 'Not Ready' to pass.
Most Commonly Affected Vehicles
- Chevrolet / GMC Silverado, Sierra, Tahoe, Yukon (2014-2019) — Addressed by GM TSB #20-NA-207. Voltage from the transmission park/neutral circuit bleeds into the knock sensor circuit at ECM connector X2. Inspect and clean the X2 connector before replacing parts.
- Subaru WRX / Forester (2015-2018) — Covered by Subaru TSB #07-133-18R. The original knock sensor (P/N 22060AA160) cracks internally. You must install the updated part (P/N 22060AA180) and torque it to exactly 17.7 ft-lbs.
- Toyota Tacoma / 4Runner / Tundra (V6 & V8) (2005-2016) — Rodents chew the soy-based wiring harness located under the intake manifold. Repair requires removing the manifold, often costing over $1,200 in labor.
- Hyundai / Kia Sonata, Optima, Sorento (2.0L & 2.4L GDI) (2011-2019) — Subject to TSB PI1802 for a Knock Sensor Detection System (KSDS) software update. This refines logic to prevent false codes and detects early engine bearing wear (triggering P1326).
- Honda Accord / Odyssey / Pilot (J-Series V6) (2003-2017) — The Bank 2 sensor sits in the engine valley. The wiring harness insulation bakes from engine heat, becomes brittle, and cracks, leading to shorts.
- Ford F-150 (V8 & EcoBoost V6) (2004-2020) — Sensors are located under the intake manifold. Replacement is a high-labor job due to the extensive disassembly required.
Manufacturer-Specific Notes
- General Motors: Per TSB #20-NA-207, P0333 triggers when shifting out of Park because voltage from the transmission circuit bleeds into the knock sensor circuit at the ECM's X2 connector. Clean this connector first.
- Subaru: TSB #07-133-18R mandates replacing the crack-prone original sensor with an updated part (P/N 22060AA180). It must be torqued to exactly 17.7 ft-lbs without any thread sealant.
- Toyota: Soy-based wire insulation attracts rodents. A P0333 on a V6/V8 Toyota is almost always a chewed harness under the intake manifold. Comprehensive auto insurance often covers this $1,200+ repair.
- Hyundai / Kia: TSB PI1802 requires a software update to the Knock Sensor Detection System (KSDS) to distinguish between false electrical signals and genuine, harmful engine bearing wear.
Frequently Asked Questions
What does 'Bank 2' mean?
Bank 1 is the side of a V-shaped engine containing cylinder #1. Bank 2 is the opposite side. Search your vehicle's firing order online to locate Bank 2 instantly.
What's the most common mistake when fixing P0333?
The biggest mistake is replacing the knock sensor without testing the wiring. The actual cause is frequently a chewed wire, a corroded connector, or a specific TSB-related issue. Always test the circuit for a 5V reference and ground before buying parts.
Why is my P0333 code intermittent?
Intermittent codes stem from wiring issues or moisture. A wire with damaged insulation shorts out only at specific temperatures or when wet. A failing sensor or a corroded connector making poor contact also triggers intermittent high-voltage readings.
I replaced the knock sensor and the code came back. What now?
The fault lies in the wiring harness or the PCM. Re-test the wiring harness for an intermittent short-to-voltage or open circuit that you missed. Double-check for any applicable TSBs, like the GM ECM connector voltage bleed issue.
Why is the repair cost so high on my Toyota/Ford/Honda?
The high cost comes entirely from labor. On most V-type engines, sensors sit deep in the engine valley underneath the intake manifold. Accessing them requires 3 to 5 hours of disassembly and reassembly.
Can I get P0333 if my engine isn't making any knocking noise?
Yes. P0333 is an electrical circuit code, not a mechanical performance code. It means the PCM sees an impossible voltage (usually 5V) from the sensor's circuit, indicating the monitoring system itself is broken.
What is the correct torque spec for a knock sensor?
Torque specs typically range between 15 and 18 ft-lbs (20-24 Nm). This is critical because overtightening damages the piezoelectric crystal, while undertightening prevents it from hearing engine vibrations. Always use a calibrated torque wrench and consult your service manual.
Can a bad knock sensor cause transmission problems?
Indirectly, yes. A faulty knock sensor forces the PCM into 'limp mode,' which restricts transmission shifting to prevent high RPMs and engine load. This feels like a transmission problem but is actually the engine management system protecting itself.
Key Takeaways
- P0333 is an electrical fault code indicating a short-to-voltage or open circuit, not necessarily active engine knock.
- Always check manufacturer Technical Service Bulletins (TSBs) first, as GM vehicles have a known 5V bleed issue and Subarus require a specific updated sensor (P/N 22060AA180).
- Do not drive more than 50-100 miles with this code; the engine's protective 'limp mode' slashes fuel economy by 15% and risks $2,000+ in catalytic converter damage.
- Expect repair costs between $400 and $1,500 if the sensor is located under the intake manifold, as labor requires 3 to 5 hours of disassembly.
Helpful Videos


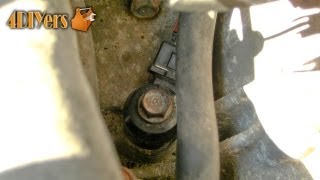

The information in this article is provided for general reference and educational purposes only. Vehicle specifications, procedures, and part compatibility can vary by production date, trim level, and region. Always consult your vehicle's factory service manual and verify part numbers before purchasing or performing repairs. Safety-critical components such as airbags, seat belts, and braking systems should be installed by a qualified professional.
- 🎬 Helpful Videos
- What Does P0333 Mean?
- Can I Drive With P0333?
- Common Causes
- Symptoms
- Common Fixes & Costs
- Used vs. New Parts: Buying Guide
- Cost of Not Fixing It
- Diagnosis Steps
- When This Code Triggers (Freeze-Frame Conditions)
- Related Codes
- Climate & Environmental Factors
- How to Clear the Code After You Fix It
- Will This Fail Emissions / State Inspection?
- Most Commonly Affected Vehicles
- Manufacturer-Specific Notes
- Frequently Asked Questions
- What does 'Bank 2' mean?
- What's the most common mistake when fixing P0333?
- Why is my P0333 code intermittent?
- I replaced the knock sensor and the code came back. What now?
- Why is the repair cost so high on my Toyota/Ford/Honda?
- Can I get P0333 if my engine isn't making any knocking noise?
- What is the correct torque spec for a knock sensor?
- Can a bad knock sensor cause transmission problems?
- Key Takeaways
- 🎟️ Get 5% Off