

P0325 on 2013-2018 Toyota RAV4 2.5L: Knock Sensor Circuit Malfunction Causes and Fixes
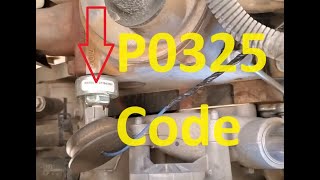
On a 2013-2018 RAV4, code P0325 is most often caused by a failed knock sensor or, more frequently, a rodent-damaged wiring harness. The sensor and harness are located under the intake manifold, making replacement a labor-intensive job. Expect a shop repair to cost between $421 and $700.
- P0325 on a 2013-2018 RAV4 indicates a problem with the knock sensor circuit.
- The repair is labor-intensive because the sensor is located under the intake manifold.
- Rodent damage to the wiring harness is a very common cause and should be inspected before replacing the sensor.
- Due to the high labor cost, it is strongly recommended to use a high-quality OEM (Denso) or reputable aftermarket (NTK) sensor and replace the intake manifold gaskets during the repair.
- The sensor mounting bolt must be torqued to exactly 15 ft-lbs (20 N*m) for proper operation.
What's Unique About the 2013-2018 Toyota RAV4
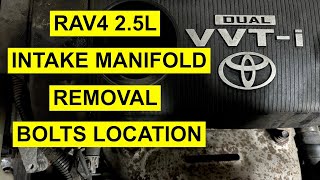
The primary challenge with the P0325 code on the 4th generation RAV4 with the 2.5L engine is the physical location of the knock sensor. It is buried on the back of the engine block, underneath the plastic intake manifold. This design turns what would be a simple sensor swap into a more involved repair that requires significant labor to remove the manifold. 🎬 Watch: How to locate and remove the plastic intake manifold Because the wiring harness is also tucked away in this hard-to-reach area, it is a common target for rodents seeking shelter. Some reports suggest the soy-based insulation on Toyota wiring of this era is particularly attractive to them, making chewed wires a very frequent cause of this specific code.
Symptoms You May Notice
- Check Engine Light is on
- TRAC OFF light may also be illuminated
- Reduced engine power and sluggish acceleration
- Decreased fuel economy
- Engine makes a pinging or knocking noise (less common, as the code often indicates the sensor isn't working at all)
- Hesitation during acceleration
- Replacing the knock sensor without first inspecting the wiring harness. Rodent damage is a very common cause, and replacing a good sensor won't fix a broken wire.
Most Likely Causes
- Damaged Knock Sensor Wiring Harness 🔴 High Probability The wiring harness is routed under the intake manifold, a warm, sheltered area that attracts rodents who may chew the wires. This is a very common failure point for this code on many Toyota models, potentially exacerbated by soy-based wire insulation.
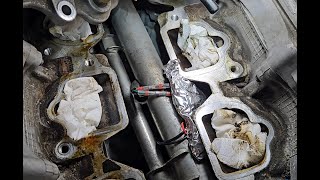
How to confirm: After removing the intake manifold, visually inspect the entire length of the knock sensor sub-harness for chew marks, breaks, or melted sections. Look for droppings or nesting materials in the engine valley as evidence before disassembly. 🎬 Watch: How to identify and repair rodent damage on Toyota harnesses
Typical fix: If damage is localized, the wires can be repaired by soldering and heat-shrinking. If the damage is at the connector, a new pigtail can be spliced in. Often, the entire knock sensor sub-harness is replaced.
Est. part cost: $20-$70 for a harness or pigtail - Failed Knock Sensor 🔴 High Probability
How to confirm: With the sensor disconnected, use a multimeter to measure the resistance between its two terminals. A good sensor should read between 120k and 280k ohms when the engine is cold. If the reading is out of spec or shows an open circuit (infinite resistance), the sensor is bad.
Typical fix: Replace the knock sensor. It is critical to tighten the new sensor's mounting bolt to the correct torque specification (15 ft-lbs or 20 N*m). Using a genuine Denso or NTK sensor is highly recommended to avoid premature failure.
Est. part cost: $90-$180 - Corroded or Loose Connector ⚪ Low Probability
How to confirm: Visually inspect the connector where the knock sensor harness plugs into the main engine harness, as well as the connector on the sensor itself. Look for green or white corrosion, bent pins, or a loose fit.
Typical fix: Clean the connector terminals with an electrical contact cleaner or replace the connector pigtail if it is damaged.
Est. part cost: $15-$30
Rare But Worth Checking
- Loose or Improperly Torqued Sensor: The knock sensor is a piezoelectric microphone that must be in firm contact with the engine block to function. If the mounting bolt is loose, it cannot detect vibrations correctly. Conversely, over-tightening can damage the sensor. Always use a torque wrench to set it to 15 ft-lbs (20 N*m).
- Faulty Engine Control Module (ECM): This is very rare. On some older Toyota/Lexus models, cracked solder joints inside the ECM have been known to cause intermittent knock sensor codes. The ECM should only be considered after all other possibilities, including the sensor and the entire wiring circuit, have been thoroughly tested and ruled out.
Diagnosis Steps
- Scan the vehicle for the P0325 code and any other related trouble codes.
- Before disassembly, inspect the engine bay for signs of rodents, such as droppings, seeds, or nesting material, especially around the intake manifold.
- Plan for intake manifold removal. This is required to access the sensor and wiring.
- Relieve fuel system pressure, disconnect the battery, and drain a portion of the engine coolant.
- Remove the intake manifold assembly to gain access to the rear of the engine block.
- Thoroughly inspect the knock sensor wiring harness for any signs of damage, especially chew marks from rodents. This is the most likely cause.
- If the wiring appears intact, disconnect the sensor and test its internal resistance with a multimeter. It should be between 120k-280k ohms.
- If the sensor tests bad, replace it. If the sensor tests good, the fault is in the wiring or the ECM.
- Check for continuity and shorts in the wiring harness from the sensor connector back to the ECM. As an advanced test, if a break is suspected in an inaccessible part of the harness, new wires can be run from the ECU connector directly to the knock sensor connector as a bypass.
- When reassembling, use new intake manifold gaskets and tighten the knock sensor bolt to exactly 15 ft-lbs (20 N*m).
- Refill the coolant, reconnect the battery, clear the codes, and perform a test drive to ensure the repair was successful.
Parts You'll Likely Need
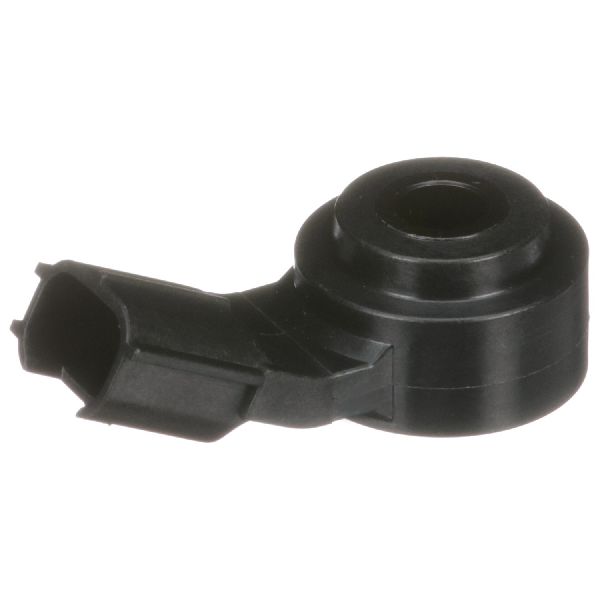
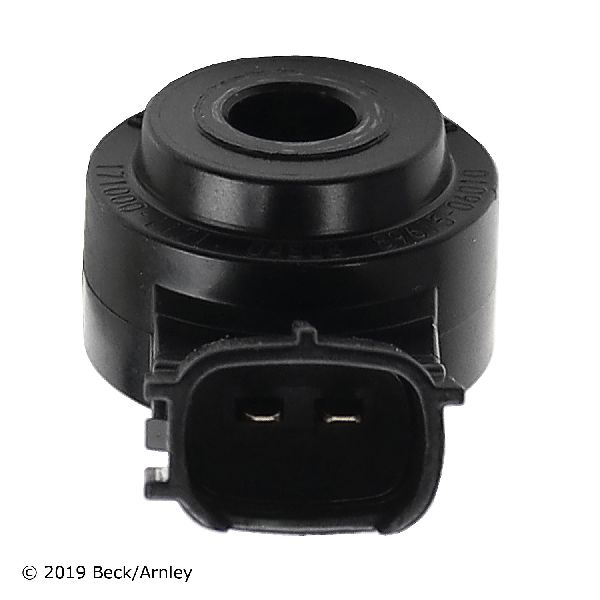
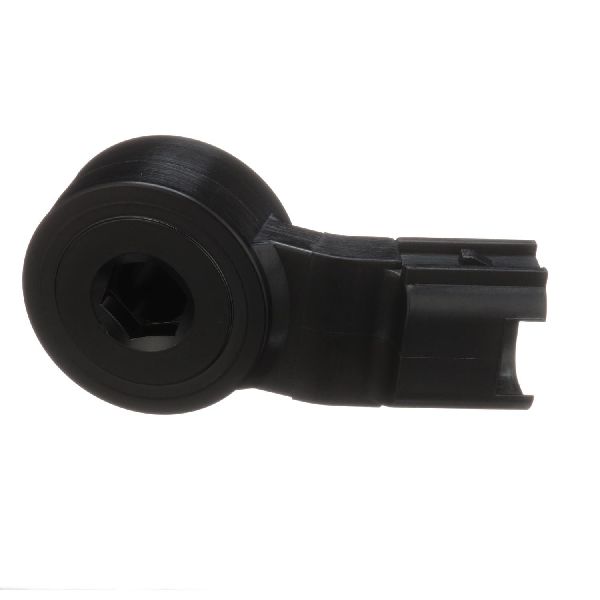
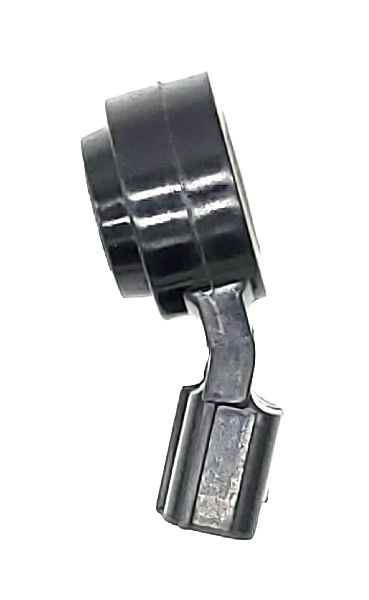
- Ignition Knock (Detonation) Sensor
(OEM #89615-06010)— This is the most commonly replaced part for this code, assuming the wiring is intact. Due to the high labor cost, using a high-quality part is crucial.
Trusted brands: Denso (OEM), NTK
OEM price range: $140-$200
Aftermarket price range: $90-$180 - Intake Manifold Gasket Set
(OEM #17171-0V020 (Manifold to Head), 17176-0V010 (Throttle Body))— The intake manifold must be removed to access the knock sensor. The gaskets are single-use and must be replaced to prevent vacuum leaks.
Trusted brands: Fel-Pro, Mahle, Genuine Toyota
OEM price range: $30-$50
Aftermarket price range: $20-$35 - Knock Sensor Wire Harness
(OEM #82219-06010)— This short harness connects the sensor to the main engine harness and is a frequent point of failure due to rodent damage. Note: This part is often listed for V6 (2GR) engines but is widely used as a service replacement for the 2AR-FE; verify fitment.
Trusted brands: Genuine Toyota, Standard Motor Products
OEM price range: $50-$70
Aftermarket price range: $30-$50 - Knock Sensor Connector Pigtail — If only the connector end is chewed by rodents, splicing in a new pigtail is more cost-effective than replacing the whole harness.
Trusted brands: Standard Motor Products S2328, Dorman 645-925
OEM price range: N/A
Aftermarket price range: $15-$30
Technical Service Bulletins (TSBs) & Recalls
- Torque Converter Shudder: While not related to P0325, this is a critical TSB for 2013-2015 RAV4 owners concerning a torque converter shudder felt at low speeds. The fix involves a new torque converter and an ECM update.
Platform-Specific Known Issues
- Extreme Vulnerability to Rodent Damage: The location of the knock sensor and its harness in the valley under the intake manifold creates a warm, sheltered nesting spot for rodents. Combined with reports of soy-based wiring insulation being used on Toyotas of this era, it makes this specific harness a prime target for being chewed. Many P0325 codes on these vehicles are resolved by repairing wires rather than replacing the sensor itself.
Mechanic-Grade Diagnostic Values
- Knock Sensor Internal Resistance — expected: 120kΩ to 280kΩ at 20°C (68°F). Failure: An open circuit (infinite resistance) or a reading significantly outside the specified range indicates a failed sensor.
- Knock Sensor Reference Voltage at Connector — expected: 4.5V to 5.5V. Failure: No voltage or voltage outside this range points to a problem with the ECM or the wiring between the ECM and the sensor, not the sensor itself.
- Knock Sensor Signal (Oscilloscope) — expected: A clear AC voltage waveform should be generated when the engine block is lightly tapped near the sensor, or when the engine is revved. The normal mode vibration frequency is approximately 6-8 kHz.. Failure: A flat line or no discernible signal when the block is tapped indicates a dead sensor, even if the resistance test passed.
Hidden / Shadow Codes Worth Checking
- P0327: Knock Sensor 1 Circuit Low Input. This is more specific than P0325 and indicates the ECM is seeing a voltage from the sensor that is below the expected threshold (e.g., under 0.5V), often due to a short circuit in the wiring. (see via Standard OBD-II scanner.)
- P0328: Knock Sensor 1 Circuit High Input. This indicates the ECM is seeing a voltage that is above the expected threshold (e.g., over 4.5V), often due to an open circuit in the wiring or a faulty sensor. (see via Standard OBD-II scanner.)
Scan Tool Commands That Help
- Toyota Techstream: Read Freeze Frame Data — This is the first step after reading the code. It captures a snapshot of all engine parameters (RPM, engine temp, speed, etc.) at the exact moment the P0325 code was set. This data is crucial for determining the conditions that triggered the fault.
- Toyota Techstream: Engine Inspection Mode — After a repair attempt, putting the engine in this mode allows a technician to run the engine under specific conditions (e.g., hold at 2,500 RPM for 10 seconds) to force the ECM's internal monitor for the knock sensor circuit to run and confirm if the fix was successful without a lengthy test drive.
Wiring & Ground Locations
- ECM Connector B30, Pins 110 & 111 — The Engine Control Module (ECM) is typically located behind the glove box. Connector B30 is one of the main plugs into the ECM.. Pin 110 is the knock sensor signal (KNK1) and Pin 111 is the sensor ground (EKNK). A technician can test the entire circuit for continuity, shorts, and voltage directly from these pins without having to access the sensor itself under the manifold.
- Engine Block Ground Strap — There are multiple ground points. A key one is a braided strap from the engine block or cylinder head to the vehicle's chassis, often near the strut tower or firewall.. A poor engine ground can cause electrical noise and voltage offsets, leading to incorrect sensor readings. The ECM relies on a stable ground reference for all its sensors, including the knock sensor. A corroded or loose ground is a rare but possible cause of a P0325 code that can be difficult to track down.
Real Owner Repair Stories
- Tacoma World Forum User (Toyota Tacoma (similar V-engine layout and issue)) — Check Engine Light with knock sensor codes.
❌ Tried (didn't work) Initial diagnosis pointed to bad sensors.
✅ What actually fixed it Upon removing the intake plenum, the user found the wiring harness had been chewed by rodents. The final fix was replacing the entire knock sensor sub-harness and, as a precaution, the sensors themselves since access was already gained. The user also sprayed rodent deterrent on the new parts. - YouTube User Daniel Furseth (Toyota Tundra (similar rodent damage issue)) — Check Engine Light, vehicle in limp mode, multiple codes.
❌ Tried (didn't work) A repair shop quoted $1200 to replace both knock sensors and the harness.
✅ What actually fixed it The owner disassembled the intake manifold himself and found chewed wires. He replaced the wiring harness for $45 and spent about 4 hours on the labor. To prevent a recurrence, he wrapped the new harness in separated stainless steel braid sleeving and then covered it with electrical tape. This fixed all codes and restored normal operation.
OEM Part Supersession History
89615-20090→89615-06010— Standard part evolution for improved reliability or manufacturing efficiency. No specific functional change is noted.
Heads up: None. The new part number is a direct, backward-compatible replacement.82219-41010→82219-06010— Standard part evolution.
Heads up: None. This is a direct replacement for the knock sensor sub-harness.
Diagnostic Flowchart
Other Known Issues on This Vehicle
Issues unrelated to this code that are worth knowing about as an owner of this generation:
- Torque Converter Shudder 🟠 Medium — Common on 2013-2015 models. Occurs under light throttle between 25-50 mph. Toyota issued a warranty extension program (ZH1) for this. (Ref: T-SB-0023-15)
- Delayed/Harsh Transmission Engagement 🟡 Low — Some owners report a delay or lurch when shifting from Park into Drive or Reverse, especially at higher mileage. Often caused by a worn valve body sleeve.
- Excessive Oil Consumption 🟠 Medium — While less severe than the earlier 2AZ-FE engine, the 2AR-FE can still consume oil, particularly if oil change intervals are extended past 5,000-7,500 miles. The cause is often stuck/clogged low-tension piston rings.
- Water Pump Leaks 🟡 Low — The water pump may develop leaks at moderate mileage, typically starting around 50,000-75,000 miles.
Used vs. New Parts: Buying Guide for This Vehicle
When a used part is the smart pick: A used part is almost never a smart choice for this repair. The only exception might be sourcing a clean, undamaged connector pigtail from a junkyard harness to splice into your existing harness if only the connector is damaged.
Donor-vehicle mileage cap: roughly under 100000 miles for the part to have meaningful remaining life.
What to inspect on the donor part:
- For a harness/pigtail: Check for any signs of rodent chew marks, no matter how small.
- Inspect the plastic for brittleness and the connector lock tab for integrity.
- Ensure there is no corrosion on the pins.
OEM-only on this vehicle (don't cheap out):
- Ignition Knock (Detonation) Sensor
Aftermarket brands forum-validated for this vehicle:
- Denso (OEM supplier)
- NTK
Brands owners have reported issues with on this vehicle:
- Unknown, no-name brands from online marketplaces. Given the high labor cost to access the sensor, using a cheap, unverified part is a significant risk that could lead to doing the job twice.
Real Owner Stories
Aggregated from forums and TSBs cited above. Mileages and costs reflect what owners reported in those sources.
2013 Toyota RAV4 2.5L
Symptoms: The Check Engine Light came on along with the 'TRAC OFF' light.
What fixed it: Repairing or replacing the knock sensor circuit components.
Source hint: reddit.com/r/rav4club
2009 Toyota RAV4 (2AR-FE platform-mate)
Symptoms: A chewed knock sensor harness caused a P0325 code and disabled the traction control system.
What fixed it: Repairing the rodent-damaged knock sensor wiring harness.
Source hint: Enormis Mobile Specialties - 'Toyota RAV4 Rodent Damage Repair'
Related OBD-II Codes
Frequently Asked Questions
Does TSB-0023-15 regarding torque converter shudder apply to my P0325 knock sensor code?
Why is my TRAC OFF light on at the same time as the P0325 Check Engine Light?
Is it true that rodents are a common cause for this code on the 2AR-FE engine?
Can I just replace the knock sensor to fix P0325?
What is the specific torque specification for the knock sensor on the 2.5L engine?
What resistance should I look for when testing the RAV4 knock sensor?
Helpful Videos

Used OEM Parts in Stock


New Aftermarket Parts Available


The information in this article is provided for general reference and educational purposes only. Vehicle specifications, procedures, and part compatibility can vary by production date, trim level, and region. Always consult your vehicle's factory service manual and verify part numbers before purchasing or performing repairs. Safety-critical components such as airbags, seat belts, and braking systems should be installed by a qualified professional.
- Toyota RAV4:
- 🎬 Helpful Videos
- 🛍️ Shop This Part
- What's Unique About the 2013-2018 Toyota RAV4
- Symptoms You May Notice
- Most Likely Causes
- Rare But Worth Checking
- Diagnosis Steps
- Parts You'll Likely Need
- Technical Service Bulletins (TSBs) & Recalls
- Platform-Specific Known Issues
- Mechanic-Grade Diagnostic Values
- Hidden / Shadow Codes Worth Checking
- Scan Tool Commands That Help
- Wiring & Ground Locations
- Real Owner Repair Stories
- OEM Part Supersession History
- Diagnostic Flowchart
- Other Known Issues on This Vehicle
- Used vs. New Parts: Buying Guide for This Vehicle
- Real Owner Stories
- 2013 Toyota RAV4 2.5L
- 2009 Toyota RAV4 (2AR-FE platform-mate)
- Related OBD-II Codes
- Frequently Asked Questions
- 🎟️ Get 5% Off