

P0325 on 1995-2003 Oldsmobile Aurora: Knock Sensor Circuit Malfunction Causes and Fixes
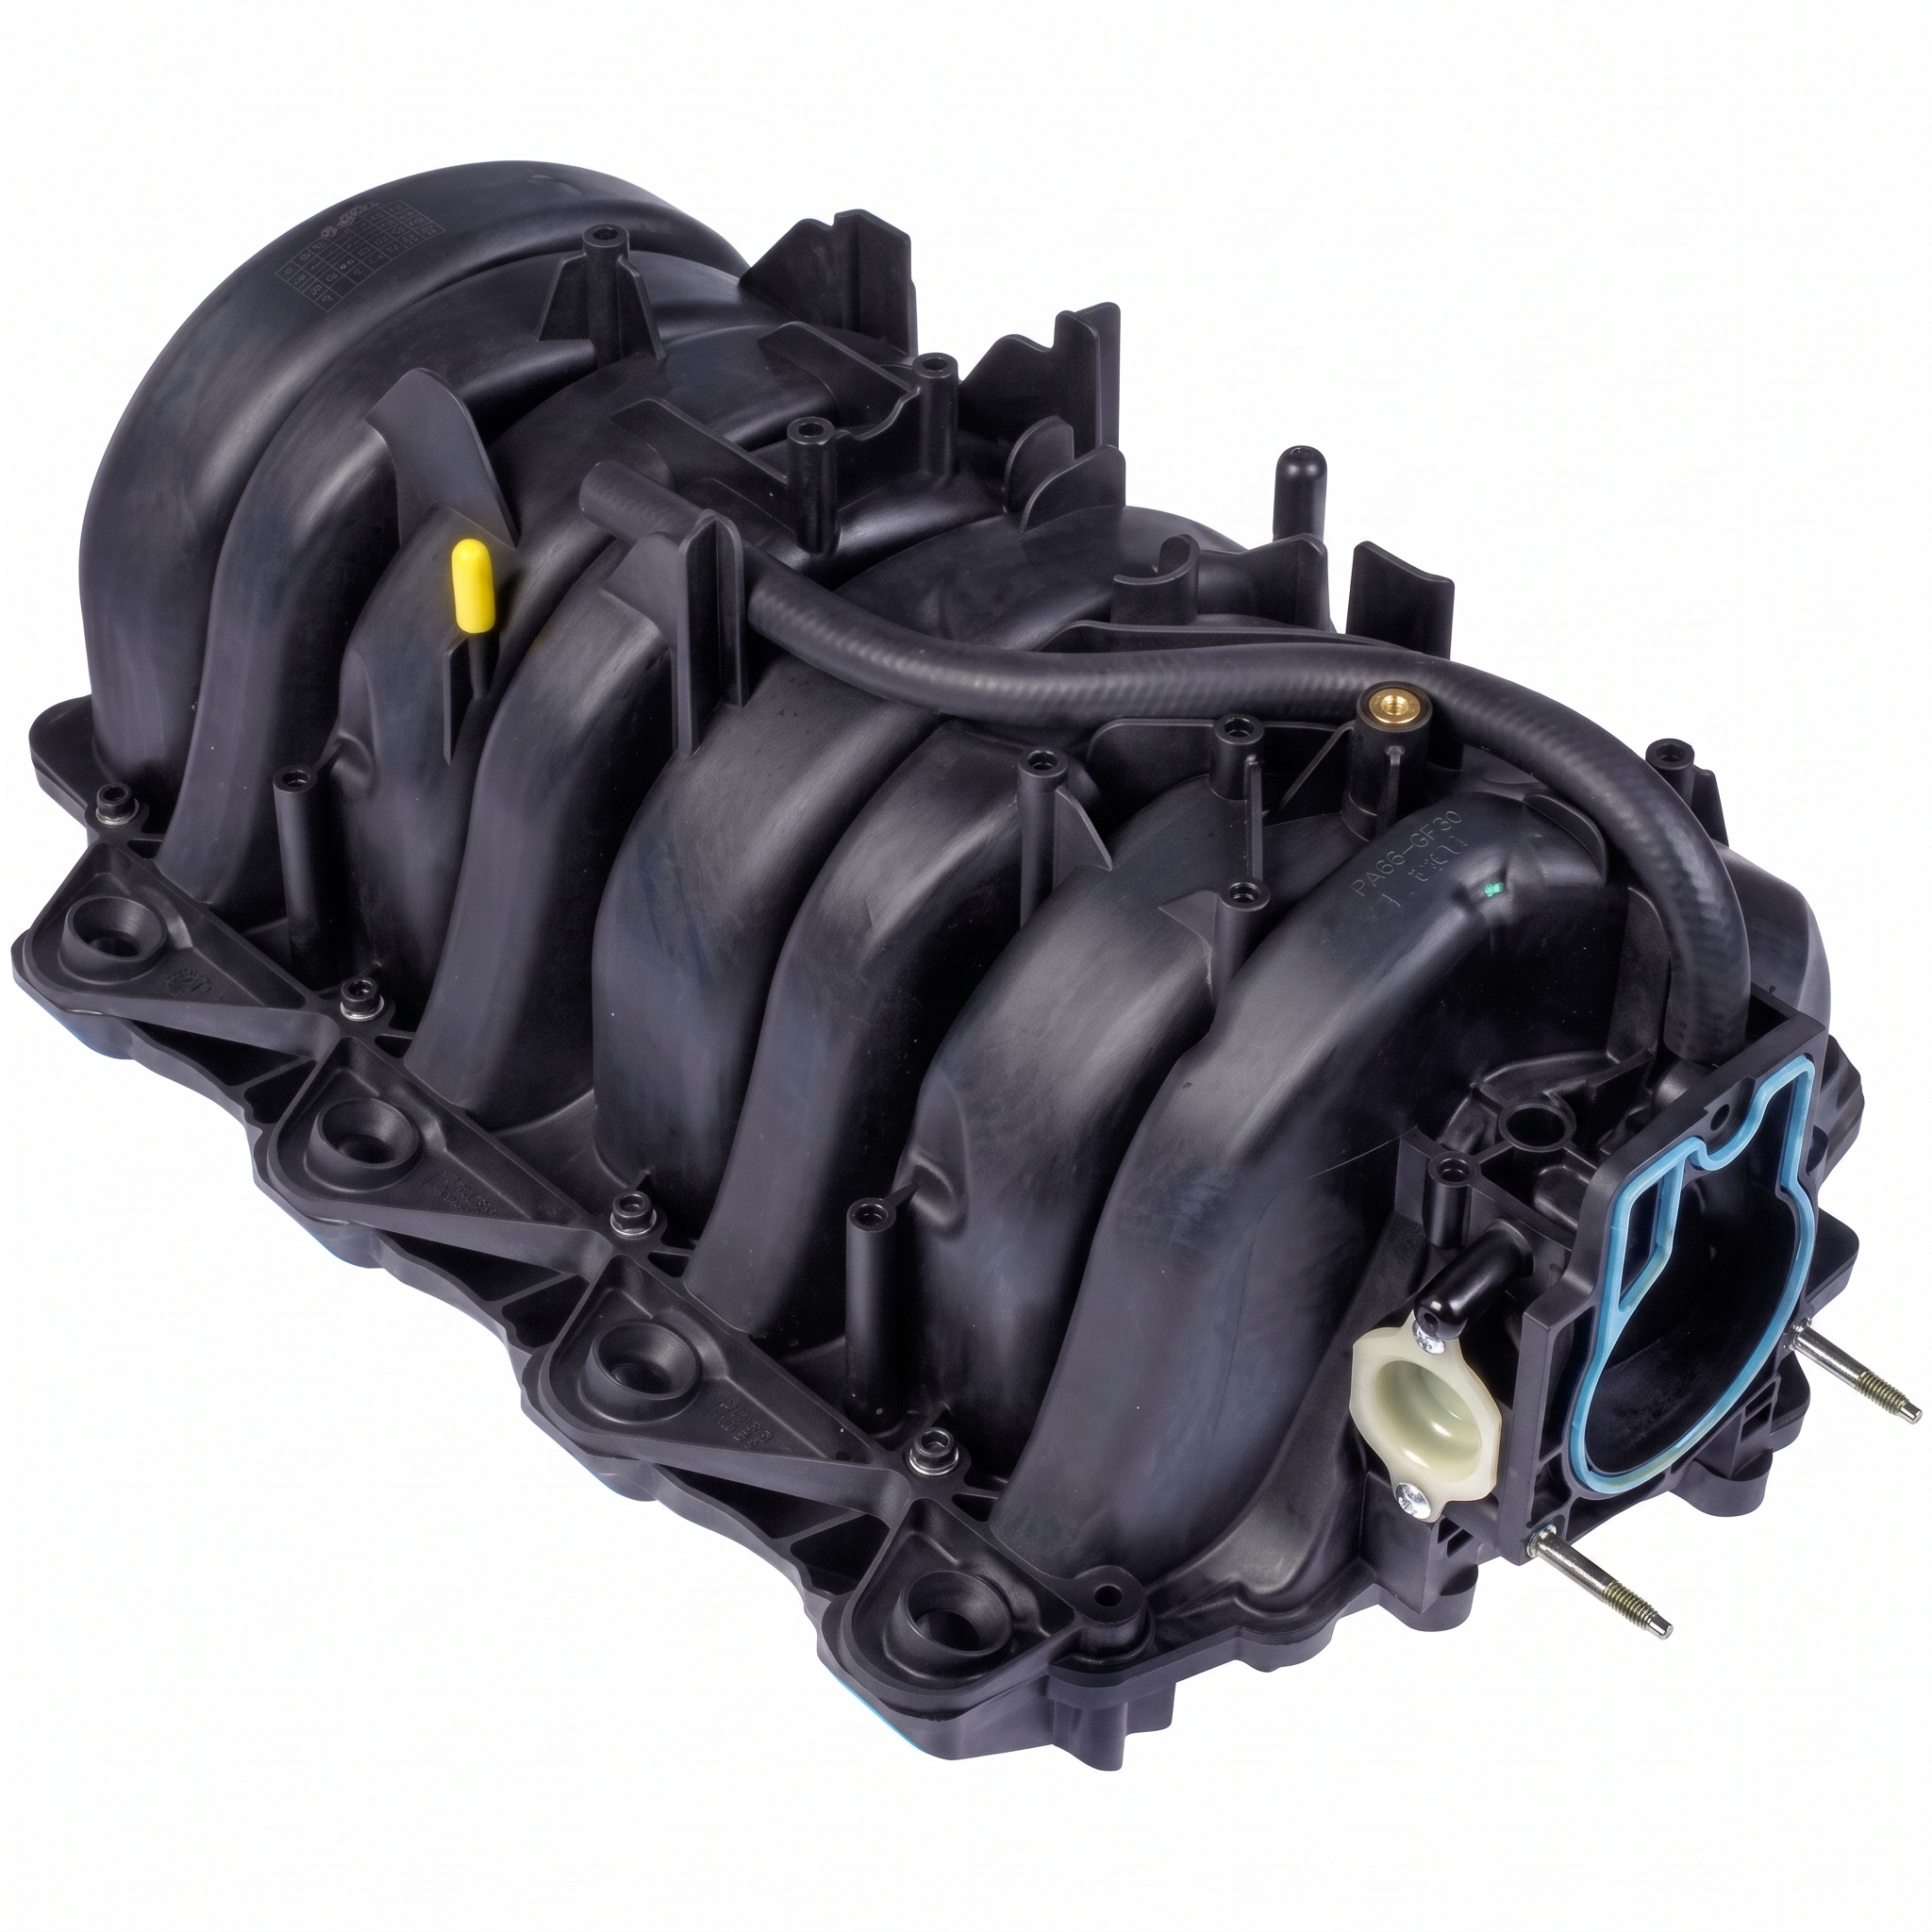
On the Oldsmobile Aurora, P0325 almost always means a failed knock sensor or its wiring. The repair is difficult and expensive because on both the V8 and V6 engines, the sensors are located in the engine valley, under the intake manifold. This turns a simple sensor swap into a 4-6 hour job. Expect to pay a shop $500-$950 for this repair, with most of the cost being labor. It is critical to replace both sensors and the harness at the same time.
- P0325 on an Oldsmobile Aurora points to a fault in the Bank 1 knock sensor circuit, most often a failed sensor.
- The main challenge of this repair is that the sensors are located under the intake manifold on both V8 and V6 engines, making it a labor-intensive job.
- Due to the high labor cost, it is critical to replace both knock sensors and the wiring harness at the same time to avoid repeating the repair.
- Symptoms include a Check Engine Light, reduced power, and poor fuel economy.
- This repair is not recommended for beginners; professional service is advised due to the complexity of removing the intake manifold.
What's Unique About the 1995-2003 Oldsmobile Aurora
The Oldsmobile Aurora, with its Northstar-derived L47 V8 and the related LX5 V6 (sometimes called the 'Shortstar'), is notorious for one specific issue regarding this code: sensor location. On both engines, the two knock sensors are buried deep in the engine valley, underneath the entire intake manifold. This design choice, common in many V-type engines to ensure accurate readings from the block, turns what would be a simple sensor swap into a labor-intensive and costly repair that requires removing the top part of the engine. Because of the high labor cost and the high-heat environment that degrades both sensors and wiring, it is almost universally recommended to replace both knock sensors and the wiring harness at the same time.
Generation note: This covers two generations of the Aurora. The first generation (1995-1999) only came with the 4.0L L47 V8. The second generation (2001-2003) offered both the 4.0L L47 V8 and the 3.5L LX5 V6. The knock sensor replacement procedure is difficult on both engines in both generations due to their location under the intake manifold.
Symptoms You May Notice
- Check Engine Light is on
- Reduced engine power and sluggish acceleration
- Decreased fuel economy
- Engine may make a metallic 'pinging' or rattling sound, especially under load
- In some cases, there may be no noticeable symptoms other than the Check Engine Light
- Replacing only one knock sensor. Given the extreme labor involved in accessing them, it is a costly mistake not to replace both sensors and the harness at the same time. The second sensor often fails shortly after the first.
- Assuming an actual engine knock problem. While possible, the P0325 code specifically points to a circuit fault (no signal, invalid signal, or low input), which is more often a sensor or wiring issue than a persistent mechanical knock.
- Using a cheap, off-brand sensor. Owners and mechanics report that the PCM can be sensitive to the specific voltage range of the knock sensor. Using low-quality aftermarket sensors can lead to the code returning. Sticking with OEM brands like ACDelco or Delphi is strongly recommended.
Most Likely Causes
- Failed Knock Sensor 🔴 High Probability The sensors are located in the high-heat engine valley, causing the internal piezoelectric crystal to fail from countless heat cycles and constant vibration over time. Moisture from coolant leaks or engine washing can also collect in the sensor cavities and cause corrosion and failure.
How to confirm: Diagnosis requires removing the intake manifold to access the sensor for testing with a multimeter. A good sensor should have a resistance of approximately 93k-107k Ohms. Due to the high labor involved, it's common practice to replace the sensors based on the P0325/P0330 codes alone, especially on a high-mileage vehicle where sensor failure is the most probable cause.
Typical fix: Replace both knock sensors and the associated wiring harness.
Est. part cost: $40-$115 per sensor for a quality OEM brand like ACDelco or Delphi. - Damaged Wiring or Connector 🟡 Medium Probability The wiring harness in the engine valley is also exposed to extreme heat, which can make the plastic conduit and wire insulation brittle, cracked, or corroded. Rodent damage is also a known possibility in this sheltered, warm location.
How to confirm: After removing the intake manifold, visually inspect the harness for cracks, melting, or chew marks. Test for continuity from the sensor connector to the main engine harness plug. The connectors themselves can become brittle and fail.
Typical fix: Replace the knock sensor sub-harness. This is considered a mandatory part of the job when replacing the sensors.
Est. part cost: $20-$70 for the harness.
Rare But Worth Checking
- Improperly Torqued Sensor: If the sensor was recently replaced and the code returned, this is a possibility. The knock sensor bolt must be torqued to a specific value, which for similar GM V-engines is 15 ft-lbs (20 N·m). Over-tightening can make the sensor overly sensitive, while under-tightening can prevent it from detecting real knock or cause a poor ground connection, triggering a circuit code.
- Faulty Powertrain Control Module (PCM): This is very rare. The PCM should only be considered as the cause after both knock sensors and the wiring harness have been replaced with quality parts and confirmed to be good, and the wiring from the sub-harness to the PCM has been checked for continuity.
Diagnosis Steps
- Verify the P0325 code is present using an OBD-II scanner.
- Check for any other related trouble codes, especially P0330. Address other codes first if they are present.
- Due to the location, direct testing of the sensor and wiring is not feasible as a first step. The job must be approached as an intake manifold removal.
- Plan for the removal of the intake manifold to gain access to the engine valley.
- Once the intake is removed, inspect the knock sensor wiring harness for any signs of damage, such as cracks, brittleness from heat, or rodent damage.
- Remove the two knock sensors (one for each bank). It is highly recommended to replace both sensors and the harness as a set, regardless of which one triggered the code.
- Before installing new sensors, thoroughly clean the mounting surfaces on the engine block to ensure proper contact and grounding.
- As a preventative measure against future moisture damage, consider applying a bead of RTV silicone to create a 'dam' around the base of the new sensors, a technique recommended in some GM TSBs for similar engines.
- Install the new knock sensors and torque them to the manufacturer's specification of 15 ft-lbs (20 N·m). Incorrect torque can affect sensor performance.
- Install the new wiring harness and connect it to the new sensors.
- Reinstall the intake manifold using a new gasket set. This is critical to prevent vacuum leaks.
- Clear the trouble codes with the scanner and perform a test drive, bringing the engine to full operating temperature to ensure the code does not return.
Parts You'll Likely Need
- Knock Sensor
(OEM #GM 12567446 (ACDelco 213-320))— This is the primary cause of code P0325. Heat and vibration cause the sensor's internal piezoelectric element to fail over time. It is strongly recommended to replace both.
Trusted brands: ACDelco, Delphi
OEM price range: $50-$115
Aftermarket price range: $35-$97 - Intake Manifold Gasket Set
(OEM #Fel-Pro MS90865 (V8), MS92049 (V6))— These are single-use gaskets and must be replaced anytime the intake manifold is removed to prevent vacuum leaks and ensure proper sealing.
Trusted brands: Fel-Pro, ACDelco
OEM price range: $50-$80
Aftermarket price range: $30-$60 - Knock Sensor Wiring Harness
(OEM #ACDelco PT2652 (pigtail connector))— The original harness becomes brittle from heat and often breaks during sensor replacement. It is considered a mandatory part of the job.
Trusted brands: ACDelco, Dorman, Standard Motor Products
OEM price range: $40-$70
Aftermarket price range: $20-$50
Related Codes That Often Appear With This One
- P0330 — P0330 is the code for 'Knock Sensor 2 Circuit Malfunction'. It is very common to see this code alongside P0325, as both sensors live in the same harsh environment and tend to fail around the same time, reinforcing the recommendation to replace both at once.
Technical Service Bulletins (TSBs) & Recalls
- While no TSB specifically for the Aurora and P0325 was found, a GM TSB for other models with under-intake knock sensors recommends creating a dam from RTV silicone around the sensors upon replacement to prevent future water intrusion, a practice highly relevant to the Aurora.
Platform-Specific Known Issues
- The primary vehicle-specific issue is the location of the knock sensors on both the 4.0L V8 and 3.5L V6 engines. They are located in the engine valley, under the intake manifold, making replacement a labor-intensive job that requires significant disassembly.
- Water Intrusion: On the L47 V8, the cavity where the knock sensors sit can sometimes collect water (from rain or engine washing) or leaking coolant from the intake manifold gaskets, which can submerge and ruin the sensors and their connectors over time.
Mechanic-Grade Diagnostic Values
- Knock Sensor Internal Resistance — expected: 93,000 to 107,000 Ohms (93k-107k Ω) when measured between the sensor's terminal and the sensor body (ground).. Failure: A reading of infinity (Open Line) or significantly outside the specified range indicates a failed sensor.
- Knock Sensor AC Voltage Output (Dynamic Test) — expected: A noticeable AC voltage spike (e.g., >1.0V) when tapping the engine block near the sensor with the sensor connected and a multimeter set to AC volts.. Failure: A very low or non-existent AC voltage signal (e.g., <0.1V) during the tap test suggests the sensor's piezoelectric element is dead.
- Knock Sensor Bolt Torque — expected: 15 ft-lbs (20 N·m).. Failure: Over or under-torquing can cause incorrect sensitivity or a bad ground connection, leading to false signals or a circuit code.
- Scan Tool Live Data: Knock Retard — expected: 0° at idle and during steady cruising with no audible knock.. Failure: If the PCM is detecting a valid signal and real detonation, this value will increase as the PCM pulls timing. If the code P0325 is active, this value may be stuck at 0° because the PCM cannot get a reliable signal, or it may default to a high value as part of a safe mode strategy.
Scan Tool Commands That Help
- Tech2 or equivalent professional scan tool: Live Data > Engine Data > Knock Retard (KR) — This data PID is used to verify if the PCM is actively retarding ignition timing. If P0325 is present, observing this PID can help determine if the PCM is getting any signal at all. A value stuck at 0° while revving the engine may confirm the lack of signal.
Wiring & Ground Locations
- G104 — On the lower left side of the engine, near the transmission connector (for 2001-2003 models).. This is a primary engine block ground. A poor connection here can introduce electrical noise or cause grounding issues for various sensors, including the knock sensors which ground through the engine block.
- G105 — At the rear of the engine, below the Engine Coolant Temperature (ECT) sensor (for 2001-2003 models).. Another critical engine ground point. Verifying that all engine-to-chassis grounds are clean and tight is a crucial step if sensor and harness replacement does not solve the issue.
- PCM Location — Left side of the engine compartment, under the air cleaner assembly.. This is the destination for the knock sensor signal. If the sensor and sub-harness are good, the wiring must be checked for continuity from the sub-harness connector all the way back to the PCM connectors.
Real Owner Repair Stories
- PerformanceTrucks.net Forums user 'tkm509' (GM Truck with similar engine architecture) — Check engine light with knock sensor code (Bank 2 low input) returned.
❌ Tried (didn't work) Replaced both knock sensors and one pigtail connector four months prior.
✅ What actually fixed it The user tested the resistance of the recently installed sensors after the code returned. The test revealed that the 4-month-old rear knock sensor had failed. Replacing the faulty new sensor resolved the code.
OEM Part Supersession History
ACDelco 213-1525→GM 12567446 / ACDelco 213-320— Part number consolidation and branding updates over time.
Heads up: ACDelco part numbers 213-1525 and 213-320 both cross-reference to the GM Genuine part 12567446 and are compatible.
Diagnostic Flowchart
Used vs. New Parts: Buying Guide for This Vehicle
When a used part is the smart pick: For this specific repair, using used parts is never a smart choice. The cost of the repair is dominated by the 4-6 hours of labor required to remove the intake manifold. The risk of a used sensor or harness failing prematurely far outweighs the small cost savings on the part itself.
OEM-only on this vehicle (don't cheap out):
- Knock Sensor
- Knock Sensor Wiring Harness
Aftermarket brands forum-validated for this vehicle:
- ACDelco (OEM)
- Delphi (Often the OEM supplier)
- NTK
Brands owners have reported issues with on this vehicle:
- Generic, unbranded 'budget' sensors from online marketplaces are frequently reported on forums to be out-of-spec, causing the code to return immediately.
Real Owner Stories
Aggregated from forums and TSBs cited above. Mileages and costs reflect what owners reported in those sources.
2001 Oldsmobile Aurora 4.0L V8
Symptoms: The Check Engine Light came on with a P0325 code. A dealer replaced only the one sensor indicated by the code, but the light and code returned soon after.
What fixed it: The issue was only resolved by following the common wisdom of replacing both knock sensors and the wiring harness at the same time.
Source hint: GMTNation.com - 'P0325 - Which knock sensor is the culprit?'
Related OBD-II Codes
Frequently Asked Questions
Where are the knock sensors located on my 1995-2003 Aurora's V8 or V6 engine?
My mechanic only found a code for one knock sensor (P0325). Is it okay to just replace that one?
What is the correct torque specification for installing new knock sensors on my Aurora?
I heard about using RTV silicone to protect the new sensors. Is this a good idea for my Aurora?
Can I save money by using a cheap knock sensor from an online marketplace?
My 2001 Oldsmobile Intrigue has a P0325 code. Is the repair process the same as the Aurora?
What causes the knock sensors to fail so often on these engines?
We Have This Part in Stock


The information in this article is provided for general reference and educational purposes only. Vehicle specifications, procedures, and part compatibility can vary by production date, trim level, and region. Always consult your vehicle's factory service manual and verify part numbers before purchasing or performing repairs. Safety-critical components such as airbags, seat belts, and braking systems should be installed by a qualified professional.
- Oldsmobile Aurora:
- 🛍️ Shop This Part
- What's Unique About the 1995-2003 Oldsmobile Aurora
- Symptoms You May Notice
- Most Likely Causes
- Rare But Worth Checking
- Diagnosis Steps
- Parts You'll Likely Need
- Related Codes That Often Appear With This One
- Technical Service Bulletins (TSBs) & Recalls
- Platform-Specific Known Issues
- Mechanic-Grade Diagnostic Values
- Scan Tool Commands That Help
- Wiring & Ground Locations
- Real Owner Repair Stories
- OEM Part Supersession History
- Diagnostic Flowchart
- Used vs. New Parts: Buying Guide for This Vehicle
- Real Owner Stories
- 2001 Oldsmobile Aurora 4.0L V8
- Related OBD-II Codes
- Frequently Asked Questions
- 🎟️ Get 5% Off