

P0325 on 2006-2014 Kia Sedona 3.8L: Knock Sensor Circuit Malfunction Guide
This code indicates a fault in the knock sensor circuit for Bank 1. The most common cause is a failed knock sensor, followed by wiring issues. On this engine, the sensors are located under the intake manifold, making replacement a labor-intensive job (3-6 hours). Due to the high labor cost, it is strongly advised to replace both sensors and the intake gaskets at the same time.
- P0325 on the 3.8L Sedona points to a problem with the Bank 1 (firewall side) knock sensor or its wiring.
- The most common fix is replacing the knock sensor itself.
- This is not a simple DIY job; the sensor is buried under the intake manifold, making labor the most significant cost component.
- Due to the high labor cost, it is critical to replace both sensors, the sub-harness, and the intake gaskets in one job.
- Using the correct torque on the new sensor's mounting bolt is critical for proper operation.
What's Unique About the 2006-2014 Kia Sedona
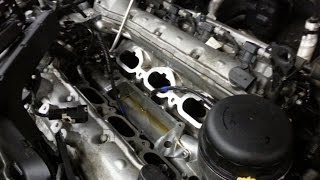
The 3.8L Lambda V6 in the second-generation Sedona is generally considered a durable, port-injected engine, avoiding some of the issues seen in later direct-injected Kia/Hyundai engines. However, like many V6 designs, the two knock sensors are located deep in the engine valley, underneath the upper and lower intake manifolds. This location makes what would be a simple sensor swap on a four-cylinder engine a much more involved and labor-intensive repair on the Sedona, requiring significant disassembly.
Symptoms You May Notice
- Check Engine Light is on
- Reduced engine power and sluggish acceleration
- Decreased fuel economy
- Audible engine knocking or pinging, especially under load
- Hesitation during acceleration
- Vehicle may enter a 'limp mode' with severely restricted RPMs
- Replacing spark plugs or ignition coils without diagnosing the knock sensor circuit first.
- Replacing the wrong bank's knock sensor. Bank 1 is near the firewall.
Most Likely Causes
- Failed Knock Sensor 🔴 High Probability The sensor is located in a high-heat area in the engine valley, which can lead to failure over time due to repeated heat cycles and vibration. This is the most common point of failure for this code.
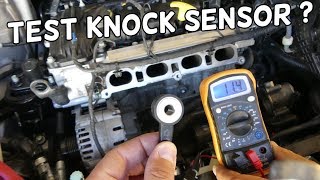
How to confirm: After accessing the sensor, test its internal resistance with a multimeter and compare it to the manufacturer's specifications. A reading outside the specified range (or an open/short circuit) indicates a faulty sensor. You can also test for an AC voltage signal while tapping on the engine block near the sensor. 🎬 Watch: How to test a Hyundai/Kia knock sensor
Typical fix: Replace the faulty knock sensor. It is highly recommended to replace both sensors (Bank 1 and Bank 2) and the knock sensor sub-harness at the same time due to the high labor cost to access them.
Est. part cost: $60-$100 per sensor - Damaged Wiring or Connector 🟡 Medium Probability The wiring harness in the engine valley is susceptible to damage from heat, oil, and rodents, which are known to chew on the wiring insulation. Soy-based wiring insulation used in this era can attract pests.
How to confirm: Visually inspect the wiring harness leading to the knock sensor for any signs of fraying, melting, corrosion, or rodent damage. Perform a continuity test on the wires between the sensor connector and the ECM connector. Check for shorts to power or ground.
Typical fix: Repair the damaged section of the wire or replace the knock sensor wiring harness if the damage is extensive. The sub-harness in the valley is the most common point of failure.
Est. part cost: $5-$50 for repair, $100+ for a new harness
Rare But Worth Checking
- Faulty Engine Control Module (ECM): This is very rare. The ECM should only be considered after thoroughly testing the sensor and its entire circuit. Some owners on Edmunds forums have reported needing the dealer to reprogram the main computer for various electrical issues.
- Internal Engine Problems: Severe mechanical issues can sometimes cause vibrations that may be misinterpreted by the system, but this would typically be accompanied by other codes and more severe symptoms.
Diagnosis Steps
- Use an OBD-II scanner to confirm the P0325 code and check for any other pending or active codes.
- Visually inspect the area around the intake manifold for any obvious signs of damaged wiring or connectors, although the sensor itself will not be visible.
- Gain access to the knock sensors by removing the upper and lower intake manifolds. This is a multi-hour job. 🎬 Watch this step-by-step knock sensor replacement walkthrough
- Once accessed, perform a thorough visual inspection of both knock sensors and their wiring harnesses for damage, corrosion, or loose connections.
- Disconnect the Bank 1 knock sensor and test its resistance with a multimeter. Compare the reading to the manufacturer's specifications. An out-of-spec reading confirms a bad sensor.
- Check for a reference voltage from the ECM at the connector and check the signal wire for continuity back to the ECM. Check for shorts to power or ground.
- If the sensor and wiring test good, the issue may be with the ECM, but this is extremely rare and requires professional diagnosis.
Parts You'll Likely Need
- Knock Sensor (Bank 1)
(OEM #39320-3C200)— This is the most common failure point for the P0325 code. Due to the labor involved, it's wise to replace both sensors (Bank 1 and Bank 2) at the same time.
Trusted brands: Genuine Kia/Hyundai, Delphi, Standard Motor Products
OEM price range: $80-$125
Aftermarket price range: $40-$70 - Knock Sensor (Bank 2)
(OEM #39320-3C300)— Since accessing the sensors requires removing the intake manifold, replacing the second sensor proactively is a cost-effective measure to prevent future repairs.
Trusted brands: Genuine Kia/Hyundai, Delphi, Standard Motor Products
OEM price range: $80-$120
Aftermarket price range: $40-$70 - Intake Manifold Gasket Set
(OEM #29215-3C100 (Upper), 28411-3C100 (Lower))— The upper and lower intake manifold gaskets must be replaced whenever the manifold is removed to ensure a proper seal and prevent vacuum leaks.
Trusted brands: Fel-Pro (MS 97086), Mahle, Genuine Kia
OEM price range: $50-$80
Aftermarket price range: $25-$60
Related Codes That Often Appear With This One
- P0330 — P0330 is the code for the Bank 2 knock sensor circuit. Since both sensors are in the same difficult-to-reach location and subject to the same conditions, it's common for them to fail around the same time or for a wiring issue to affect both circuits. It is standard practice to replace both when one fails.
Platform-Specific Known Issues
- Labor Intensive Location: A YouTube guide for a 2010 Sedona shows the knock sensors are located deep in the engine valley, requiring the removal of the intake manifold, exhaust manifold components, and the coolant housing to access them. The job is estimated to take 3-6 hours.
- 'While You're In There' Repairs: While in the engine valley for the knock sensor replacement, it is a good opportunity to inspect and potentially replace the oil cooler gaskets, as they can be a source of oil leaks on this engine. 🎬 See this video on oil cooler leaks and sensor locations The starter is also located in this area and may be worth replacing proactively on a high-mileage vehicle.
- Real-World Repair Costs: RepairPal estimates the replacement cost for a knock sensor on a 2006-2010 Kia Sedona to be between $905 and $1,202, with later models from 2011-2014 estimated between $791 and $1,118. This reflects the high labor time required.
Mechanic-Grade Diagnostic Values
- Knock Sensor Mounting Bolt Torque — expected: 13.7 – 17.4 lb-ft (18.6 – 23.5 N.m). Failure: Over-tightening can make the sensor too sensitive and cause false signals; under-tightening can prevent it from detecting actual engine knock.
- Knock Sensor Circuit Voltage (at ECM) — expected: The ECM expects a fluctuating voltage signal from the sensor while the engine is running.. Failure: A P0325 code is set when the ECM detects a voltage that is consistently above 4.8V or below 0.2V while the engine speed is above 2000 RPM, indicating a short or open circuit.
- Knock Sensor Resistance — expected: Unreliable test method for this type of sensor.. Failure: Unlike older resistor-type sensors, modern piezoelectric knock sensors used in this vehicle may not give a meaningful resistance reading with a standard multimeter. A test on a new, known-good sensor may show an open circuit. Diagnosis should rely on voltage checks and physical inspection.
Wiring & Ground Locations
- Transmission Ground Wiring Assembly — This harness provides a key ground path for the transmission and, by extension, the engine block where the knock sensors are mounted.. Corrosion or damage to this ground (OEM Part # 918654D030) can introduce electrical noise into the engine block, potentially interfering with the sensitive knock sensor signals and causing false codes. It should be inspected for integrity during diagnosis.
Diagnostic Flowchart
Other Known Issues on This Vehicle
Issues unrelated to this code that are worth knowing about as an owner of this generation:
- Front Lower Control Arm Corrosion 🔴 High — Common enough to warrant a recall, especially in salt-belt states. (Ref: NHTSA Recall #16V516000 (Kia SC133))
- ABS Module Electrical Short 🔴 High — Affects 2006-2010 models. Moisture can enter the ABS module, creating a fire risk even when the vehicle is off. (Ref: NHTSA Recall #20V102000 (Kia SC186))
- Timing Chain Tensioner Noise/Wear 🟠 Medium — A rattling noise on cold startup that lasts more than a few seconds can indicate a failing timing chain tensioner. Often related to oil level/pressure. (Ref: Kia released an updated tensioner to address this issue.)
- Oil Leaks from Valve/Timing Covers 🟠 Medium — Valve cover and timing chain cover gaskets are common sources of oil leaks. Leaks from the front valve cover can drip onto the alternator, causing premature failure.
- Premature Alternator Failure 🟠 Medium — Often a secondary failure caused by oil leaking from the valve cover gasket onto the alternator.
- Malfunctioning Power Sliding Doors 🟡 Low — A very common complaint among owners, often related to the door latch mechanisms or wiring.
Used vs. New Parts: Buying Guide for This Vehicle
When a used part is the smart pick: Due to the extremely high labor cost (3-6 hours) to access the knock sensors under the intake manifold, using a used sensor is strongly discouraged. The risk of a premature failure of the used part outweighs any initial cost savings. A used knock sensor sub-harness from a low-mileage donor may be considered if a new one is unavailable, but only after careful inspection.
Donor-vehicle mileage cap: roughly under 80000 miles for the part to have meaningful remaining life.
What to inspect on the donor part:
- For a wiring harness, ensure the plastic connectors are not brittle and click securely.
- Check that the wiring insulation is still flexible and not cracked or oil-saturated.
- Avoid any parts from vehicles with signs of rodent infestation in the engine bay.
OEM-only on this vehicle (don't cheap out):
- Knock Sensor: To avoid the risk of repeating this labor-intensive job, using a Genuine Kia/Hyundai sensor is the safest choice. The sensor's sensitivity is calibrated for the specific engine harmonics.
Aftermarket brands forum-validated for this vehicle:
- Fel-Pro (for intake gaskets)
- Delphi (for sensors)
- Standard Motor Products (for sensors)
Brands owners have reported issues with on this vehicle:
- No-name, unbranded sensors from online marketplaces should be avoided due to the high labor cost of replacement if the part is defective or has a short lifespan.
Real Owner Stories
Aggregated from forums and TSBs cited above. Mileages and costs reflect what owners reported in those sources.
2010 Kia Sedona 3.8L V6
Symptoms: The knock sensors were found to be located deep in the engine valley, requiring the removal of the intake manifold and coolant housing to reach them.
What fixed it: Replacement of the knock sensors located in the engine valley.
Source hint: YouTube guide for a 2010 Sedona mentioned in 'Labor Intensive Location'
2006 Kia Sedona 3.8L V6
Symptoms: Persistent check engine lights and various electrical issues.
What fixed it: Dealer computer reprogramming was required to solve persistent check engine lights after repairs.
Source hint: Edmunds Forums: A thread on 'Kia Sedona Computer Problems' from 2007
2007 Kia Sedona 3.8L V6
Symptoms: Check Engine Light on with high labor requirements for repair.
What fixed it: Knock sensor replacement.
Cost: $905-$1,202
Source hint: RepairPal estimates cited in 'Real-World Repair Costs'
Kia Owner Report
Symptoms: An owner reported that their vehicle could not drive more than 20mph due to an error code of P0325, and they were informed that the engine had seized (NHTSA ODI #11671686).
What fixed it: Towed to a dealership for major engine diagnostics.
Source hint: NHTSA ODI #11671686
Related OBD-II Codes
Frequently Asked Questions
Why is the repair for P0325 so expensive on my 2006-2014 Kia Sedona?
Should I replace both knock sensors even if only one is failing?
Can I use a used knock sensor to save money on my 3.8L Lambda V6?
Is there anything else I should fix while the intake manifold is off for the P0325 code?
Could rodents be the cause of my P0325 code?
Does my Sedona have a recall related to the knock sensor?
Helpful Videos
We Have This Part in Stock


The information in this article is provided for general reference and educational purposes only. Vehicle specifications, procedures, and part compatibility can vary by production date, trim level, and region. Always consult your vehicle's factory service manual and verify part numbers before purchasing or performing repairs. Safety-critical components such as airbags, seat belts, and braking systems should be installed by a qualified professional.
- Kia Sedona:
- 🎬 Helpful Videos
- 🛍️ Shop This Part
- What's Unique About the 2006-2014 Kia Sedona
- Symptoms You May Notice
- Most Likely Causes
- Rare But Worth Checking
- Diagnosis Steps
- Parts You'll Likely Need
- Related Codes That Often Appear With This One
- Platform-Specific Known Issues
- Mechanic-Grade Diagnostic Values
- Wiring & Ground Locations
- Diagnostic Flowchart
- Other Known Issues on This Vehicle
- Used vs. New Parts: Buying Guide for This Vehicle
- Real Owner Stories
- 2010 Kia Sedona 3.8L V6
- 2006 Kia Sedona 3.8L V6
- 2007 Kia Sedona 3.8L V6
- Kia Owner Report
- Related OBD-II Codes
- Frequently Asked Questions
- 🎟️ Get 5% Off