

OBD-II Code P0325: Knock Sensor Circuit Malfunction
What P0325 means, why it triggers, and how to fix it
- Code P0325 indicates an electrical failure in the Bank 1 knock sensor circuit, disabling the engine's primary defense against harmful detonation.
- A failed sensor or heat-damaged wiring harness causes over 80% of P0325 codes.
- Driving with an active P0325 code reduces fuel economy by up to 15% and risks a $1,200+ catalytic converter failure.
- Repair costs range from $150 for accessible 4-cylinder sensors to over $1,200 for V6 and V8 engines requiring intake manifold removal.
- Always install an OEM sensor and tighten it to the exact factory torque specification (often 15-20 ft-lbs) to prevent the code from returning.
What Does P0325 Mean?

Code P0325 means the engine control unit (ECU) detects an electrical circuit failure in knock sensor 1 (Bank 1). The knock sensor is a tuned microphone bolted to the engine block that listens for 'knock' or 'pinging'—harmful vibrations from uneven fuel combustion. When the circuit fails, the ECU cannot 'hear' these knocks or adjust ignition timing to protect the engine.
Technical definition: The official SAE/OBD-II definition is "Knock Sensor 1 Circuit Malfunction (Bank 1 or Single Sensor)." This indicates the Powertrain Control Module (PCM) detects the knock sensor signal voltage is outside its expected range. For example, the code sets if the voltage drops below 0.2V above 2000 RPM or exceeds 4.8V, indicating a short or open circuit.
Can I Drive With P0325?
Yes, But With Caution. You can drive short distances, but it is strongly discouraged. The ECU defaults to 'safe' ignition timing, reducing engine power and increasing fuel consumption. Ignoring the code causes long-term engine damage from undetected knocking. Continued driving overheats the catalytic converter, causing failure that costs $900 to $4,500 to repair.
Common Causes

- Faulty Knock Sensor (Very Common) — The sensor is the most frequent culprit. The internal piezoelectric crystal cracks or degrades from millions of heat and vibration cycles, stopping voltage signal generation.
- Damaged or Corroded Wiring/Connectors (Very Common) — The wiring harness routes through high-heat areas. Insulation becomes brittle and cracks, or connectors corrode from moisture, interrupting the signal. Moisture intrusion is especially common on GM V8s where water pools in the engine valley. Rodent damage is also frequent, as pests chew wires nestled in these warm areas.
- Faulty Knock Sensor Sub-Harness (Common) — On many V6 and V8 engines (especially Toyota and Nissan), a separate sub-harness connects the main harness to the sensors. This sub-harness fails frequently due to extreme heat under the intake manifold and requires replacement alongside the sensors. 🎬 Watch this step-by-step replacement for Toyota V6 sub-harnesses and sensors.
- Loose or Improperly Torqued Sensor (Common) — The knock sensor must be tightened to a precise torque specification (e.g., 15 ft-lbs for GM V8s). If too loose, it fails to detect vibrations. If over-torqued, the internal crystal breaks, causing a dead sensor or false signals.
- Underlying Engine Mechanical Problems (Less Common) — The sensor and circuit are sometimes fine, but correctly detect severe knock. This results from low-octane fuel, excessive carbon buildup, a clogged EGR system, or engine overheating.
- Interference from Other Noisy Components (Less Common) — The sensor picks up vibrations from failing mechanical parts. Noisy valve lifters, worn bearings, or a rattling heat shield create frequencies the PCM misinterprets as a circuit fault.
- Faulty Engine Control Module (ECM/PCM) or Software (Rare) — The computer itself rarely develops an internal circuit fault. Some manufacturers (like Hyundai/Kia) issue TSBs for software anomalies triggering P0325, requiring an ECM reprogram.
Symptoms

- Reduced Engine Power, Hesitation, and Sluggish Acceleration — The vehicle feels sluggish, stumbles, or jerks during acceleration. The computer enters a 'limp' mode with retarded timing to protect the engine.
- Worse Fuel Economy — Because ignition timing is not optimized, the engine burns up to 15% more fuel.
- Engine Pinging or Knocking Noise — A metallic pinging or rattling sound emits from the engine during acceleration, indicating uncontrolled detonation.
- Failed Emissions Test — An active P0325 code triggers an automatic failure during state emissions inspections.
- Check Engine Light is On (also visible on scanner) — This is the most common and often the only symptom. 🎬 Watch: How to identify bad knock sensor symptoms before replacing.
Diagnostic Flowchart
Tap your situation to follow the diagnostic path that matches what you're seeing on this code.
Common Fixes & Costs

- Replace Knock Sensor
— Parts: $50-$150, Labor: $100-$900, ~0.8-5.0 hr book time
(DIY)
Nissan Frontier/Xterra (VQ40DE): OEM 22060-7S000 (Alt: Bosch 0261231175, Denso 197-6030)
Honda CR-V/Accord (K24): OEM 30530-PPL-A01 (Alt: Denso 550-25001, Walker 242-1051)
Toyota/Lexus V6 (e.g., Camry, RX300): OEM 89615-12090 or 89615-06010 (Alt: Denso 8961512090, Standard Motor Products KS81) - Replace Knock Sensor and Sub-Harness
— Parts: $80-$350, Labor: $300-$1200, ~2.0-8.0 hr book time
(Intermediate)
Nissan Frontier/Xterra (VQ40DE): OEM 24079-EA200 or 24079-7S000 (Alt: Dorman 645-920)
Toyota/Lexus V6 (e.g., Camry, Sienna): OEM 82219-08010 or 82219-35020 (Alt: Standard Motor Products KCH-117) - Repair or Replace Wiring Harness/Connector — Parts: $10-$50, Labor: $100-$300, ~1.0-2.5 hr book time (Intermediate)
- Address Underlying Mechanical Issues (e.g., Carbon Cleaning, Cooling System Repair) — Parts: $20-$200, Labor: $150-$600, ~1.5-4.0 hr book time (Professional)
- Update or Reprogram Powertrain Control Module (PCM) — Parts: $0, Labor: $100-$250, ~0.5-1.0 hr book time (Professional)
DIY vs Professional
- Replace Knock Sensor (Accessible) — Beginner: Yes
Tools: Basic socket set, wrench set, torque wrench. - Replace Knock Sensor (Under Intake Manifold) — Beginner: Not recommended
Tools: Advanced tool set, including deep sockets, extensions, torque wrench, fuel line disconnect tools, new intake manifold gaskets, and possibly a vehicle-specific service manual. - Repair Wiring Harness/Connector — Beginner: Maybe
Tools: Soldering iron or quality crimp connectors, heat shrink tubing, wire strippers, multimeter.
Used vs. New Parts: Buying Guide
When a used part is worth it: Using a used knock sensor is never recommended. The high labor cost to access the sensor makes installing a part with an unknown history too risky.
Donor-vehicle mileage cap: roughly under 40000 miles for the part to have meaningful remaining life.
Donor quality checklist:
- Only consider used if it is a verified OEM part (e.g., Denso, Bosch) from a low-mileage vehicle.
- Ensure the part number matches exactly.
- Avoid parts from rust-belt states due to corrosion risk.
Decision logic:
- If The sensor is easily accessible (e.g., on the side of a 4-cyl block) → A high-quality aftermarket part is acceptable, but OEM is preferred.
- If The sensor is under the intake manifold (4+ hours of labor) → Always buy a new OEM or OES part. The cost of repeating the labor outweighs the savings.
- If The code returns after using a cheap aftermarket sensor → Replace it with an OEM part before diagnosing further. This is a highly common failure scenario.
Warranty tradeoff: Used parts offer a 30-90 day warranty. Aftermarket parts offer 1-year to lifetime warranties. New OEM parts carry a 1-year/12,000-mile warranty.
Worst-case if a used part fails: $400-$1500 if a used or cheap part fails, primarily due to repeating the labor.
What Happens If You Wait — Timeline
- 0-2 weeks: Check Engine Light illuminates. The PCM defaults to retarded ignition timing. Drivers notice slight sluggishness. (MPG impact: 0-5%% · Added cost: $0-$20 in wasted fuel)
- 2 weeks - 3 months: Noticeable drop in fuel economy and sluggish acceleration. The engine feels 'lazy'. Automatic emissions failure. (MPG impact: 5-15%% · Added cost: $50-$150 in wasted fuel)
- 3-8 months: Retarded timing causes unburnt fuel to superheat the catalytic converter, cracking or melting the internal substrate. (MPG impact: 10-20%% · Added cost: $1200-$2800 for now-necessary catalytic converter replacement)
- 8+ months: Severe risk of engine damage. The disabled sensor cannot protect against detonation, destroying pistons or bearings. (MPG impact: 15-25%+% · Added cost: $3,000-$8,000+ for major engine repair on top of catalytic converter replacement)
Cost of Not Fixing It
- 0-1 month: Reduced fuel economy by 5-10% and sluggish acceleration. Automatic emissions inspection failure. (Added cost: $20-$50 per month in extra fuel costs.)
- 1-6 months: Driving with retarded timing causes unburnt fuel to superheat the catalytic converter, leading to substrate meltdown. (Added cost: $1200-$2800 for catalytic converter replacement.)
- 6+ months: Severe risk of internal engine damage. Without the knock sensor, detonation destroys pistons, rings, or bearings. (Added cost: $3,000-$8,000+ for major engine repair or replacement.)
Diagnosis Steps

- Scan for Codes & Review Freeze Frame Data
Use an OBD-II scanner to confirm P0325. Check for codes like P0330 (Bank 2), P0171 (Lean), or misfire codes (P030X), which indicate a root cause. Analyze freeze frame data to identify engine conditions (RPM, load, temp) when the code set.
Tools: OBD-II Scanner (Beginner) - Visually Inspect the Wiring and Connector
Locate the knock sensor on the engine block. Inspect the wiring harness for melting, cracking, or rodent chew marks. Check the connector for corrosion, moisture, or loose pins.
Tools: Flashlight, Inspection Mirror (Beginner) - Clear Code and Test Drive
Clear the P0325 code and test drive the vehicle, replicating the freeze frame conditions. If the code returns immediately, a hard fault exists. If delayed, the issue is intermittent.
Tools: OBD-II Scanner (Beginner) - Test Sensor with Multimeter (AC Voltage)
Disconnect the sensor. Set a multimeter to AC Voltage. Connect one lead to the sensor's signal pin and the other to a good engine ground. Gently tap the engine block near the sensor with a wrench. A functioning sensor generates a fluctuating AC voltage (a few millivolts up to ~0.5V). No voltage means a dead sensor.
Tools: Multimeter, Basic Hand Tools (Intermediate) - Check Sensor Internal Resistance
Switch the multimeter to Ohms (Ω). Check the sensor's internal resistance between its terminals. Compare this to the manufacturer's specification (e.g., GM sensors read 93kΩ-110kΩ; older Toyotas show infinite resistance/O.L.). Readings outside spec confirm a faulty sensor.
Tools: Multimeter, Vehicle-specific Repair Manual (Intermediate) - Check Sensor Mounting and Surface
Verify the sensor is torqued to the exact manufacturer specification (e.g., 15 ft-lbs on GM 5.3L V8s). An over-tightened bolt cracks the piezoelectric element, and an under-tightened one fails to transmit vibrations. Ensure the mounting surface is clean.
Tools: Torque Wrench (Advanced) - Check for Reference Voltage and Continuity in Harness
Turn the ignition ON (engine off). Disconnect the sensor harness and check for a 2.5V or 5V reference voltage from the ECM at the signal wire. With the key off, check for continuity (near zero ohms) in the signal and ground wires between the sensor and ECM connectors. Test resistance between the signal wire and chassis to rule out a short to ground.
Tools: Multimeter, Vehicle-specific Wiring Diagram (Advanced) - Live Data Scan Tool Analysis
Using an advanced scan tool, monitor the knock sensor PID. At idle, the value remains low and stable. When revving the engine, the value changes, confirming the PCM receives a signal. Active 'Knock Retard' without audible knock indicates a hypersensitive sensor or external noise.
Tools: Advanced OBD-II Scan Tool (Advanced) - Advanced: Analyze with an Oscilloscope
Back-probe the sensor's signal wire at the ECM with an oscilloscope. With the engine running at 2,500-4,000 RPM, a consistent noise pattern (5-15 kHz) should appear. A flat line or erratic spiking voltage confirms a sensor or circuit failure.
Tools: Oscilloscope, Wiring Diagram (Professional)
When This Code Triggers (Freeze-Frame Conditions)
- Engine Coolant Temp: 180-200°F (82-93°C) (The engine is fully warmed up and operating in closed-loop.)
- RPM: 1500-2500 RPM (The code sets during steady-state cruising or light acceleration.)
- Engine Load: 30-60% (Occurs under moderate load conditions, such as climbing a slight incline.)
- Vehicle Speed: 35-55 mph (56-88 km/h) (The fault registers during city or highway cruise speeds.)
Related Codes
- P0330 — Code for 'Knock Sensor 2 Circuit Malfunction.' On V6/V8 engines, the two sensors often fail simultaneously or share a wiring harness. Replace both sensors and the harness together to save labor.
- P0171 / P0174 — Codes for 'System Too Lean.' A lean air-fuel mixture raises combustion temperatures and causes real engine knock. Fix lean codes first; if P0325 persists, diagnose the sensor circuit.
- P0300, P0301, etc. — Codes for cylinder misfires. Severe misfires create vibrations the ECM misinterprets as a knock sensor fault. Repair misfire codes first by checking spark plugs, coils, and injectors.
- P1326 — Specific to Hyundai/Kia, indicating the Knock Sensor Detection System detects abnormal vibrations consistent with connecting rod bearing wear. P1326 is a critical warning of impending engine failure requiring immediate inspection.
Climate & Environmental Factors
- High Humidity / Heavy Rain: Moisture is a primary cause of P0325. Water seeps into connectors or the sensor body, causing corrosion and short circuits. On GM V8s, water pools in the engine valley after a car wash or heavy rain.
- Cold Climates: Condensation forms on the engine block as it cools, then freezes and thaws, promoting water intrusion and corrosion.
- High Altitude: Thinner air at altitude affects the air-fuel mixture, making an engine more prone to actual detonation. This makes a functioning knock sensor system critical.
How to Talk to a Mechanic About This Code
Say this: "I have an OBD-II code P0325 for the Bank 1 knock sensor circuit. I'd like to schedule a diagnostic to confirm if the issue is the sensor or the wiring. Please check for related technical service bulletins."
This encourages a focused diagnostic instead of a broad inspection. Mentioning TSBs prompts them to check for known issues.
Avoid saying:
- 'My check engine light is on.'
- 'My car is making a weird noise.'
- 'Just replace the knock sensor.'
Questions to ask before authorizing the repair:
- Did you test the sensor's signal and wiring continuity?
- What is your policy on replacing the sub-harness and the second sensor?
- What is the warranty on parts and labor?
- Will you use an OEM part?
Where to Take It: Dealer vs Independent vs Chain
- Dealer:
Recommended if the vehicle has a known software issue or is under warranty. Otherwise, an independent shop is more cost-effective.
Best for: Vehicles under a powertrain or emissions warranty., Vehicles with known TSBs for P0325 that require a software update., Complex cases where a previous repair at an independent shop has failed.
Downsides: Highest labor rates., May recommend replacing more parts than necessary as a precaution. (Typical cost: +50% vs. baseline) - Independent Shop:
Best fit for the majority of P0325 repairs, offering a balance of expertise and value.
Best for: Most out-of-warranty vehicles., Straightforward sensor or wiring harness replacements., Vehicles where the sensor is in a labor-intensive location (e.g., under the intake manifold), as their lower labor rates provide significant savings.
Downsides: Quality can vary, so check for ASE certifications and online reviews., May not have access to the latest manufacturer software updates. (Typical cost: +0% vs. baseline) - Chain Shop:
Acceptable for a free initial scan, but use caution for complex diagnostics or intake manifold removal.
Best for: Getting the initial code read for free., Repairs on vehicles where the knock sensor is easily accessible.
Downsides: Technician experience varies widely., May lack the advanced diagnostic tools to differentiate between a sensor, wiring, or ECM fault., High pressure to approve repairs quickly. (Typical cost: -10% vs. baseline)
When to Walk Away From the Repair
If the estimated repair cost for P0325 exceeds 50% of your car's value, weigh your options. This is common on V6/V8 engines where repairs exceed $1,200.
- Car worth $3000, fix is $1500: Walk away. The repair cost is half the car's value. Sell as a 'mechanic's special' or trade it in.
- Car worth $8000, fix is $1200: Fix it. The repair is significant but well under the threshold, preserving the value of the vehicle.
- Car worth $4500, fix is $600: Fix it. This is a reasonable cost to keep a reliable vehicle on the road and pass emissions.
What Scan Tool You Need for This Code
Minimum: A basic OBD-II code reader that reads and clears codes and shows freeze frame data.
A basic scanner won't show live data. Seeing the knock sensor's live voltage signal is crucial for determining if the sensor is dead or the wiring is faulty.
Budget: BlueDriver Pro (~$100) — Connects to your smartphone and graphs live data from the knock sensor.
Mid-range: Innova 5610 or Foxwell NT510 Elite (~$320) — Offers robust live data graphing and accesses manufacturer-specific codes.
Professional: Autel MaxiCOM MK808 / MS906 series (~$500-1200) — Provides full bidirectional control to test the circuit and comprehensive live data analysis.
Rent vs buy: Auto parts stores read codes for free. Buying a scanner like the BlueDriver offers excellent value for DIY diagnostics.
How to Clear the Code After You Fix It
- Use an OBD-II scan tool to clear the diagnostic trouble codes (DTCs).
- Ensure the fuel tank is between 35% and 85% full to allow the EVAP monitor to run.
- Perform a complete drive cycle to run all readiness monitors.
Drive cycle (~20 minutes): Start with a cold engine. Idle for 3 minutes with the A/C on. Accelerate to 55 mph and hold a steady speed for 5 minutes. Decelerate without braking to 20 mph. Accelerate again to 55-60 mph and hold for 5 minutes.
Readiness monitors affected: Catalyst Monitor, Oxygen (O2) Sensor Monitor, EVAP System Monitor
Before emissions retest: drive at least 50 miles to fully set monitors.
Watch out for:
- Disconnecting the battery clears the code but resets all readiness monitors to 'Not Ready', guaranteeing an emissions test failure.
- The code returns immediately if the root cause (e.g., bad wiring) is not repaired.
- Driving only on the highway fails to complete all necessary monitor tests.
Will This Fail Emissions / State Inspection?
Yes — this code typically fails an OBD-II emissions inspection.
- California: An active P0325 code is an automatic smog check failure. After repair, driving 100+ miles of mixed city/highway is required to set the monitors.
- New York: A vehicle fails the NYS OBD-II inspection if the Check Engine Light is on for P0325. You must complete the drive cycle to set readiness monitors before a re-test.
- Texas: An active P0325 code causes an OBD inspection failure. Clearing the code right before the test results in a 'Not Ready' rejection.
Most Commonly Affected Vehicles
- Nissan Frontier, Xterra, Pathfinder (VQ40DE & VG33E engines) (1999-2019) — Extremely common due to knock sensor and sub-harness failure from heat. Located under the intake manifold, making replacement labor-intensive (often a $1000+ job). Many owners relocate the sensor to an accessible bolt on the manifold as a workaround, though this is not a factory-approved repair.
- Honda CR-V, Accord, Element (K-series & J-series engines) (2002-2017) — The knock sensor itself is a common failure point, often due to age or rodent damage to the wiring. On K-series (4-cyl) and J-series (V6) engines, it is located under the intake manifold. Real-world replacement cost at a shop is often in the $250-$600 range.
- Toyota / Lexus Camry, Highlander, Sienna, RX300/330 (V6 engines) (1999-2009) — Failure of the knock sensor or its harness is common. On V6 models, two sensors are located under the intake manifold. It is standard practice to replace both sensors (OEM part 89615-12090 or 89615-06010) and the sub-harness (OEM part 82219-08010) at the same time, as a P0325 code is often accompanied by P0330 (Bank 2).
- Subaru Outback, Forester, Legacy (EJ25 engine) (1996-2012) — Prone to both sensor failure and wiring issues. The sensor can crack, and improper torque during installation (spec is ~17.7 ft-lbs) is a known problem that causes the code to return.
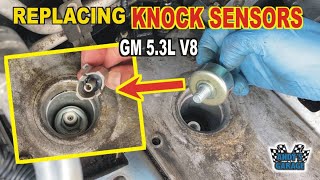
- Chevrolet / GMC Silverado, Sierra, Tahoe, Suburban (4.8L, 5.3L, 6.0L V8 engines) (1999-2013) — The two knock sensors are located under the intake manifold in the engine valley. They are highly susceptible to corrosion from moisture that collects in this area. It is a common pro tip to apply a bead of RTV silicone to form a 'dam' around the new sensors to prevent future water intrusion.
- Ford F-150, Explorer, Police Interceptor Utility (2004-2017) — On many V8 engines, the sensors are under the intake manifold, making replacement labor-intensive. TSB 18-2367 was issued for 2016-2017 Explorers with the 3.5L EcoBoost engine for a wire chafing condition near connector C109 that causes P0325.
- Hyundai / Kia Sonata, Elantra, Optima, Forte, Tucson (GDI engines) (2011-2021) — Many models with Gasoline Direct Injection (GDI) engines are subject to a service campaign (e.g., TSB #21-01-023H, Campaign 953) to update the ECM's knock sensor detection logic. This update enhances the system's ability to detect abnormal bearing wear, triggering P1326.
- Volkswagen Touareg, various models (2007-2009) — A VW service bulletin advises that humidity enters the knock sensor or its wiring, causing corrosion and failure. The recommended fix is to replace the sensor and harness with modified, better-sealed parts.
Manufacturer-Specific Notes
- Nissan: The knock sensor sub-harness under the intake manifold is the primary failure point. Relocating the sensor is a popular DIY hack but fails to monitor the specific cylinder block frequencies correctly.
- Subaru: The sensor is extremely sensitive to torque (spec is ~17.7 ft-lbs). Over-tightening cracks the internal crystal, while under-tightening prevents knock detection. A torque wrench is mandatory.
- General Motors (Chevy/GMC): On Gen III/IV V8s, sensors sit in the engine valley under the intake manifold. Water pools here, corroding sensors. Professionals build an RTV silicone 'dam' around new sensors to block water intrusion.
- Hyundai / Kia: GDI engines have service campaigns (e.g., Campaign 953) updating the knock sensor software. This system listens for specific vibration patterns indicating impending engine bearing failure.
- Ford: TSB 18-2367 covers 2016-2017 Explorer/Police Interceptor Utility vehicles (3.5L EcoBoost) for wire chafing near connector C109, causing P0325.
- Honda: Honda extends warranties for related problems, like TSB 20-100 for 2016 Pilots covering misfire codes. These underlying misfires are sometimes confused with knock sensor failures.
Real Owner Stories
2004 Honda Element, 130K miles - Intermittent Light
Check Engine Light for P0325 turned on and off intermittently over several months. The light often appeared after accelerating from a stop on a hill.
Outcome: Replacing the knock sensor fixed the issue completely. The owner reported the car ran much better, felt more powerful, and had improved throttle response.
Lesson: An intermittent P0325 code appearing under load indicates a failing sensor. Replace it to restore engine performance and protection.
2007 Honda Element - DIY Replacement, Code Returned
Owner got a P0325 code and performed a DIY replacement to save money. After the repair, the Check Engine Light remained on.
Outcome: The light came back on after driving one mile. The owner had to use a second, higher-quality aftermarket sensor before the code was resolved permanently.
Lesson: If P0325 returns after a DIY replacement, a faulty cheap aftermarket part is the likely cause. Always use high-quality OEM parts.
2002 Acura RSX, 150K miles - Misdiagnosis & High Repair Quote
Check Engine Light came on, scanned as P0325. A mechanic quoted $400-$800 for the repair, which the owner could not afford immediately.
Outcome: Forum experts strongly advised against driving the vehicle, explaining that a non-functioning knock sensor leaves the engine unprotected from detonation.
Lesson: P0325 indicates a circuit failure, not active knocking. Driving with a disabled knock sensor risks major internal engine damage.
Nissan Frontier (VG33E) - No CEL, but Bad Fuel Economy
Owner experienced consistently poor fuel economy (16 MPG) in a Nissan truck known for knock sensor issues. No Check Engine Light was on.
Outcome: The scan revealed no stored codes. In this specific case for older Nissan trucks, the knock sensor did not turn on the CEL, and a bad sensor only caused a noticeable timing difference under heavy acceleration.
Lesson: On specific older vehicles (like 90s Nissans), a P0325 code stores without illuminating the Check Engine Light, causing poor MPG.
How to Prevent This Code From Triggering
- Use high-quality, top-tier gasoline (Every fill-up) — Using fuel with the correct octane rating prevents carbon deposits and reduces actual engine knock.
- Perform regular engine oil and filter changes (Per owner's manual (e.g., 5,000-7,500 miles)) — Clean oil ensures proper lubrication, preventing lifter noise or bearing wear misinterpreted as knock.
- Protect wiring in known rodent-prone areas (As needed) — Applying rodent-repellent tape prevents pests from chewing through wires in the engine valley.
- Keep cooling system in good working order (Check coolant level monthly; service as per manual) — Ensuring the radiator and coolant are in good condition prevents overheating and detonation.
- Create a silicone 'dam' on applicable GM V8 engines (When replacing sensors) — Applying a bead of RTV silicone around sensor grommets prevents water from pooling and destroying sensors.
Frequently Asked Questions
Can I just ignore the P0325 code?
No. The computer disables a critical engine protection system when this code is active. Continuing to drive risks severe internal engine damage from detonation and destroys the catalytic converter.
Can bad gas cause a P0325 code?
Using low-octane fuel causes real engine knock, which makes the sensor work, not fail. A P0325 code indicates a fault in the electrical circuit itself. The only exception is if severe, prolonged knocking physically destroys the sensor.
Why is the labor cost to replace a knock sensor so high?
The cost depends entirely on engine layout. On 4-cylinder engines, it takes less than an hour. On V6 and V8 engines, the sensor is buried under the intake manifold, requiring 4-8 hours of labor and pushing costs over $1,200.
I replaced the knock sensor, but the code came back. What now?
First, verify you installed an OEM sensor and torqued it to the exact specification. If so, the problem is in the wiring, especially the sub-harness. Perform a continuity and short-to-ground test on the harness from the sensor to the ECM.
Are cheap aftermarket knock sensors okay to use?
No. Cheap aftermarket sensors frequently cause the code to return because they have incorrect internal resistance or lack the required frequency tuning.
Will a P0325 code clear itself?
Rarely. If the cause is temporary moisture that dries out, the code clears after several drive cycles. In 99% of cases, the underlying physical fault persists and requires repair.
What is 'Bank 1'?
On 'V' shaped engines (V6, V8), cylinders are split into two 'banks.' Bank 1 is the side of the engine containing the number one cylinder, usually closest to the firewall. Inline 4-cylinder engines only have one bank.
Key Takeaways
- Code P0325 indicates an electrical failure in the Bank 1 knock sensor circuit, disabling the engine's primary defense against harmful detonation.
- A failed sensor or heat-damaged wiring harness causes over 80% of P0325 codes.
- Driving with an active P0325 code reduces fuel economy by up to 15% and risks a $1,200+ catalytic converter failure.
- Repair costs range from $150 for accessible 4-cylinder sensors to over $1,200 for V6 and V8 engines requiring intake manifold removal.
- Always install an OEM sensor and tighten it to the exact factory torque specification (often 15-20 ft-lbs) to prevent the code from returning.
Helpful Videos

The information in this article is provided for general reference and educational purposes only. Vehicle specifications, procedures, and part compatibility can vary by production date, trim level, and region. Always consult your vehicle's factory service manual and verify part numbers before purchasing or performing repairs. Safety-critical components such as airbags, seat belts, and braking systems should be installed by a qualified professional.
- 🎬 Helpful Videos
- What Does P0325 Mean?
- Can I Drive With P0325?
- Common Causes
- Symptoms
- Diagnostic Flowchart
- Common Fixes & Costs
- DIY vs Professional
- Used vs. New Parts: Buying Guide
- What Happens If You Wait — Timeline
- Cost of Not Fixing It
- Diagnosis Steps
- When This Code Triggers (Freeze-Frame Conditions)
- Related Codes
- Climate & Environmental Factors
- How to Talk to a Mechanic About This Code
- Where to Take It: Dealer vs Independent vs Chain
- When to Walk Away From the Repair
- What Scan Tool You Need for This Code
- How to Clear the Code After You Fix It
- Will This Fail Emissions / State Inspection?
- Most Commonly Affected Vehicles
- Manufacturer-Specific Notes
- Real Owner Stories
- 2004 Honda Element, 130K miles - Intermittent Light
- 2007 Honda Element - DIY Replacement, Code Returned
- 2002 Acura RSX, 150K miles - Misdiagnosis & High Repair Quote
- Nissan Frontier (VG33E) - No CEL, but Bad Fuel Economy
- How to Prevent This Code From Triggering
- Frequently Asked Questions
- Can I just ignore the P0325 code?
- Can bad gas cause a P0325 code?
- Why is the labor cost to replace a knock sensor so high?
- I replaced the knock sensor, but the code came back. What now?
- Are cheap aftermarket knock sensors okay to use?
- Will a P0325 code clear itself?
- What is 'Bank 1'?
- Key Takeaways
- 🎟️ Get 5% Off