

OBD-II Code P0237: Turbocharger Boost Sensor 'A' Circuit Low
What P0237 means, why it triggers, and how to fix it like a pro
- Code P0237 triggers when the turbo boost sensor sends a voltage signal below 0.5V, indicating a short to ground, damaged wiring, or a dead sensor.
- Driving with P0237 forces the engine into limp mode, cutting turbo power and dropping fuel economy by 10-20%.
- Stop driving immediately; running rich in limp mode destroys catalytic converters, turning a $150 sensor replacement into a $2,500 repair.
- Test the 5-volt reference and ground pins with a multimeter before buying parts, as wiring chafing causes this code just as often as a failed sensor.
- Check for Technical Service Bulletins (TSBs) first, specifically TSB #21-NA-149 for 2019+ GM trucks, which outlines known wiring harness chafe points.
What Does P0237 Mean?

P0237 means the Powertrain Control Module (PCM) detects the turbocharger boost pressure sensor voltage is below the expected minimum threshold (typically under 0.5V). This sensor tells the computer how much boost the turbo creates. A low voltage signal points directly to an electrical short to ground, severed wiring, or a dead sensor, forcing the computer to trigger limp mode to protect the engine.
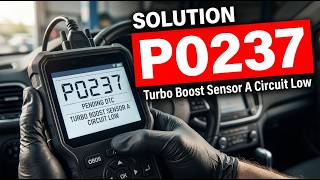
Technical definition: The SAE/OBD-II definition is "Turbocharger/Supercharger Boost Sensor 'A' Circuit Low." 🎬 Watch: A quick breakdown of what causes this circuit code. The PCM sets this code when the 'A' boost pressure sensor voltage drops below its specified minimum (often <0.5V, or <0.23V on Hondas). This strictly indicates an electrical fault: a short to ground, an open circuit, or internal sensor failure.
Can I Drive With P0237?
No — Do Not Drive. Driving is strongly not recommended. Your vehicle's computer disables the turbocharger and enters a reduced power 'limp mode', causing a severe loss of power that is unsafe in traffic. Continuing to drive with an incorrect air/fuel mixture destroys the catalytic converter, adding $800-$2,500 to your repair bill. Drive only a short distance to a safe location or repair shop.
Common Causes

- Faulty or internally shorted boost pressure sensor (Very Common) — This is the most frequent cause. The sensor (often integrated with the MAP sensor) fails internally, sending a constant low or zero-voltage signal to the computer.
- Damaged, corroded, or shorted wiring and grounds (Common) — Wiring harnesses near hot exhaust components melt, fray, and short to ground. Corrosion in connector pins or a weak ground strap creates a voltage drop that the computer interprets as a low signal. On 2019+ GM trucks, harness chafing is a documented primary cause (TSB #21-NA-149).
- Soot or carbon buildup on the sensor element (Common)
- Vacuum leaks, boost leaks, or cracked intercooler (Common) — Cracked hoses, split charge air pipes, loose clamps, or a leaking intercooler allow pressurized air to escape. While this usually triggers an underboost code (P0299), a massive leak causes an implausibly low reading that contributes to P0237.
- Stuck-open turbocharger wastegate or faulty actuator (Less Common) — If the wastegate is stuck open, the turbo cannot build pressure. On modern electronically controlled turbos, a faulty actuator is often the root cause.
- Clogged air filter or intake restriction (Rare) — A severely clogged engine air filter or intake blockage starves the turbo for air, preventing it from building the expected boost pressure.
- Faulty Powertrain Control Module (PCM) (Rare) — The vehicle's main computer rarely fails. Consider this only after exhaustively eliminating all wiring, ground, and sensor issues.
Symptoms

- Drastic loss of engine power (Limp Mode) — The vehicle feels sluggish and accelerates slowly because the computer disables the turbocharger to protect the engine.
- Engine hesitation, rough idle, or stalling — The engine stumbles during acceleration or idles unevenly due to the computer miscalculating the air/fuel mixture.
- Increased fuel consumption and black exhaust smoke — The engine runs on an inefficient, rich fuel mixture to compensate for the perceived lack of air, dropping MPG and pushing black soot out the tailpipe.
- Abnormal noises from the engine bay — You hear a high-pitched whining, hissing, or wheezing sound from the turbocharger area as pressurized air escapes from a leak.
- Check Engine Light is on (also visible on scanner) — The Malfunction Indicator Lamp (MIL) illuminates immediately upon detecting the low voltage.
Diagnostic Flowchart

Tap your situation to follow the diagnostic path that matches what you're seeing on this code.
Common Fixes & Costs
- Replace Turbocharger Boost Pressure Sensor — Parts: $40 - $180, Labor: $90 - $250, ~0.8 hr book time (DIY)
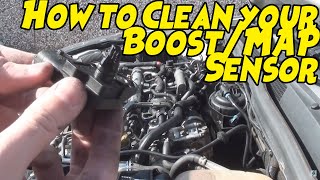
- Clean Soot-Clogged MAP/Boost Sensor — Parts: $10 - $20, Labor: $50 - $100, ~0.5 hr book time (DIY)
- Repair Damaged Wiring or Connectors — Parts: $10 - $50, Labor: $150 - $400, ~2.0 hr book time (Intermediate)
- Replace Leaking Intake/Boost Hoses — Parts: $40 - $220, Labor: $50 - $150, ~1.0 hr book time (DIY)
- Replace Turbocharger Assembly — Parts: $800 - $2,500, Labor: $400 - $1,000, ~6.0 hr book time (Professional)
DIY vs Professional
- Replace Boost Sensor — Beginner:
Tools: Basic socket set, Torx bits, flashlight, pliers. - Clean Sensor — Beginner:
Tools: Socket set, MAF sensor cleaner or electrical contact cleaner. - Repair Wiring/Connectors — Beginner:
Tools: Digital multimeter, wire strippers, soldering iron, heat shrink tubing, Tesa tape. - Replace Hoses/Pipes — Beginner:
Tools: Screwdriver or socket set for hose clamps, pick tool. - Replace Turbocharger — Beginner:
Tools: Extensive professional toolset, lift, torque wrenches.
Used vs. New Parts: Buying Guide
When a used part is worth it: Buying a used electronic boost pressure sensor is never recommended. The low cost of a new aftermarket part ($40-$80) makes the risk of a faulty used part and repeat labor costs impractical.
Donor-vehicle mileage cap: roughly under 50000 miles for the part to have meaningful remaining life.
Donor quality checklist:
- Verify the exact OEM part number matches.
- Inspect the used sensor's connector for corrosion and the tip for heavy soot.
- Avoid parts from vehicles scrapped due to engine fires.
Decision logic:
- If The part is an electronic sensor like a boost/MAP sensor. → Buy new. The savings are minimal compared to the risk of premature failure.
- If Vehicle is over 150,000 miles and the new OEM part exceeds $200. → A new aftermarket sensor is the best value. A used part remains a high-risk gamble.
Warranty tradeoff: Used sensors carry a 30-day warranty that excludes labor. New aftermarket sensors offer 1-year to lifetime warranties. New OEM parts carry a 1-2 year warranty.
Worst-case if a used part fails: 200-500. If a used sensor fails, you pay for diagnostic time and labor all over again.
What Happens If You Wait — Timeline
- 0-1 week: Code P0237 sets, illuminating the Check Engine Light. The PCM disables the turbo and enters limp mode, causing an immediate, severe loss of power. (MPG impact: 10-20%% · Added cost: $0-25 in wasted fuel)
- 1 week - 2 months: Continued driving forces the engine to run on a default rich fuel mixture. This causes poor fuel economy, spark plug fouling, and black exhaust smoke. (MPG impact: 15-25%% · Added cost: $50-200 in wasted fuel and spark plug replacement)
- 2-4 months: The constant rich mixture drastically increases exhaust temperatures. The catalytic converter substrate overheats, sinters, and begins to melt. (MPG impact: 15-25%% · Added cost: $800-1,500 (catalytic converter damage is likely))
- 4+ months: The catalytic converter becomes completely clogged. Exhaust flow is severely restricted, causing extreme backpressure that destroys the turbocharger or engine internals. The vehicle stalls or fails to start. (MPG impact: 25-40%% · Added cost: $1,500-3,500+ (full catalytic converter and turbo repair needed))
Cost of Not Fixing It
- Immediate: Vehicle enters limp mode with severe power loss, making highway merging unsafe. Fuel economy drops by 10-20%. (Added cost: Negligible, besides increased fuel usage.)
- 1-6 months: Driving with a rich air/fuel mixture overheats and destroys the catalytic converter. (Added cost: 1200-2800)
- 6+ months: Prolonged incorrect operation creates extreme exhaust backpressure, destroying the turbocharger and potentially causing internal engine damage. (Added cost: 1500-4000+)
Diagnosis Steps

- Read the Code and Freeze Frame Data
Use an OBD-II scanner to confirm P0237. Review freeze frame data to see engine conditions when the code set. Note accompanying codes: P0299 points to a physical leak, while P0238 points to an intermittent electrical short.
Tools: OBD-II Scanner (Beginner) - Visually Inspect Wiring and Hoses
Inspect the boost pressure sensor's wiring harness for melting, chafing, or corrosion, especially near exhaust manifolds. Check all vacuum lines, charge pipes, and the intercooler for cracks, loose clamps, or oil residue indicating a leak.
Tools: Flashlight (Beginner) - Check Live Sensor Data & Altitude Rationality
With Key On, Engine Off (KOEO), view live data. The boost sensor must read atmospheric pressure (~14.7 PSI / 101 kPa at sea level; ~12.2 PSI at 5,000 ft) and match the BARO sensor. A reading near zero confirms a hard electrical fault.
Tools: OBD-II Scanner with Live Data (Intermediate) - Test the Sensor Circuit with a Multimeter
Unplug the sensor. With KOEO, test the connector pins. You must find a 5-volt reference signal and a solid ground (<100mV). If either is missing, repair the wiring. If both are present, back-probe the signal wire with the sensor plugged in; a reading below 0.5V confirms a dead sensor.
Tools: Multimeter with back-probe pins (Intermediate) - Perform a Wiggle Test
While monitoring the sensor's voltage on a multimeter or scanner, vigorously wiggle the wiring harness and connector. If the voltage jumps or drops out, you have located an intermittent break in the wiring.
Tools: OBD-II Scanner or Multimeter (Intermediate) - Test for Boost Leaks
If the electrical circuit is perfect, the low pressure reading is real. Pressurize the intake system from the turbo inlet with a smoke machine to expose cracked hoses, a leaking intercooler, or loose clamps.
Tools: Automotive Smoke Machine (Advanced) - Scope the Sensor Signal
For complex intermittent issues, graph the sensor's signal wire with an oscilloscope. Apply vacuum/pressure with a hand pump. A healthy sensor shows a smooth voltage transition; a noisy or flatlined signal requires sensor replacement.
Tools: Oscilloscope, Vacuum/Pressure Pump (Professional) - Test Wastegate Function
Use a vacuum pump to verify a vacuum-actuated wastegate holds pressure and moves freely. Use a bi-directional scanner to command an electronic wastegate open and closed to rule out mechanical turbo failure.
Tools: Vacuum Pump, Bi-directional OBD-II Scanner (Professional)
When This Code Triggers (Freeze-Frame Conditions)
- Engine Coolant Temp: 180-210°F (Fully warmed up and at operating temperature.)
- RPM: 1800-3000 RPM (During moderate acceleration or when trying to maintain speed under load.)
- Engine Load: 40-70% (The PCM is requesting boost from the turbocharger to meet driver demand.)
- Vehicle Speed: 40-65 mph (Occurs at highway speeds when accelerating or merging.)
Related Codes
- P0238 — The direct opposite code: 'Turbocharger Boost Sensor 'A' Circuit High.' P0237 indicates a short to ground, while P0238 indicates a short to power or an open circuit. Unplugging the sensor to see if P0237 changes to P0238 proves the wiring is intact.
- P0299 — 'Turbocharger Underboost.' P0237 is an electrical fault, while P0299 is a mechanical fault (actual boost fails to meet the target). A massive boost leak causes either, but P0237 requires electrical testing first.
- P0106 — 'MAP Sensor Performance/Rationality.' P0237 is a hard electrical fault where voltage is below spec. P0106 is a logic fault where the sensor provides a signal, but it conflicts with other sensors like throttle position.
- P0235 — 'Turbocharger Boost Sensor 'A' Circuit Malfunction.' A general circuit fault code. While P0237 specifically points to a 'low' input, P0235 indicates any general problem (high, low, or intermittent) within the circuit.
Climate & Environmental Factors
- Altitude: Directly impacts the baseline Key On, Engine Off (KOEO) reading. At sea level, atmospheric pressure is ~14.7 PSI, but at 5,000 feet, it is ~12.2 PSI. You must know your local expected pressure to accurately diagnose the sensor.
- High Humidity: Accelerates corrosion on connector pins if protective seals fail. This corrosion increases resistance, dropping the voltage signal below the threshold and triggering P0237.
- Extreme Heat: Prolonged engine bay heat degrades plastic wire insulation, making it brittle. This leads to cracked wires and shorts to ground, a primary cause of P0237.
- Extreme Cold: Makes plastic connectors brittle and prone to snapping during repairs. Increased electrical load during cold starts causes momentary voltage drops that trigger P0237 on borderline circuits.
How to Talk to a Mechanic About This Code
Say this: "I have a P0237 code for the 'Turbo Boost Sensor A Circuit Low'. I'd like to schedule a diagnosis. Please ensure the technician tests the sensor's 5-volt reference, ground, and signal wire before recommending a part replacement. I also want to check for any TSBs related to harness chafing."
This signals you understand P0237 is a circuit fault, not just a bad sensor. It directs the shop to perform a proper electrical diagnosis, preventing them from missing a wiring issue.
Avoid saying:
- 'Just fix whatever's wrong'
- 'My check engine light is on, can you look at it?'
- 'My car is losing power, I think it's the turbo'
Questions to ask before authorizing the repair:
- Did you confirm the sensor has a good 5V reference and ground at the connector?
- If you are recommending a wiring repair, can you show me where the harness is damaged?
- Did you find any Technical Service Bulletins for this code on my specific vehicle?
- What is the warranty on the recommended parts and labor?
Where to Take It: Dealer vs Independent vs Chain
- Dealer:
Recommended for in-warranty vehicles or if a known, complex TSB applies.
Best for: Vehicles still under powertrain or emissions warranty, Vehicles with complex TSBs (e.g., GM harness chafing) requiring specific procedures, Complex European models requiring specialized tools
Downsides: Highest labor rate (1.5-2x vs. independent), Often recommends larger, more expensive assembly replacements (Typical cost: +50% vs. baseline) - Independent Shop:
Best overall fit for most out-of-warranty P0237 repairs, provided you choose a well-vetted shop.
Best for: Out-of-warranty vehicles where cost is a primary concern, Common P0237 causes like sensor replacement or straightforward wiring repair
Downsides: Diagnostic skill varies greatly; ensure the shop has strong electrical diagnostic capabilities. (Typical cost: +0% vs. baseline) - Chain Shop:
Use with caution. P0237 is a 'circuit' code requiring more than part swapping. Acceptable only if you've done the diagnosis yourself.
Best for: Simple part replacements when you have already confirmed the sensor is the sole cause.
Downsides: Technicians often lack in-depth electrical diagnostic training, High pressure to sell parts leads to replacing the sensor without diagnosing the full circuit. (Typical cost: -10% vs. baseline)
When to Walk Away From the Repair
If the total estimated repair cost exceeds 40-50% of your car's current private-party value, seriously consider selling or trading it in.
- Car worth $5000, fix is $2800: Walk away. The repair cost is over 50% of the car's value. This is a bad investment.
- Car worth $15000, fix is $400: Fix it. This repair is well below the threshold and necessary for the vehicle's performance.
- Car worth $3000, fix is $1200: Borderline. At 40% of the vehicle's value, get a second opinion on the diagnosis before proceeding.
What Scan Tool You Need for This Code
Minimum: OBD-II scanner with Live Data streaming.
A basic $20 code reader only shows 'P0237'. It cannot display live voltage or pressure readings, which are essential to determine if the fault is electrical or mechanical. You must compare the Boost sensor reading to the BARO sensor reading.
Budget: BlueDriver Pro or Autel AL619 (~$100) — Reads the code, shows freeze-frame data, and displays live data streams for the boost sensor. This is the minimum needed for a confident DIY diagnosis.
Mid-range: Foxwell NT510 Elite or Innova 5610 (~$180) — Includes bi-directional controls. This allows you to command components like an electronic wastegate actuator to move, ruling out mechanical failures.
Professional: Autel MaxiCOM MK808 / MK900 series (~$500-900) — Offers full bi-directional control, advanced topology mapping, and access to manufacturer-specific tests, equivalent to professional shop tools.
Rent vs buy: If this is a one-time repair, major auto parts stores offer free tool loaner programs where you can borrow a scanner with live data capabilities.
How to Clear the Code After You Fix It
- Ensure all repairs are complete and the boost sensor is securely reconnected.
- Use an OBD-II scan tool to formally clear the P0237 code from the PCM's memory.
- Perform a test drive including several instances of moderate acceleration to allow the PCM to verify the repair.
Drive cycle (~20 minutes): Start the engine cold and idle for 3 minutes. Drive for 20 minutes mixing city stop-and-go and steady highway cruising at 55 mph. Include two medium-throttle accelerations. Allow the vehicle to cool down completely.
Readiness monitors affected: Catalyst Monitor, Evaporative System Monitor, Oxygen (O2) Sensor Monitor
Before emissions retest: drive at least 50 miles to fully set monitors.
Watch out for:
- Disconnecting the battery fails to clear the code from permanent memory on modern vehicles.
- Clearing the code immediately before an emissions test results in an automatic 'Not Ready' failure.
Will This Fail Emissions / State Inspection?
Yes — this code typically fails an OBD-II emissions inspection.
- California: An active P0237 code results in an automatic smog check failure. A complete OBD-II drive cycle must be performed post-repair to set all readiness monitors to 'Ready'.
- New York: The NYS DMV inspection includes an OBD-II scan. A Check Engine Light with code P0237 is an automatic failure.
- Texas: In counties requiring emissions testing, an active P0237 causes the vehicle to fail the OBD portion of the inspection.
Manufacturer-Specific Notes
- Ford: On 6.7L Power Stroke diesels, TSB SSM 53328 notes P0237 appearing with codes P003A and P2263 points to a faulty electronic turbocharger actuator (LC3Z-9G488-B), not the sensor. Soot buildup on the MAP sensor is also highly common.
- General Motors (Chevrolet/GMC): On 2019+ Sierra/Silverado trucks, TSB #21-NA-149 details numerous engine harness chafe points causing P0237. On 2023+ Equinox/Terrain models, TSB #PIP5927D points to a damaged charge air inlet pipe at the turbo.
- SAAB: SAAB triggers P0237 strictly when the boost pressure sensor voltage remains below 0.09 volts for more than 5 consecutive seconds.
- Volkswagen/Audi: On TDI and TFSI engines, the boost pressure sensor (often called a 'Thrust Sensor') is positioned where PCV oil vapor heavily contaminates it, leading to premature failure.
Real Owner Stories
2017 Fiat 500 1.3L Diesel at 100,000 km
Check Engine Light illuminated with code P0237, but the car drove normally without entering limp mode.
What they tried:
- Located the boost pressure sensor on the backside of the EGR.
- Removed the sensor and cleaned the heavy soot off the tip with cleaner.
Outcome: Cleaning the sensor successfully cleared the P0237 code and restored normal function.
Lesson: On diesel engines, soot contamination is a primary cause. Clean the sensor with an appropriate cleaner before buying replacement parts.
2018 VW Jetta 1.4T with intermittent power loss
Car experienced severe lack of boost. The P0237 code came and went. The owner restored boost temporarily by flooring the accelerator.
What they tried:
- Replaced the MAP sensor, boost pressure sensor, downpipe, intake, charge pipe, ignition coils, and wastegate actuator.
- Inspected the turbo and replaced all gaskets.
Outcome: The problem persisted. The owner concluded the issue was a wiring problem between the ECU and the sensor.
Lesson: Do not fire the parts cannon. A simple wiring harness wiggle test or multimeter circuit check prevents wasting thousands of dollars on unneeded parts.
2019 Ford Expedition 3.5L with repeat failures
Vehicle lost acceleration, triggering P0237. A shop replaced the boost pressure sensor.
What they tried:
- The new sensor failed again 9,000 miles later. The shop replaced it a second time under warranty.
Outcome: The recurring failure suggests an underlying electrical issue (voltage spikes, bad ground) is destroying the sensors.
Lesson: Repeat failures of the same part indicate the root cause remains unfixed. Demand a deeper electrical diagnosis to prevent a third failure.
How to Prevent This Code From Triggering
- Install protective wire loom or high-temperature tape (Once, or during other repairs) — Protects the sensor's wiring harness from engine heat and abrasion, preventing wires from melting or chafing through and shorting to ground.
- Clean MAP/Boost sensor during air filter changes (Every 15,000-30,000 miles) — On direct-injection and diesel engines, oil vapor and soot coat the sensor, insulating it and causing incorrect readings. Gentle cleaning prevents this buildup.
- Regularly inspect intake hoses and clamps (Every oil change) — Vibrations and heat cycles loosen hose clamps and crack plastic pipes. Tightening clamps prevents boost leaks that stress the turbo system.
- Apply dielectric grease to the connector (When replacing the sensor or inspecting the connector) — Seals the electrical connector from moisture, preventing pin corrosion. Corrosion creates high resistance, causing a voltage drop that triggers P0237.
Frequently Asked Questions
What does 'Circuit Low' actually mean?
It means the electrical signal the computer receives from the sensor is lower than the minimum expected voltage (typically <0.5V). The power is present, but a short diverts it to ground instead of its intended path. The computer sees this near-zero signal and triggers the code.
What are the most common mistakes when diagnosing P0237?
The biggest mistake is replacing the boost sensor without testing the circuit. Because P0237 is a 'circuit' fault, damaged wiring or a bad ground causes it just as often. Always test the sensor's 5V reference and ground pins before buying parts.
Can a bad ground cause P0237?
Yes. The sensor's signal is measured relative to ground. If the sensor's ground connection is poor, it creates a voltage offset that the PCM interprets as a low signal, triggering P0237 even if the sensor is perfectly fine.
How much does it cost to fix code P0237?
A DIY boost sensor replacement costs $40-$180 for the part. A professional wiring repair ranges from $150 to $400 depending on the damage location. Major repairs like a turbocharger replacement cost $1,500 to $3,000+.
Can I replace the boost sensor myself to fix P0237?
Yes, replacing an accessible boost sensor is a straightforward DIY repair. However, you must diagnose the circuit correctly first. If the fault lies in the wiring, a new sensor will not fix the issue.
Will clearing the code make it go away?
No. Clearing the code turns the check engine light off temporarily, but it returns as soon as the computer detects the low voltage fault again. You must repair the underlying electrical or mechanical problem.
Can a clogged air filter cause P0237?
A severely clogged air filter restricts airflow and causes underboost conditions (like P0299), but it rarely causes P0237 directly. P0237 points specifically to a voltage signal below the minimum specification, which is almost always an electrical failure.
Key Takeaways
- Code P0237 triggers when the turbo boost sensor sends a voltage signal below 0.5V, indicating a short to ground, damaged wiring, or a dead sensor.
- Driving with P0237 forces the engine into limp mode, cutting turbo power and dropping fuel economy by 10-20%.
- Stop driving immediately; running rich in limp mode destroys catalytic converters, turning a $150 sensor replacement into a $2,500 repair.
- Test the 5-volt reference and ground pins with a multimeter before buying parts, as wiring chafing causes this code just as often as a failed sensor.
- Check for Technical Service Bulletins (TSBs) first, specifically TSB #21-NA-149 for 2019+ GM trucks, which outlines known wiring harness chafe points.
Helpful Videos


The information in this article is provided for general reference and educational purposes only. Vehicle specifications, procedures, and part compatibility can vary by production date, trim level, and region. Always consult your vehicle's factory service manual and verify part numbers before purchasing or performing repairs. Safety-critical components such as airbags, seat belts, and braking systems should be installed by a qualified professional.
- 🎬 Helpful Videos
- What Does P0237 Mean?
- Can I Drive With P0237?
- Common Causes
- Symptoms
- Diagnostic Flowchart
- Common Fixes & Costs
- DIY vs Professional
- Used vs. New Parts: Buying Guide
- What Happens If You Wait — Timeline
- Cost of Not Fixing It
- Diagnosis Steps
- When This Code Triggers (Freeze-Frame Conditions)
- Related Codes
- Climate & Environmental Factors
- How to Talk to a Mechanic About This Code
- Where to Take It: Dealer vs Independent vs Chain
- When to Walk Away From the Repair
- What Scan Tool You Need for This Code
- How to Clear the Code After You Fix It
- Will This Fail Emissions / State Inspection?
- Manufacturer-Specific Notes
- Real Owner Stories
- 2017 Fiat 500 1.3L Diesel at 100,000 km
- 2018 VW Jetta 1.4T with intermittent power loss
- 2019 Ford Expedition 3.5L with repeat failures
- How to Prevent This Code From Triggering
- Frequently Asked Questions
- What does 'Circuit Low' actually mean?
- What are the most common mistakes when diagnosing P0237?
- Can a bad ground cause P0237?
- How much does it cost to fix code P0237?
- Can I replace the boost sensor myself to fix P0237?
- Will clearing the code make it go away?
- Can a clogged air filter cause P0237?
- Key Takeaways
- 🎟️ Get 5% Off