

OBD-II Code P0236: Turbo/Supercharger Boost Sensor 'A' Circuit Performance
What P0236 means, why it triggers, and how to fix it
- P0236 triggers when the engine computer receives an illogical signal from the turbo boost sensor, instantly cutting engine power and forcing the vehicle into limp mode.
- Over 80% of P0236 codes stem from three issues: a failed boost pressure sensor, a cracked charge pipe causing a boost leak, or corroded sensor wiring.
- Driving with an active P0236 code risks catastrophic engine damage from uncontrolled overboosting or a $1,500+ catalytic converter failure due to rich fuel mixtures.
- Never replace the boost sensor without first performing a Key-On, Engine-Off (KOEO) test to verify that the Boost, MAP, and BARO sensors all read within 0.5 PSI of atmospheric pressure.
What Does P0236 Mean?

P0236 triggers when your Engine Control Module (ECM) receives an irrational signal from the turbocharger or supercharger boost pressure sensor. The sensor's reading contradicts expected values based on engine load, or it fails to match the Manifold Absolute Pressure (MAP) and Barometric Pressure (BARO) sensors during key-on, engine-off checks. The ECM instantly cuts power and enters limp mode to protect the engine.
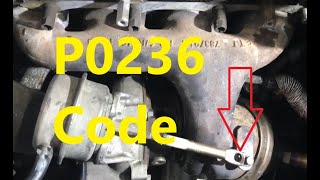
Technical definition: The SAE/OBD-II definition is "Turbocharger/Supercharger Boost Sensor 'A' Circuit Range/Performance". The ECM detects the boost pressure sensor signal is out of its expected electrical range or lacks logical correlation 🎬 Watch: A breakdown of P0236 causes and common fixes. with the MAP and BARO sensors.
Can I Drive With P0236?
No — Do Not Drive. Driving is not recommended. Your vehicle is in a protective limp mode with reduced power. Continuing to drive with a potential overboost condition risks severe engine damage, such as melted pistons or blown head gaskets, and guarantees catalytic converter failure. A damaged catalytic converter adds $800 to $2,500 to the repair bill. Drive only as far as a qualified repair shop.
Common Causes

- Faulty Turbocharger/Supercharger Boost Pressure Sensor (Very Common) — This is the most frequent cause. The sensor degrades from heat cycles or becomes contaminated with oil and carbon, causing it to send slow, stuck, or incorrect voltage signals to the computer.
- Vacuum or Boost Leaks in the Intake System (Common) — Cracked hoses, loose clamps, a failed PCV valve, or a damaged intercooler let pressurized air escape. 🎬 See how to perform a DIY boost leak test. This physical loss of air pressure causes the sensor to report an illogical reading to the ECM.
- Damaged Wiring or Corroded Connectors (Common) — Wires fray from heat and vibration, and connector pins corrode from moisture. This disrupts the 5-volt reference or signal wire, causing opens, shorts, or high resistance. Specific splices in VW and Ford engine harnesses are known failure points. 🎬 Watch: Step-by-step guide to testing a VW boost pressure sensor.
- Sticking Turbocharger Wastegate (Less Common) — The wastegate controls turbo speed. If it sticks open or closed, or if its electronic actuator fails, the turbo produces the wrong amount of boost, triggering a performance code.
- Faulty Aftermarket Modifications (Less Common) — Aftermarket 'piggyback' tuners intercept and alter the sensor's signal, often pushing it outside the ECM's expected range. Poorly installed cold air intakes also create system leaks.
- Exhaust Restriction or Leak (Rare) — A clogged catalytic converter creates excessive backpressure, while an exhaust manifold leak allows gas to escape before spinning the turbine. Both reduce turbo efficiency and lower boost pressure.
- Clogged Air Filter (Rare) — A severely clogged engine air filter restricts airflow into the turbo, preventing it from building expected boost and causing the computer to flag the reading as illogical.
- Failing Engine Control Module (ECM) (Rare) — The vehicle's main computer rarely fails, but software glitches or internal hardware damage cause it to misinterpret a perfectly good sensor signal. Rule out all wiring and reference voltage issues first.
Symptoms

- Reduced Engine Power / 'Limp Mode' — The car feels sluggish, hesitates, or suffers from severe turbo lag. The computer limits power to prevent catastrophic engine damage from uncontrolled boost levels.
- Check Engine Light is On — The Malfunction Indicator Lamp (MIL) illuminates. A flashing MIL during heavy acceleration signals a severe misfire requiring immediate shutdown.
- Abnormal Engine or Turbo Noises — A distinct whistling or 'whooshing' sound from the engine bay indicates a physical air leak in a charge pipe or the intercooler.
- Increased Fuel Consumption — Gas mileage drops by 10-15% because the engine defaults to a 'safe' fuel map that runs excessively rich.
- Black Smoke from Exhaust — Dark smoke pours from the exhaust during hard acceleration, confirming an incorrect, overly rich air-fuel mixture.
- Erratic or Surging Boost (also visible on scanner) — If equipped with a boost gauge, the needle jumps erratically or power surges and falls during steady acceleration.
Diagnostic Flowchart
Tap your situation to follow the diagnostic path that matches what you're seeing on this code.
Common Fixes & Costs
- Replace the Turbocharger/Supercharger Boost Pressure Sensor — Parts: $50-$200, Labor: $80-$150, ~1 hr book time (DIY)
- Repair Vacuum or Boost Leaks (Hoses, Clamps) — Parts: $10-$100, Labor: $100-$300, ~1.5 hr book time (Intermediate)
- Repair Damaged Wiring or Clean Connectors — Parts: $5-$25, Labor: $80-$250, ~1 hr book time (Intermediate)
- Replace the Turbocharger/Supercharger — Parts: $1,000-$3,000+, Labor: $500-$1,500, ~8 hr book time (Professional)
DIY vs Professional
- Replace Boost Pressure Sensor — Beginner:
Tools: Basic socket set, screwdriver, flashlight. - Repair Obvious Vacuum/Boost Leaks — Beginner:
Tools: Pliers, hose clamp driver, flashlight. - Repair Damaged Wiring — Beginner:
Tools: Multimeter, wire strippers, soldering iron, heat shrink tubing, wiring diagrams. - Replace Turbocharger — Beginner:
Tools: Extensive professional toolset, lift, engine support, specialty line wrenches, torque wrenches.
Used vs. New Parts: Buying Guide
When a used part is worth it: Buying a used boost pressure sensor is never recommended. It is a low-cost wear item, and the labor to replace it a second time outweighs any initial savings.
Donor-vehicle mileage cap: roughly under 20000 miles for the part to have meaningful remaining life.
Donor quality checklist:
- Match the part number exactly; visually identical sensors have different voltage ranges.
- Avoid sensors from high-mileage vehicles or regions with extreme heat.
Decision logic:
- If The cost of a new OEM or reputable aftermarket sensor is under $150 → Always buy new. The risk of a used sensor failing quickly is too high.
- If The part is for a temporary diagnosis to confirm a fault → A known-good used part serves as a cheap diagnostic tool, but should not be a permanent repair.
- If The part has a high failure rate due to oil or moisture contamination → Favor new, as a used part was likely exposed to the same contaminants.
Warranty tradeoff: Salvage yard parts carry a 30-day warranty. New aftermarket sensors offer 1-year to lifetime warranties. New OEM parts include a 1-year/12,000-mile warranty.
Worst-case if a used part fails: $100-$300 for repeat labor, plus the cost of another sensor.
What Happens If You Wait — Timeline
- 0-1 month: Code sets, Check Engine Light illuminates. Vehicle enters limp mode, causing sluggish acceleration. (MPG impact: 10-15%% · Added cost: $50-$100 in wasted fuel)
- 1-4 months: Driving in a rich fuel map stresses the catalytic converter with high temperatures. Uncontrolled overboost begins wearing turbo bearings. (MPG impact: 10-15%% · Added cost: $200-$400 in wasted fuel. Risk of catalytic converter damage begins.)
- 4-8 months: Sustained high temperatures melt the catalytic converter substrate. Persistent overboost causes turbocharger seals to fail, leading to oil consumption. (MPG impact: 15-25%% · Added cost: $1,000-$3,000 for catalytic converter or turbocharger replacement.)
- 8+ months: Catastrophic failure. Severe overboost causes detonation, blown head gaskets, or bent connecting rods. A melted catalytic converter blocks the exhaust. (MPG impact: 25%+% · Added cost: $3,000-$7,500+ for major engine repair or replacement.)
Cost of Not Fixing It
- Immediate (0-1 month): Significant loss of power ('limp mode'), poor acceleration, and a 10-15% drop in fuel economy as the ECM defaults to a safe, rich fuel map. (Added cost: $50-$100 per month in extra fuel costs.)
- Short-Term (1-6 months): Continued operation with a rich fuel mixture overheats and damages the catalytic converter. Uncontrolled overboost events begin stressing turbo bearings. (Added cost: $800-$2,800 for catalytic converter replacement.)
- Long-Term (6+ months): Severe engine damage. Persistent overboost conditions lead to blown head gaskets, damaged pistons, or complete turbocharger failure. (Added cost: $3,000-$7,500+ for turbocharger and engine repair.)
Diagnosis Steps

- Scan Codes and Check KOEO Sensor Readings
Use a scanner to confirm P0236. With the key on and engine off (KOEO), view live data for the Boost, MAP, and BARO sensors. At sea level, all should read approximately 14.7 PSI (101 kPa). A variance of more than 0.5 PSI isolates the faulty sensor.
Tools: OBD-II Scanner with Live Data (Intermediate) - Visually Inspect Hoses and Wiring
Examine all vacuum lines and large charge pipes connected to the turbo and intercooler for cracks or loose clamps. Inspect the boost sensor wiring and connector for frayed insulation, corrosion, or oil contamination.
Tools: Flashlight (Beginner) - Perform a Boost Leak Test (Smoke Test)
Force low-pressure smoke into the intake system. Smoke pours out of hidden cracks in hoses, the intercooler, or gaskets that visual inspections miss.
Tools: Automotive Smoke Machine (Intermediate) - Test Sensor Voltage and Circuit
Disconnect the sensor to verify a 5V reference signal and a solid ground (less than 0.1 ohms). Reconnect and back-probe the signal wire: it should read 1.5-2.5V at KOEO, drop at idle, and rise smoothly to ~4.5V under boost. A stuck voltage confirms a dead sensor.
Tools: Multimeter, Back-probe Kit, Wiring Diagram (Advanced) - Perform a Live Voltage 'Wiggle Test'
With the engine running and the sensor back-probed, gently wiggle the wiring harness. Erratic voltage jumps confirm an intermittent connection, a broken internal wire, or a corroded pin.
Tools: Multimeter or Scan Tool, Back-probe Kit (Advanced) - Inspect the Turbocharger Wastegate
Check the wastegate actuator and linkage for binding. Use a vacuum pump or bidirectional scan tool to command the wastegate open and closed, ensuring it moves freely without sticking.
Tools: Hand-held Vacuum Pump, Advanced Scan Tool (Advanced) - Analyze Signal with an Oscilloscope
Connect an oscilloscope to the sensor's signal wire. A healthy sensor produces a smooth analog voltage that tracks pressure changes instantly. A noisy, delayed, or flat-lined signal confirms internal sensor failure.
Tools: Automotive Oscilloscope (Professional)
When This Code Triggers (Freeze-Frame Conditions)
- Engine Coolant Temp: 180-210°F (82-99°C) (Fully warmed up and under load.)
- RPM: 2000-3500 RPM (During acceleration or when maintaining speed, where the ECM expects the turbo to produce boost.)
- Engine Load: 40-80% (Sets when the driver demands power, such as climbing a hill or accelerating onto a highway.)
- Vehicle Speed: 40-65 mph (65-105 km/h) (Steady-state highway driving or during a hard acceleration event.)
Related Codes
- P0299 — Indicates a Turbo Underboost condition. P0299 sets when actual boost is consistently lower than commanded boost. A large physical boost leak triggers both codes simultaneously.
- P0234 — Indicates a Turbo Overboost condition. Triggered when actual boost is dangerously higher than commanded, often from a stuck wastegate. P0236 appears if the sensor reading is deemed illogical during the event.
- P0106 — Indicates a MAP sensor performance problem. The ECM compares the boost sensor to the MAP sensor. If one fails, it triggers a performance code for the other.
- P0237 / P0238 — Indicate Boost Sensor 'A' Circuit Low (P0237) and High (P0238). These point to a hard electrical fault (short to ground or power), whereas P0236 indicates a rationality problem.
- P0069 — Indicates a MAP-Barometric Pressure Correlation fault. Triggered during a KOEO check if the MAP sensor contradicts the BARO sensor, utilizing the same diagnostic logic as P0236.
Climate & Environmental Factors
- Cold Weather: In freezing temperatures (below 0°F / -18°C), moisture from the PCV system freezes inside the intercooler and charge pipes. This ice blockage causes erratic airflow and triggers P0236, a known issue on GM 1.4L/1.5T engines.
- High Altitude: At higher altitudes, ambient barometric pressure drops. A slow-responding boost sensor fails to correlate correctly with the BARO and MAP sensors during the KOEO check, triggering P0236 even if the sensor functions normally at sea level.
- High Humidity / Moisture: High humidity accelerates corrosion on connector pins and wiring harnesses. Moisture intrusion causes shorts or high resistance in the boost sensor circuit, leading to an irrational signal.
How to Talk to a Mechanic About This Code
Say this: "I have an OBD-II code P0236 for the turbo boost sensor circuit. I'd like to schedule a diagnostic. Please start by checking for boost leaks and performing a Key-On, Engine-Off sensor correlation test before recommending part replacements."
This directs the mechanic to perform specific, logical diagnostic steps rather than blindly replacing the most obvious part, saving you money.
Avoid saying:
- 'My car is running weird and the check engine light is on.' (Invites an expensive, wide-ranging diagnostic process).
- 'I think I need a new turbo.' (Never jump to the most expensive conclusion).
- 'Just fix it.' (Gives the shop a blank check to replace parts without approval).
Questions to ask before authorizing the repair:
- Did you find any boost leaks with a smoke test?
- What were the readings for the Boost, MAP, and BARO sensors during the Key-On, Engine-Off test?
- If the sensor needs replacement, what is the warranty on the new part and your labor?
Where to Take It: Dealer vs Independent vs Chain
- Dealer:
Best for: Vehicles under warranty., Complex, manufacturer-specific issues like known wiring problems or ECM updates., Newer vehicles with advanced electronic systems.
Downsides: Highest labor rates., Defaults to replacing expensive assemblies rather than performing detailed component repairs. (Typical cost: +40% vs. baseline) - Independent Shop:
Best fit for most scenarios. An experienced independent mechanic effectively diagnoses and repairs bad sensors, boost leaks, and wiring faults at a reasonable cost.
Best for: Out-of-warranty vehicles where cost is a major factor., Common repairs like sensor replacement or fixing boost leaks., Shops specializing in your vehicle's brand.
Downsides: Diagnostic capabilities vary greatly; look for ASE certification., Lacks access to the latest manufacturer-specific software updates. (Typical cost: +0% vs. baseline) - Chain Shop:
Acceptable for a simple boost sensor replacement, but avoid for initial diagnosis. Boost leaks and wiring faults are beyond the scope of a typical chain shop.
Best for: Simple part replacements if the diagnosis is already certain.
Downsides: Technician skill varies dramatically., Lacks advanced diagnostic tools for complex turbo system issues., Inclined to replace parts rather than diagnose tricky wiring faults. (Typical cost: -10% vs. baseline)
When to Walk Away From the Repair
If the estimated repair cost exceeds 40% of the car's private-party value, sell or trade it in.
- Car worth $4000, fix is $2200: Walk away. The repair cost is over 50% of the car's value.
- Car worth $12000, fix is $1800: Fix it. The repair cost is well below the threshold and represents a reasonable investment.
- Car worth $3000, fix is $2500: Walk away. The repair cost is nearly the entire value of the car.
What Scan Tool You Need for This Code
Minimum: An OBD-II reader that displays live sensor data.
A basic $20 code reader only shows the P0236 code. Diagnosis requires viewing live voltage and pressure readings from the Boost, MAP, and BARO sensors.
Budget: BlueDriver Pro Scan Tool (~$100) — Connects to a smartphone to read codes, view freeze-frame data, and graph live sensor data for the boost, MAP, and BARO sensors.
Mid-range: Innova 5610 (~$350) — Offers bidirectional control to command components like an electronic wastegate to move, determining if the issue is mechanical or electrical.
Professional: Autel MaxiCOM MK808S (~$450) — Provides full bidirectional control, OE-level diagnostics, and access to manufacturer-specific codes crucial for diagnosing complex wiring issues.
Rent vs buy: Auto parts stores rent basic code readers for free, but they lack live data capabilities. Buying a scanner with live data is a mandatory investment for DIY diagnosis.
How to Clear the Code After You Fix It
- Use an OBD-II scan tool to clear the P0236 code.
- Perform a complete drive cycle to allow the vehicle's readiness monitors to reset.
- Re-scan the vehicle to ensure the code does not return.
Drive cycle (~30 minutes): A general drive cycle includes: 1) A cold start after sitting for 8+ hours. 2) 5-10 minutes of city driving with several stops. 3) 10-15 minutes of steady highway driving between 50-65 mph. 4) A cool-down period.
Readiness monitors affected: Catalyst Monitor, Evaporative System (EVAP) Monitor, O2 Sensor Monitor
Before emissions retest: drive at least 100 miles to fully set monitors.
Watch out for:
- Disconnecting the battery clears the code but resets all readiness monitors to 'Not Ready', guaranteeing an emissions test failure.
- The code returns immediately if the root cause of the fault was not correctly repaired.
- Failing to drive long enough under the right conditions leaves monitors 'Not Ready'.
Will This Fail Emissions / State Inspection?
Yes — this code typically fails an OBD-II emissions inspection.
- California: An active P0236 code is an automatic smog check failure. All OBD-II readiness monitors must be 'Ready' to pass; drive 50-100 miles after a repair before re-testing.
- New York: The NYS DMV vehicle inspection includes an OBD-II scan. An illuminated Check Engine Light results in an automatic failure.
- Texas: In emissions-testing counties, an illuminated Check Engine Light is an automatic failure. Even if cleared, the vehicle fails if readiness monitors are not reset.
Most Commonly Affected Vehicles
- Ford F-150 (EcoBoost), Focus, Escape (2011-2020) — On 3.5L EcoBoost engines, the sensor suffers moisture contamination from the PCV system. For 1.6L engines, TSB 16-0161 addresses a known wiring splice failure.
- Audi / Volkswagen A4, Golf, Jetta, Passat (1.8T/2.0T TSI) (2008-2019) — A failed PCV/oil separator is a frequent root cause. Always check for high resistance in the T14 engine wiring harness connector (TSB 2037108) before replacing the sensor.
- Hyundai / Kia Veloster Turbo, Optima/K5 Turbo, Sonata Turbo (2011-2020) — A known issue resolved by replacing the boost pressure sensor located on the intercooler cold-side pipe.
- Chevrolet / GMC Silverado (Duramax), Cruze, Equinox (2004-2020) — On 1.4L/1.5T gas engines, check for ice buildup in the intercooler in cold climates (TSB 22-NA-007). On older Duramax diesels, check the wastegate control solenoid.
- Subaru WRX, Forester XT (2008-2021) — On 2015+ WRX models, P0236 triggers when the electronic wastegate actuator becomes slow to respond or fails its internal self-test.
- BMW 320d, 535i, X5 (2007-2017) — On N54/N55 engines, thoroughly inspect for cracked charge pipes, especially the plastic pipe connecting to the throttle body.
- Mercedes-Benz C-Class, E-Class, Sprinter (2007-2018) — Check for oil contamination in the sensor and harness from leaking seals, and inspect the complex vacuum line network for leaks.
- Honda Civic, CR-V, Accord (1.5T) (2016-2023+) — Diagnosis requires comparing boost and barometric sensor values at KOEO. A difference greater than 3.8 PSI confirms a fault. Ensure the latest PCM software is installed.
Manufacturer-Specific Notes
- Ford: On EcoBoost engines, P0236 causes an intermittent 'wrench' light and limp mode that vanishes after restarting the car. This points directly to a failing sensor or a known wiring splice issue (TSB 16-0161).
- Volkswagen/Audi: For 1.8T and 2.0T engines, the root cause is frequently a failed PCV valve or high resistance in the T14 wiring harness connector (TSB 2037108), not a faulty sensor.
- General Motors (GM): On 1.4L/1.5T Cruze and Equinox models, multiple sensor codes (P0236, P0299, P2227) appear together due to ice buildup in the intercooler (TSB 22-NA-007) or a damaged front wiring harness.
- Honda: On 1.5T engines, oil dilution increases crankcase pressure, contaminating the intake tract and sensors. Honda released specific PCM software updates to address these engine management parameters.
Real Owner Stories
2011 Ford F-150 EcoBoost at 60K miles
Intermittent 'wrench' light and limp mode disappeared after restarting the truck. Fuel economy dropped by 2 MPG.
What they tried:
- First dealer visit failed to locate the problem because the code was 'soft' and not stored.
- A second visit during an active fault diagnosed a failing boost sensor.
Outcome: Replaced the boost pressure sensor and wiring harness plug. Power returned and fuel economy improved.
Lesson: Intermittent limp mode that clears on restart is a classic symptom of a failing boost sensor on EcoBoost engines. Persistent symptoms warrant diagnosis even without stored codes.
2017 Chevy Cruze at 50K miles
Check Engine Light illuminated with P0236, alongside P0097 and P0237. The cooling fan ran constantly.
What they tried:
- Replaced the intake air temperature sensor, but the codes immediately returned.
- Struggled to locate the correct sensor on the engine.
Outcome: A technician discovered the connectors for the oxygen sensor and the boost sensor were accidentally swapped during a previous repair. Swapping them back fixed all codes.
Lesson: Double-check that the correct sensor is being diagnosed. If multiple unrelated sensor codes appear at once, suspect a swapped connector or wiring harness issue before replacing parts.
2016 Ford Escape 1.6L
Car exhibited rough running, lack of power, hesitation, and code P0236.
What they tried:
- Considered replacing the boost pressure sensor based on generic advice.
Outcome: The actual cause was a known wiring issue. Ford TSB 16-0161 identified a faulty splice (S129) in the reference voltage circuit. A wiring repair fixed the issue.
Lesson: Always check for TSBs before replacing parts. Symptoms of a bad sensor are often caused by documented wiring harness flaws.
How to Prevent This Code From Triggering
- Use high-quality, manufacturer-spec synthetic engine oil (Every oil change) — Correct viscosity oil lubricates and cools high-speed turbo bearings. Low-quality oil breaks down, leading to sludge and turbo failure.
- Perform regular oil and filter changes (Per manufacturer schedule) — Contaminated oil contains abrasive particles that score turbo bearings and clog fine oil passages, causing oil starvation.
- Allow a brief warm-up and cool-down period (Daily habit) — Idling for 30 seconds before shutdown lets the turbo cool gradually, preventing oil from burning in the bearing housing.
- Regularly inspect and replace the engine air filter (Every 15,000-30,000 miles) — A clean filter prevents debris from destroying delicate compressor blades and ensures unrestricted airflow.
- Periodically clean the boost pressure sensor (Every 30,000-50,000 miles) — Oil vapor and carbon coat the sensor element, slowing response times. Cleaning with electronics cleaner restores function.
Frequently Asked Questions
Is it expensive to fix code P0236?
The cost varies based on the root cause. A professional diagnosis averages $150. Replacing a bad boost sensor typically costs $130 to $350, while fixing a simple vacuum leak runs under $200.
Can I drive my car with a P0236 code?
No, driving is not recommended. Your car is in a reduced-power limp mode to prevent damage. Continuing to drive risks destroying the turbocharger or engine from uncontrolled boost pressure.
What's the difference between a boost sensor and a MAP sensor?
Both measure air pressure, but the boost sensor (T-MAP) sits on the charge pipe to measure turbo pressure. The MAP sensor sits on the intake manifold after the throttle body. The computer compares their signals to verify turbo health.
What are the most common mistakes when diagnosing P0236?
The biggest mistake is replacing the boost sensor without testing it. Always use a scan tool to compare the Boost, MAP, and BARO sensor readings with the key on and engine off. If they don't all read atmospheric pressure, you have a clear diagnostic direction.
Can aftermarket parts or tuning cause a P0236 code?
Yes, aftermarket 'piggyback' tuners that modify the boost signal often push voltages outside the ECM's expected range. This triggers P0236 if the tune is too aggressive or the device malfunctions. Poorly installed cold air intakes also cause leaks that set this code.
Will P0236 clear itself?
No, P0236 is a hard code that requires manual clearing with a scan tool after repairs. Even if an intermittent fault temporarily turns off the Check Engine Light, the code remains stored in the ECM memory. You must fix the root cause to permanently clear it.
Can a bad battery cause a P0236 code?
Yes, a failing battery or alternator causes low system voltage, leading to erratic sensor behavior. This triggers multiple unrelated performance codes, including P0236. Always test your battery and charging system if several electrical codes appear simultaneously.
I replaced the boost sensor but the code came back. What now?
If a new sensor fails to clear the code, you likely have a hidden air leak or a wiring fault. Perform a smoke test to locate cracked intercoolers or hoses. Also, check for Technical Service Bulletins (TSBs) regarding known wiring harness issues for your specific vehicle.
Key Takeaways
- P0236 triggers when the engine computer receives an illogical signal from the turbo boost sensor, instantly cutting engine power and forcing the vehicle into limp mode.
- Over 80% of P0236 codes stem from three issues: a failed boost pressure sensor, a cracked charge pipe causing a boost leak, or corroded sensor wiring.
- Driving with an active P0236 code risks catastrophic engine damage from uncontrolled overboosting or a $1,500+ catalytic converter failure due to rich fuel mixtures.
- Never replace the boost sensor without first performing a Key-On, Engine-Off (KOEO) test to verify that the Boost, MAP, and BARO sensors all read within 0.5 PSI of atmospheric pressure.
Helpful Videos


The information in this article is provided for general reference and educational purposes only. Vehicle specifications, procedures, and part compatibility can vary by production date, trim level, and region. Always consult your vehicle's factory service manual and verify part numbers before purchasing or performing repairs. Safety-critical components such as airbags, seat belts, and braking systems should be installed by a qualified professional.
- 🎬 Helpful Videos
- What Does P0236 Mean?
- Can I Drive With P0236?
- Common Causes
- Symptoms
- Diagnostic Flowchart
- Common Fixes & Costs
- DIY vs Professional
- Used vs. New Parts: Buying Guide
- What Happens If You Wait — Timeline
- Cost of Not Fixing It
- Diagnosis Steps
- When This Code Triggers (Freeze-Frame Conditions)
- Related Codes
- Climate & Environmental Factors
- How to Talk to a Mechanic About This Code
- Where to Take It: Dealer vs Independent vs Chain
- When to Walk Away From the Repair
- What Scan Tool You Need for This Code
- How to Clear the Code After You Fix It
- Will This Fail Emissions / State Inspection?
- Most Commonly Affected Vehicles
- Manufacturer-Specific Notes
- Real Owner Stories
- 2011 Ford F-150 EcoBoost at 60K miles
- 2017 Chevy Cruze at 50K miles
- 2016 Ford Escape 1.6L
- How to Prevent This Code From Triggering
- Frequently Asked Questions
- Is it expensive to fix code P0236?
- Can I drive my car with a P0236 code?
- What's the difference between a boost sensor and a MAP sensor?
- What are the most common mistakes when diagnosing P0236?
- Can aftermarket parts or tuning cause a P0236 code?
- Will P0236 clear itself?
- Can a bad battery cause a P0236 code?
- I replaced the boost sensor but the code came back. What now?
- Key Takeaways
- 🎟️ Get 5% Off