

OBD-II Code P0221: Throttle/Pedal Position Sensor 'B' Circuit Range/Performance
The Ultimate Guide to P0221: What it means, why it triggers, and how to fix it for good
- P0221 triggers 'limp mode' and limits engine power, making the vehicle unsafe for highway driving due to unpredictable stalling.
- Over 70% of P0221 codes stem from a worn-out throttle position sensor integrated directly into the electronic throttle body assembly.
- Save $400+ by checking for a bunched-up floor mat, inspecting the wiring harness for chafing, and cleaning the throttle body before replacing parts.
- Modern vehicles integrate the position sensors into the throttle body or pedal assembly, requiring a full $250-$850 unit replacement rather than a cheap sensor swap.
- Replacing or cleaning the throttle body requires a mandatory electronic 'relearn' procedure using an OBD-II scanner to restore proper idle and acceleration.
What Does P0221 Mean?

P0221 means your car's Powertrain Control Module (PCM) is receiving an unexpected voltage signal from the 'B' sensor that reads how far you are pushing the gas pedal. Modern cars use two sensors ('A' and 'B') for redundancy. This code triggers when the 'B' sensor's voltage is out of the normal range, erratic, or contradicts the reading from the 'A' sensor.
Technical definition: The SAE/OBD-II definition is "Throttle/Pedal Position Sensor/Switch 'B' Circuit Range/Performance Problem." The PCM has detected that the voltage signal from throttle/pedal position sensor 'B' falls outside its expected 0.5V to 4.5V range or performs erratically compared to sensor 'A'.
Can I Drive With P0221?
Yes, But With Caution. You can drive for short distances (under 20 miles) to a repair shop, but daily use is unsafe. The engine will suddenly lose power, stall, or enter a reduced power 'limp mode,' creating a hazard in traffic. A flashing Check Engine Light signifies a severe misfire that destroys the catalytic converter, adding $800-$2500 to the repair cost.
Common Causes

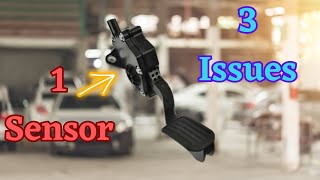
- Worn Throttle Position Sensor (TPS) or Accelerator Pedal Sensor (APPS) (Very Common) — The internal contacts of the sensor wear out over time from heat, vibration, and millions of pedal presses, sending erratic voltage signals. In modern vehicles, this sensor is integrated directly into the accelerator pedal assembly or the throttle body and cannot be replaced separately. 🎬 Watch: How to replace a faulty accelerator pedal assembly
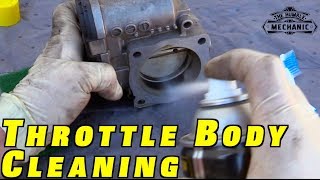
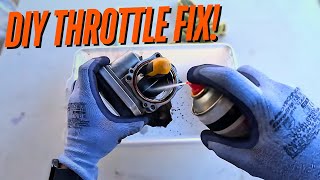
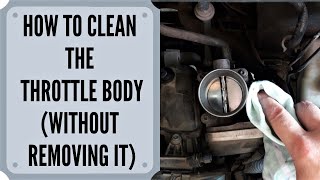
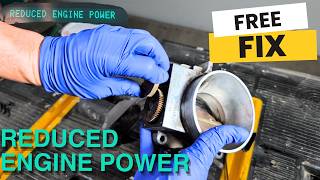
- Carbon-Fouled Electronic Throttle Body (Common) — Carbon and oil sludge build up inside the throttle body, preventing the throttle plate from moving smoothly or closing completely. This physical restriction 🎬 Watch: How to clean your throttle body the right way forces the sensor's readings out of sync with the PCM's commanded position.
- Corroded or Damaged Wiring Harness (Common) — Wires routing to the sensor frequently chafe, fray, or melt near the hot engine block. A loose, corroded, or moisture-damaged connector pin at the sensor or the PCM disrupts the 5-volt reference signal, instantly triggering the code.
- Jammed Driver's Side Floor Mat (Uncommon) — An improperly placed or stacked floor mat physically obstructs the accelerator pedal's movement. This prevents the pedal from returning to its 0% idle position, creating a permanent mismatch between the sensor signals.
- Outdated PCM Software (Uncommon) — Manufacturers occasionally release PCM software updates to widen overly sensitive voltage tolerances or improve the logic for interpreting sensor signals. A dealership re-flash resolves the code without replacing parts.
- Failing Battery or Alternator (Rare) — A dying battery or weak alternator causes system-wide voltage drops. Sensitive 5-volt reference sensors require perfectly stable voltage to function; fluctuations lead to incorrect readings and trigger P0221 as a secondary symptom.
- Failed Powertrain Control Module (PCM) (Rare) — The internal circuits inside the PCM that process the signal from the 'B' sensor short out or fail. This incorrectly sets a P0221 code even when the sensor and wiring test perfectly.
Symptoms

- Reduced Engine Power ('Limp Mode') — The PCM intentionally limits engine power, RPM, and vehicle speed to prevent unintended acceleration when it cannot trust the throttle signals.
- Hesitation, Stumbling, or Shaking on Acceleration — The car pauses, jerks, or violently shakes when you press the gas pedal due to the PCM struggling to maintain a consistent air/fuel ratio.
- Engine Stalling at Low Speeds — The engine stalls unexpectedly when coming to a stop, driving at parking lot speeds, or immediately after starting.
- Hard Start or No Start — The vehicle cranks but refuses to start because the PCM lacks a clear throttle position signal to calculate the start-up fuel mixture.
- Illuminated Check Engine Light (also visible on scanner) — The Malfunction Indicator Lamp (MIL) illuminates immediately. It flashes if the erratic throttle signal induces a severe engine misfire.
- Erratic or High Idle (also visible on scanner) — The engine idles 500-1000 RPM higher than normal, or the idle speed surges up and down without any input on the gas pedal.
- Reduced Fuel Economy (also visible on scanner) — The engine runs inefficiently in a default rich-fuel state, dropping fuel mileage by 10-20%.
Diagnostic Flowchart
Tap your situation to follow the diagnostic path that matches what you're seeing on this code.
Common Fixes & Costs
- Replace the Throttle Body Assembly — Parts: $150-$600, Labor: $100-$250, ~1.2 hr book time (Intermediate)
- Replace the Accelerator Pedal Position Sensor Assembly — Parts: $75-$300, Labor: $50-$150, ~0.8 hr book time (DIY)
- Repair or Replace Damaged Wiring/Connector — Parts: $20-$100, Labor: $150-$400, ~2.0 hr book time (Professional)
- Clean the Throttle Body — Parts: $10-$20, Labor: $75-$150, ~0.8 hr book time (DIY)
- Reprogram or Replace the PCM — Parts: $0-$800, Labor: $100-$300, ~1.5 hr book time (Professional)
DIY vs Professional
- Clean the Throttle Body — Beginner: Yes
Tools: Socket set, screwdriver, throttle body cleaner, rags, soft brush. - Replace Accelerator Pedal Assembly — Beginner: Yes
Tools: Socket set, flashlight. - Replace Throttle Body Assembly — Beginner: No (Intermediate skill recommended)
Tools: Socket set, torque wrench, pliers, new gasket, advanced scan tool. - Repair or Replace Damaged Wiring/Connector — Beginner: No
Tools: Soldering iron, heat shrink tubing, wire strippers, multimeter, depinning tools.
Used vs. New Parts: Buying Guide
When a used part is worth it: Only when replacing a throttle body or pedal assembly on a vehicle worth less than $3,000 where budget is the absolute priority.
Donor-vehicle mileage cap: roughly under 80000 miles for the part to have meaningful remaining life.
Donor quality checklist:
- Verify the donor vehicle was not scrapped for engine fire or electrical flooding.
- Match the OEM part number exactly; electronic throttle bodies have dozens of non-interchangeable variations.
- Inspect the connector pins for green corrosion and the throttle plate for excessive carbon.
Decision logic:
- If Vehicle is less than 10 years old or has under 150,000 miles → Buy a new OEM or premium aftermarket part. The reliability and warranty justify the cost.
- If The part is a known high-failure item (e.g., Ford Escape throttle bodies) → Never buy used. A used part is likely on the verge of the exact same premature failure.
- If Budget is extremely tight on an older vehicle → Purchase a used OEM part from a reputable auto recycler with a minimum 30-day return policy.
Warranty tradeoff: Used parts carry a 30-day part-only warranty. New aftermarket parts offer 1-year to lifetime warranties. If a used part fails, you pay labor costs twice.
Worst-case if a used part fails: $200-$500 for repeat labor and a second replacement part.
What Happens If You Wait — Timeline
- 0-1 month: Intermittent Check Engine Light. The code appears after a cold start but clears on its own. No noticeable symptoms or only a slight hesitation. (MPG impact: 0-2%% · Added cost: $0)
- 1-3 months: Check Engine Light stays on. The vehicle hesitates during acceleration, and the idle becomes erratic. The car occasionally enters limp mode, but restarting resolves it. (MPG impact: 3-8%% · Added cost: $20-$80 in wasted fuel)
- 3-6 months: Symptoms become severe. The vehicle regularly enters limp mode and stalls at low speeds. The unpredictable acceleration poses a significant safety risk. (MPG impact: 10-20%% · Added cost: $100-$250 in wasted fuel and carbon buildup)
- 6+ months: Continued driving with an incorrect air/fuel mixture overheats and destroys the catalytic converter. Spark plugs foul and oxygen sensors fail. The car is undrivable. (MPG impact: 15-25%% · Added cost: $800 - $3000+)
Cost of Not Fixing It
- 0-1 month: Unpredictable stalling and hesitation create a severe safety risk in traffic. Fuel economy drops by 10-15%. (Added cost: $20-$50 in wasted fuel)
- 1-6 months: The erratic throttle signal induces rich fuel mixtures and misfires, overheating and melting the internal honeycomb of the catalytic converter. (Added cost: $800 - $2500)
- 6+ months: Continued stress from incorrect air/fuel mixtures fouls spark plugs, creates severe carbon buildup on intake valves, and destroys oxygen sensors. (Added cost: $300 - $1000)
Diagnosis Steps

- Read Codes and Freeze Frame Data
Use an OBD-II scanner to confirm P0221 and check for related codes (P0121, P2135). Analyze the freeze-frame data to identify the exact engine speed, RPM, and load at the moment the code triggered.
Tools: OBD-II Scanner (Beginner) - Check Technical Service Bulletins (TSBs)
Search online for TSBs related to P0221 for your specific vehicle. Manufacturers frequently issue bulletins for known wiring defects (like VW/Audi TSB 01-17-05) that require a $50 repair kit instead of a $500 throttle body.
Tools: Internet Access (Beginner) - Inspect Floor Mat and Pedal Area
Ensure the driver's side floor mat is secured to its pegs and not bunched up behind or under the accelerator pedal, restricting its full range of motion.
Tools: None (Beginner) - Visually Inspect Wiring and Perform a 'Wiggle Test'
Inspect the wiring harness at the accelerator pedal and the throttle body for chafing, melting, or green corrosion on the pins. While monitoring live voltage on a scanner, have an assistant gently wiggle the harness; if the voltage drops, you have located a broken wire.
Tools: Flashlight, OBD-II Scanner, Assistant (Intermediate) - Inspect and Clean the Throttle Body
Remove the air intake hose. If thick black carbon coats the throttle plate and bore, clean it thoroughly with dedicated throttle body cleaner and a soft brush. A sticking plate is a primary cause of range/performance codes.
Tools: Screwdriver/Socket Set, Throttle Body Cleaner, Soft Brush (Intermediate) - Analyze Live Sensor Data Graphically
Use a scanner to graph live data for 'TPS A' and 'TPS B' simultaneously. As you slowly press the pedal, the two lines must move in smooth, opposite directions (one sweeping 0.5V to 4.5V, the other 4.5V to 0.5V). A sudden spike or flatline on the 'B' graph confirms a dead sensor spot.
Tools: Advanced OBD-II Scanner with Live Data Graphing (Advanced) - Test Sensor Voltage and Resistance
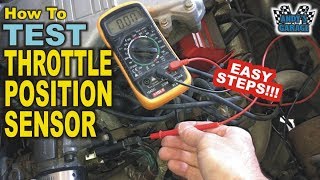
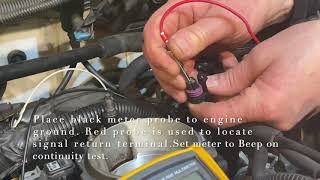
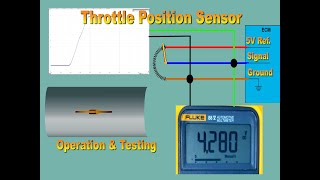
If you lack a live-data scanner, back-probe the sensor's signal wire with a multimeter set to DC volts. The voltage must increase smoothly from ~0.5V to ~4.5V as you press the pedal. Any jumps or dead spots indicate internal sensor failure.
Tools: Digital Multimeter, Back-probe Kit (Advanced) - Perform Waveform Analysis
For intermittent faults that pass multimeter tests, connect an automotive oscilloscope. A clean, smooth waveform indicates a healthy circuit; static, noise, or micro-dropouts confirm a failing sensor or severe wiring interference.
Tools: Automotive Oscilloscope (Professional)
When This Code Triggers (Freeze-Frame Conditions)
- Engine Coolant Temp: 175-210°F (Fully warmed up, though the electrical fault occurs at any temperature.)
- RPM: 1500-2500 RPM (During light acceleration or steady-state cruising when the pedal position is held steady.)
- Engine Load: 20-50% (Triggers under moderate engine load, rarely at idle or full throttle.)
- Vehicle Speed: 30-60 mph (Occurs during city or highway driving as the pedal maintains a constant position.)
Related Codes
- P0121 — The equivalent 'Range/Performance' code for the 'A' sensor circuit. If P0121 and P0221 appear together, the throttle body assembly has failed or a shared ground wire is broken.
- P2135 — Indicates a 'Voltage Correlation' problem. P2135 triggers when the PCM sees a direct, mathematical conflict between the 'A' and 'B' signals. It points to the exact same root causes as P0221.
- P0220 — A general malfunction code for the 'B' circuit indicating a complete loss of signal. P0221 indicates the signal is present but erratic or irrational.
- P0222 / P0223 — P0222 means the 'B' circuit voltage is too low (short to ground). P0223 means the voltage is too high (short to power). These direct you to find a hard wiring short rather than a worn sensor.
Climate & Environmental Factors
- Humidity and Road Salt: Heavy rain and winter road salt accelerate corrosion on the exposed pins of the throttle body connector. This corrosion increases electrical resistance, corrupting the 5-volt signal and triggering P0221.
- Extreme Engine Heat: Sustained high temperatures bake the wiring harness insulation, making it brittle and prone to cracking. Heat also degrades the internal circuit board of the throttle position sensor, causing intermittent dropouts on hot days.
How to Talk to a Mechanic About This Code
Say this: "I have a P0221 code and need a diagnostic. Please graph the live data for the 'A' and 'B' throttle position sensors and perform a wiggle test on the wiring harness before recommending a throttle body replacement. Also, check for any related TSBs."
This proves you understand the electrical nature of the code. It forces the technician to rule out cheap wiring faults and software updates before defaulting to a $600 parts replacement.
Avoid saying:
- 'Just fix whatever's wrong'
- 'My check engine light is on, can you look at it?'
- 'My car is hesitating, I think I need a new throttle body.'
Questions to ask before authorizing the repair:
- Did you graph the live data for both TPS sensors, and did sensor 'B' show dropouts or noise?
- Did you perform a wiggle test on the wiring harness to rule out an intermittent connection?
- Are there any Technical Service Bulletins (TSBs) suggesting a wiring repair kit instead of a full component replacement?
- Does the repair estimate include the mandatory electronic throttle relearn procedure?
- What is the warranty on this specific repair, including both parts and labor?
Where to Take It: Dealer vs Independent vs Chain
- Dealer:
Best for: Vehicles under original powertrain or extended warranty., Complex German vehicles (VW, Audi, BMW) requiring specific TSB wiring kits., Cases requiring a proprietary PCM software re-flash.
Downsides: Labor rates are $150-$250+ per hour., Service advisors default to replacing full assemblies rather than repairing a $20 wire. (Typical cost: +50% vs. baseline) - Independent Shop:
The best fit. A reputable independent shop with advanced scan tools is perfectly equipped to graph sensor data, trace wiring faults, and perform throttle relearns.
Best for: Out-of-warranty vehicles., Diagnosing electrical faults and performing live data analysis., Cost-conscious owners seeking a repair rather than a blind parts replacement.
Downsides: Diagnostic skill varies; ensure the shop employs ASE-certified electrical specialists., May lack access to the latest manufacturer PCM software updates. (Typical cost: +0% vs. baseline) - Chain Shop:
Avoid for diagnosis. Chain shops will likely replace the throttle body immediately, leaving you stranded when the actual problem is a broken wire.
Best for: Simple mechanical tasks like cleaning the throttle body.
Downsides: Technicians lack the oscilloscope and live-data training required to trace intermittent 5-volt reference faults., High pressure to sell expensive throttle bodies without diagnosing the root cause. (Typical cost: -10% vs. baseline)
When to Walk Away From the Repair
If the estimated repair cost exceeds 40-50% of the car's private-party value, sell or trade it in instead of repairing it.
- Car worth $4000, fix is $850: Fix it. The repair cost is 21% of the car's value, well below the threshold.
- Car worth $3000, fix is $1500: Walk away. The repair cost is 50% of the car's value. Do not invest heavily into an older vehicle nearing the end of its lifespan.
- Car worth $12000, fix is $1000: Fix it. This is a low-cost repair compared to the vehicle's value and restores critical safety functions.
What Scan Tool You Need for This Code

Minimum: An OBD-II scanner that displays and graphs live data for multiple PIDs simultaneously.
A $20 code reader only confirms the code exists. You must view the live voltage sweep of the sensor to determine if the signal is dropping out, noisy, or out of range. Without live data, you are guessing.
Budget: XTOOL A30D / MUCAR BT200 Max (~$90) — These smartphone-based tools display live data streams from the throttle position sensors and offer basic bidirectional tests.
Mid-range: Foxwell NT510 Elite / Autel MaxiCOM MK808S (~$180-380) — Provides robust live data graphing to compare sensor 'A' and 'B' signals. Crucially, they include the mandatory 'Throttle Relearn' function required after replacing the throttle body.
Professional: Autel MaxiSys MS906 / Launch X431 Series (~$600-1200) — Delivers professional-level live data graphing, full bidirectional control, and advanced ECU coding capabilities for complex PCM diagnostics.
Rent vs buy: Buy a midrange scanner. Auto parts stores loan basic code readers, but you need a tool capable of graphing live data and performing a throttle relearn to fix P0221 yourself.
How to Clear the Code After You Fix It
- Reconnect the battery if disconnected during repair.
- Perform the electronic throttle body relearn procedure using a scan tool.
- Use the scan tool to formally clear the P0221 code from the PCM.
- Perform a drive cycle to run the vehicle's readiness monitors.
Drive cycle (~30 minutes): Start with a cold engine. Idle for 3 minutes with the A/C and defroster on. Drive for 15 minutes at a steady 55 mph highway speed. Conclude with 15 minutes of stop-and-go city driving. Let the vehicle cool down completely.
Readiness monitors affected: Catalyst (CAT) monitor, Evaporative System (EVAP) monitor, Oxygen (O2) Sensor monitor, Comprehensive Component Monitor (CCM)
Before emissions retest: drive at least 100 miles to fully set monitors.
Watch out for:
- Disconnecting the battery clears the code but resets all readiness monitors to 'Not Ready', causing an automatic emissions test failure.
- Failing to perform the throttle relearn procedure causes severe idle surging and immediate return of the code.
- The code returns instantly upon startup if a wiring short was not properly repaired.
Will This Fail Emissions / State Inspection?
Yes — this code typically fails an OBD-II emissions inspection.
- California: An active P0221 is an automatic Smog Check failure. After repair, you must complete a full drive cycle to set all monitors to 'Ready' before retesting.
- New York: The NYS safety/emissions inspection includes an OBD-II scan. P0221 results in an immediate emissions failure.
- Texas: In the 17 emissions-testing counties, an illuminated Check Engine Light for P0221 fails the OBD-II inspection.
Most Commonly Affected Vehicles
- Ford F-150, Escape, Fusion, Focus (2009-2018) — Notorious for electronic throttle body failures that force the vehicle into limp mode. Ford issued extended warranties (Customer Satisfaction Program 13N03) for millions of these units.
- Chevrolet / GMC Silverado, Sierra, Tahoe, Malibu (2007-2016) — Frequently display a 'Reduced Engine Power' message alongside P0221. The wiring harness connector pigtail at the throttle body is the most common failure point, followed by the throttle body itself.
- Volkswagen / Audi Jetta, Golf, A4, Tiguan (2006-2017) — Prone to poor pin contact in the throttle body connector. TSB 01-17-05 details a specific repair kit to replace the connector pins, which solves the issue without replacing the throttle body.
- Nissan Altima, Maxima, Sentra (2007-2017) — Commonly experience failures of the accelerator pedal position sensor assembly, resulting in a complete lack of throttle response. The entire pedal assembly must be replaced.
- Hyundai / Kia Sonata, Santa Fe, Elantra (2006-2015) — The PCM logic is highly sensitive to minor voltage deviations. A difference of just 8% between Sensor A and Sensor B triggers P0221, making them susceptible to codes from minor sensor wear.
Manufacturer-Specific Notes
- Volkswagen/Audi: An illuminated 'EPC' light alongside P0221 guarantees a throttle system fault. Always perform the wiring repair outlined in TSB 01-17-05 before replacing the throttle body.
- General Motors (Chevy/GMC): The dashboard displays a terrifying 'Reduced Engine Power' warning. The fix is almost always replacing the $40 wiring pigtail connector at the throttle body, not the $300 throttle body itself.
- Ford: Ford electronic throttle bodies fail at an exceptionally high rate. If you own a 2009-2013 Ford and get P0221, the throttle body assembly is the culprit 90% of the time.
Real Owner Stories
2010 VW Jetta 2.0T with intermittent EPC light
The car randomly lost all throttle response above 50% throttle, illuminating the EPC and Check Engine lights. Restarting temporarily fixed the issue, but P0221 remained stored.
What they tried:
- Suspected a failing throttle body.
- Researched forums and found TSB 01-17-05 regarding wiring issues.
Outcome: The problem was a poor electrical connection at the throttle body connector. The owner re-pinned the connector using the $50 repair kit specified in the TSB, permanently fixing the code.
Lesson: Always check for TSBs before replacing parts. For VW/Audi, a $50 wiring repair kit fixes P0221 far more often than a $400 throttle body replacement.
2015 Chevy Malibu loses power on the highway
The vehicle suddenly lost power and displayed 'Reduced Engine Power' on the highway. The scanner pulled codes P0221 and P0220.
What they tried:
- Read codes with an OBD-II scanner.
- Visually inspected the accelerator pedal assembly and wiring.
Outcome: The issue traced to a worn-out connector at the accelerator pedal position sensor. Replacing the $30 connector pigtail restored full performance.
Lesson: Do not assume the sensor failed. A visual inspection of the connector and wiring harness, especially near the pedal where feet kick it, reveals the true, cheaper cause.
Abarth 595 Competizione with P0221 only on cold starts
The car entered limp mode with P0221 exclusively on cold starts. Once warmed up and cleared, it drove perfectly.
What they tried:
- Replaced the accelerator pedal assembly.
- Replaced the battery and ground strap.
- Replaced spark plugs and coils.
Outcome: The owner fired the parts cannon without fixing the cold-start issue. The actual failure was the internal electronics of the throttle body contracting and failing when cold.
Lesson: Pay attention to WHEN the fault occurs. A problem present only when cold strongly suggests a component failing due to thermal contraction, guiding you straight to the throttle body.
How to Prevent This Code From Triggering
- Clean the throttle body (Every 60,000 miles) — Removes carbon and oil residue that causes the throttle plate to stick. This ensures smooth operation and prevents the physical mismatch that triggers P0221.
- Inspect and clean electrical connectors (Annually) — Connectors exposed to heat and moisture corrode. Spraying them with electronic contact cleaner prevents the high-resistance connections that cause intermittent signals.
- Ensure floor mats are properly secured (Every time you enter the car) — A bunched-up floor mat physically obstructs the accelerator pedal, preventing it from returning to idle and creating a sensor mismatch.
- Maintain a healthy battery (Replace every 3-5 years) — Throttle position sensors require a stable 5-volt reference. A weak battery causes voltage fluctuations, leading to erratic sensor readings and secondary fault codes.
Frequently Asked Questions
Can I just replace the sensor instead of the whole throttle body or pedal?
On most modern cars, no. Manufacturers integrate the throttle position sensor into the throttle body assembly and the accelerator pedal sensor into the pedal assembly. You must replace the entire component.
Will cleaning the throttle body fix a P0221 code?
Yes, if carbon buildup causes the throttle plate to stick. Cleaning restores smooth operation and aligns the sensor's readings with the PCM's expectations. This is a highly recommended, inexpensive first step.
What is 'limp mode'?
Limp mode is a critical safety feature triggered by the PCM when it cannot trust the throttle signals. It intentionally limits engine power, RPM, and speed to prevent sudden, unintended acceleration. This allows you to safely drive to a repair shop.
What is a common misdiagnosis for P0221?
Mechanics frequently replace the expensive throttle body without inspecting the wiring harness first. A corroded connector pin or a chafed wire causes the exact same code and symptoms. Always verify electrical continuity before replacing parts.
Do I need to do a 'relearn' procedure after the fix?
Yes. After replacing or cleaning a throttle body, you must perform a throttle body relearn procedure using an advanced OBD-II scanner. This calibrates the PCM to the throttle plate's new idle and wide-open positions.
My scanner shows P0221 but the car drives fine. What should I do?
Treat this as an early warning of a failing sensor or a loose electrical connection. The problem will worsen, eventually forcing the car into limp mode while driving. Diagnose and repair it before it leaves you stranded.
Is P0221 a serious code?
Yes. P0221 directly compromises vehicle drivability and safety. The risk of sudden power loss or stalling in heavy traffic makes the vehicle unsafe for daily use until repaired.
Can a bad battery cause a P0221 code?
Yes. A failing battery or alternator causes system-wide voltage drops. Sensitive 5-volt reference sensors like the TPS malfunction under low voltage, triggering a P0221 code as a secondary symptom.
Can bad fuel cause a P0221 code?
No. Bad fuel causes misfires (P0300) or lean/rich conditions (P0171), but it does not affect the electronic signaling of the throttle position sensor circuit.
How can I prevent a P0221 code in the future?
Clean the throttle body every 60,000 miles to prevent carbon buildup. Ensure your driver's side floor mat is secured to the floor pegs. Maintain a healthy battery to provide stable voltage to the engine sensors.
Key Takeaways
- P0221 triggers 'limp mode' and limits engine power, making the vehicle unsafe for highway driving due to unpredictable stalling.
- Over 70% of P0221 codes stem from a worn-out throttle position sensor integrated directly into the electronic throttle body assembly.
- Save $400+ by checking for a bunched-up floor mat, inspecting the wiring harness for chafing, and cleaning the throttle body before replacing parts.
- Modern vehicles integrate the position sensors into the throttle body or pedal assembly, requiring a full $250-$850 unit replacement rather than a cheap sensor swap.
- Replacing or cleaning the throttle body requires a mandatory electronic 'relearn' procedure using an OBD-II scanner to restore proper idle and acceleration.
Helpful Videos

The information in this article is provided for general reference and educational purposes only. Vehicle specifications, procedures, and part compatibility can vary by production date, trim level, and region. Always consult your vehicle's factory service manual and verify part numbers before purchasing or performing repairs. Safety-critical components such as airbags, seat belts, and braking systems should be installed by a qualified professional.
- 🎬 Helpful Videos
- What Does P0221 Mean?
- Can I Drive With P0221?
- Common Causes
- Symptoms
- Diagnostic Flowchart
- Common Fixes & Costs
- DIY vs Professional
- Used vs. New Parts: Buying Guide
- What Happens If You Wait — Timeline
- Cost of Not Fixing It
- Diagnosis Steps
- When This Code Triggers (Freeze-Frame Conditions)
- Related Codes
- Climate & Environmental Factors
- How to Talk to a Mechanic About This Code
- Where to Take It: Dealer vs Independent vs Chain
- When to Walk Away From the Repair
- What Scan Tool You Need for This Code
- How to Clear the Code After You Fix It
- Will This Fail Emissions / State Inspection?
- Most Commonly Affected Vehicles
- Manufacturer-Specific Notes
- Real Owner Stories
- 2010 VW Jetta 2.0T with intermittent EPC light
- 2015 Chevy Malibu loses power on the highway
- Abarth 595 Competizione with P0221 only on cold starts
- How to Prevent This Code From Triggering
- Frequently Asked Questions
- Can I just replace the sensor instead of the whole throttle body or pedal?
- Will cleaning the throttle body fix a P0221 code?
- What is 'limp mode'?
- What is a common misdiagnosis for P0221?
- Do I need to do a 'relearn' procedure after the fix?
- My scanner shows P0221 but the car drives fine. What should I do?
- Is P0221 a serious code?
- Can a bad battery cause a P0221 code?
- Can bad fuel cause a P0221 code?
- How can I prevent a P0221 code in the future?
- Key Takeaways
- 🎟️ Get 5% Off