

OBD-II Code P0197: Engine Oil Temperature Sensor Circuit Low
What P0197 means, why it triggers, and how to fix it
- P0197 triggers when the Powertrain Control Module (PCM) detects an Engine Oil Temperature sensor voltage below 0.5V, indicating a short circuit or failed sensor.
- A failed EOT sensor causes 70% of P0197 codes, with damaged wiring or corroded connectors making up most remaining cases.
- Driving with P0197 disables your engine's oil temperature safeguards, risking a $3,000+ catastrophic engine failure if an actual overheating event occurs.
- Replacing the EOT sensor on 2015+ Volkswagen and Audi models requires draining the engine oil, as the sensor integrates directly into the oil pan.
- Test the sensor circuit for a 5-volt reference and ground using a multimeter before spending $150+ on a replacement part to rule out a simple broken wire.
What Does P0197 Mean?

P0197 means your car's Powertrain Control Module (PCM) detects a voltage signal from the Engine Oil Temperature (EOT) sensor that is lower than the normal operating range (typically below 0.5 volts). The computer interprets this low voltage as an electrical fault, such as a short circuit to ground, rather than an actual low oil temperature. The PCM relies on this data for critical calculations related to fuel delivery, injection timing, variable valve timing, and oil life monitoring.
Technical definition: Engine Oil Temperature Sensor 'A' Circuit Low. This indicates the Powertrain Control Module (PCM) detects the voltage signal from the engine oil temperature sensor is below the specified minimum threshold, typically under 0.5 volts. The PCM interprets this as a hard circuit fault, triggering the Check Engine Light.
Can I Drive With P0197?
Yes, But With Caution. You can drive the vehicle, but limit trips to essential travel. Your engine's ability to monitor its own oil temperature is compromised, meaning you will not receive a warning during a potentially damaging overheating condition. Ignoring this accelerates engine wear and risks catastrophic engine failure if the oil actually overheats. Resolve the issue promptly to avoid turning a $150 sensor repair into a $4,000 engine replacement.
Common Causes

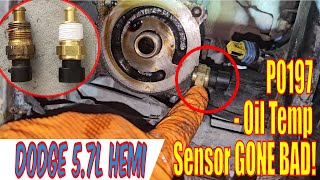
- Faulty Engine Oil Temperature (EOT) Sensor (Very Common) — The sensor's internal thermistor, which changes resistance with temperature, fails by creating a short circuit. This is the most frequent cause of a P0197 code. 🎬 See this sensor replacement walkthrough for Dodge and Ram vehicles.
- Damaged Wiring, Connector, or Pigtail (Common) — Wires leading to the sensor fray, break, or short to ground from heat, vibration, or road debris. Connector pins corrode from moisture or oil, and plastic pigtails become brittle and fail from heat cycles.
- Internal Sensor Leak (VW/Audi) (Common) — A specific failure mode on Volkswagen and Audi models involves engine oil seeping through the body of the sensor and contaminating the electrical connector pins from the inside, causing a short.
- Dirty, Low, or Incorrect Engine Oil (Less Common) — Extremely low engine oil exposes the sensor to air, causing erratic readings. Thick sludge coats the sensor, insulating it and causing slow or inaccurate responses that trigger a fault.
- Blown Fuse (Rare) — A short circuit in the sensor's power wire blows the associated fuse. This cuts power to the sensor circuit entirely, resulting in a P0197 code.
- Software Calibration Glitch (Rare) — The PCM's software is overly sensitive or has a glitch causing it to misinterpret sensor data. A software update or re-flash from the manufacturer resolves this.
- Faulty Powertrain Control Module (PCM) (Very Rare) — The internal circuit that reads the voltage from the sensor fails, requiring the PCM to be repaired or replaced.
Symptoms

- Incorrect Oil Temperature Gauge Reading — If equipped, the oil temperature gauge reads at its lowest possible value (e.g., 'Cold' or '--') and does not move even when the engine is fully warmed up.
- Intermittent Gauge Flicker or Erratic Readings — The oil temperature gauge flickers or jumps between a normal reading and the minimum value, particularly after hitting a bump, indicating a loose connection.
- Slight Decrease in Fuel Economy — The PCM defaults to a richer fuel mixture because it incorrectly assumes the engine is cold, leading to a 2-5% drop in MPG.
- Rough Idle or Hesitation on Cold Start — The engine runs slightly rough or hesitates after a cold start because the PCM applies an incorrect fuel and timing strategy based on the faulty temperature reading.
- Check Engine Light On (also visible on scanner) — The PCM illuminates the Malfunction Indicator Lamp (MIL) as soon as it detects the circuit fault.
Diagnostic Flowchart
Tap your situation to follow the diagnostic path that matches what you're seeing on this code.
Common Fixes & Costs
- Replace Engine Oil Temperature (EOT) Sensor — Parts: $25 - $150, Labor: $100 - $300, ~0.8 hr book time (DIY)
- Repair Damaged Wiring or Replace Connector Pigtail — Parts: $15 - $50, Labor: $100 - $200, ~1.5 hr book time (Intermediate)
- Perform an Engine Oil and Filter Change — Parts: $40 - $100, Labor: $30 - $60, ~0.5 hr book time (DIY)
- Update or Re-flash Powertrain Control Module (PCM) — Parts: $0, Labor: $100 - $250, ~1 hr book time (Professional)
- Replace Powertrain Control Module (PCM) — Parts: $800 - $1500, Labor: $150 - $300, ~2 hr book time (Professional)
Used vs. New Parts: Buying Guide
When a used part is worth it: For an Engine Oil Temperature sensor, buying used rarely makes sense. The part is a relatively low-cost electronic component, and the potential savings are minimal compared to the labor cost of replacement, especially if the sensor is in a hard-to-reach location.
Donor-vehicle mileage cap: roughly under 50000 miles for the part to have meaningful remaining life.
Donor quality checklist:
- If considering used, only pull from a very low-mileage vehicle that was wrecked.
- Avoid parts from vehicles in the Rust Belt, as corrosion is a primary failure mode for sensors and connectors.
- Ensure the part number matches exactly; do not rely on visual similarity.
Decision logic:
- If The new part costs less than $150 and labor is more than 1 hour → Always buy a new OEM or high-quality aftermarket sensor. The risk of a used part failing and requiring repeat labor is not worth the small savings.
- If The vehicle is very old and a new part is unavailable → A used part is the only option, but test its resistance before installation to verify it is within spec.
Warranty tradeoff: Used parts from a salvage yard typically have a 30-day warranty at best. New aftermarket sensors often come with a 1-year to limited lifetime warranty. New OEM parts usually carry a 1-year warranty.
Worst-case if a used part fails: $150-350 (The cost of repeat labor to replace the failed used part, plus the cost of buying the new part you should have bought initially).
What Happens If You Wait — Timeline
- 0-1 month: Check Engine Light is on. Oil temperature gauge (if equipped) reads cold or shows an error. The PCM defaults to a safe strategy, causing a slight increase in fuel consumption. (MPG impact: 0-2%% · Added cost: $0-15 in wasted fuel)
- 1-4 months: MPG loss becomes more noticeable (2-5%). The engine exhibits slight hesitation or a rough idle on cold starts as the PCM uses an incorrect fuel map. The primary risk is the inability to detect a real oil overheating problem. (MPG impact: 2-5%% · Added cost: $20-60 in wasted fuel)
- 4-12 months: The risk of severe engine damage from an undetected overheating event becomes significant. If another fault occurs (e.g., coolant leak, fan failure), the lack of a warning from the EOT system leads to catastrophic failure. (MPG impact: 2-5%% · Added cost: $2,000 - $8,000+ (Potential cost of engine repair/replacement if an undetected oil overheating event occurs))
- 12+ months: Continued operation with a default rich fuel mixture overheats and damages the catalytic converter over a long period. The ongoing high risk of engine failure from an unmonitored overheat remains the primary concern. (MPG impact: 3-7%% · Added cost: $1,200 - $2,800 (Potential cost of catalytic converter replacement, in addition to the constant risk of catastrophic engine damage))
Cost of Not Fixing It
- 0-1 month: Noticeable 2-5% decrease in fuel economy and potential for rough cold starts. The check engine light remains on. (Added cost: $10 - $30 (in wasted fuel))
- 1-6 months: The primary risk is the inability to detect a genuine engine oil overheating event, which leads to rapid and severe engine wear if another cooling-related fault occurs. (Added cost: $2000 - $8000+ (Potential cost of major engine repair or replacement if an undetected overheating event happens))
- 6+ months: Continued risk of catastrophic engine failure. A prolonged rich fuel condition caused by the fault overheats and damages the catalytic converter, adding another expensive repair. (Added cost: $1200 - $2800 (Potential cost of catalytic converter replacement, in addition to the ongoing risk of engine failure))
Diagnosis Steps

- Verify the Code with an OBD-II Scanner
Connect an OBD-II scanner to your vehicle's diagnostic port. Confirm P0197 is active and check for related codes (e.g., P0196, P0198). Note the freeze-frame data to see the engine's state when the code set.
Tools: OBD-II Scanner (Beginner) - Analyze Live Sensor Data
Use the live data function on your scanner to view the EOT sensor reading. With a P0197 fault, you will see a static, impossibly low default temperature (e.g., -40°F/-40°C) that does not change as the engine warms. If it reads ambient temperature with the engine off but drops to -40°F when running, the circuit is shorting.
Tools: OBD-II Scanner with Live Data (Beginner) - Visual Inspection of Sensor and Wiring
Locate the EOT sensor (near the oil filter, in the oil filter housing, or in the oil pan). Visually inspect the connector and wiring for broken wires, melted plastic, rodent damage, oil contamination, or corrosion. On VW/Audi models, check for oil seeping out of the connector itself.
Tools: Flashlight, Mirror (Intermediate) - PRO TIP: Perform a Harness 'Wiggle Test'
With the engine running and your scanner's live data displayed, carefully wiggle the wiring harness and connector for the sensor. If the temperature reading flickers or changes, you have an intermittent break or short in the wiring.
Tools: OBD-II Scanner with Live Data (Intermediate) - Check for Related Technical Service Bulletins (TSBs)
Before testing circuits or replacing parts, check for manufacturer TSBs related to P0197 for your specific vehicle. There is often a known issue with a simple fix, such as a required software update or a redesigned wiring pigtail.
Tools: Online Repair Database or Dealer Inquiry (Intermediate) - Test for Reference Voltage and Ground
Disconnect the sensor's electrical connector. With the ignition key 'On' (engine off), use a digital multimeter to check the harness-side connector. One pin must have a 5-volt reference signal from the PCM, and another must have a good ground (less than 5 Ohms resistance to the battery negative). If either is missing, the problem is in the wiring or PCM.
Tools: Digital Multimeter (Advanced) - Test for a Short to Ground
With the sensor disconnected and the key OFF, switch your multimeter to measure resistance (Ohms). Check for continuity between the signal wire at the connector and a known good chassis ground. The reading must be infinite (OL - Open Loop). If you have continuity (under 1,000 Ohms), the signal wire is shorted to ground in the harness.
Tools: Digital Multimeter (Advanced) - PRO TIP: Test the Sensor's Resistance Dynamically
With the sensor disconnected, measure the resistance across its terminals. Consult your service manual for exact specs (e.g., 10,000 Ohms at 77°F). Use a heat gun to gently warm the sensor tip while watching the multimeter. The resistance must decrease smoothly. If the resistance jumps, doesn't change, or reads open/zero, replace the sensor.
Tools: Digital Multimeter, Heat Gun (Advanced) - Advanced: Test Signal Voltage Under Load
Back-probe the signal wire at the sensor connector while connected. With the key on, engine off (cold), the voltage should be 2.5-4.5V. As the engine warms up, the voltage must smoothly decrease. If the voltage is stuck below 0.5V, it confirms the fault condition.
Tools: Digital Multimeter with back-probe pins (Advanced)
When This Code Triggers (Freeze-Frame Conditions)
- Engine Coolant Temp: 180-210°F (82-99°C) (The code often sets after the engine reaches full operating temperature.)
- RPM: 1500-2500 (Frequently occurs during steady-state cruise conditions on the highway.)
- Engine Load: 30-60% (A moderate and stable engine load, where the PCM expects consistent sensor readings.)
- EOT Sensor Voltage: < 0.21 V (The direct trigger for the code is the voltage dropping below the minimum threshold for a set period (e.g., 5 seconds).)
Related Codes
- P0198 — This is the opposite code, 'Engine Oil Temperature Sensor Circuit High'. P0197 (Low) is caused by a short to ground (low voltage, <0.5V), while P0198 (High) is caused by an open circuit (high resistance, >4.7V). If both codes appear intermittently, it strongly suggests a loose connection or a wire alternately shorting and breaking.
- P0196 — This code means 'Engine Oil Temperature Sensor Circuit Range/Performance'. P0197 is a hard electrical fault (short), while P0196 is a rationality fault. The PCM sets P0196 when the sensor's signal seems illogical compared to other sensors or doesn't change as expected, pointing to a 'lazy' sensor rather than a complete electrical failure.
- P0195 — This is a general fault code for 'Engine Oil Temperature Sensor Malfunction'. P0197 points directly to a 'Circuit Low' electrical condition, while P0195 is a generic indicator that a fault exists within the sensor circuit.
- P0117 — This is 'Engine Coolant Temperature Sensor Circuit Low'. It is highly unlikely both sensors failed simultaneously. This scenario strongly points to a shared wiring problem, a common ground fault, or a PCM issue affecting multiple sensor circuits.
Climate & Environmental Factors
- Road Salt & High Humidity: In regions using road salt or experiencing high humidity, corrosion on wiring and connectors accelerates significantly. Saltwater penetrates cracked wire insulation or connector seals, causing shorts to ground that directly trigger a P0197 code, especially for sensors located low on the engine.
- Extreme Cold: In very cold climates, engine oil becomes significantly thicker, slowing the sensor's response time. While this typically causes a P0196 (Performance) code, it occasionally triggers a P0197 fault during startup.
How to Talk to a Mechanic About This Code
Say this: "I have an active P0197 code for the Engine Oil Temperature Sensor Circuit Low. I'd like to schedule a diagnostic. Please check the sensor's live data, and test the wiring and connector for a 5-volt reference and ground before recommending a sensor replacement."
This signals you understand the problem is often the wiring, not just the sensor. It directs the technician to perform a proper electrical diagnosis instead of just replacing the most likely part, saving you money on unnecessary parts.
Avoid saying:
- 'My check engine light is on, can you just fix it?'
- 'My car is acting weird, I think it's an oil sensor.'
- 'Just replace the oil temperature sensor.'
Questions to ask before authorizing the repair:
- Did you see the live oil temperature data on the scan tool? What did it read?
- Did you confirm a 5-volt reference and good ground at the sensor connector?
- Did you perform a 'wiggle test' on the harness to check for shorts?
- If the sensor needs replacement, is an OEM or a quality aftermarket part being used?
- What is the warranty on the parts and labor for this repair?
Where to Take It: Dealer vs Independent vs Chain
- Dealer:
Recommended if your vehicle is a newer VW or Audi where the sensor replacement is complex, or if a Technical Service Bulletin (TSB) points to a software fix. Otherwise, an independent shop is more cost-effective.
Best for: Vehicles under warranty., Complex, manufacturer-specific issues (like the VW/Audi oil-pan-integrated sensor)., When a potential PCM software update is a likely fix.
Downsides: Typically the highest labor rates., Recommends replacing a whole assembly (e.g., oil filter housing) when only the sensor is bad. (Typical cost: +50% vs. baseline) - Independent Shop:
Best fit for most P0197 repairs. This is a common electrical fault that any competent independent shop diagnoses and repairs effectively, often at a significantly lower cost than a dealer.
Best for: Most out-of-warranty vehicles., Straightforward sensor replacements and wiring repairs.
Downsides: Quality varies greatly; look for shops with ASE-certified technicians and good reviews., Lacks access to the very latest manufacturer-specific TSBs or software. (Typical cost: +0% vs. baseline) - Chain Shop:
Use with caution. Acceptable for a straightforward, easily accessible sensor replacement if you are confident that is the issue. AVOID for initial diagnosis, as they lack the diagnostic rigor and simply replace the sensor without testing the circuit.
Best for: Simple oil changes., Reading the initial code for free (at some locations).
Downsides: Technician skill in electrical diagnostics is highly variable., High pressure to upsell services; recommends unnecessary flushes or other items., Not equipped for more complex wiring repairs or module programming. (Typical cost: -10% vs. baseline)
When to Walk Away From the Repair
If the estimated repair cost for the P0197 fault and any other known issues exceeds 50% of your car's private-party value, it is time to seriously consider selling or trading it in.
- Car worth $4500, fix is $2200: Walk away. The repair cost is nearly half the car's value. It is not a sound financial decision.
- Car worth $15000, fix is $450: Fix it. This is a relatively minor repair cost compared to the vehicle's value.
- Car worth $3000, fix is $1600: Walk away. The repair cost is over 50% of the car's value. Put that money toward a more reliable vehicle.
What Scan Tool You Need for This Code
Minimum: A scanner that reads and clears codes, and displays live sensor data, including Engine Oil Temperature.
A basic $20 code reader only shows the 'P0197' code. To properly diagnose the issue, you must see the live data from the oil temperature sensor to confirm it gives an illogical reading (like -40°F) or fails to change as the engine warms up.
Budget: BlueDriver Pro or Foxwell NT301 (~$100) — Connects to your smartphone via Bluetooth (BlueDriver) or works as a handheld (Foxwell). Both read the code, show freeze-frame data, and display live engine oil temperature, which is everything a skilled DIYer needs to confirm if the sensor or circuit is the problem.
Mid-range: Innova 5610 or Autel MaxiCheck MX808S (~$250-400) — These are powerful handheld or tablet-style scanners. They offer all the features of the budget picks plus bidirectional controls to test circuits and access to more vehicle-specific manufacturer codes and data.
Professional: Autel MaxiCOM MK808S / MK906BT (~$500-1200) — Provides full bidirectional control, allowing a user to command modules and test circuits directly. It offers OEM-level diagnostics, which is overkill for a simple P0197 but invaluable for diagnosing complex wiring issues or ruling out a PCM fault with certainty.
Rent vs buy: For a one-time diagnosis, auto parts stores like AutoZone read your code for free. However, they do not typically analyze live data for you. If you plan to do the diagnosis yourself, buying a budget pick for under $100 is a wise investment.
How to Clear the Code After You Fix It
- Use an OBD-II scan tool to clear the P0197 trouble code.
- Start the engine and let it idle for 2-3 minutes to allow the PCM to re-learn.
- Perform a complete OBD-II drive cycle to run the vehicle's self-diagnostic tests.
Drive cycle (~20 minutes): A general drive cycle includes: 1) Cold start and idle for 2-3 minutes. 2) Drive in stop-and-go traffic for 5-10 minutes. 3) Drive at a steady highway speed (e.g., 55 mph) for 5-10 minutes. 4) Allow the vehicle to cool down completely. This process helps the readiness monitors to set.
Readiness monitors affected: Catalyst Monitor, Oxygen (O2) Sensor Monitor, Comprehensive Component Monitor
Before emissions retest: drive at least 50 miles to fully set monitors.
Watch out for:
- Simply disconnecting the battery clears the code, but it also resets all readiness monitors to 'Not Ready', causing an automatic emissions test failure.
- The code returns immediately or during the drive cycle if the underlying electrical fault was not properly repaired.
- Not allowing the vehicle to cool to ambient temperature before starting the drive cycle prevents some monitors from running.
Will This Fail Emissions / State Inspection?
Yes — this code typically fails an OBD-II emissions inspection.
- California: An active P0197 code causes an automatic failure of the smog check due to the illuminated Check Engine Light. Additionally, the vehicle fails if the Comprehensive Component Monitor has not completed its self-test after a repair.
- New York: The NYS DMV inspection includes an OBD-II scan. A P0197 code and the resulting Malfunction Indicator Lamp (MIL) on is an automatic failure.
- Texas: In the 17 Texas counties requiring emissions testing, a vehicle with an active P0197 code fails the OBD portion of the inspection.
Most Commonly Affected Vehicles
- Volkswagen Golf, GTI, Jetta, Passat, Tiguan, Atlas (2015-2021) — Extremely common. The EOT sensor integrates with the oil level sensor in the oil pan (Part #06L907660C). A known issue is oil leaking internally through the sensor into the connector pins. Replacement requires draining the oil.
- Ford F-Series, E-Series with 6.0L/6.4L Power Stroke Diesel (2003-2010) — Very common on these diesel trucks. The EOT sensor (Motorcraft #SW-6052) is a critical input for injector timing. A faulty sensor causes noticeable performance drops and cold start failures.
- Dodge / Jeep / Chrysler / Ram Charger, Dart, 200, Cherokee, Renegade, Ram 1500 (2011-2021) — Common on vehicles with the 2.4L Multiair and 5.7L HEMI engines. For the HEMI, the sensor (Mopar #5149077AB) is located on the oil filter housing, making it accessible after removing the oil filter.
- BMW 3 Series (E90/E91), 5 Series (E60), X3, X5 (2005-2013) — Particularly common on vehicles with N52 and M54 engines. The sensor is conveniently located on the oil filter housing assembly, making it accessible to inspect and replace without draining the oil.
- Audi A4, A6, Q5, Q7 (2006-2016) — Similar to Volkswagen, the sensor is a combined level/temperature unit in the oil pan (VW/Audi part G266) that is prone to failure and requires draining the oil to replace.
- Nissan Maxima, Murano, Altima, Sentra (2009-2020) — On many Nissan models, the wiring and connector pigtail for the EOT sensor are a known failure point, becoming brittle and shorting out due to heat exposure.
- Subaru Impreza, Outback, Forester, WRX (2010-2018) — Commonly found on EJ and FB series boxer engines. The sensor is located on the engine block and is easily tested for resistance to confirm failure.
- Chevrolet / GMC Silverado, Sierra, Cruze (2014-2019) — On diesel models like the Duramax, the EOT reading is critical for engine performance. Corrosion within the sensor connector is a common cause for this code.
Manufacturer-Specific Notes
- Volkswagen/Audi: The EOT sensor integrates with the oil level sensor (G266 sensor) at the bottom of the oil pan, requiring an oil drain for replacement. A unique failure is oil leaking *through* the sensor body into the electrical connector, causing a short.
- Ford/GM (Diesel Trucks): On Power Stroke and Duramax engines, the EOT sensor is a primary input for the PCM to control injection timing, fuel pressure, and glow plug operation. A P0197 fault causes severe performance drops and cold start failures.
- BMW: On M54, N52, and N54 engines, the sensor is located on the side of the oil filter housing assembly. This makes it significantly more accessible than oil pan-mounted sensors, allowing for inspection and replacement without draining the engine oil.
- Stellantis (Dodge/Jeep/Chrysler): On 2.4L MultiAir engines, the EOT sensor is a critical input for the variable valve timing system. On 5.7L HEMI engines, the sensor is on the oil filter housing, but the wiring harness is prone to damage, causing a P0197 code even when the sensor is good.
Real Owner Stories
2019 VW Jetta with P0197
Check Engine Light came on. Scan showed P0197. Owner noted that on VWs, the oil temp and level sensor are a single unit in the oil pan.
Outcome: The owner replaced the sensor (part #06L907660C), which required draining the engine oil to access.
Lesson: On modern VW and Audi vehicles, the oil temperature sensor combines with the level sensor in the oil pan, making replacement more involved than a simple screw-in sensor.
2004 Ford F-350 6.0L Power Stroke with P0197
Truck would not start on a cold morning (50°F). It turned over and produced white smoke smelling of fuel, but would not fire. Code P0197 was present.
Outcome: The owner replaced the faulty EOT sensor, which was preventing a proper cold start sequence because the PCM uses this data for fuel timing.
Lesson: On diesel engines like the 6.0L Power Stroke, a faulty EOT sensor directly causes a no-start condition in cold weather because the PCM relies on its reading for critical injection timing adjustments.
2020 VW Jetta with Rodent Damage
P0197 code appeared. Upon visual inspection, the owner found that the wires leading to the oil temperature sensor had been chewed through by rodents.
Outcome: The fix required repairing the wiring harness by replacing the connector pigtail entirely.
Lesson: Always perform a visual inspection of the wiring harness. Rodent damage is a common cause for circuit-low faults, especially for sensors located low on the engine.
How to Prevent This Code From Triggering
- Apply Dielectric Grease to Connectors (During any sensor replacement or electrical work) — Dielectric grease is non-conductive and seals electrical connectors from moisture, oil, and dirt. This prevents the corrosion and short circuits that are a primary cause of P0197.
- Perform Regular Visual Inspections of Engine Wiring (Every oil change) — Periodically checking for signs of frayed wires, rodent damage, or harnesses resting on hot exhaust components allows you to catch potential issues before they cause a short circuit.
- Keep Engine Bay and Undercarriage Clean (Seasonally, especially after winter in salt-belt regions) — Washing away road salt and grime reduces the risk of accelerated corrosion on exposed sensor connectors and wiring harnesses, particularly for sensors mounted low on the engine.
- Ensure All Protective Sleeving and Conduits are Intact (During repairs or inspections) — Plastic conduits, heat-shrink tubing, and other protective sleeves are the first line of defense against physical abrasion and heat damage. Replacing cracked or missing pieces preserves wiring integrity.
- Use High-Quality Engine Oil and Change it on Schedule (Per manufacturer's recommendation) — Clean, correct-viscosity oil prevents sludge buildup that insulates the sensor and causes slow or inaccurate readings.
Key Takeaways
- P0197 triggers when the Powertrain Control Module (PCM) detects an Engine Oil Temperature sensor voltage below 0.5V, indicating a short circuit or failed sensor.
- A failed EOT sensor causes 70% of P0197 codes, with damaged wiring or corroded connectors making up most remaining cases.
- Driving with P0197 disables your engine's oil temperature safeguards, risking a $3,000+ catastrophic engine failure if an actual overheating event occurs.
- Replacing the EOT sensor on 2015+ Volkswagen and Audi models requires draining the engine oil, as the sensor integrates directly into the oil pan.
- Test the sensor circuit for a 5-volt reference and ground using a multimeter before spending $150+ on a replacement part to rule out a simple broken wire.
Helpful Videos


The information in this article is provided for general reference and educational purposes only. Vehicle specifications, procedures, and part compatibility can vary by production date, trim level, and region. Always consult your vehicle's factory service manual and verify part numbers before purchasing or performing repairs. Safety-critical components such as airbags, seat belts, and braking systems should be installed by a qualified professional.
- 🎬 Helpful Videos
- What Does P0197 Mean?
- Can I Drive With P0197?
- Common Causes
- Symptoms
- Diagnostic Flowchart
- Common Fixes & Costs
- Used vs. New Parts: Buying Guide
- What Happens If You Wait — Timeline
- Cost of Not Fixing It
- Diagnosis Steps
- When This Code Triggers (Freeze-Frame Conditions)
- Related Codes
- Climate & Environmental Factors
- How to Talk to a Mechanic About This Code
- Where to Take It: Dealer vs Independent vs Chain
- When to Walk Away From the Repair
- What Scan Tool You Need for This Code
- How to Clear the Code After You Fix It
- Will This Fail Emissions / State Inspection?
- Most Commonly Affected Vehicles
- Manufacturer-Specific Notes
- Real Owner Stories
- 2019 VW Jetta with P0197
- 2004 Ford F-350 6.0L Power Stroke with P0197
- 2020 VW Jetta with Rodent Damage
- How to Prevent This Code From Triggering
- Key Takeaways
- 🎟️ Get 5% Off