

OBD-II Code P0187: Fuel Temperature Sensor 'B' Circuit Low Voltage
The Ultimate Expert Guide to Diagnosing and Fixing P0187
- P0187 triggers when the Powertrain Control Module detects a fuel temperature sensor 'B' signal below 0.2 volts, defaulting the reading to an implausible -40°F.
- Inspect the wiring harness and connector first, as a short to ground causes over 80% of P0187 codes, saving you the cost of an unnecessary sensor replacement.
- Expect a 5% to 10% drop in fuel economy and potential catalytic converter damage costing up to $2,500 if you drive with this code for more than 6 months.
- Test the sensor connector with a multimeter with the key on and engine off; you must see a 5-volt reference and less than 0.1 volts on the ground wire to rule out PCM issues.
What Does P0187 Mean?
Your car's Powertrain Control Module (PCM) is receiving a voltage signal from the 'B' fuel temperature sensor that falls below the manufacturer's specified range. The computer relies on this sensor to measure fuel density and adjust the fuel mixture. A persistently low voltage reading, typically below 0.2 volts, indicates the fuel is extremely cold (e.g., -40°F). Because this temperature is implausible, the PCM triggers the Check Engine Light and stores the P0187 code.
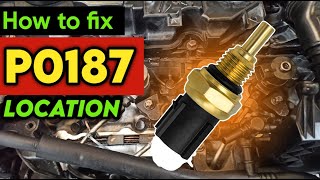
Technical definition: Fuel Temperature Sensor 'B' Circuit Low Input. 🎬 Watch: A quick overview of the P0187 code and its causes. This diagnostic trouble code (DTC) indicates the Powertrain Control Module (PCM) detects the voltage signal from the 'B' fuel temperature sensor is below its normal operating threshold of 0.2 volts. This condition is caused by a short to ground in the signal circuit or an internal sensor failure.
Can I Drive With P0187?
Yes, But With Caution. You can drive with a P0187 code, but address it promptly. The incorrect sensor reading causes poor fuel economy, stalling, and hard starting. Driving over 100 miles forces a rich fuel mixture, which overheats and damages the catalytic converter—a repair costing between $800 and $2500. Diagnose the vehicle immediately to avoid expensive downstream repairs.
Common Causes
- Damaged Wiring or Corroded Connector (Very Common) — The wiring harness leading to the sensor is susceptible to fraying, rodent damage, or shorting to a ground source. The electrical connector pins corrode or clog with moisture and debris, impeding the signal.
- Faulty Fuel Temperature Sensor (Common) — The sensor uses a thermistor to measure temperature and fails internally over time. It shorts out or breaks, sending a continuous low voltage signal back to the PCM.
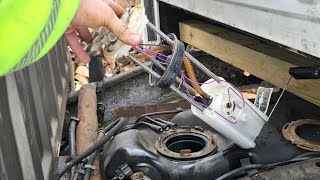
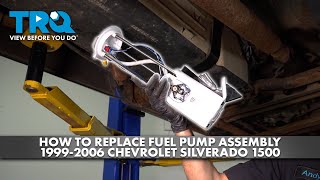
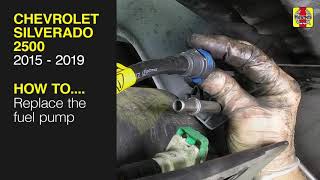
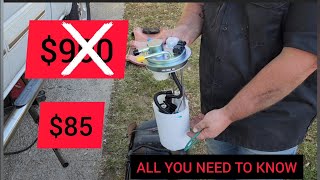
- Faulty Fuel Pump Assembly (Less Common) — In many modern vehicles, the fuel temperature sensor is an integral part of the fuel pump module inside the gas tank. An internal short within the module triggers this code, necessitating the replacement of the entire assembly. 🎬 See this step-by-step guide for replacing the fuel pump assembly.
- Contaminated Fuel (Less Common) — Water, debris, or excessive ethanol content in the fuel interferes with the sensor's operation, leading to inaccurate readings. This occurs frequently in vehicles where the temperature sensor is integrated into a fuel composition sensor.
- Low System Voltage / Weak Battery (Rare) — A failing battery or alternator causes low voltage across numerous vehicle systems. The PCM misinterprets this system-wide voltage drop as a specific fault in the sensor circuit.
- Faulty Powertrain Control Module (PCM) (Very Rare) — The PCM has a failed internal circuit responsible for processing the sensor's signal. Consider this only after exhaustively ruling out wiring and sensor failures.
Symptoms
- Check Engine Light is On — The light illuminates as soon as the PCM logs the P0187 fault. In some cases, this is the only noticeable symptom.
- Poor Fuel Economy — The PCM enriches the fuel mixture, assuming the fuel is cold and dense. This causes the engine to consume excess fuel, reducing mileage by 5-10%.
- Engine Hesitates, Stalls, or Runs Rough — Due to an incorrect air/fuel ratio, the engine stumbles during acceleration, runs rough at idle, or stalls unexpectedly.
- Hard Starting — The vehicle is difficult to start, especially when the engine is cold or hot, because the fuel mixture commanded by the PCM does not match actual engine conditions.
- Additional Fuel System Codes Stored (scan-tool only — no driver-felt sign) — P0187 is frequently accompanied by lean conditions (P0171/P0174) or fuel composition sensor codes.
Diagnostic Flowchart
Tap your situation to follow the diagnostic path that matches what you're seeing on this code.
Common Fixes & Costs
- Repairing Damaged Wiring or Cleaning Connector — Parts: $5-$30, Labor: $130-$260, ~1.5 hr book time (Intermediate)
- Replacing the Fuel Temperature Sensor (Rail-Mounted)
— Parts: $40-$100, Labor: $65-$130, ~0.8 hr book time
(DIY)
: OEM 8S4Z-9G292-A (Alt: Standard Motor Products, Walker Products)
: OEM GM 97224993 (Alt: ACDelco 97224993, Standard Motor Products FTS104)
: OEM VW 028906040C (Alt: Bosch, Vemo) - Replacing the Fuel Pump Assembly (In-Tank Sensor)
— Parts: $250-$600, Labor: $260-$520, ~3.5 hr book time
(Professional)
: OEM FL3Z-9H307-E (Alt: Delphi, Carter, Spectra Premium)
: OEM GM 84963785 (Alt: ACDelco, Delphi, Bosch) - PCM Reprogramming or Replacement — Parts: $0-$1000, Labor: $130-$260, ~1.5 hr book time (Professional)
DIY vs Professional
- Repairing Damaged Wiring or Cleaning Connector — Beginner:
Tools: Multimeter, wire cutters/strippers, crimp connectors, heat shrink tubing, electrical contact cleaner, flashlight. - Replacing Fuel Temperature Sensor (Rail-Mounted) — Beginner:
Tools: Basic socket/wrench set, fuel line disconnect tool, rags, safety glasses. - Replacing Fuel Pump Assembly (In-Tank) — Beginner:
Tools: Floor jack, jack stands, extensive socket set, fuel tank lock ring tool, fuel siphon, safety glasses, fire extinguisher. - PCM Replacement — Beginner:
Tools: Specialized diagnostic tools for programming and flashing the new module.
Used vs. New Parts: Buying Guide
When a used part is worth it: For a simple, rail-mounted fuel temperature sensor, the savings from a used part are minimal and not worth the risk. For a complete fuel pump assembly where the sensor is integrated, a low-mileage (under 50K miles) used OEM unit is a cost-effective alternative.
Donor-vehicle mileage cap: roughly under 50000 miles for the part to have meaningful remaining life.
Donor quality checklist:
- Verify the donor vehicle was not scrapped due to fuel system or electrical issues.
- Match the OEM part number exactly, as different numbers have different calibrations or connectors.
- For fuel pump assemblies, avoid parts from vehicles that sat for a long time, as the internal pump motor seizes.
Decision logic:
- If The part is a standalone sensor on the fuel rail → Always buy new. The cost is low ($40-$100) and the risk of a used electronic sensor failing is high.
- If The part is an expensive, in-tank fuel pump assembly and the vehicle is over 100K miles → A low-mileage used OEM assembly is a reasonable choice on a tight budget, but a new aftermarket unit provides a better warranty.
- If The part is wiring-related → Never use a 'used' wire repair. Always use new wire, connectors, and terminals for a durable fix.
Warranty tradeoff: Used parts typically offer a 30-90 day warranty, which fails to cover intermittent issues. New aftermarket parts come with a 1-year to limited lifetime warranty. New OEM parts carry a 1-2 year warranty.
Worst-case if a used part fails: $300-$600 if a used fuel pump assembly fails after installation, requiring you to pay labor to drop the tank a second time.
What Happens If You Wait — Timeline
- 0-1 month: Check Engine Light is on. You notice a slight drop in fuel economy or no symptoms at all. The vehicle automatically fails an emissions test. (MPG impact: 3-5%% · Added cost: $10-$30 in wasted fuel.)
- 1-3 months: MPG loss becomes more noticeable (5-10%). The engine hesitates during acceleration or is hard to start. The PCM consistently runs a rich fuel mixture to compensate for the faulty reading. (MPG impact: 5-10%% · Added cost: $50-$100 in wasted fuel.)
- 3-6 months: The catalytic converter begins to suffer damage from the sustained rich fuel mixture. The unburned fuel overheats the catalyst substrate, reducing its efficiency. You trigger a new code, P0420 (Catalyst System Efficiency Below Threshold). (MPG impact: 10-15%% · Added cost: $800-$2,500 if the catalytic converter needs replacement.)
- 6+ months: Severe and irreversible damage to the catalytic converter occurs. The internal honeycomb structure melts or breaks apart, causing a rattling noise or a severe exhaust restriction that leads to a major loss of power. The engine stalls frequently. (MPG impact: 15-25%% · Added cost: $1,500-$3,500+ for a new catalytic converter, O2 sensors, and potentially fouled spark plugs.)
Cost of Not Fixing It
- 0-1 month: Noticeable drop in fuel economy (5-10%), potential for rough idling, and hard starting. Failed emissions test is guaranteed. (Added cost: $20-$50 in wasted fuel.)
- 1-6 months: The consistently rich fuel mixture overheats the catalytic converter, reducing its efficiency and lifespan. You will likely trigger new codes like P0420. (Added cost: $800-$2500 if the catalytic converter requires replacement.)
- 6+ months: Severe and permanent damage to the catalytic converter occurs. The rich condition fouls spark plugs and causes carbon buildup on internal engine components. (Added cost: $1000-$3000+ to cover catalytic converter, spark plugs, and engine cleaning.)
Diagnosis Steps
- Scan for Codes and Analyze Live Data
Use an OBD-II scanner to confirm P0187 is active and note any other stored codes. Switch to live data and observe the 'Fuel Temp Sensor B' PID. A P0187 code sets when the voltage is near zero, corresponding to an impossibly cold temperature like -40°F. A normal reading on a warm engine is between 68°F and 176°F.
Tools: OBD-II Scanner with Live Data (Beginner) - Perform a Visual Inspection and Wiggle Test
Inspect the wiring harness from the fuel temperature sensor to the PCM for frayed wires, rodent damage, and corrosion. While monitoring the live sensor voltage on your scanner, gently wiggle the wiring harness. If the voltage fluctuates wildly or drops to zero when moving a specific section, you have located an intermittent short.
Tools: Flashlight, OBD-II Scanner (Beginner) - Test the Circuit at the Connector
Disconnect the sensor. With the Key On, Engine Off (KOEO), use a multimeter to test the connector. You must find a 5-volt reference wire from the PCM and a ground wire reading less than 0.1 volts. If the 5V reference is missing, the issue is upstream in the wiring or PCM. If the signal wire reads 0 volts when disconnected, it indicates a short to ground in the harness.
Tools: Multimeter (Intermediate) - Test the Sensor's Resistance
With the sensor disconnected, measure the resistance across its terminals using a multimeter. Compare the reading to the manufacturer's specifications. A typical thermistor reads between 2,000-3,000 Ohms at 68°F and 300-500 Ohms at 176°F. A reading of near-zero ohms indicates an internal short, requiring sensor replacement.
Tools: Multimeter, Vehicle Service Manual (Intermediate) - Check for Technical Service Bulletins (TSBs)
Check for TSBs related to P0187 for your specific make, model, and year. Manufacturers release bulletins for known issues with updated parts or software updates, saving significant diagnostic time.
Tools: Online Service Manual Access (Beginner) - Analyze the Waveform with an Oscilloscope
For intermittent faults, back-probe the sensor's signal wire with an oscilloscope. A healthy sensor produces a steady DC voltage corresponding to fuel temperature. A noisy, erratic, or flatlined pattern near 0 volts confirms a circuit or sensor fault that a multimeter misses.
Tools: Oscilloscope (Advanced) - Check for Fuel Contamination
Take a fuel sample from the fuel rail's Schrader valve. Let the sample sit in a clear glass container and look for separation, indicating water or contaminants that affect sensor readings, especially on flex-fuel vehicles.
Tools: Fuel Sample Jar (Advanced)
When This Code Triggers (Freeze-Frame Conditions)
- Engine Coolant Temp: 180-200°F (82-93°C) (The fault logs when the engine is fully warmed up and running in closed-loop fuel control.)
- RPM: 1500-2500 (The code sets during steady-state cruise or light acceleration, not typically at idle or heavy throttle.)
- Engine Load: 30-60% (Occurs under moderate engine load, where the PCM actively cross-references sensor inputs for plausibility.)
- Vehicle Speed: 35-55 mph (56-88 km/h) (Triggers during constant highway or city cruising speeds, allowing the PCM's diagnostic routines enough time to identify the persistent low voltage signal.)
Related Codes
- P0188 — The direct opposite code: 'Fuel Temperature Sensor B Circuit High.' P0187 is caused by a short to ground resulting in near-zero voltage. P0188 is caused by an open circuit, causing the signal voltage to read high (near 5 volts).
- P0186 — Means 'Circuit Range/Performance.' Unlike P0187 (stuck low), P0186 sets when the sensor signal is erratic or illogical compared to other engine sensors. A 'wiggle test' pinpoints a P0186 fault.
- P0171 / P0174 — 'System Too Lean' codes. P0187 indirectly causes them. If the PCM thinks the fuel is extremely cold, it shortens injector pulse width. The oxygen sensors detect too much oxygen, triggering lean codes. Fix P0187 first.
- P0087 — 'Fuel Rail/System Pressure - Too Low.' A faulty fuel temperature reading leads the PCM to command incorrect fuel pressure, triggering P0087. Diagnosing the P0187 circuit is the logical first step.
Climate & Environmental Factors
- High Humidity / Coastal Areas: Accelerates corrosion on electrical connectors and wiring, a primary cause of the P0187 low voltage fault. Applying dielectric grease during repairs prevents recurrence.
- Winter Climates / Road Salt: Road salt and brine solutions are highly corrosive and damage the wiring harness running along the vehicle's frame to the fuel tank, leading to shorts to ground.
- Extreme Cold: Does not directly cause the code, as the fault indicates an electrical short circuit rather than an actual temperature reading. However, symptoms like hard starting become more noticeable.
How to Talk to a Mechanic About This Code
Say this: "I have an OBD-II code P0187, and my scanner shows the fuel temperature is stuck at -40 degrees. I'd like to book a diagnostic appointment. Please start by testing the sensor's wiring and connector for a short to ground before recommending a sensor replacement."
This signals you've done your research and know that a wiring short is the most common cause. It directs the technician to perform a proper electrical diagnosis first, preventing you from paying for a new sensor or fuel pump you don't need.
Avoid saying:
- 'My check engine light is on, can you look at it?'
- 'Just fix whatever is wrong.'
- 'My car is running a little rough.'
Questions to ask before authorizing the repair:
- Did you test the 5-volt reference and ground at the sensor connector? What were the readings?
- If you found a short in the wiring, can you show me the damaged section before you repair it?
- If you are recommending a new sensor, can you confirm the old one failed a resistance test?
- What is the warranty on this specific repair, including both parts and labor?
Where to Take It: Dealer vs Independent vs Chain
- Dealer:
Best for: Vehicles under warranty, Repairs that have a specific Technical Service Bulletin (TSB) requiring a PCM software update, Complex electrical issues on high-end or newer models
Downsides: Highest labor rates, Recommends replacing a whole assembly (like a fuel pump module) when only a wiring repair is needed (Typical cost: +50% vs. baseline) - Independent Shop:
Best fit. P0187 is a standard electrical diagnostic job that any competent independent shop handles efficiently. They are more likely to perform a cost-effective wire repair than a dealer.
Best for: Out-of-warranty vehicles where cost is a factor, Diagnosing common electrical faults like wiring shorts and sensor failures
Downsides: Quality varies greatly; look for shops with ASE-certified technicians specializing in diagnostics. (Typical cost: +0% vs. baseline) - Chain Shop:
Use with caution. Acceptable for a straightforward, rail-mounted sensor swap, but AVOID for initial diagnosis of an intermittent or wiring-related P0187.
Best for: Simple part replacements if the diagnosis is already certain (e.g., you've confirmed the sensor is bad)
Downsides: Technician skill for electrical diagnosis is inconsistent, Higher likelihood of upselling unnecessary services or replacing parts without a full diagnosis. (Typical cost: -10% vs. baseline)
When to Walk Away From the Repair
If the estimated repair cost exceeds 40-50% of the car's private-party value, consider selling or trading it in.
- Car worth $4000, fix is $1200: Borderline. The repair is 30% of the car's value. Get a second opinion before authorizing, especially if the fix involves replacing an entire fuel pump assembly.
- Car worth $12000, fix is $300: Fix it. This is a low-cost repair (likely a sensor or wiring) and is well below the threshold.
- Car worth $2500, fix is $1300: Walk away. The repair cost is over 50% of the vehicle's value. It is not a sound financial decision.
What Scan Tool You Need for This Code
Minimum: An OBD-II reader that displays both Freeze Frame and Live Data for the Fuel Temperature Sensor PID.
A basic $20 code reader only tells you the code 'P0187'. It won't show you the live data reading (like -40°F) that confirms a short circuit, nor the freeze frame data that shows when the fault occurred. Without this data, you're just guessing.
Budget: BlueDriver Pro (~$99) — Connects to your smartphone and provides detailed code descriptions, freeze frame data, and live data graphing for the fuel temperature sensor. This is enough for a DIYer to confirm the short circuit and inspect the wiring.
Mid-range: Foxwell NT510 Elite (~$180) — A handheld unit that provides manufacturer-specific codes, live data, and some bidirectional controls to test components. This is excellent for more advanced diagnostics without needing a tablet-based system.
Professional: Autel MaxiCOM MK808S (~$450) — A full-featured diagnostic tablet with extensive bidirectional controls, allowing you to command specific modules and view comprehensive live data. It's powerful enough for professional use but accessible for serious DIYers.
Rent vs buy: If this is a one-time repair, many auto parts stores like AutoZone loan you a scanner for free (with a refundable deposit). Buy a scanner only if you plan to perform your own diagnostics more than once a year.
How to Clear the Code After You Fix It
- Use an OBD-II scan tool to formally clear the P0187 code.
- Ensure the fuel tank is between 1/4 and 3/4 full.
- Perform a complete OBD-II drive cycle to allow the system's readiness monitors to run.
Drive cycle (~30 minutes): A generic drive cycle includes a cold start (engine off for 8+ hours), 2-3 minutes of idling, 10-15 minutes of mixed city and highway driving (including steady speeds around 55 mph), and a period of coasting down to a stop.
Readiness monitors affected: Catalyst Monitor, Oxygen (O2) Sensor Monitor, Fuel System Monitor
Before emissions retest: drive at least 100 miles to fully set monitors.
Watch out for:
- Disconnecting the battery clears the code but resets all readiness monitors to 'Not Ready', guaranteeing an emissions test failure.
- The code returns immediately if the underlying short circuit or sensor failure is not properly repaired.
- Some vehicles have specific drive cycle requirements that must be followed precisely for monitors to set.
Will This Fail Emissions / State Inspection?
Yes — this code typically fails an OBD-II emissions inspection.
- California: An active Check Engine Light for P0187 is an automatic smog check failure. After repair, a full drive cycle must be completed to set all required readiness monitors before a re-test.
- New York: The NYS DMV inspection includes an OBD-II scan. A P0187 code results in an immediate failure. The vehicle cannot be registered or renewed until the issue is fixed and the code is cleared.
- Texas: In counties requiring emissions testing, a vehicle with code P0187 fails the OBD-II portion of the inspection. After repairs, readiness monitors must be set to 'Ready' to pass.
Most Commonly Affected Vehicles
- Ford F-150, Ranger (1997-2024) — Extremely common on Flex Fuel (E85) models where the temperature sensor is integrated with the fuel composition sensor. Wiring harness damage near the fuel rail or on the frame is a frequent cause.
- Chevrolet / GMC Silverado, Sierra (2007-2024) — The sensor is integrated into the fuel pump module, making replacement labor-intensive as the fuel tank must be dropped. For 2024 models, check recall N23241586 for ECM reprogramming related to fuel delivery.
- Volkswagen TDI Models (Jetta, Golf, Passat) (2000-2015) — On TDI diesel engines, this sensor (G81) is critical for injection timing and fuel density calculations. A failure leads to noticeable performance issues. The wiring to the sensor is a known failure point.
- Toyota Camry (2007-2024) — Diagnosis must start with a close inspection of the sensor's electrical connector, as moisture intrusion and corrosion directly cause the low voltage reading.
- Hyundai / Kia Elantra, Forte, Sorento (2011-2020) — P0187 appears due to sensor failure on the fuel rail or wiring issues. The diagnostic logic is sensitive, making ruling out simple connection problems essential.
- Honda / Acura Accord, Civic, MDX, RDX (2005-2020) — Caused by an internal sensor failure or damage to the wiring harness. Verifying the sensor circuit is a crucial first step before replacing expensive direct-injection components.
- Nissan Frontier, Xterra (1998-2004) — Known for issues with the fuel temperature sensor. Its location makes it difficult to access, leading to higher labor costs for replacement.
- Dodge / Ram Ram 1500, Dakota (2002-2013) — The sensor is part of the fuel pump module in the tank. Wiring along the frame rail is a common point of failure due to exposure to the elements.
Manufacturer-Specific Notes
- Flex Fuel Vehicles (General): On E85 compatible vehicles, the fuel temperature sensor is integrated with the fuel composition sensor. A failure in this unit triggers both temperature and composition codes, requiring a sensor that matches the vehicle's specific calibration.
- GM (Chevrolet/GMC): The sensor is integrated into the fuel pump module, requiring dropping the fuel tank for service. Check for active recalls, such as N252516900 (2021-2022 models) covering faulty Fuel Pump Control Modules that cause stalling.
- Ford: Ford trucks are highly sensitive to fuel temperature for optimizing fuel delivery and transmission shift strategies. A P0187 is sometimes accompanied by harsh shifting. Wiring harness rub-through on the frame near the tank is a known failure point.
- VW/Audi (TDI): Fuel temperature is a critical input for the high-pressure pump and injection timing. A P0187 fault leads to a noticeable decrease in power, increased engine noise, and smoking. The wiring harness to the sensor on the injection pump fails frequently due to vibration.
Real Owner Stories
2011 Ford F-150 (Flex Fuel) at 125K miles
Check Engine Light came on with codes P0187 and P018C. Owner noticed a 2-3 MPG drop in fuel economy and occasional long crank times. Live data showed fuel temp at -40°F and ethanol percentage jumping to 85% on regular gasoline.
What they tried:
- Initially suspected bad fuel. Added fuel additives and filled with premium gas, but the code returned.
- Replaced the fuel composition/temperature sensor on the fuel line, as it's a common failure point on these trucks.
Outcome: Replacing the combined fuel composition and temperature sensor (Ford Part No. 8S4Z-9G292-A) resolved the issue. After replacement and clearing the codes, fuel temperature read correctly and ethanol percentage returned to a normal ~10%. Total cost was about $120 for the part and 30 minutes of DIY labor.
Lesson: On Flex Fuel vehicles, P0187 is almost always related to the combined composition/temp sensor. Incorrect ethanol readings along with the temp code are a dead giveaway. Don't waste money on fuel additives; test or replace the sensor.
2008 Chevy Silverado 1500 at 150K miles
P0187 appeared intermittently, especially after heavy rain or going through a car wash. No noticeable performance issues other than the Check Engine Light.
What they tried:
- Shop A replaced the fuel temperature sensor, which is part of the fuel pump module inside the tank. This was an expensive repair ($700+) and did not fix the problem; the code returned a week later.
- Shop B performed a detailed wiring inspection and found a section of the harness on the frame rail near the driver's side that was chafed and shorting to ground when wet.
Outcome: The damaged section of the wiring harness was repaired for $150. The wire was properly spliced, heat-shrunk, and rerouted to prevent future rubbing. The code did not return.
Lesson: Intermittent electrical codes that correlate with weather are almost always a wiring or connector issue. Don't let a shop replace an expensive in-tank part without first exhaustively checking the wiring harness for shorts or corrosion, especially on truck frames exposed to the elements.
2004 VW Jetta TDI at 190K miles
Car suddenly lost power, started running rough, and had visible smoke from the exhaust. Codes P0187 and P0186 were stored. Live data showed fuel temp at -40°C.
What they tried:
- Owner first cleaned the electrical connector on the injection pump for the G81 fuel temperature sensor, but the fault persisted.
- Ordered a new G81 sensor (VW Part No. 028906040C).
Outcome: The owner replaced the G81 sensor located on the diesel injection pump. The repair was relatively simple, costing about $30 for the sensor and an hour of work. After replacement, the car's performance returned to normal, and the codes were cleared successfully.
Lesson: On VW TDI engines, a P0187 fault is more critical and has more severe performance symptoms than on gasoline engines. The G81 sensor is a known failure point due to engine vibration, but it is an inexpensive and accessible part to replace.
How to Prevent This Code From Triggering
- Apply Dielectric Grease to Connectors (During any electrical or fuel system repair) — Dielectric grease seals electrical connectors from moisture, road salt, and oxygen, which are the primary causes of the corrosion that leads to short circuits and low voltage codes like P0187.
- Perform Regular Wiring Harness Inspections (Every 15,000 miles or annually, especially for trucks) — Visually inspecting harnesses that run along the frame or near moving parts helps you spot chafing, rubbing, or rodent damage before the wire's insulation is breached, preventing a short to ground.
- Use High-Quality Fuel from Top-Tier Stations (Every fill-up) — Top-tier gasoline contains enhanced detergent packages that keep the entire fuel system clean from deposits. It also has better quality control to prevent water contamination, which damages sensors and connectors.
- Address Fluid Leaks Promptly (As needed) — Engine oil, coolant, or power steering fluid leaks degrade the protective insulation on wiring harnesses over time, making them brittle and susceptible to cracking, which exposes the wires to potential shorts.
Frequently Asked Questions
What is the most common mistake when diagnosing P0187?
The single biggest mistake is replacing the fuel temperature sensor without first testing the circuit. Technicians frequently find the actual problem is a simple wiring short or a corroded connector, which is a much cheaper fix.
I replaced the sensor, but the P0187 code came back. What's next?
If a new sensor fails to clear the code, the fault is in the wiring harness or the PCM. You must perform a continuity test on the signal and ground wires from the sensor connector to the PCM. Look for a hidden short to ground, which appears when the harness is flexed during a wiggle test.
What does the fuel temperature sensor 'B' actually do?
It measures fuel temperature, allowing the PCM to calculate fuel density. Colder fuel is denser than warmer fuel. The PCM uses this data to adjust fuel injector pulse width, ensuring the optimal air-fuel ratio.
Can I fix P0187 myself?
A DIYer with basic tools can fix this code if the cause is a bad sensor on the fuel rail or an accessible wire. If the sensor is inside the fuel tank, the repair is difficult and dangerous. Dropping a fuel tank requires professional equipment and expertise.
Will a P0187 code cause me to fail an emissions test?
Yes. An active P0187 code with the Check Engine Light on is an automatic failure for an emissions inspection. The fault directly impacts the engine's fuel management system, which controls emissions.
Why is it called sensor 'B'?
The 'B' designation indicates the vehicle has multiple fuel temperature sensors or a secondary fuel system circuit. For example, a vehicle has Sensor 'A' in the fuel tank and Sensor 'B' on the fuel rail. The code specifies exactly which circuit has the fault.
Can a bad fuel filter cause a P0187 code?
A clogged fuel filter does not directly cause a P0187 code. This code strictly indicates an electrical circuit fault, specifically low voltage. A severely clogged filter causes pressure-related codes like P0087, not electrical temperature codes.
Will the P0187 code clear itself?
The code clears itself after several drive cycles if the fault was temporary, such as a loose connection jostled back into place. If the underlying electrical short or failed sensor persists, the code remains active. You must repair the root cause and clear the code with a scanner.
Key Takeaways
- P0187 triggers when the Powertrain Control Module detects a fuel temperature sensor 'B' signal below 0.2 volts, defaulting the reading to an implausible -40°F.
- Inspect the wiring harness and connector first, as a short to ground causes over 80% of P0187 codes, saving you the cost of an unnecessary sensor replacement.
- Expect a 5% to 10% drop in fuel economy and potential catalytic converter damage costing up to $2,500 if you drive with this code for more than 6 months.
- Test the sensor connector with a multimeter with the key on and engine off; you must see a 5-volt reference and less than 0.1 volts on the ground wire to rule out PCM issues.
Helpful Videos


The information in this article is provided for general reference and educational purposes only. Vehicle specifications, procedures, and part compatibility can vary by production date, trim level, and region. Always consult your vehicle's factory service manual and verify part numbers before purchasing or performing repairs. Safety-critical components such as airbags, seat belts, and braking systems should be installed by a qualified professional.
- 🎬 Helpful Videos
- What Does P0187 Mean?
- Can I Drive With P0187?
- Common Causes
- Symptoms
- Diagnostic Flowchart
- Common Fixes & Costs
- DIY vs Professional
- Used vs. New Parts: Buying Guide
- What Happens If You Wait — Timeline
- Cost of Not Fixing It
- Diagnosis Steps
- When This Code Triggers (Freeze-Frame Conditions)
- Related Codes
- Climate & Environmental Factors
- How to Talk to a Mechanic About This Code
- Where to Take It: Dealer vs Independent vs Chain
- When to Walk Away From the Repair
- What Scan Tool You Need for This Code
- How to Clear the Code After You Fix It
- Will This Fail Emissions / State Inspection?
- Most Commonly Affected Vehicles
- Manufacturer-Specific Notes
- Real Owner Stories
- 2011 Ford F-150 (Flex Fuel) at 125K miles
- 2008 Chevy Silverado 1500 at 150K miles
- 2004 VW Jetta TDI at 190K miles
- How to Prevent This Code From Triggering
- Frequently Asked Questions
- What is the most common mistake when diagnosing P0187?
- I replaced the sensor, but the P0187 code came back. What's next?
- What does the fuel temperature sensor 'B' actually do?
- Can I fix P0187 myself?
- Will a P0187 code cause me to fail an emissions test?
- Why is it called sensor 'B'?
- Can a bad fuel filter cause a P0187 code?
- Will the P0187 code clear itself?
- Key Takeaways
- 🎟️ Get 5% Off