

OBD-II Code P0181: Fuel Temperature Sensor 'A' Circuit Range/Performance
The Ultimate Guide to Diagnosing and Fixing P0181
- P0181 triggers when the Powertrain Control Module receives an erratic or illogical signal from the fuel temperature sensor, directly impacting fuel economy by up to 10%.
- Perform a 'cold soak' test by comparing Fuel Temp, Intake Air Temp (IAT), and Engine Coolant Temp (ECT) scan tool readings after the car sits for 8 hours; all three must be within 9°F of each other.
- Do not immediately replace the fuel pump; inspect the wiring harness for chafing and check the Fuel Pump Driver Module (FPDM) for corrosion, especially on 2000-2010 Ford trucks.
- On 2015-2020 Nissan Rogues, P0181 is almost always caused by an internal wiring flaw requiring a complete fuel pump assembly replacement per TSB NTB20-094.
- Using an engine block heater in ambient temperatures above 0°F (-18°C) causes a false P0181 code on GM Duramax diesels due to a temperature rationality mismatch.
What Does P0181 Mean?

The Powertrain Control Module (PCM) is receiving an illogical or erratic signal from Fuel Temperature Sensor 'A'. This sensor tells the PCM the fuel temperature, allowing it to fine-tune the air-fuel mixture for optimal combustion as fuel density changes. The 'Range/Performance' aspect means the signal isn't simply stuck high or low; it fluctuates implausibly, drops out intermittently, or contradicts data from the Engine Coolant and Intake Air Temperature sensors.
Technical definition: The PCM sets P0181 when the voltage signal from fuel temperature sensor 'A' falls outside its calibrated, expected range during a continuous self-test. The PCM identifies this 'rationality' fault by observing a signal that is intermittent, erratic, or fails to correlate with the Intake Air Temperature (IAT) and Engine Coolant Temperature (ECT) sensors after a cold soak (sitting for 8+ hours). For example, the code sets if the fuel temperature reads 15°C (27°F) different than the coolant temperature on a cold start.
Can I Drive With P0181?
Yes, But With Caution. You can drive with a P0181 code, but it is a gamble. It causes reduced engine power, hesitation, or unexpected stalling, posing a significant safety risk in traffic. Driving for extended periods with an incorrect fuel mixture damages the catalytic converter or Diesel Particulate Filter (DPF) on diesel models, leading to repairs exceeding $2000. Diagnose the issue promptly to avoid getting stranded or incurring expensive secondary repairs.
Common Causes

- Faulty Fuel Temperature Sensor (Very Common) — The sensor itself is the most frequent point of failure. Over time, it suffers internal short circuits, contamination, or simple wear, causing it to send incorrect or erratic readings. On many modern vehicles, this sensor is integrated into the fuel pump module or a fuel composition (flex-fuel) sensor, complicating replacement.
- Wiring or Connector Issues (Common) — The wiring harness leading to the sensor is highly susceptible to damage. Wires break, fray, or short to ground, and the electrical connector becomes loose, corroded, or contaminated with moisture, interrupting the signal. On VW TDIs, wires frequently break right at the connector.
- Failing Fuel Pump or Fuel Pump Driver Module (FPDM) (Less Common) — A failing fuel pump overheats, raising the fuel temperature in the tank beyond its normal operating range and causing a legitimate but out-of-range reading. A faulty Fuel Pump Driver Module (FPDM), common on 2000-2010 Ford trucks, causes the pump to run erratically, leading to fuel pressure and temperature fluctuations that trigger P0181.
- Contaminated or Improper Fuel (Less Common) — Water, excessive additives, or a high concentration of ethanol (in non-flex-fuel vehicles) alters the fuel's properties and interferes with the sensor's accuracy. In extremely cold weather, diesel fuel gels or water in the tank freezes, triggering the code.
- Extreme Environmental Temperatures (Rare) — In exceptionally cold climates (below -20°F or -30°C), the fuel temperature naturally falls below the sensor's minimum expected range, triggering the code even when no component has failed.
- Faulty Related Temperature Sensors (IAT/ECT) (Rare) — The PCM cross-references the fuel temperature reading with the Intake Air Temperature (IAT) and Engine Coolant Temperature (ECT) sensors on a cold start. If one of these other sensors is faulty and provides a wildly different reading, the PCM incorrectly flags the fuel temperature sensor as the problem.
- Incorrect PCM Software or Calibration (Rare) — The PCM's software sometimes contains a bug or requires an update. The stored parameters for expected fuel temperature are incorrect, causing the PCM to misinterpret a valid sensor signal. This is a known issue on 2011-2015 Honda Civics where a software re-flash is the specified repair. 🎬 Watch: Diagnosing a P0181 code on a Nissan Rogue
- Faulty Powertrain Control Module (PCM) (Very Rare) — The PCM itself rarely fails. The internal circuit responsible for processing the sensor's signal develops a fault, leading to a misinterpretation of a perfectly good signal. Consider this only after exhausting all other possibilities.
Symptoms
- Reduced Fuel Economy — Fuel economy decreases significantly. An incorrect temperature reading causes the PCM to calculate the air-fuel mixture inefficiently, resulting in a 5-10% drop in MPG.
- Rough Idle, Hesitation, or Stalling — The engine runs rough, idles erratically, hesitates during acceleration, or stalls unexpectedly. This occurs because the PCM commands an incorrect air-fuel ratio based on faulty temperature data.
- Hard Starting or No-Start Condition — The engine is difficult to start, especially in very hot or cold weather. In extreme cases, such as when fuel freezes or boils in the lines, the vehicle fails to start entirely.
- Reduced Engine Power ('Limp Mode') — To prevent engine damage from a severely incorrect fuel mixture, the PCM activates a 'limp mode,' intentionally restricting engine power and speed.
- Check Engine Light On (also visible on scanner) — The Malfunction Indicator Lamp (MIL) illuminates on the dashboard, often as the only initial symptom.
Diagnostic Flowchart
Tap your situation to follow the diagnostic path that matches what you're seeing on this code.
Common Fixes & Costs
- Replace Fuel Temperature Sensor (Standalone)
— Parts: $30-$100, Labor: $50-$150, ~1.5 hr book time
(Intermediate)
Chevrolet/GMC Duramax (2001-2016): OEM GM 97224993 (Alt: ACDelco 97224993, Standard Motor Products FTS104, Dorman 926-543, NGK/NTK FK0005) - Repair Wiring or Replace Connector — Parts: $10-$60, Labor: $120-$250, ~1.5 hr book time (Intermediate)
- Replace Fuel Pump Driver Module (FPDM)
— Parts: $50-$200, Labor: $100-$150, ~0.8 hr book time
(Intermediate)
Ford F-150 (2004-2008): OEM Ford 4L3Z-9D370-A (Alt: Dorman 590-001 (OE Fix), Carquest Premium FPC1087, Standard Motor Products FPM100)
Ford F-150 (2009-2014): OEM Ford 9L3Z-9D370-B (Alt: Dorman 601-225)
Ford F-150 (2015-2020): OEM Ford FL3Z-9D370-B (Alt: Dorman 601-240) - Replace Fuel Pump Assembly (with Integrated Sensor)
— Parts: $300-$1800, Labor: $200-$400, ~3 hr book time
(Professional)
Nissan Rogue (2015-2020): OEM Nissan 17040-4BA0C, 17040-6MA0A (Alt: Delphi FG1932, Spectra Premium SP4126M, Bosch, TRQ, API) - Update or Re-flash PCM Software — Parts: $0, Labor: $100-$250, ~1 hr book time (Professional)
- Replace Powertrain Control Module (PCM) — Parts: $800-$1500, Labor: $150-$300, ~1.5 hr book time (Professional)
Used vs. New Parts: Buying Guide
When a used part is worth it: For an expensive fix like a complete fuel pump assembly, a used OEM unit from a low-mileage, accident-damaged vehicle is a cost-effective alternative to a cheap aftermarket part.
Donor-vehicle mileage cap: roughly under 80000 miles for the part to have meaningful remaining life.
Donor quality checklist:
- Verify the donor vehicle's mileage and reason for being salvaged (collision is better than engine/electrical failure).
- Match the OEM part number exactly; do not rely on visual similarity.
- Purchase from a reputable salvage yard that offers a short-term warranty (30-90 days).
Decision logic:
- If The standalone sensor is available and the vehicle is a daily driver. → Buy a new OEM or high-quality aftermarket sensor. The low cost outweighs the risk of a used part failing.
- If The entire fuel pump assembly must be replaced ($500+) and the vehicle is older (>150K miles). → A tested, used OEM pump is a reasonable choice to save money, but acknowledge the risk of a shorter lifespan.
- If The vehicle has low mileage or is critical for reliability. → Buy a new OEM or top-tier aftermarket (e.g., Delphi, Bosch) assembly. The peace of mind and longer warranty justify the cost.
Warranty tradeoff: Used parts typically have a 30-90 day warranty covering the part only. New aftermarket parts offer a 1-year to limited lifetime warranty. New OEM parts carry a 1-2 year warranty.
Worst-case if a used part fails: $400-800 if a used fuel pump fails after installation, representing repeat labor plus another replacement part.
What Happens If You Wait — Timeline
- 0-1 month: Check Engine Light illuminates. Code P0181 is stored. In many cases, there are no other noticeable symptoms. The fault is often intermittent. (MPG impact: 0-5%% · Added cost: $0-25 in wasted fuel)
- 1-3 months: Drivability issues begin to appear, such as occasional hard starting (hot or cold), a slight rough idle, or a noticeable 5-10% drop in fuel economy as the PCM defaults to a less efficient fuel map. (MPG impact: 5-10%% · Added cost: $50-150 in wasted fuel)
- 3-6 months: Engine hesitation or stalling becomes more frequent, posing a safety risk. The consistently incorrect air-fuel mixture (often rich as a fail-safe) starts to stress the catalytic converter, causing it to overheat. (MPG impact: 10-15%% · Added cost: $200+ in wasted fuel, risk of catalytic converter damage beginning)
- 6+ months: Continued operation with a bad fuel mixture leads to permanent damage to the catalytic converter ($1200-$2800). In extreme cases, especially with lean conditions, it leads to increased combustion temperatures and damage to internal engine components or fuel injectors. (MPG impact: 15-25%% · Added cost: $1500-3000+ for catalytic converter and/or other secondary component failures)
Cost of Not Fixing It
- 0-1 month: Noticeable drop in fuel economy (5-10%), stalling, and an illuminated Check Engine Light leading to a failed emissions test. (Added cost: Negligible, other than increased fuel costs.)
- 1-6 months: Running on an improper air-fuel mixture causes the catalytic converter to overheat and degrade, leading to permanent damage. (Added cost: $1200-2800 for catalytic converter replacement.)
- 6+ months: Continued stress on the fuel system increases the risk of being stranded. Extreme cases cause secondary damage to fuel injectors or internal engine components. (Added cost: $2000+ for multiple component failures.)
Diagnosis Steps

- Scan for Codes and Review Freeze Frame Data
Using an OBD-II scanner, confirm the P0181 code is present and check for any other codes. Document the freeze frame data, which provides a snapshot of sensor values at the moment the fault occurred. This data is critical for understanding the conditions that triggered the code, such as fuel temperature, ECT, IAT, and engine load.
Tools: OBD-II Scanner (Beginner) - Analyze Live Sensor Data (Cold Soak Test)
With an advanced scan tool, compare the live data readings of the Fuel Temperature Sensor (FTS), Intake Air Temperature (IAT), and Engine Coolant Temperature (ECT) sensors before starting the engine (after it sits for at least 8 hours). All three readings must be within 5°C (9°F) of each other and the ambient temperature. A fuel temp reading that is drastically different (e.g., -40°F or 250°F) confirms a faulty sensor or circuit.
Tools: Advanced OBD-II Scanner (Intermediate) - Perform a Thorough Visual Inspection
Visually inspect the entire wiring harness and all connectors associated with the fuel temperature sensor. Look for chafed or broken wires, loose connections, or corrosion on the connector pins. The sensor is located on the fuel rail, in the fuel line, or as part of the in-tank fuel pump assembly.
Tools: Flashlight, Inspection Mirror (Beginner) - Perform a 'Wiggle Test' on the Wiring Harness
While monitoring the live fuel temperature data on your scan tool, carefully wiggle the wiring harness and connector for the fuel temperature sensor. If the voltage or temperature reading fluctuates wildly or drops out during the wiggle test, it confirms an intermittent connection or a break in the wiring requiring repair.
Tools: Advanced OBD-II Scanner (Intermediate) - Check for Reference Voltage and Ground
Turn the ignition on (engine off). At the sensor's connector (harness side), use a multimeter to verify the presence of a 5-volt reference voltage. Check the ground wire for good continuity to the chassis ground (less than 0.1 ohms). The absence of reference voltage or a poor ground points to a wiring issue or a PCM problem.
Tools: Multimeter (Intermediate) - Test the Sensor's Resistance
If the sensor is accessible, disconnect its electrical connector and measure the internal resistance across its terminals using a multimeter set to Ohms (Ω). Compare your reading to the manufacturer's specifications, which are temperature-dependent. For example, a common sensor specifies 2,200-2,800 Ohms (2.2-2.8 kΩ) at 68-77°F (20-25°C). An infinite (OL) or zero-ohm reading confirms a failed sensor. 🎬 Watch: How to test and replace the fuel temperature sensor
Tools: Multimeter, Vehicle-Specific Repair Manual (Intermediate) - Inspect Fuel Quality
Take a clean sample of fuel from the tank. Visually inspect it for water (which separates), debris, or unusual cloudiness. For diesel vehicles in cold weather, check if the fuel shows signs of gelling. Poor fuel quality directly affects the sensor's operation.
Tools: Clean Glass Jar (Advanced) - Advanced: Validate Sensor Voltage Range
Using a scan tool, monitor the Fuel Temperature Sensor voltage PID. The typical operating range is between 0.1V and 4.9V. A voltage reading stuck at 0V or 5V indicates a hard short or open circuit (triggering codes like P0182/P0183). P0181 sets when a voltage is inappropriately high or low for the given condition, but not completely maxed out. For example, a reading of 4.0V on a cold-soaked engine (which should be closer to 2.5-3.0V) is a range/performance fault.
Tools: Advanced OBD-II Scanner, Multimeter (Advanced) - Advanced: Check Fuel Pressure
Connect a fuel pressure gauge to the fuel rail's service port. Check the pressure with the Key On, Engine Off (KOEO) and at idle. Specifications vary, but for many gasoline engines, expect 40-60 PSI. A failing fuel pump or FPDM causes erratic pressure and temperature, so unstable pressure readings point away from the sensor itself and towards a fuel delivery problem.
Tools: Fuel Pressure Gauge, Vehicle-Specific Repair Manual (Advanced) - Analyze Sensor Signal with an Oscilloscope (Pro Tip)
For hard-to-find intermittent faults, connect a lab scope to the sensor's signal wire. A good sensor produces a clean, stable DC voltage signal that changes slowly with temperature. Look for sudden voltage spikes, dropouts, or excessive 'hash' (electrical noise) on the signal pattern. This reveals internal sensor failures or electromagnetic interference that a multimeter misses.
Tools: Oscilloscope (Lab Scope) (Professional)
When This Code Triggers (Freeze-Frame Conditions)
- Fault Trigger: Cold Soak Rationality Check (Code sets at startup after the vehicle sits for 8+ hours, when the PCM compares FTS, ECT, and IAT readings and finds a discrepancy.)
- Engine Coolant Temp (ECT): 40-95°F (5-35°C) (During a cold soak test, the fault logs if the fuel temperature is significantly different from the ECT and ambient air temperature.)
- RPM: Variable (The fault logs at idle (during startup check) or at steady cruise RPMs if the signal becomes erratic or intermittent while driving.)
- Vehicle Speed: 0 mph or >20 mph (The code triggers either at 0 mph during the initial key-on-engine-off check, or while driving if the sensor signal becomes unstable.)
Related Codes
- P0180 — P0180 indicates a general circuit malfunction, meaning the PCM detects no signal at all (e.g., a completely open or shorted circuit). P0181 is a 'performance' code, meaning the PCM receives a signal, but it is erratic, intermittent, or illogical compared to other inputs.
- P0182 / P0183 — These codes are more specific. P0182 ('Circuit Low') means the signal voltage is stuck near zero, indicating a short to ground. P0183 ('Circuit High') means the signal voltage is stuck near 5V, indicating an open circuit. P0181 sets when the voltage fluctuates illogically or fails a rationality check, rather than being permanently stuck.
- P0184 — P0184 specifically indicates 'Fuel Temperature Sensor 'A' Circuit Intermittent'. This is very similar to P0181, but P0184 sets when the signal disappears and reappears, while P0181 sets when the signal is present but nonsensical or out of its expected performance range.
- P0171 / P0174 — These 'System Too Lean' codes are a direct result of a P0181 fault. If the sensor incorrectly tells the PCM the fuel is very hot, the PCM commands less fuel to be injected. This creates a lean air-fuel mixture, triggering P0171 (Bank 1) or P0174 (Bank 2). Always diagnose and fix fuel sensor codes like P0181 first.
Climate & Environmental Factors

- Extreme Cold: Causes diesel fuel to 'gel' or thicken, impeding flow and causing the PCM to flag a performance issue. In temperatures below -20°F to -30°F, the fuel itself falls below the sensor's expected range, triggering a P0181 even without a component failure. Water contamination in the tank freezes, blocking fuel pickup and causing a no-start.
- High Humidity / Road Salt: Promotes corrosion on electrical connectors, wiring, and modules, particularly the Ford FPDM mounted on the frame rail. Moisture intrusion into connectors shorts the sensor signal, causing erratic readings.
- High Altitude: Exacerbates existing fuel mixture problems. The PCM relies on the fuel temperature to calculate fuel density for the correct air-fuel ratio. An incorrect temperature reading combined with thinner air at altitude leads to more noticeable performance issues.
- GM Block Heater Usage: On Duramax diesel engines, plugging in the block heater in ambient temperatures above 0°F (-18°C) sets a false P0181. The PCM's cold-start rationality check sees a large, illogical difference between the warm coolant and the cold fuel/intake air.
How to Talk to a Mechanic About This Code
Say this: "I have a P0181 code and I'd like to schedule a diagnostic. I'd like you to start by performing a cold-soak test to compare the fuel temperature, coolant temperature, and intake air temperature readings before starting the engine. Please also check for any technical service bulletins related to this code for my vehicle's make and model."
This language signals that you've done your research and understand the correct diagnostic procedure. It directs the mechanic to the most efficient starting point (the cold soak test) and prompts them to check for known issues (TSBs), preventing them from replacing parts unnecessarily.
Avoid saying:
- 'My check engine light is on, can you just fix it?'
- 'My car is running weird, I think it's the fuel pump.'
- 'Just do whatever you think is best.'
Questions to ask before authorizing the repair:
- What were the temperature readings for the Fuel, ECT, and IAT sensors during the cold soak test?
- Did you find any TSBs for this code on my vehicle?
- Did you perform a wiggle test on the sensor's wiring harness and connector?
- Can you provide a printout of the freeze frame data and the live data you captured?
- What is the warranty on the proposed repair, covering both parts and labor?
Where to Take It: Dealer vs Independent vs Chain
- Dealer:
Recommended if you have a vehicle with a known TSB (Nissan, Honda, GM) or if the vehicle is still under warranty. Otherwise, it's an expensive second choice.
Best for: Vehicles under warranty., Repairs involving manufacturer-specific TSBs or software updates (e.g., Nissan Rogue wiring, Honda PCM re-flash)., Complex electrical issues where a first attempt at an independent shop failed.
Downsides: Highest labor rates, typically $150-$250 per hour., More likely to recommend replacing an entire assembly (like a fuel pump module) rather than attempting a wiring or connector repair. (Typical cost: +40% vs. baseline) - Independent Shop:
Best fit for most P0181 situations, especially for out-of-warranty vehicles. A good independent diagnostician efficiently tests wiring and sensors, saving you from the dealer's 'replace the whole assembly' approach.
Best for: Out-of-warranty vehicles where cost is a major factor., Diagnosing common failure points like wiring, connectors, or standalone sensors., Vehicles like Ford trucks where the FPDM is a common, non-dealer-specific failure.
Downsides: Quality and diagnostic skill vary widely; vet shops by checking for ASE certifications and online reviews., May not have access to the very latest TSBs or proprietary software for re-flashing a PCM. (Typical cost: +0% vs. baseline) - Chain Shop:
Use with caution. Acceptable for a straightforward, confirmed bad sensor replacement, but AVOID for initial diagnosis of an intermittent P0181 code, which requires more nuanced troubleshooting.
Best for: Simple, clear-cut repairs like replacing an easily accessible, standalone fuel temperature sensor.
Downsides: Technician skill varies dramatically., Often lack the advanced diagnostic equipment or experience for intermittent electrical faults or TSB-related issues., High pressure to sell parts leads to replacing a sensor without diagnosing the underlying wiring or connector issue. (Typical cost: -10% vs. baseline)
When to Walk Away From the Repair
If the estimated repair cost for the P0181 fault exceeds 50% of your car's private-party value, seriously consider selling the vehicle as-is.
- Car worth $3500, fix is $1800: Walk away. The repair cost is over 50% of the car's value. It's not a sound financial decision.
- Car worth $15000, fix is $2000: Fix it. The repair cost is well under the 50% threshold and is significantly less than replacing the vehicle.
- Car worth $2500, fix is $400: Fix it. This is a relatively inexpensive repair that makes the car reliable and sellable for its full value.
What Scan Tool You Need for This Code
Minimum: A scanner that can read and graph live data, and also access freeze frame data.
A $20 code reader only displays the 'P0181' code. Diagnosing this requires viewing live temperature readings from the Fuel Temp, Coolant Temp, and Intake Air Temp sensors simultaneously to perform a 'cold soak' test. Without live data, you are just guessing.
Budget: BlueDriver Pro (~$100) — Connects to your smartphone via Bluetooth and the app allows you to view and graph live data for all necessary sensors. It also reads freeze frame data, making it a perfect tool for a DIYer to confirm a sensor rationality fault before going to a shop.
Mid-range: Foxwell NT510 Elite (~$180) — A dedicated handheld scanner that provides live data and graphing. Its main advantage over budget picks is the ability to access manufacturer-specific PIDs, which is crucial for diagnosing quirks on brands like Honda or GM.
Professional: Autel MaxiCOM MK808S (~$450) — Offers full bidirectional control (to command modules and run tests) and access to OEM-level diagnostics. This is professional-grade and overkill for a single code, but invaluable for a serious enthusiast who works on multiple cars.
Rent vs buy: For a one-time diagnosis, many AutoZone locations lend you a scanner as part of their 'Loan-A-Tool' program, where you pay a deposit that is fully refunded upon return. Note: Some states like California have restrictions on this program. Call your local store to confirm availability before you go.
How to Clear the Code After You Fix It
- Use an OBD-II scan tool to clear the P0181 code and any related fault codes.
- If the battery was disconnected for the repair, reconnect it.
- Perform a complete OBD-II drive cycle to allow the readiness monitors to run.
Drive cycle (~30 minutes): Start with a cold engine (sat overnight). Idle for 2-3 minutes. Drive a mix of city (stop-and-go) and highway (steady speed of 55-60 mph for 5-10 minutes) traffic. Allow the vehicle to cool down completely and repeat if necessary.
Readiness monitors affected: Catalyst (CAT) monitor, Evaporative (EVAP) System monitor, Oxygen (O2) Sensor monitor, Fuel System monitor
Before emissions retest: drive at least 100 miles to fully set monitors.
Watch out for:
- Clearing the code with a scanner resets all readiness monitors to 'incomplete'. You must complete a drive cycle before an emissions test.
- The code returns quickly if the underlying fault (e.g., bad wiring, faulty sensor) is not correctly repaired.
- Some monitors, like the EVAP system, have specific conditions to run (e.g., fuel level between 15-85%) and are difficult to set.
Will This Fail Emissions / State Inspection?
Yes — this code typically fails an OBD-II emissions inspection.
- California: An illuminated Check Engine Light is an automatic failure. After repair, a full OBD-II drive cycle must be completed to set the readiness monitors before a re-test is possible.
- New York: The NYS DMV inspection includes an OBD-II scan. A P0181 code results in an immediate test failure.
- Texas: In the 17 counties requiring emissions testing, an active P0181 code causes the vehicle to fail the OBD-II portion of the state inspection.
Most Commonly Affected Vehicles
- Nissan Rogue (2015-2020) — Extremely common due to a known issue where yellow wires inside the fuel pump module were misrouted at the factory, leading to chafing and corrosion on the connector pins. Nissan issued Technical Service Bulletin (TSB) NTB20-094 for this problem. The sensor is not sold separately, so the official fix is to replace the entire fuel pump assembly, a repair costing $1500-$2200.
- Ford F-150 / Ranger (2000-2010) — Often caused by a failed sensor on the fuel rail or, more commonly, a faulty Fuel Pump Driver Module (FPDM) located on the frame rail, which corrodes and causes erratic fuel pump operation. Check the FPDM before condemning the in-tank sensor.
- Chevrolet / GMC Silverado / Sierra with Duramax Diesel (2001-2016) — Plugging in the engine block heater in ambient temperatures above 0°F (-18°C) triggers this code. The PCM performs a self-check comparing IAT, ECT, and fuel temp on a cold start; the block heater creates a temperature variance that the PCM flags as a fault. A customer satisfaction program (N212346580) was issued for 2017-2019 models to replace faulty block heater cords.
- Volkswagen Jetta, Golf, Passat (TDI) (2009-2015) — Frequently caused by the two wires breaking directly at the fuel temperature sensor connector due to vibration and heat. The standard repair is to replace the connector pigtail or carefully de-pin the connector to install new wire terminals.
- Honda Civic (2011-2015) — The code is triggered by a faulty fuel temperature sensor or poor electrical connections. However, in some instances, a P0181 code is the result of a correlation fault with the Manifold Absolute Pressure (MAP) sensor and requires a PCM software update per a Honda TSB, not a hardware replacement.
- Hyundai / Kia Elantra, Forte, various models (2011-2018) — This code commonly points to a direct failure of the fuel temperature sensor. The sensor is often integrated into the in-tank fuel pump assembly, necessitating the replacement of the entire unit to resolve the fault.
- Subaru Impreza, Outback, Forester (2000-2010) — The code is triggered by a failing fuel temperature sensor. The sensor is often part of the fuel sending unit assembly inside the tank and is not available as a separate part, requiring replacement of the complete unit.
- Jeep Grand Cherokee (2005-2014) — P0181 is commonly associated with either a failing fuel temperature sensor, which is frequently integrated with the fuel pump module, or corrosion developing in the main wiring harness connectors near the fuel tank.
Manufacturer-Specific Notes

- GM (Duramax): Plugging in the block heater when the ambient temperature is above 0°F (-18°C) causes a false P0181 code. The PCM compares the engine coolant, intake air, and fuel temperatures on a cold start; the artificial heat from the block heater creates a discrepancy that the computer interprets as a sensor performance fault. A related Customer Satisfaction Program (N212346580) for 2017-2019 models addresses faulty block heater cords.
- Nissan: On 2015-2020 Rogues, P0181 is almost always caused by an internal wiring flaw within the fuel pump module, as detailed in TSB NTB20-094. The sensor itself is rarely the problem, but it is not sold separately from the expensive fuel pump assembly, making the repair costly.
- Honda: On certain models like the 2011-2015 Civic, a P0181 code sets due to a correlation fault with the Manifold Absolute Pressure (MAP) sensor, not the fuel temp sensor. The official fix is often a PCM software update rather than any hardware replacement.
- Ford: On many F-Series and Ranger trucks, a common cause for fuel-related codes, including P0181, is the failure of the Fuel Pump Driver Module (FPDM). This module, often mounted to the vehicle's frame, corrodes and fails, causing erratic fuel pump operation that the PCM misinterprets as a fuel temperature issue.
Real Owner Stories
2015 Nissan Rogue at 41K miles
Check Engine Light came on less than two weeks after purchasing the used vehicle. No immediate drivability symptoms were noticed, but the owner was concerned about an upcoming 650-mile road trip.
Outcome: This is a classic case of the well-documented TSB NTB20-094 for Nissan Rogues. The wiring inside the fuel pump module is known to be faulty. The owner was advised that the entire fuel pump assembly requires replacement as the sensor is not sold separately.
Lesson: On a 2015-2020 Nissan Rogue, P0181 almost always points to the TSB. Don't replace any other parts; the fuel pump assembly is the required fix, even if the issue seems intermittent or weather-related.
2014 VW Jetta TDI (CKRA engine)
Check Engine Light on with codes P0181 (implausible signal) and P0183 (open/short to positive). No major performance issues were noted.
Outcome: The owner de-pinned the old connector and installed new wire terminals (TE Pin 7-1452665-2) and seals into the existing connector housing (VW part 4H0973702A), a repair costing only a few dollars in parts plus labor. The codes were cleared and did not return.
Lesson: On VW TDIs, always inspect the wires at the sensor connector first. A simple, cheap wiring repair saves you from buying an unnecessary sensor or harness section. Using the correct de-pinning tools and terminals makes for a professional, long-lasting fix.
2008 Chevy Silverado Duramax
Owner plugged in the engine block heater on a night where the temperature was above 0°F (-18°C). The next morning, the truck started fine but threw a P0181 code.
Outcome: The owner cleared the code and made a note to not use the block heater unless temperatures were truly frigid (below 0°F). The code did not return. Some owners opt to have the dealer update the ECM calibration or install a thermostatically controlled block heater cord to prevent this false code.
Lesson: For Duramax owners, a P0181 code that appears after using the block heater in mild winter weather is likely a false code. Don't replace any parts. Clear the code and either avoid using the heater above 0°F or get the updated cord/software.
2005 Ford F-150 with drivability issues
Truck was hesitating, running rough, and occasionally stalling, accompanied by a P0181 code. The owner initially suspected a bad fuel pump or sensor.
Outcome: The owner replaced the FPDM with an aftermarket 'OE Fix' version from Dorman (part 590-001) which includes spacers to lift the module off the frame, preventing future corrosion. The replacement took less than an hour with basic tools. This single part replacement resolved all the drivability issues and the P0181 code.
Lesson: On many Ford trucks from this era, fuel-related codes and drivability problems are frequently caused by a corroded FPDM, not the in-tank fuel pump. Always inspect the FPDM before condemning the more expensive and difficult-to-replace fuel pump assembly.
How to Prevent This Code From Triggering
- Apply Dielectric Grease to Connectors (Anytime a connector is disconnected) — Dielectric grease is non-conductive and seals out moisture and oxygen, preventing corrosion on connector pins and sockets. This is especially critical for connectors exposed to the elements, like the Ford FPDM or sensors near the frame.
- Use a Quality Fuel System Cleaner (Every 3,000-5,000 miles) — Additives in quality cleaners (like Techron or Sea Foam) help remove water and contaminants from the fuel tank. This prevents moisture from interfering with sensor readings or causing corrosion from within the fuel system.
- Use Diesel Anti-Gel Additives in Winter (At every fill-up when temperatures are below 32°F (0°C)) — Prevents paraffin wax in diesel fuel from crystallizing ('gelling') in cold weather. Gelled fuel clogs filters and causes the fuel temperature to drop below the sensor's expected range, triggering a false P0181 code.
- Secure and Protect Wiring Harnesses (During any under-hood or under-vehicle maintenance) — Ensure wiring harnesses are properly clipped into place and away from hot exhaust components or sharp edges. Vibration causes chafing over time, leading to shorts or breaks in the wire, a common cause of P0181.
- Avoid Using Block Heater in Mild Weather (Duramax) (During winter months) — On Duramax engines, only use the block heater when temperatures are expected to drop below 0°F (-18°C). Using it in warmer conditions creates a temperature differential that triggers a false P0181 code during the PCM's startup checks.
Frequently Asked Questions
What are the most common mistakes when diagnosing P0181?
The biggest mistake is replacing the fuel temperature sensor or the entire fuel pump assembly without proper diagnosis. Always perform a 'cold soak' live data test and a 'wiggle test' on the wiring first. Check for Technical Service Bulletins (TSBs) like the known wiring issue on Nissan Rogues before buying parts.
Can I just clear the P0181 code and keep driving?
You can clear the code with a scanner, but it will return if a hardware or software fault exists. Continuously ignoring it causes poor performance, decreased fuel economy, and stalling hazards. Fix the underlying issue to prevent catalytic converter damage.
Where is the Fuel Temperature Sensor 'A' located?
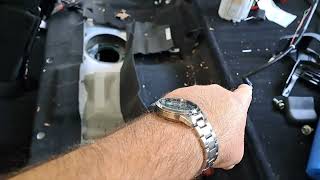
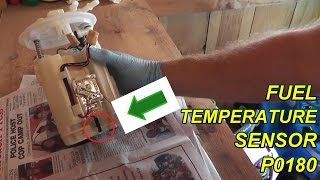
Its location varies widely by vehicle. It is a standalone sensor on the fuel rail, integrated into a flex-fuel composition sensor, or built into the in-tank fuel pump module. Consult a vehicle-specific repair manual to pinpoint its exact location.
Is P0181 a serious code?
It is a moderately serious code. While it rarely causes immediate catastrophic engine failure, associated drivability problems like stalling pose a significant safety hazard. Address it promptly to ensure reliability and prevent long-term damage to the catalytic converter.
Will a P0181 code fail an emissions test or MOT?
Yes. An illuminated Check Engine Light due to a P0181 code causes an automatic failure during an OBD-II emissions test or MOT inspection. The underlying incorrect fuel mixture also causes the vehicle to exceed legal tailpipe emission limits.
Can using E85 or different fuel blends cause P0181?
Yes, particularly in vehicles not designed for flex-fuel. The fuel temperature sensor is often housed within the fuel composition sensor, which measures ethanol content. Using an incompatible fuel blend causes erratic readings from the assembly, triggering a P0181 code.
What does the 'A' in 'Sensor A' mean?
The 'A' designates the primary fuel temperature sensor in the circuit. Complex fuel systems with diesel return lines or dual tanks have a second sensor ('B'). A fault in the secondary sensor triggers a different set of codes, such as P0186.
Key Takeaways
- P0181 triggers when the Powertrain Control Module receives an erratic or illogical signal from the fuel temperature sensor, directly impacting fuel economy by up to 10%.
- Perform a 'cold soak' test by comparing Fuel Temp, Intake Air Temp (IAT), and Engine Coolant Temp (ECT) scan tool readings after the car sits for 8 hours; all three must be within 9°F of each other.
- Do not immediately replace the fuel pump; inspect the wiring harness for chafing and check the Fuel Pump Driver Module (FPDM) for corrosion, especially on 2000-2010 Ford trucks.
- On 2015-2020 Nissan Rogues, P0181 is almost always caused by an internal wiring flaw requiring a complete fuel pump assembly replacement per TSB NTB20-094.
- Using an engine block heater in ambient temperatures above 0°F (-18°C) causes a false P0181 code on GM Duramax diesels due to a temperature rationality mismatch.
Helpful Videos

The information in this article is provided for general reference and educational purposes only. Vehicle specifications, procedures, and part compatibility can vary by production date, trim level, and region. Always consult your vehicle's factory service manual and verify part numbers before purchasing or performing repairs. Safety-critical components such as airbags, seat belts, and braking systems should be installed by a qualified professional.
- 🎬 Helpful Videos
- What Does P0181 Mean?
- Can I Drive With P0181?
- Common Causes
- Symptoms
- Diagnostic Flowchart
- Common Fixes & Costs
- Used vs. New Parts: Buying Guide
- What Happens If You Wait — Timeline
- Cost of Not Fixing It
- Diagnosis Steps
- When This Code Triggers (Freeze-Frame Conditions)
- Related Codes
- Climate & Environmental Factors
- How to Talk to a Mechanic About This Code
- Where to Take It: Dealer vs Independent vs Chain
- When to Walk Away From the Repair
- What Scan Tool You Need for This Code
- How to Clear the Code After You Fix It
- Will This Fail Emissions / State Inspection?
- Most Commonly Affected Vehicles
- Manufacturer-Specific Notes
- Real Owner Stories
- 2015 Nissan Rogue at 41K miles
- 2014 VW Jetta TDI (CKRA engine)
- 2008 Chevy Silverado Duramax
- 2005 Ford F-150 with drivability issues
- How to Prevent This Code From Triggering
- Frequently Asked Questions
- What are the most common mistakes when diagnosing P0181?
- Can I just clear the P0181 code and keep driving?
- Where is the Fuel Temperature Sensor 'A' located?
- Is P0181 a serious code?
- Will a P0181 code fail an emissions test or MOT?
- Can using E85 or different fuel blends cause P0181?
- What does the 'A' in 'Sensor A' mean?
- Key Takeaways
- 🎟️ Get 5% Off