

Ultimate P0167 Guide: O2 Sensor Heater Malfunction (Bank 2, Sensor 3)
The Definitive Guide to Diagnosing and Fixing OBD-II Code P0167
- P0167 indicates an electrical failure in the Bank 2 Sensor 3 heater circuit, with a burned-out sensor element causing 60-70% of cases.
- Test the 15-20A heater fuse and verify 12V power at the harness connector before spending $100+ on a replacement sensor.
- Driving with an active P0167 code drops fuel economy by 5-15% and guarantees an automatic emissions test failure.
- Owners of 2013-2017 Jaguar and Land Rover vehicles must check for TSB JTB00392NAS1, as a known PCM software glitch triggers false P0167 codes.
What Does P0167 Mean?
Your vehicle's Powertrain Control Module (PCM) identified a fault in the heater circuit of the oxygen (O2) sensor on Bank 2, Sensor 3. This sensor sits in the exhaust system after the catalytic converter. Its internal heater brings the sensor to operating temperature (around 600°F or 315°C) quickly after a cold start. This rapid warm-up allows the engine to enter 'closed-loop' mode, using sensor feedback for precise fuel adjustments and minimal emissions.
Technical definition: O2 Sensor Heater Circuit Malfunction (Bank 2, Sensor 3). The PCM sets this code when voltage, current, or resistance within the Bank 2, Sensor 3 O2 sensor heater circuit falls outside the manufacturer's specified range. This indicates an electrical problem with the heater or its wiring, not the sensor's oxygen-measuring capability.
Can I Drive With P0167?
Yes, But With Caution. Yes, but limit driving. Your vehicle suffers reduced fuel economy and automatically fails emissions tests. Driving for months causes irreversible catalytic converter damage from a prolonged rich fuel mixture, adding $800-$2,500 to the repair bill.
Common Causes
- Failed Oxygen Sensor Heater Element (Very Common) — The internal heating element burned out or developed an open circuit. This accounts for 60-70% of P0167 cases.
- Damaged Wiring or Connectors (Common) — Wiring routed near the hot exhaust melts, chafes, or breaks. Connectors fill with moisture or road salt, causing pin corrosion and high electrical resistance.
- Blown Fuse or Faulty Relay (Common) — A blown 15-20 amp fuse cuts power to the heater circuit. This usually indicates a short circuit in the wiring that requires repair before replacing the fuse.
- PCM Software Glitch (Less Common) — Outdated PCM software incorrectly flags a P0167 code, particularly on 2013-2017 Jaguar and Land Rover models. A dealer software update resolves this.
- Incorrect Aftermarket Sensor (Less Common) — Cheap aftermarket sensors possess incorrect internal heater resistance. The PCM detects this mismatch from the OEM calibration and triggers the code.
- Poor Ground Connection (Rare) — A corroded, loose, or broken ground wire prevents the heater circuit from completing its path to the chassis or PCM.
- Sensor Contamination (Rare) — Engine oil, coolant leaks, or non-sensor-safe RTV silicone seep into the sensor and its connector, fouling internal electrical components.
- Faulty Powertrain Control Module (PCM) (Very Rare) — The PCM's internal driver circuit fails. Consider this only after ruling out all other electrical faults.
Symptoms
- Check Engine Light On — The Malfunction Indicator Lamp (MIL) illuminates while the fault remains active.
- Decreased Fuel Economy — The engine stays in the inefficient 'open-loop' mode longer after startup, dropping gas mileage by 5-15%.
- Failed Emissions Test — P0167 triggers an automatic failure for state emissions inspections.
- Rough Idle or Engine Hesitation — The PCM uses a default, richer fuel map until the sensor heats up naturally, causing a rough idle during cold starts.
- Black Smoke from Exhaust — Prolonged rich fuel conditions cause unburnt fuel to exit the tailpipe as black smoke.
Diagnostic Flowchart
Tap your situation to follow the diagnostic path that matches what you're seeing on this code.
Common Fixes & Costs
- Replace Oxygen Sensor (Bank 2, Sensor 3)
— Parts: $60-$250, Labor: $100-$200, ~1.2 hr book time
(DIY)
Jaguar F-TYPE/XF (2013-2016): OEM C2D54166 (Alt: Bosch T2R54607)
Ford F-150 (V8): OEM BL3Z-9G444-A (Alt: Denso 234-4933)
Chevrolet/GMC 1500 Trucks (V8): OEM GM 12612459 (Alt: Denso 234-4669) - Repair Damaged Wiring or Connector — Parts: $10-$60, Labor: $100-$250, ~1.5 hr book time (Intermediate)
- Replace Blown O2 Sensor Heater Fuse — Parts: $1-$10, Labor: $75-$200, ~1 hr book time (DIY)
- Update Powertrain Control Module (PCM) Software — Parts: $0, Labor: $150-$400, ~1 hr book time (Professional)
- Replace Powertrain Control Module (PCM) — Parts: $600-$1500, Labor: $200-$400, ~2.5 hr book time (Professional)
DIY vs Professional
- Replace Oxygen Sensor — Beginner:
Tools: Jack and stands, penetrating oil, O2 sensor socket set, ratchet, torque wrench. - Repair Damaged Wiring — Beginner:
Tools: Soldering iron or quality crimp connectors, heat shrink tubing, wire strippers, multimeter. - Replace Blown Fuse — Beginner:
Tools: Fuse puller or needle-nose pliers. - Update/Replace PCM — Beginner:
Tools: Manufacturer-specific diagnostic tool, subscription to programming software.
Used vs. New Parts: Buying Guide
When a used part is worth it: Buying a used oxygen sensor is never recommended. They are wear-and-tear components with a 50,000-100,000 mile lifespan.
Donor-vehicle mileage cap: roughly under 20000 miles for the part to have meaningful remaining life.
Donor quality checklist:
- Avoid sensors with any visible corrosion, oil contamination, or physical damage.
- Match the OEM part number exactly; do not use a visually similar part.
Decision logic:
- If The part is an oxygen sensor. → Buy new OEM or premium aftermarket. The cost savings of a used sensor are not worth the high risk of premature failure.
- If The required part is a wiring harness connector. → A used connector from a salvage yard is a perfectly acceptable and cost-effective repair.
Warranty tradeoff: Used parts from a salvage yard typically have a 30-90 day warranty. New aftermarket sensors carry a 1-year warranty. New OEM sensors are covered for 12 months/12,000 miles.
Worst-case if a used part fails: $150-$300. This represents the cost of a new sensor plus repeated labor costs after the used part fails.
What Happens If You Wait — Timeline
- 0-2 weeks: Code P0167 sets. Engine stays in 'open-loop' mode longer after a cold start. (MPG impact: 0-5%% · Added cost: $0)
- 2 weeks - 3 months: Fuel economy drops 5-15%. Vehicle runs rich, causing carbon buildup on spark plugs and inside the catalytic converter. (MPG impact: 5-15%% · Added cost: $20-$80 in wasted fuel)
- 3-8 months: Rich condition overheats the catalytic converter. A P0430 (catalyst inefficiency) code may appear intermittently. (MPG impact: 10-20%% · Added cost: $500-$1500 (catalytic converter damage is likely starting))
- 8+ months: Catalytic converter substrate melts, creating exhaust restrictions. Requires new converter. (MPG impact: 20-30%+% · Added cost: $1200-$2800 (catalytic converter replacement is now mandatory))
Cost of Not Fixing It
- 0-1 month: Fuel economy drops 5-15% and the vehicle fails emissions tests. (Added cost: $20-$60 per month in extra fuel costs.)
- 1-6 months: Prolonged rich fuel mixtures overheat the catalytic converter, reducing its lifespan. (Added cost: $0, but damage is accumulating.)
- 6+ months: The catalytic converter substrate melts. This triggers P0420/P0430 codes and requires complete converter replacement. (Added cost: $1200-$2800)
Diagnosis Steps
- Scan for Codes & Review Freeze Frame Data
Use an OBD-II scanner to confirm P0167 and note other codes. Review freeze-frame data for engine parameters (RPM, temp, speed) at the exact moment the fault triggered.
Tools: OBD-II Scanner (Beginner) - Thorough Visual Inspection
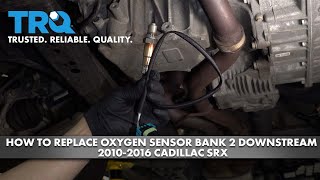
Safely elevate the vehicle. Locate Bank 2, Sensor 3 (downstream, opposite cylinder #1). 🎬 Watch: How to replace a Bank 2 downstream oxygen sensor Inspect the wiring harness for melting, chafing against the chassis, or connector corrosion.
Tools: Jack, Jack Stands, Flashlight, Safety Glasses (Beginner) - Check the O2 Heater Fuse
Locate the 15-20A O2 sensor heater fuse in the owner's manual. Inspect it and confirm continuity with a multimeter. A blown fuse indicates a short circuit that must be found.
Tools: Owner's Manual, Multimeter, Fuse Puller (Beginner) - Test Heater Circuit Resistance at the Sensor
Disconnect the sensor. Measure resistance between the two heater pins (usually the same color wires) using a multimeter set to Ohms. A good sensor reads 3-15 ohms. An 'OL' reading means an open circuit, requiring replacement.
Tools: Multimeter (Intermediate) - Verify Power and Ground at the Harness
With the sensor unplugged and ignition on (engine off), check for 12V on the power supply wire in the vehicle-side connector. Check the ground wire for continuity to chassis ground (<1 ohm).
Tools: Multimeter (Intermediate) - Pro Tip: Measure Heater Circuit Current Draw
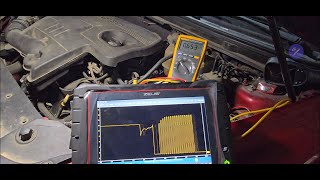
Connect the sensor and start the engine. Clamp a DC amp meter around the heater power wire. A good circuit draws 0.5 to 2.0 amps initially. Zero draw confirms an open circuit; excessive draw confirms a short.
Tools: DC Amp Clamp/Multimeter (Advanced) - Pro Tip: Analyze Live Data PIDs
Monitor the 'O2 Heater Monitor' PID using a live data scanner. The status must switch to 'On' after a cold start. Observe Fuel Trims; values consistently outside +/-10% indicate the PCM is struggling with fuel mixtures.
Tools: OBD-II Scanner with Live Data (Advanced) - Pro Tip: Check for Shorts to Ground/Power
Disconnect the sensor and PCM. Check for continuity between the heater power wire and chassis ground. Any reading besides 'OL' indicates a short to ground.
Tools: Multimeter, Service Manual (for PCM pinout) (Advanced) - Verify the Repair
Clear DTCs with a scanner. Start the vehicle and idle. Monitor the heater status for Bank 2, Sensor 3 to ensure it shows 'Active' during warm-up. Perform a drive cycle.
Tools: OBD-II Scanner (Beginner)
When This Code Triggers (Freeze-Frame Conditions)
- Engine Coolant Temp: 170-220°F (77-104°C) (The heater test often runs after the engine reaches operating temperature.)
- RPM: 1200-2500 (The test runs at idle or during steady-state driving.)
- Vehicle Speed: 0 mph (Idle) or 40-60 mph (The monitor runs while stationary or at steady highway speeds.)
Related Codes
- P0147 — Identical heater circuit malfunction code for Bank 1, Sensor 3. Having both indicates a shared component failure, like a blown fuse.
- P0064 — Specific code for 'Heater Control Circuit High'. Points directly to a short to power.
- P0063 — Specific code for 'Heater Control Circuit Low'. Points to a short to ground or an open circuit.
- P0162 / P0163 / P0164 — Relate to the signal circuit of Bank 2, Sensor 3. Indicates issues with the sensor's oxygen reading, pointing to a completely failed sensor.
Climate & Environmental Factors
- Cold Climates: The PCM's self-test for the heater circuit is more stringent in cold weather. A marginal heater element fails this test and triggers P0167 during a cold start.
- High Humidity & Road Salt: Moisture and road salt penetrate the undercarriage connector, causing pin corrosion. This creates high resistance, impeding current flow and triggering a fault.
How to Talk to a Mechanic About This Code
Say this: "I have a P0167 code for the O2 sensor heater circuit on Bank 2, Sensor 3. Please verify if the issue is the sensor, the wiring, or a fuse before recommending a replacement part."
This directs the mechanic to perform a proper electrical diagnosis rather than immediately replacing the most likely faulty part, saving you money if the issue is just a wire or fuse.
Avoid saying:
- 'My check engine light is on, can you look at it?' (This is too vague and invites a broad, potentially expensive diagnostic process).
- 'Just fix whatever is wrong.' (This gives the shop a blank check to perform repairs without your specific approval).
- 'A friend told me I need a new O2 sensor.' (This encourages a shop to replace a part without performing their own diagnosis).
Questions to ask before authorizing the repair:
- Did you test the heater circuit resistance on the old sensor, and what was the reading?
- Did you confirm there is 12-volt power and a good ground at the sensor connector?
- Will you provide a written estimate with a breakdown of parts and labor costs before starting the work?
- What is your warranty on this specific repair, covering both the part and the labor?
Where to Take It: Dealer vs Independent vs Chain
- Dealer:
Recommended only if your vehicle has a known software TSB (Jaguar/Land Rover) or is under warranty.
Best for: Vehicles still under an emissions or powertrain warranty., Jaguar and Land Rover vehicles known for software-related P0167 issues., Complex electrical issues that an independent shop has failed to diagnose.
Downsides: Typically the highest labor rates, often 1.5x to 2x more than independent shops., May be quicker to replace parts rather than perform detailed wiring repairs. (Typical cost: +50% vs. baseline) - Independent Shop:
Best fit for most vehicles. A competent mechanic easily diagnoses sensor, wiring, or fuse issues.
Best for: Out-of-warranty vehicles where cost is a factor., Standard diagnostic procedures for common codes like P0167.
Downsides: Quality and diagnostic skill can vary greatly. Look for shops with ASE certifications., May not have manufacturer-specific software for updates. (Typical cost: +0% vs. baseline) - Chain Shop:
Acceptable only if you already diagnosed a bad sensor yourself and just need it installed. Avoid for initial diagnosis.
Best for: Simple, straightforward part replacements where the diagnosis is already certain.
Downsides: Technician skill and experience can be inconsistent., Business model may create pressure for upselling unnecessary services. (Typical cost: -10% vs. baseline)
When to Walk Away From the Repair
If the total estimated repair cost exceeds 40-50% of the car's private-party value, consider selling or trading it in.
- Car worth $4000, fix is $2000: Walk away. The repair cost is 50% of the car's value, making it a poor investment.
- Car worth $12000, fix is $400: Fix it. The repair is well below the threshold and is a routine part of vehicle maintenance.
- Car worth $2500, fix is $1500: Walk away. The repair cost is 60% of the vehicle's value. It's almost certain other age-related failures will occur soon.
What Scan Tool You Need for This Code
Minimum: A code reader that displays live sensor data and freeze frame data. A basic code reader that only provides the DTC number is not sufficient.
A basic $20 reader tells you the P0167 code exists, but it won't show you if the sensor is actually responding or what the engine conditions were when the code was set.
Budget: BlueDriver Pro (~$90) — Connects to your smartphone via Bluetooth. Reads codes, views freeze frame data, and graphs live O2 sensor data.
Mid-range: Foxwell NT510 Elite (~$180) — Adds brand-specific diagnostics and bidirectional controls to command the O2 sensor heater circuit on.
Professional: Autel MaxiCOM MK808S (~$450) — Provides full bidirectional control, all-system scanning, and detailed live data graphing.
How to Clear the Code After You Fix It
- Use an OBD-II scan tool to clear diagnostic trouble codes.
- Ensure the fuel tank is between 25% and 75% full.
- Perform a complete drive cycle to allow readiness monitors to run.
Drive cycle (~20 minutes): Idle the engine for 2-3 minutes from a cold start. Accelerate to 55 mph and hold for 3-5 minutes. Decelerate to 20 mph without braking. Repeat 2-3 times.
Readiness monitors affected: O2 Sensor Heater Monitor, O2 Sensor Monitor, Catalyst Monitor
Before emissions retest: drive at least 50 miles to fully set monitors.
Watch out for:
- Disconnecting the battery clears codes but resets all readiness monitors.
- The code returns immediately if the electrical fault persists.
- EVAP monitors have specific ambient temperature requirements and take longer to set.
Will This Fail Emissions / State Inspection?
Yes — this code typically fails an OBD-II emissions inspection.
- California: An active P0167 code is an automatic failure. All readiness monitors must be 'Ready'.
- New York: The NYS DMV OBD-II scan immediately fails vehicles with a P0167 fault.
- Texas: Illuminated Check Engine Lights and P0167 codes result in failed inspections in the 17 emissions-testing counties.
Most Commonly Affected Vehicles
- Jaguar F-TYPE, XF, XJ (2013-2016) — Highly susceptible to a false P0167 due to a PCM software error. TSB JTB00392NAS1 requires a dealer software update.
- Land Rover Range Rover, Discovery, LR4 (2013-2017) — Shares the Jaguar engine platforms and the TSB JTB00392NAS1 software issue.
- Ford F-150, Explorer, Mustang (V6/V8) (2004-2014) — Harness routing on 2011-2014 models makes it prone to heat damage from the catalytic converter.
- Chevrolet / GMC Silverado, Sierra, Tahoe, Suburban (2007-2013) — Commonly caused by original sensor heater element failure or moisture intrusion at the connector.
- Dodge / Ram / Chrysler Ram 1500, Durango, Grand Cherokee (2009-2018) — Plastic connector tabs become brittle, leading to poor connections and heater circuit faults.
- Toyota Tundra, Sequoia, 4Runner (V8) (2005-2015) — Almost always caused by a straightforward failure of the Denso sensor's internal heater.
- BMW Various models with V8/V12 engines (2002-2010) — Prone to faults due to sensor age and wiring insulation becoming brittle from high engine bay temperatures.
- Nissan / Infiniti Titan, Armada, QX56 (2004-2015) — Frequent DIY repair pointing directly to a failed oxygen sensor heater element.
Manufacturer-Specific Notes
- Jaguar / Land Rover: TSB JTB00392NAS1 advises dealers to update PCM software to fix false P0167 codes. Always check for TSBs before replacing hardware.
- Ford / GM: Wiring harnesses for downstream sensors route near the exhaust. Plastic clips break, allowing wires to melt on the pipe.
- Chrysler / Dodge / Jeep: Connectors on Hemi and Pentastar engines collect water, leading to pin corrosion.
- Warranty & Emissions Coverage: Federal warranty covers O2 sensors for 2 years/24,000 miles. PZEV vehicles in CARB states extend this to 15 years/150,000 miles.
Real Owner Stories
2011 Ford F-150 with 135,000 miles
Check Engine Light came on. No other symptoms were noticed. Owner is an experienced DIYer.
What they tried:
- Scanned code, confirmed P0167.
- Visually inspected wiring and found it was melted to the exhaust pipe near the sensor.
- Replaced the sensor and attempted to repair the wiring with butt connectors.
Outcome: The code returned. The owner realized simple butt connectors fail in high-temperature environments. The final fix was replacing the connector pigtail with a high-quality, heat-shrink-wrapped solder repair. The code has not returned.
Lesson: Visual inspection is key. Use high-temperature rated connectors and heat shielding for wiring near the exhaust to prevent repeat failures.
2014 Jaguar XF at 85,000 miles
P0167 code appeared. The owner took the car to an independent shop.
What they tried:
- Shop diagnosed a bad O2 sensor and replaced it with a new Bosch aftermarket part.
- The Check Engine Light returned within 50 miles.
- The shop replaced the sensor again under warranty, but the code came back.
Outcome: The owner found Jaguar TSB JTB00392NAS1. A Jaguar dealer confirmed the software was outdated and updated the PCM software, permanently resolving the code.
Lesson: For 2013-2017 Jaguar/Land Rover vehicles, check for TSB JTB00392NAS1 before replacing hardware to save hundreds on unnecessary parts.
2008 Nissan Titan with 160,000 miles
P0167 code appeared along with a noticeable decrease in fuel economy (around 10-15%).
What they tried:
- The owner suspected the O2 sensor due to the vehicle's age and mileage.
- Skipped initial wiring checks and purchased a new Denso O2 sensor.
- Tested the resistance of the old sensor after removal and found it was 'Open Loop' (infinite resistance).
Outcome: The new sensor was installed, the code was cleared, and fuel economy returned to normal. The fix took less than an hour.
Lesson: On high-mileage vehicles, a direct sensor replacement is often the quickest fix if the vehicle has over 100,000 miles, though circuit testing remains best practice.
How to Prevent This Code From Triggering
- Use Top Tier certified gasoline (Every fill-up) — Detergents prevent carbon buildup, reducing contaminants that foul the O2 sensor and damage the catalytic converter.
- Address engine misfires immediately (As needed) — Unburnt fuel ignites in the catalytic converter, causing extreme temperatures that destroy the O2 sensor.
- Perform regular engine maintenance (spark plugs, air filter) (Per manufacturer's schedule (e.g., every 30-60k miles)) — Worn spark plugs lead to rich fuel mixtures, contaminating the O2 sensor with soot.
- Fix oil and coolant leaks promptly (As needed) — Antifreeze and oil seep into the sensor's electrical connector, causing failure.
- Ensure one longer drive (20+ minutes) per week (Weekly) — Burns off moisture and carbon deposits that clog the catalytic converter and foul the O2 sensor.
Frequently Asked Questions
Where exactly is Bank 2, Sensor 3 located?
Bank 2 is the engine side without cylinder #1. Sensor 3 is the third sensor in that exhaust stream, located after the final catalytic converter.
What is the most common misdiagnosis for P0167?
The most frequent mistake is replacing the oxygen sensor without testing the circuit. A blown fuse or melted wire means a new sensor won't fix the problem.
Can I just replace the heater inside the O2 sensor?
No. The heating element is an integral, non-serviceable part of the oxygen sensor. You must replace the entire sensor assembly.
What happens if I ignore code P0167 for a long time?
Ignoring the code causes poor fuel economy and high emissions. Over several months, the rich fuel mixture permanently damages the catalytic converter, costing over $2,000.
Why do only V6, V8, or V10/V12 engines get this code?
Four-cylinder and inline-six engines have only one cylinder bank (Bank 1). P0167 is specific to 'Bank 2', which only exists on V-style or flat engines.
Will clearing the code with a scanner fix it?
No. Clearing the code only erases the fault from memory. The PCM runs a self-test on the next drive, and the code returns immediately if the fault remains.
What is the difference between Sensor 2 and Sensor 3?
On complex exhaust systems, Sensor 2 monitors the primary catalytic converter's efficiency. Sensor 3 sits further downstream to monitor a secondary catalytic converter or perform secondary diagnostic checks. Refer to your vehicle's service manual for the exact layout.
Can a weak battery or alternator cause a P0167 code?
A failing charging system providing consistently low voltage (~10-11V) causes the heater to warm up too slowly, failing the diagnostic test. However, you will experience other serious electrical symptoms first.
Key Takeaways
- P0167 indicates an electrical failure in the Bank 2 Sensor 3 heater circuit, with a burned-out sensor element causing 60-70% of cases.
- Test the 15-20A heater fuse and verify 12V power at the harness connector before spending $100+ on a replacement sensor.
- Driving with an active P0167 code drops fuel economy by 5-15% and guarantees an automatic emissions test failure.
- Owners of 2013-2017 Jaguar and Land Rover vehicles must check for TSB JTB00392NAS1, as a known PCM software glitch triggers false P0167 codes.
Helpful Videos

The information in this article is provided for general reference and educational purposes only. Vehicle specifications, procedures, and part compatibility can vary by production date, trim level, and region. Always consult your vehicle's factory service manual and verify part numbers before purchasing or performing repairs. Safety-critical components such as airbags, seat belts, and braking systems should be installed by a qualified professional.
- 🎬 Helpful Videos
- What Does P0167 Mean?
- Can I Drive With P0167?
- Common Causes
- Symptoms
- Diagnostic Flowchart
- Common Fixes & Costs
- DIY vs Professional
- Used vs. New Parts: Buying Guide
- What Happens If You Wait — Timeline
- Cost of Not Fixing It
- Diagnosis Steps
- When This Code Triggers (Freeze-Frame Conditions)
- Related Codes
- Climate & Environmental Factors
- How to Talk to a Mechanic About This Code
- Where to Take It: Dealer vs Independent vs Chain
- When to Walk Away From the Repair
- What Scan Tool You Need for This Code
- How to Clear the Code After You Fix It
- Will This Fail Emissions / State Inspection?
- Most Commonly Affected Vehicles
- Manufacturer-Specific Notes
- Real Owner Stories
- 2011 Ford F-150 with 135,000 miles
- 2014 Jaguar XF at 85,000 miles
- 2008 Nissan Titan with 160,000 miles
- How to Prevent This Code From Triggering
- Frequently Asked Questions
- Where exactly is Bank 2, Sensor 3 located?
- What is the most common misdiagnosis for P0167?
- Can I just replace the heater inside the O2 sensor?
- What happens if I ignore code P0167 for a long time?
- Why do only V6, V8, or V10/V12 engines get this code?
- Will clearing the code with a scanner fix it?
- What is the difference between Sensor 2 and Sensor 3?
- Can a weak battery or alternator cause a P0167 code?
- Key Takeaways
- 🎟️ Get 5% Off