

OBD-II Code P0150: O2 Sensor Circuit Malfunction (Bank 2, Sensor 1)
The Ultimate 2026 Guide to Diagnosing and Fixing P0150
- P0150 indicates a fault in the Bank 2, Sensor 1 oxygen sensor circuit, but exhaust leaks account for up to 30% of misdiagnoses.
- Check Short Term and Long Term fuel trims before buying parts; a reading above +10% confirms a vacuum or exhaust leak, not a bad sensor.
- Driving with an active P0150 drops fuel economy by 10-20% and destroys a $1,500 catalytic converter within 6 months.
- If P0150 appears alongside P0130, do not replace the sensors; check the shared 15A heater circuit fuse or look for a PCM software update.
What Does P0150 Mean?

Code P0150 means the Engine Control Module (ECM) detects an electrical circuit fault in the upstream oxygen sensor on engine Bank 2. This sensor (Bank 2, Sensor 1) sits in the exhaust manifold before the catalytic converter. It measures exhaust oxygen levels to adjust the air-fuel ratio. When the signal sticks, lags, or falls outside the expected 0.1V-0.9V range, the ECM triggers the Check Engine Light.
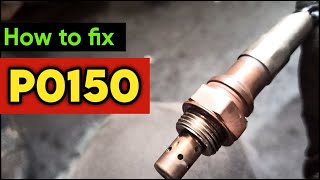
🎬 Watch: A complete breakdown of P0150 causes and symptoms.Technical definition: The SAE/OBD-II definition is "O2 Sensor Circuit Malfunction (Bank 2, Sensor 1)". The ECM expects the upstream O2 sensor voltage to rapidly fluctuate between 0.1 volts (lean) and 0.9 volts (rich). P0150 sets when the ECM observes the signal stuck at a specific voltage (e.g., 0.45V bias), absent (0V), or failing to switch between rich and lean states within a specified timeframe (typically 20-60 seconds).
Can I Drive With P0150?
Yes, But With Caution. Yes, but address it within 100-200 miles. Ignoring it forces the Engine Control Module (ECM) into a rich fuel default, dropping fuel economy by 10-20%. The primary risk is overloading the catalytic converter with unburned fuel, turning a $150 sensor replacement into a $1,500-$4,500 converter replacement.
Common Causes

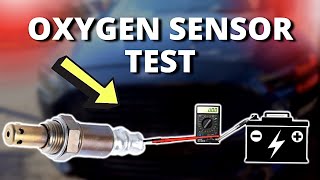
- Faulty Bank 2, Sensor 1 Oxygen Sensor (Very Common) — The sensor's internal zirconia element or heater circuit fails from age (80,000+ miles) or contamination, preventing accurate voltage generation. 🎬 See how to test an oxygen sensor with a multimeter.
- Exhaust Leak (Common) — A cracked manifold or leaking gasket introduces outside oxygen into the exhaust. This skews readings, causing a persistent lean signal the ECM flags as a circuit fault.
- Damaged Wiring or Corroded Connector (Common) — Extreme heat melts wiring against the exhaust, or moisture corrodes connector pins. This creates high resistance, disrupting the signal to the ECM.
- Blown Heater Circuit Fuse (Less Common) — Heated O2 sensors use an internal heater to reach operating temperature. If the dedicated fuse blows, the sensor responds too slowly on cold starts, triggering a performance fault.
- Vacuum Leak (Less Common) — A cracked intake gasket or deteriorated vacuum hose introduces unmetered air. If this predominantly affects Bank 2, it creates a lean condition the ECM misinterprets as a sensor fault.
- Fuel System Issues (Less Common) — A failing fuel pressure regulator or clogged injector forces the O2 sensor's readings to extreme high or low voltages, which the ECM flags as a circuit issue.
- Contaminated Fuel (Rare) — Fuel contaminated with silicone, water, or improper additives permanently fouls the oxygen sensor's sensing element.
- Engine Mechanical Fault (Rare) — Low compression or a leaking head gasket introduces unburnt air or coolant into the exhaust, generating abnormal readings.
- Faulty Engine Control Module (ECM) (Very Rare) — The ECM's internal driver circuit for the Bank 2 O2 sensor fails. Consider this only after exhaustively ruling out wiring, sensors, and software updates.
Symptoms

- Check Engine Light is On — The ECM illuminates the Malfunction Indicator Lamp (MIL) immediately upon confirming the P0150 fault.
- Decreased Fuel Economy — The ECM enters 'open-loop' mode, defaulting to a rich fuel mixture. Expect a 10-20% drop in MPG.
- Rough Idle or Engine Hesitation — An incorrect air-fuel mixture disrupts combustion, causing erratic idling and stumbling during acceleration.
- Rotten Egg Smell from Exhaust — Unburned fuel overloads the catalytic converter, producing a distinct sulfur smell.
- Failed Emissions Test — An active P0150 code guarantees an automatic failure during an OBD-II emissions inspection.
Diagnostic Flowchart
Tap your situation to follow the diagnostic path that matches what you're seeing on this code.
Common Fixes & Costs
- Replace Bank 2, Sensor 1 Oxygen Sensor — Parts: $50-$150, Labor: $100-$200, ~0.8 hr book time (DIY)
- Repair Exhaust Leak (Gasket or Manifold) — Parts: $25-$150, Labor: $150-$400, ~2.5 hr book time (Intermediate)
- Repair Damaged Wiring or Connector — Parts: $15-$50, Labor: $100-$250, ~1.5 hr book time (Intermediate)
- Replace Blown Heater Circuit Fuse — Parts: $1-$10, Labor: $0-$50, ~0.2 hr book time (DIY)
- Reprogram Powertrain Control Module (PCM) — Parts: $0, Labor: $150-$250, ~1.0 hr book time (Pro Only)
Used vs. New Parts: Buying Guide
When a used part is worth it: Never buy a used oxygen sensor. They are wear items with a finite lifespan. The minimal cost savings do not justify the high risk of repeat labor.
Donor-vehicle mileage cap: roughly under 20000 miles for the part to have meaningful remaining life.
Donor quality checklist:
- If forced to buy used, ensure the donor vehicle has under 20k miles.
- Avoid sensors with physical damage, rust, or oil contamination.
Decision logic:
- If The part is an oxygen sensor. → Buy a new, high-quality aftermarket (Bosch, NTK, Denso) or OEM sensor.
- If The vehicle is a BMW or Hyundai. → Buy a new OEM sensor from the dealer to guarantee calibration compatibility.
- If The actual cause is a catalytic converter. → A used converter from a low-mileage donor is acceptable if budget is tight.
Warranty tradeoff: Used sensors have no warranty. New aftermarket sensors carry 1-year to lifetime warranties. OEM parts carry 1-year/12,000-mile warranties.
Worst-case if a used part fails: $150-$300 to buy the part again and pay for repeat labor.
What Happens If You Wait — Timeline
- 0-2 weeks: Check Engine Light illuminates. The ECM logs P0150. No noticeable symptoms occur. (MPG impact: 0-5%% · Added cost: $0)
- 2 weeks - 3 months: ECM defaults to a rich fuel mixture. Fuel economy drops noticeably. Occasional rough idle occurs. (MPG impact: 10-15%% · Added cost: $30-$100 in wasted fuel.)
- 3-6 months: Rich mixture overheats the catalytic converter. A rotten egg smell appears. Converter damage begins. (MPG impact: 15-20%% · Added cost: Risk of permanent catalytic converter damage increases significantly.)
- 6+ months: Catastrophic catalytic converter failure. Substrate melts, causing severe backpressure, stalling, and potential engine damage. (MPG impact: >20%% · Added cost: $1,500-$4,500 for converter replacement and secondary repairs.)
Cost of Not Fixing It
- 0-1 Month: Fuel economy drops 10-15%. The engine runs rich, causing rough idling and hesitation. (Added cost: $30-$60 in wasted fuel.)
- 1-6 Months: The rich mixture overheats the catalytic converter. A rotten egg smell appears as converter damage begins. (Added cost: Risk of permanent catalytic converter damage increases.)
- 6+ Months: Catastrophic catalytic converter failure. The internal substrate melts, causing severe backpressure, stalling, and potential engine damage. (Added cost: $1,500-$4,500 for converter replacement and secondary repairs.)
Diagnosis Steps

- Scan Codes and Review Freeze Frame Data
Retrieve the P0150 code and freeze frame data. Note any accompanying codes. P0174 (Lean) points to a leak, while P0130 (Bank 1 fault) points to a shared electrical issue like a blown fuse.
Tools: OBD-II Scanner (Beginner) - Analyze Fuel Trims (Crucial Step)
Check Short Term (STFT B2) and Long Term (LTFT B2) fuel trims. If LTFT B2 exceeds +10%, the ECM is adding fuel to compensate for a lean condition. Stop testing the sensor; find the vacuum or exhaust leak on Bank 2.
Tools: OBD-II Scanner with Live Data (Intermediate) - Analyze Live Sensor Data
With a warm engine, graph 'O2S B2S1' voltage. A healthy sensor fluctuates rapidly between ~0.1V and ~0.9V. A flat line (e.g., 0.45V), a signal stuck at 0V, or slow switching confirms a circuit or sensor failure.
Tools: OBD-II Scanner with Live Data Graphing (Intermediate) - Perform a Visual Inspection
Locate Bank 2, Sensor 1. Inspect wiring for melting or breaks. Check the connector for corrosion. Inspect the exhaust manifold for black soot trails indicating a leak.
Tools: Flashlight, Inspection Mirror (Beginner) - Test the Sensor's Heater Circuit
Unplug the sensor. Use a multimeter set to Ohms (Ω) to measure resistance between the two heater pins (usually the same color wires). Normal resistance is 3-25 Ohms. Infinite resistance (OL) means an open circuit; replace the sensor.
Tools: Multimeter (Intermediate) - Check Harness Power and Ground
With the key 'On' (engine off), verify the vehicle's harness connector provides 12V to the heater circuit pin. Verify the ground pin has continuity to the chassis. Lack of 12V indicates a blown fuse or wiring break.
Tools: Multimeter, Wiring Diagram (Advanced) - Forced Rich/Lean Response Test
While graphing B2S1 voltage, pull a vacuum hose to force a lean condition; voltage must drop to ~0.1V instantly. Spray unlit propane into the intake to force a rich condition; voltage must spike to ~0.9V. Slow reactions confirm a dying sensor.
Tools: OBD-II Scanner, Unlit Propane Torch (Advanced) - Check Fuel Pressure
If fuel trims are highly negative (-15%) and O2 voltage is stuck high, connect a fuel pressure gauge. High pressure indicates a faulty regulator, causing a rich condition the sensor is accurately reporting.
Tools: Fuel Pressure Gauge (Advanced) - Oscilloscope Waveform Analysis
Connect an oscilloscope to the signal wire. A healthy sensor produces a sharp square wave, transitioning in under 100ms. Rounded or slow waveforms (>250ms) definitively prove sensor failure.
Tools: Automotive Oscilloscope (Pro Only)
When This Code Triggers (Freeze-Frame Conditions)
- Engine Coolant Temp: 180-200°F (Fault logs when the engine is fully warmed up and operating in closed-loop fuel control.)
- RPM: 1500-2500 (Occurs during steady-state cruising or light acceleration.)
- Engine Load: 30-60% (Sets under moderate, stable engine load where the ECM expects predictable O2 sensor behavior.)
- Vehicle Speed: 45-65 mph (Highway driving provides the sustained operation needed for the monitor to detect a slow or non-responsive sensor.)
Related Codes
- P0130 — Identical fault for Bank 1, Sensor 1. If P0130 and P0150 appear together, sensors rarely fail simultaneously. Check shared fuses, grounds, or PCM software updates.
- P0174 — System Too Lean (Bank 2). A true lean condition from a vacuum or exhaust leak is correctly reported by the O2 sensor, but the ECM flags it as P0150. Always investigate leaks first.
- P0175 — System Too Rich (Bank 2). Caused by leaking injectors or high fuel pressure. The sensor reports high voltage, which the ECM eventually flags as P0150.
- P0151 / P0152 / P0153 — Specific Bank 2, Sensor 1 codes. P0151 is stuck low (lean), P0152 is stuck high (rich), and P0153 is slow response. These pinpoint the exact failure mode of the general P0150 code.
Climate & Environmental Factors
- Cold Climates / Road Salt: Road salt accelerates corrosion of the sensor body and electrical connector pins, creating high resistance that triggers P0150.
- High Humidity: Moisture penetrates cracked wire insulation or unsealed connectors, causing shorts that disrupt the sensor signal.
- Cold Starts: The ECM expects the heated O2 sensor to reach 600°F and respond within 60 seconds. A weak heater element fails this test in cold weather.
How to Talk to a Mechanic About This Code
Say this: "I have a P0150 code. Please check live O2 sensor voltage and Bank 2 fuel trims to rule out an exhaust leak before replacing the sensor."
This prevents the shop from blindly replacing the sensor. It forces them to verify if the sensor is actually dead or just accurately reporting a leak.
Avoid saying:
- 'My check engine light is on, can you just fix it?'
- 'I need a new oxygen sensor.'
- 'Just do whatever you think is best.'
Questions to ask before authorizing the repair:
- What did the live data for the Bank 2 Sensor 1 voltage look like?
- Were the long-term fuel trims for Bank 2 above 10%?
- Did you inspect the exhaust manifold for leaks?
- What brand of sensor are you installing, and what is the warranty?
Where to Take It: Dealer vs Independent vs Chain
- Dealer:
Best for: Vehicles under powertrain or PZEV emissions warranty., Known manufacturer quirks like the Ford F-150 PCM reflash (TSB 13-3-5)., Complex brands (BMW, Land Rover) requiring proprietary reset tools.
Downsides: Labor rates are 1.5-2x higher than independent shops., Requires expensive OEM parts. (Typical cost: +50% vs. baseline) - Independent Shop:
Best fit for most situations. A reputable independent shop effectively diagnoses P0150 for a reasonable price.
Best for: Out-of-warranty vehicles., Diagnosing common codes like P0150 via standard leak and wiring tests.
Downsides: Diagnostic capability varies; vet shops based on ASE certifications., May lack tools for PCM flashing. (Typical cost: +0% vs. baseline) - Chain Shop:
Use with caution. Acceptable for confirmed sensor replacement. Avoid for initial diagnosis.
Best for: Simple parts replacement when you are certain the sensor is the only issue.
Downsides: Technicians often lack deep diagnostic experience for wiring faults or vacuum leaks., High pressure to upsell unnecessary services. (Typical cost: -10% vs. baseline)
When to Walk Away From the Repair
If the estimated repair cost exceeds 40-50% of the car's private-party value, sell or trade it in.
- Car worth $4000, fix is $2000: Walk away. The repair cost is 50% of the car's value.
- Car worth $12000, fix is $350: Fix it. A standard O2 sensor replacement is a minor cost relative to the car's value.
- Car worth $2500, fix is $1500: Walk away. The repair cost is 60% of the car's value.
What Scan Tool You Need for This Code

Minimum: A scanner that displays live data, specifically O2 sensor voltage and fuel trims (STFT/LTFT).
A $20 code reader only shows 'P0150'. It cannot display live voltage or fuel trims, which are essential to differentiate a bad sensor from a vacuum leak.
Budget: BlueDriver Pro or FOXWELL NT301 (~$70) — Displays live graphing data for O2 sensor voltage and fuel trims to confirm if the sensor is dead or reporting a leak.
Mid-range: Innova 5610 or XTOOL D7 (~$330) — Adds bidirectional controls to test circuits directly and offers OEM-specific data for resets on brands like BMW.
Professional: Autel MaxiCOM MK808 (~$500-1200) — Provides dealership-level diagnostics, ECU coding, and access to detailed wiring diagrams.
Rent vs buy: Parts stores loan basic code readers, but diagnosing P0150 requires live data. Buying a budget scanner under $100 is a necessary investment.
How to Clear the Code After You Fix It
- Use an OBD-II scanner to clear the P0150 code.
- Ensure the engine is cold, then start it and let it idle for 3 minutes.
- Perform a complete OBD-II drive cycle to run readiness monitors.
Drive cycle (~30 minutes): Idle for 3 minutes. Drive in city traffic (25-45 mph) for 10 minutes. Drive steadily on the highway (55-65 mph) for 15 minutes without cruise control. Idle for 2 minutes before shutting off.
Readiness monitors affected: O2 sensor monitor, O2 sensor heater monitor, Catalyst monitor
Before emissions retest: drive at least 50 miles to fully set monitors.
Watch out for:
- Disconnecting the battery clears the code but resets all monitors to 'Not Ready', causing an automatic smog failure.
- The code returns within two drive cycles if an exhaust leak was ignored.
- California requires all monitors to be 'Ready', which can take up to 100 miles of mixed driving.
Will This Fail Emissions / State Inspection?
Yes — this code typically fails an OBD-II emissions inspection.
- California: Automatic failure. After repair, all readiness monitors must be 'Ready'. Expect to drive 50-100 miles to set monitors.
- New York: Automatic failure. The vehicle must complete a drive cycle to set readiness monitors before re-inspection.
- Texas: In emissions-testing counties, P0150 causes an automatic OBD-II failure. The code must be cleared and monitors set.
Most Commonly Affected Vehicles
- Ford F-150 (2009-2010) — V8 models (4.6L, 5.4L) frequently log P0150 and P0130 due to a software glitch. TSB 13-3-5 requires a PCM reflash before replacing sensors.
- Chevrolet / GMC Silverado 1500 / Sierra 1500 (2007-2013) — V8 engines (4.8L, 5.3L, 6.0L) are notorious for cracked exhaust manifolds. This leak is the primary cause of P0150 on these trucks.
- Toyota Camry (2007-2017) — On V6 models (2GR-FE), Bank 2 is near the firewall. Sensor 1 is difficult to access, requiring component removal.
- Nissan Altima / Frontier (2005-2015) — On V6 models, heater circuit fuses and wiring harness connectors frequently fail due to heat exposure.
- Hyundai Santa Fe (2003-2009) — The 2.7L V6 is highly sensitive to aftermarket sensors. Use OEM or NTK/NGK equivalents to prevent recurring codes.
- Jeep Grand Cherokee (2005-2010) — Wiring harness damage from heat and vibration near the passenger-side exhaust manifold is a frequent cause.
- BMW X5 / 3-Series (2000-2015) — Often appears with lean code P0174 due to a cracked CCV system. After repair, fuel trim adaptations must be reset with a BMW-specific scanner.
- Subaru Outback / Legacy (2005-2014) — On H6 engines, P0150 is often triggered by exhaust leaks at the flange gaskets rather than sensor failure.
Manufacturer-Specific Notes
- Ford: 2009-2010 F-150 V8s require a PCM software update (TSB 13-3-5) to fix false P0150/P0130 codes. Do not replace sensors first.
- General Motors (GM): V8 trucks (Silverado, Tahoe) frequently crack exhaust manifolds. Always inspect manifolds for leaks before buying an O2 sensor.
- Land Rover: Sensors vent through wire sheathing. Applying dielectric grease inside the connector blocks venting, ruining calibration and triggering P0150.
- BMW: After replacing the sensor, fuel trim 'adaptations' must be reset using a capable scanner. Clearing the code is insufficient.
- Multiple (PZEV States): Partial Zero Emission Vehicles (PZEV) in states like CA, NY, and MA often have 15-year/150,000-mile warranties covering O2 sensors.
Real Owner Stories
2010 Ford F-150 5.4L at 136k miles
Check Engine Light appeared with code P0150. No drivability issues were noticed.
What they tried:
- Owner replaced the O2 sensor twice, a purge valve, and a charcoal canister with no success.
- Owner took the truck to a dealership for diagnosis.
Outcome: The root cause was a software glitch. Ford TSB 13-3-5 requires a PCM reflash. Replacing the sensor does not resolve the issue if the software is outdated.
Lesson: Always check for Technical Service Bulletins (TSBs) before replacing parts. A $150 dealership reflash solves the problem, whereas throwing parts at it wastes hundreds.
1999 Mercedes S320 with P0150 & P0135
Codes P0150 and P0135 appeared. Live data showed no voltage from the sensor.
What they tried:
- Installed a new OEM sensor, but the code remained.
- Tested wiring continuity from the sensor connector to the ECU plug; wiring was perfect.
Outcome: The Engine Control Unit (ECU) input circuit was damaged. The ECU required replacement to process the sensor signal.
Lesson: When a verified-good sensor and perfect wiring still result in a circuit code, the control module (ECM/PCM/ECU) is the culprit.
2010 Ford Escape 3.0L at 150k miles
Vehicle presented P0130 and P0150 simultaneously. Owner noted a ticking exhaust sound.
What they tried:
- Owner realized both sensors were replaced two years prior, making simultaneous failure unlikely.
- Inspected the exhaust system.
Outcome: A cracked exhaust manifold was leaking oxygen into both banks. Repairing the manifold cleared both codes.
Lesson: If codes for Bank 1 and Bank 2 appear together, look for shared electrical issues or system-wide leaks. Do not buy two new sensors.
How to Prevent This Code From Triggering
- Use Top Tier certified gasoline (Every fill-up) — Top Tier fuels contain detergents that prevent carbon buildup, reducing contaminants that foul the O2 sensor.
- Replace engine air filter (Every 15,000-30,000 miles) — A clogged filter restricts airflow, causing a rich condition that fouls the oxygen sensor and damages the catalytic converter.
- Perform regular oil changes (Every 5,000-7,500 miles) — Prevents oil consumption. Burned oil leaves deposits that poison the oxygen sensor's sensing element.
- Address engine misfires immediately (As needed) — Misfires dump raw fuel into the exhaust, rapidly overheating and destroying the oxygen sensor and catalytic converter.
- Proactively replace upstream O2 sensors (Every 80,000-100,000 miles) — Sensors slow with age, reducing fuel efficiency. Proactive replacement maintains peak performance.
Frequently Asked Questions
What does 'Bank 2, Sensor 1' actually mean?
Bank 2 is the side of a V-style engine without the #1 cylinder. Sensor 1 is the 'upstream' sensor located before the catalytic converter. It controls the air-fuel mixture.
What is the most common misdiagnosis for P0150?
The most frequent mistake is replacing the sensor without checking fuel trims for vacuum or exhaust leaks. A high positive fuel trim (e.g., +15%) means the sensor is correctly reporting a leak. Replacing the sensor wastes money.
I replaced the sensor but the P0150 code came back. What now?
If the code returns, you likely have an unrepaired exhaust leak, a missed wiring short, or a required PCM software update. Verify you used an OEM-equivalent sensor, as cheap aftermarket parts often fail immediately.
Can a bad spark plug or misfire cause a P0150 code?
Yes. A misfiring cylinder dumps unburned oxygen into the exhaust. The O2 sensor reports this extreme lean condition, and the ECM flags the constant signal as a circuit fault.
Should I replace both upstream O2 sensors at the same time?
Yes, on vehicles over 80,000 miles. O2 sensors degrade at the same rate. Replacing both upstream sensors ensures balanced fuel control and prevents the other sensor from failing shortly after.
Will a P0150 code clear itself?
No. P0150 indicates a hard fault detected over a specific period. You must repair the underlying issue and manually clear the code with a scanner.
How much does it cost to have a shop diagnose P0150?
Shops charge a diagnostic fee of $120 to $180, covering one hour of labor. This includes scanning codes, analyzing live data, and visual inspections.
Should I use an OEM or aftermarket oxygen sensor?
Use a high-quality aftermarket sensor (Bosch, Denso, NTK) or an OEM part. Avoid ultra-cheap unbranded sensors. Brands like BMW and Hyundai require genuine OEM sensors to prevent recurring codes.
Key Takeaways
- P0150 indicates a fault in the Bank 2, Sensor 1 oxygen sensor circuit, but exhaust leaks account for up to 30% of misdiagnoses.
- Check Short Term and Long Term fuel trims before buying parts; a reading above +10% confirms a vacuum or exhaust leak, not a bad sensor.
- Driving with an active P0150 drops fuel economy by 10-20% and destroys a $1,500 catalytic converter within 6 months.
- If P0150 appears alongside P0130, do not replace the sensors; check the shared 15A heater circuit fuse or look for a PCM software update.
Helpful Videos

The information in this article is provided for general reference and educational purposes only. Vehicle specifications, procedures, and part compatibility can vary by production date, trim level, and region. Always consult your vehicle's factory service manual and verify part numbers before purchasing or performing repairs. Safety-critical components such as airbags, seat belts, and braking systems should be installed by a qualified professional.
- 🎬 Helpful Videos
- What Does P0150 Mean?
- Can I Drive With P0150?
- Common Causes
- Symptoms
- Diagnostic Flowchart
- Common Fixes & Costs
- Used vs. New Parts: Buying Guide
- What Happens If You Wait — Timeline
- Cost of Not Fixing It
- Diagnosis Steps
- When This Code Triggers (Freeze-Frame Conditions)
- Related Codes
- Climate & Environmental Factors
- How to Talk to a Mechanic About This Code
- Where to Take It: Dealer vs Independent vs Chain
- When to Walk Away From the Repair
- What Scan Tool You Need for This Code
- How to Clear the Code After You Fix It
- Will This Fail Emissions / State Inspection?
- Most Commonly Affected Vehicles
- Manufacturer-Specific Notes
- Real Owner Stories
- 2010 Ford F-150 5.4L at 136k miles
- 1999 Mercedes S320 with P0150 & P0135
- 2010 Ford Escape 3.0L at 150k miles
- How to Prevent This Code From Triggering
- Frequently Asked Questions
- What does 'Bank 2, Sensor 1' actually mean?
- What is the most common misdiagnosis for P0150?
- I replaced the sensor but the P0150 code came back. What now?
- Can a bad spark plug or misfire cause a P0150 code?
- Should I replace both upstream O2 sensors at the same time?
- Will a P0150 code clear itself?
- How much does it cost to have a shop diagnose P0150?
- Should I use an OEM or aftermarket oxygen sensor?
- Key Takeaways
- 🎟️ Get 5% Off