

P0139 on 2009-2017 Volvo XC60: Slow O2 Sensor Causes and Fixes
On a 2009-2017 Volvo XC60, code P0139 almost always means the rear (downstream) oxygen sensor has failed due to age. Replacing this sensor is the most common fix. Before replacing, check for exhaust leaks and wiring damage. Expect to pay $120-$200 for an OEM-quality aftermarket part (like Bosch or Denso) or $250+ for a genuine Volvo part. DIY difficulty is 2/5, requiring an O2 sensor socket.
- P0139 points to the rear (post-catalytic converter) oxygen sensor on your XC60.
- The most likely cause by far is simply an old, worn-out oxygen sensor that needs to be replaced.
- Before buying a new sensor, perform a quick visual inspection of the exhaust for obvious leaks and check the sensor's wiring for damage.
- This is a DIY-friendly repair for those comfortable working under their car; you will need a special 22mm O2 sensor socket.
- Ignoring this code will lead to a failed emissions test and prevents your car from properly monitoring its catalytic converter.
What's Unique About the 2009-2017 Volvo XC60
On the Volvo XC60 with a 3.2L or 3.0L inline-six (I6) engine, diagnosis is slightly simpler because there is only one cylinder bank, so 'Bank 1' is the only bank. The P0139 code points directly to the single downstream O2 sensor. This issue is not typically a sign of a unique Volvo-specific defect, but rather a common maintenance item on a vehicle with aging emissions components. The causes and fixes are standard for most modern cars, with the sensor itself being the most frequent point of failure. The sensor is located directly in the catalytic converter, accessible from underneath the vehicle.
Symptoms You May Notice
- Check Engine Light is illuminated.
- Failure to pass an emissions/smog test.
- Potential for slightly reduced fuel economy, though it may not be noticeable to the driver.
- In rare cases, hesitation or rough running on deceleration if the root cause is a more severe issue like leaking fuel injectors.
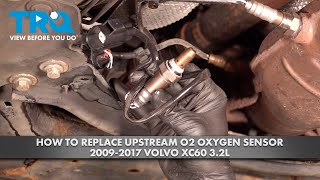
- Replacing the upstream (Sensor 1) 🎬 See this video to identify and replace the upstream sensor. oxygen sensor. This code specifically points to the downstream (Sensor 2) sensor, which is located after the catalytic converter.
- Replacing the sensor without checking for exhaust leaks first. An exhaust leak before the sensor can mimic the symptoms of a failed sensor.
Most Likely Causes
- Aged or Failing Rear Oxygen Sensor 🔴 High Probability Oxygen sensors are wear-and-tear items that degrade over time, typically after 60,000-100,000 miles. Contamination from exhaust gases, carbon, and soot makes them less responsive.
How to confirm: Use a scan tool to graph the voltage of the Bank 1 Sensor 2. A healthy downstream sensor should show a relatively stable voltage (e.g., 0.6V-0.8V) when the engine is warm and at a steady RPM. If it responds very slowly to engine speed changes (like a sharp rev from idle to 2500 RPM and back), or the voltage line is choppy or stuck, the sensor is failing. A definitive bench test is to measure the resistance of the sensor's internal heater circuit; a good sensor typically reads between 2 and 4 ohms.
Typical fix: Replace the Bank 1, Sensor 2 (downstream) oxygen sensor. Soaking the old sensor with a penetrating oil like PB Blaster a day before removal is highly recommended.
Est. part cost: $120-$280 - Exhaust System Leak 🟡 Medium Probability Exhaust components, especially flex pipes and flange gaskets, can develop small cracks or leaks from corrosion and heat cycles. These leaks allow outside air into the exhaust stream, which skews the O2 sensor's readings and can cause a slow response fault.
How to confirm: Listen for a 'ticking' or 'puffing' sound from the exhaust, especially when the engine is cold, which may disappear as the metal expands. A visual inspection may reveal black soot trails near flanges or cracks. A professional smoke test is the most definitive method.
Typical fix: Repair the leak. This may involve replacing a gasket, but often requires welding or replacing the leaking pipe section.
Est. part cost: $10-$300 - Damaged Wiring or Connector ⚪ Low Probability The sensor wiring runs underneath the vehicle and is exposed to road debris, water, and extreme heat from the exhaust, which can cause corrosion or physical damage over time. The connector is located above the subframe and can be difficult to access without lowering other components.
How to confirm: Visually inspect the entire wiring harness from the O2 sensor to its connection point. Look for melted plastic, chafed or broken wires, and corrosion on the connector pins. The connector for the downstream sensor is located above the center of the subframe. Check circuit resistance from the sensor connector to the PCM; values above 5 ohms can indicate a wiring problem.
Typical fix: Repair the damaged section of the wire or replace the connector pigtail. If the sensor itself is damaged, it must be replaced.
Est. part cost: $20-$150
Rare But Worth Checking
- Failing Catalytic Converter: A degraded catalytic converter can alter exhaust flow and cause the rear O2 sensor to read incorrectly. This is usually accompanied by code P0420 (Catalyst System Efficiency Below Threshold).
- Engine Control Module (ECM) Software Issue: Very rarely, the ECM's software calibration for monitoring the sensor may be too sensitive. A recall was issued for some 2011 models for a sensitive fuel cut-off function in the ECM software, which could potentially relate to O2 sensor readings, though not directly for P0139. A software update from a Volvo dealer would be the fix.
Diagnosis Steps
- Connect an OBD-II scanner to confirm P0139 is the active code and check for any other stored codes. Address other codes (misfires, fuel trim) first.
- Perform a thorough visual and auditory inspection of the exhaust system from the engine back to the rear O2 sensor. Look and listen for any signs of a leak (soot stains, cracks, ticking noises), especially when the engine is cold.
- Locate the downstream oxygen sensor (Bank 1, Sensor 2). On these XC60s, it is screwed directly into the catalytic converter, visible from under the vehicle.
- Carefully inspect the sensor's wiring harness and connector for any signs of melting, chafing, or corrosion. The connector is clipped to the body above the subframe.
- Using a scan tool with live data capabilities, graph the voltage for both the upstream (Sensor 1) and downstream (Sensor 2) O2 sensors with the engine warm and at a steady 2000 RPM.
- The upstream sensor's voltage should fluctuate rapidly between approximately 0.1V and 0.9V. The downstream sensor's voltage should be relatively steady and high (e.g., >0.6V). If the downstream sensor's voltage is stuck, mirrors the upstream sensor's fluctuations, or responds very slowly to a quick rev of the engine, the sensor itself is the most likely culprit.
- If no exhaust leaks are found and the wiring is intact, a slow-responding sensor confirmed via live data graphing is sufficient evidence to replace the sensor.
- After replacement, use a scan tool to clear the code and go for a road test to ensure the light does not return.
Parts You'll Likely Need
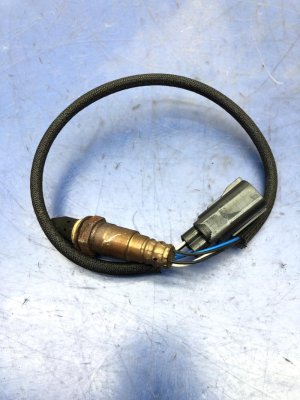
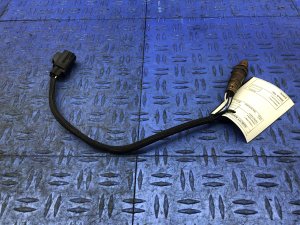
- Rear Oxygen Sensor (Downstream, Bank 1 Sensor 2)
(OEM #30774563 or 30756122)— This is the most common failure point for code P0139. The sensor becomes contaminated and sluggish with age, failing to respond within the ECM's expected timeframe. Part number 30774563 is often listed for the rear sensor on 3.0L/3.2L models. Part number 30756122 is also associated with these models, sometimes as an alternative or for different chassis numbers, so verifying by VIN is best.
Trusted brands: Bosch, Denso, NTK
OEM price range: $250-$380
Aftermarket price range: $120-$200 - O2 Sensor Socket — A special 22mm (7/8") socket with a cutout for the wire is required to remove and install the oxygen sensor without damaging the wiring. A standard 22mm wrench can also be used but may be difficult depending on access and how seized the sensor is.
Trusted brands: Lisle, OEMTools, GearWrench
Aftermarket price range: $10-$30
Related Codes That Often Appear With This One
- P0420 — If the catalytic converter is failing, it will often set a P0420 (Catalyst Efficiency) code alongside P0139, as the rear O2 sensor is what determines the converter's health.
- P0171 / P0174 — If a vacuum leak or fuel delivery issue is causing a lean condition, it can foul the O2 sensor over time, leading to a slow response. The lean code is the root cause that should be addressed first.
Platform-Specific Known Issues
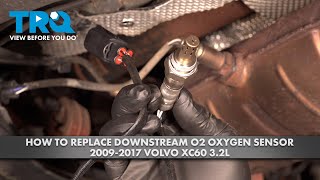
- Real-World Replacement Experience: Owners performing the replacement note that access is straightforward from under the car. The key challenges are breaking the old sensor free from the catalytic converter due to rust and heat-seizing, and carefully routing the new wire away from 🎬 Watch: Step-by-step guide to replacing the downstream O2 sensor. the hot exhaust pipe. Pre-soaking the sensor threads with penetrating oil for a day or two is a commonly recommended tip. A video from 1A Auto shows the process on a 2013 XC60, confirming the location and use of a 22mm wrench.
Mechanic-Grade Diagnostic Values
- O2 Sensor Heater Circuit Resistance — expected: 2 - 4 ohms. Failure: An open circuit (infinite resistance) or a value significantly outside the expected range indicates a failed internal heater.
- Wiring Harness Resistance (Sensor Connector to ECM) — expected: Less than 5 ohms. Failure: A reading above 5 ohms suggests excessive resistance from corrosion or wire damage, which can delay the signal and trigger P0139.
- Downstream O2 Sensor Voltage (Deceleration Fuel Cut-Off) — expected: Voltage should drop below 0.2V quickly.. Failure: If the sensor voltage fails to drop below 0.2V for 7 seconds or more during a fuel cut-off event (like engine braking), the ECM may set the code.
Scan Tool Commands That Help
- Volvo VIDA or equivalent professional scanner: Clear Diagnostic Trouble Codes (DTCs) and Reset Adaptations — After replacing the oxygen sensor, it is best practice to not only clear the fault code but also reset any learned fuel trim or emissions system adaptations to allow the ECM to learn the characteristics of the new sensor immediately.
Wiring & Ground Locations
- Downstream O2 Sensor Connector — The connector is located on the vehicle body, clipped above the center of the front subframe/cradle, accessible from underneath the vehicle.. This connector is a common point for inspection. Its location exposes it to some road debris and moisture, making it a potential point of failure due to corrosion or physical damage to the pins or locking tab.
Real Owner Repair Stories
- 1A Auto YouTube Channel (2013 Volvo XC60 3.2L AWD) — Implied Check Engine Light for downstream O2 sensor.
❌ Tried (didn't work) The video proceeds directly to the successful fix.
✅ What actually fixed it The downstream (Bank 1, Sensor 2) oxygen sensor was replaced. The video details the process of locating the sensor in the catalytic converter, disconnecting the harness connector above the subframe, and using a 22mm wrench to remove and replace the sensor. After replacement, clearing the code is advised.
OEM Part Supersession History
30713979→30756122— Part update or manufacturer change.
Heads up: Part 30756122 is a confirmed replacement for 30713979.30774563 and 30756122→N/A— N/A
Heads up: Both 30774563 and 30756122 are listed by vendors for the rear O2 sensor on these XC60 models. They may apply to different chassis number ranges or specific sub-models. There is no clear supersession from one to the other found. It is critical to verify the correct part number using the vehicle's VIN before ordering.
Model Year Variations Within This Range
- 2014-2017: For the 2014 model year, the XC60 received a major facelift. This included revised exterior styling, interior updates, and changes to engine power ratings. While the fundamental causes of P0139 are unlikely to change, these updates could mean minor differences in wiring harnesses, connectors, or ECM software calibrations. Always verify part numbers for your specific model year.
Diagnostic Flowchart
Other Known Issues on This Vehicle
Issues unrelated to this code that are worth knowing about as an owner of this generation:
- Accessory Drive Belt / Tensioner Failure 🔴 High — Commonly occurs between 60,000-120,000 miles. Squealing or chirping noises from the engine bay are the first sign. (Ref: Recalls were issued for some early diesel models, but failure is common across petrol engines as well. The critical danger is the belt shredding and getting ingested by the timing components, causing catastrophic engine damage.)
- PCV System Diaphragm Failure 🟠 Medium — The rubber diaphragm in the PCV oil trap on top of the engine can tear over time, typically after 80,000+ miles. (Ref: No recall, but it's a very common failure. Symptoms include a loud whistling or howling noise at idle. If left unfixed, it can cause oil leaks by pressurizing engine seals. The fix can be a new diaphragm or the entire PCV assembly.)
- Excessive Oil Consumption (2010-2012 models) 🟠 Medium — Some earlier SI6 engines (both 3.2L and 3.0L T6) from roughly 2010-2012 were prone to oil consumption due to piston ring design. Most affected engines were repaired under warranty, but it's a known potential issue for these specific years. (Ref: Volvo addressed this with redesigned parts, but no formal recall was issued for all vehicles.)
- Transmission Shudder/Rough Shifting 🟠 Medium — Owners report issues with rough shifting or shuddering, particularly at low speeds in higher gears, as the vehicle ages (100k+ miles). This can sometimes be improved with a fluid change and/or a software update (TCM reset/adaptation), but may indicate internal wear.
- Vacuum Pump Oil Leak (3.2L Engine) 🟡 Low — The seal on the engine-mounted vacuum pump is a known failure point, causing a noticeable oil leak down the side of the engine. (Ref: No recall, but Volvo offers a specific seal kit (part # 31401556) for the repair, which is much cheaper than replacing the entire pump.)
Used vs. New Parts: Buying Guide for This Vehicle
When a used part is the smart pick: For an oxygen sensor, a used part is never a smart choice. O2 sensors are wear items with a finite lifespan, and their performance degrades over time. A used sensor may fail shortly after installation or may already be 'lazy' enough to not perform optimally, even if it doesn't set a code immediately.
What to inspect on the donor part:
- Not applicable, as used O2 sensors are not recommended.
OEM-only on this vehicle (don't cheap out):
- While not strictly 'OEM-only', it is highly recommended to use either a Genuine Volvo sensor or one from a known OEM supplier like Denso, Bosch, or NTK. For the associated P0420 code, an OEM or high-quality, CARB-compliant aftermarket catalytic converter is strongly advised to ensure passing emissions tests.
Aftermarket brands forum-validated for this vehicle:
- Denso
- Bosch
- NTK
Brands owners have reported issues with on this vehicle:
- Generic, unbranded 'universal' sensors from online marketplaces. These often have a high failure rate, incorrect response characteristics for the Volvo engine management system, or require splicing wires which introduces a point of failure.
Real Owner Stories
Aggregated from forums and TSBs cited above. Mileages and costs reflect what owners reported in those sources.
2010 Volvo XC60
Symptoms: Owner was looking for a step-by-step guide to replace the rear O2 sensor and inquired about special tools needed for the job.
What fixed it: Replacement of the rear O2 sensor using a special wrench and PB Blaster to break the sensor free.
Source hint: VolvoForums - 'Rear O2 sensor- a step by step guide?'
2014 Volvo S60 (Platform Mate)
Symptoms: Check Engine Light with code P0139 (Heated Oxygen Sensor Slow Response Bank 1 Sensor 2).
What fixed it: Replacement of the oxygen sensor, as the failure was attributed to simple sensor degradation due to age.
Source hint: SwedeSpeed - 'CEL P0139 - Heated Oxygen Sensor (HO2S) Slow Response Bank 1 Sensor 2'
2013 Volvo XC60
Symptoms: The owner faced challenges with the sensor being heat-seized into the catalytic converter due to rust.
What fixed it: Replacement of the Bank 1, Sensor 2 (downstream) oxygen sensor after pre-soaking threads with penetrating oil and routing the new wire away from the hot exhaust.
Source hint: Real-World Replacement Experience / 1A Auto video
Related OBD-II Codes
Frequently Asked Questions
Where is the Bank 1 Sensor 2 located on my XC60?
Is there a specific tool recommended for removing the sensor on a 2013 XC60?
Can a whistling noise from my engine be related to the P0139 code?
How can I tell if my P0139 is caused by an exhaust leak instead of a bad sensor?
Why is the connector for the rear O2 sensor so difficult to find on the XC60?
What resistance should I see if I bench test the O2 sensor heater circuit?
Helpful Videos
We Have This Part in Stock

The information in this article is provided for general reference and educational purposes only. Vehicle specifications, procedures, and part compatibility can vary by production date, trim level, and region. Always consult your vehicle's factory service manual and verify part numbers before purchasing or performing repairs. Safety-critical components such as airbags, seat belts, and braking systems should be installed by a qualified professional.
- Volvo XC60:
- 🎬 Helpful Videos
- 🛍️ Shop This Part
- What's Unique About the 2009-2017 Volvo XC60
- Symptoms You May Notice
- Most Likely Causes
- Rare But Worth Checking
- Diagnosis Steps
- Parts You'll Likely Need
- Related Codes That Often Appear With This One
- Platform-Specific Known Issues
- Mechanic-Grade Diagnostic Values
- Scan Tool Commands That Help
- Wiring & Ground Locations
- Real Owner Repair Stories
- OEM Part Supersession History
- Model Year Variations Within This Range
- Diagnostic Flowchart
- Other Known Issues on This Vehicle
- Used vs. New Parts: Buying Guide for This Vehicle
- Real Owner Stories
- 2010 Volvo XC60
- 2014 Volvo S60 (Platform Mate)
- 2013 Volvo XC60
- Related OBD-II Codes
- Frequently Asked Questions
- 🎟️ Get 5% Off