

P0135 on 2010-2012 Audi S4: O2 Sensor Heater Circuit Malfunction Causes and Fixes
This code indicates a failure in the heater circuit of the Bank 1, Sensor 1 oxygen sensor on the passenger side. The most common fix is replacing the sensor itself, typically with an OEM part (06E906265S) or a Bosch equivalent (17396). The part costs between $75-$250. It is a manageable DIY job for those with an O2 sensor socket and basic tools, but checking the fuse and wiring first is crucial.
- P0135 on a 2010-2012 Audi S4 almost always points to a problem with the upstream oxygen sensor on the passenger side (Bank 1, Sensor 1).
- The most likely cause is a burned-out heating element inside the sensor itself, which is a common wear item.
- Before replacing the sensor, always perform a quick check of the associated fuse and visually inspect the wiring for damage.
- Replacing the sensor is a DIY-friendly job for most, requiring a special O2 sensor socket, but can be difficult if the sensor is seized due to rust.
- Ignoring this code will lead to poor fuel mileage, failed emissions tests, and could eventually harm the more expensive catalytic converter.
What's Unique About the 2010-2012 Audi S4
On the Audi S4's 3.0L Supercharged V6 engine (engine code CCBA), Bank 1 is the passenger side of the engine, which is the bank containing cylinder #1. The P0135 code is common enough that Audi issued a Technical Service Bulletin (TSB 01139020337671) for it. The TSB also groups P0135 with manufacturer-specific codes P1196 and P1197, which also point to heater circuit faults, suggesting a pattern failure that the manufacturer has acknowledged. The TSB's "Repair Authorization" note typically serves as guidance for dealerships to streamline warranty claims or approved repair procedures for a known issue. A known issue on this platform is the oil filter housing gasket leaking oil directly onto the O2 sensor wiring, which can degrade the harness and cause this fault.
Diagnostic Flowchart
Tap your situation to follow the diagnostic path that matches what you're seeing on this vehicle.
Symptoms You May Notice
- Check Engine Light (MIL) is illuminated.
- Reduced fuel economy.
- Failure to pass an emissions test.
- Rough idling or hesitation, particularly when the engine is cold.
- Black smoke or a foul, rich smell from the exhaust on a cold start.
- Replacing the wrong oxygen sensor (e.g., Bank 2 Sensor 1 on the driver's side, or the post-catalyst Sensor 2).
- Replacing the sensor without first checking the fuse, relay, and wiring. A new sensor will not fix a wiring or power supply problem and could be damaged by a short circuit.
- Using a cheap, generic 'universal' oxygen sensor that is not properly calibrated or pinned for the Audi's specific requirements, leading to the code returning.
- Assuming a new sensor is a good sensor. DOA (Dead on Arrival) parts can occur, leading to the same fault code returning immediately after replacement.
Most Likely Causes
- Failed Bank 1, Sensor 1 Oxygen Sensor 🔴 High Probability Oxygen sensors are wear-and-tear items exposed to extreme heat and exhaust gases. The internal heating element is a common failure point over time. The existence of a TSB for this issue points to a high frequency of failure on this platform. Additionally, oil leaks from the oil filter housing can drip onto the sensor wiring, accelerating failure.
How to confirm: Disconnect the sensor and test the resistance across the two heater circuit pins (usually the two same-colored wires, often pins 3 and 4 on the sensor connector) with a multimeter. An open circuit (infinite resistance) or a reading far outside the manufacturer's specification (typically 5-20 ohms for a good cold sensor) confirms a failed heater element. A reading of 0 ohms indicates a short circuit within the sensor.
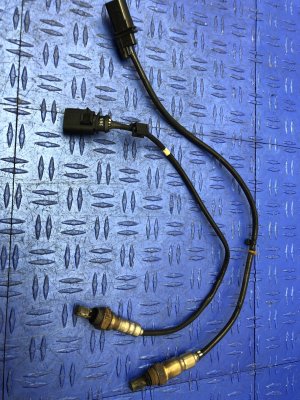
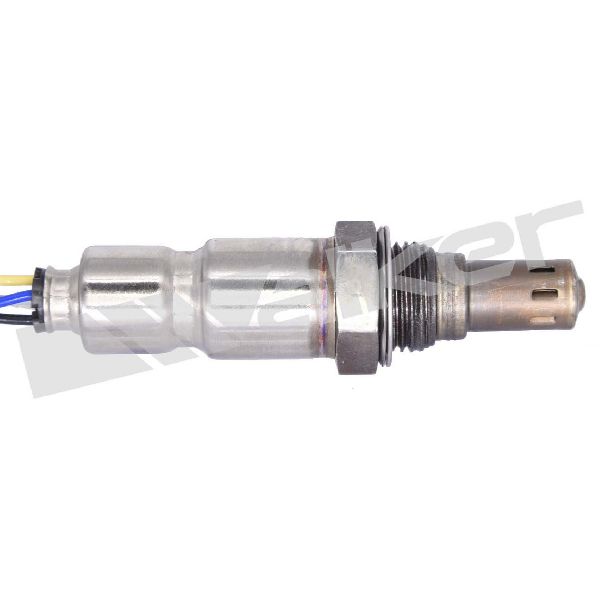
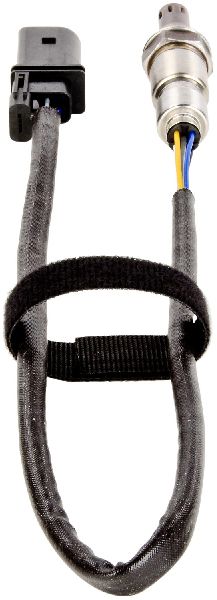
Typical fix: Replace the Bank 1, Sensor 1 oxygen sensor. The OEM part number is 06E906265S. A common, high-quality aftermarket replacement is the Bosch 17396.
Est. part cost: $75-$250 - Damaged Wiring or Corroded Connector 🟡 Medium Probability The wiring harness for the O2 sensor is routed in a hot, tight engine bay. Over time, the plastic conduit and wire insulation can become brittle and crack. The connector is also susceptible to moisture and corrosion. Oil leaks from above are also a known cause of harness degradation on the 3.0T engine.
How to confirm: Visually inspect the wiring harness from the sensor to where it connects to the main engine harness. Look for any signs of melting, fraying, or breaks. Unplug the connector and check for corrosion, moisture, or bent/damaged pins. Use a multimeter to check for battery voltage (12V+) and a good ground at the connector (harness side) with the key in the 'On' position.
Typical fix: Repair the damaged section of the wiring harness or clean the connector pins with electrical contact cleaner. If the connector is severely damaged, it may need to be replaced.
Est. part cost: $5-$50 - Blown Fuse or Faulty Relay for Heater Circuit ⚪ Low Probability A short circuit in the sensor's internal heater element or in the wiring can cause the corresponding fuse to blow as a protective measure. The circuit is also controlled by a relay, which can fail.
How to confirm: Locate the fuse for the oxygen sensor heater circuit. On the B8 S4, there are three fuse panels: one on each side of the dashboard and one in the trunk. Consult the owner's manual or fuse diagram for the specific fuse, often labeled 'O2 Sensor Heater' or similar. Visually inspect the fuse or test it with a multimeter for continuity. If the fuse is good, locate the corresponding relay and test or swap it with a known-good relay.
Typical fix: Replace the blown fuse (typically 15-30 amps). If the new fuse blows immediately, it confirms a persistent short circuit in the wiring or the sensor itself that must be diagnosed and fixed. If the relay is faulty, replace it.
Est. part cost: $1-$25
Rare But Worth Checking
- Faulty Engine Control Module (ECM): This is very rare and should be considered a last resort. Before suspecting the ECM, all other possibilities (sensor, wiring, fuses, relay) must be exhaustively ruled out. A faulty ECM driver for the heater circuit is possible but unlikely. In some documented cases, the fault has been traced to a bad ground for the O2 sensor circuit *inside* the ECU itself, requiring ECU replacement.
- Faulty Engine Coolant Temperature Sensor: An incorrect reading from the coolant temperature sensor can, in some systems, affect how the ECM manages the O2 sensor heater circuit, although this is not a primary cause for P0135. This would likely be accompanied by other fault codes.
Diagnosis Steps
- Confirm the P0135 code is present using an OBD-II scanner.
- Check the fuse for the O2 sensor heater circuit in the appropriate fuse panel. Replace if blown.
- Locate the Bank 1, Sensor 1 oxygen sensor. On the 3.0T V6, Bank 1 is on the passenger side of the engine. Sensor 1 is the upstream sensor before the catalytic converter, visible from the top of the engine bay.
- Inspect the sensor's wiring harness and connector for any visible damage, melting, or corrosion, paying close attention to any signs of oil contamination from above.
- Disconnect the sensor. With the ignition on (engine off), use a multimeter to verify battery voltage (12V+) is present at one of the heater circuit pins on the harness-side connector.
- With the sensor still disconnected, switch the multimeter to the Ohms (Ω) setting and measure the resistance between the two heater pins on the sensor itself (often pins 3 & 4). A good sensor should read between 5-20 ohms when cold. An infinite reading (OL) means the heater is burned out and the sensor must be replaced.
- If using a VCDS tool, check Measuring Value Blocks (MVB) like 040 or 042 to see the ECU's reported heater resistance. A very high reading (e.g., >1 kOhm) indicates a fault.
- If the sensor and wiring test good, the issue may be intermittent or, in rare cases, with the heater circuit relay or the ECM itself.
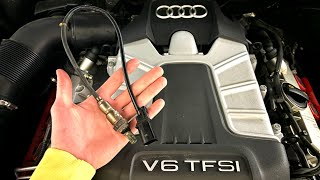
- If the sensor has failed, replace it. Use a 22mm (or 7/8") offset oxygen sensor s 🎬 Watch: Step-by-step walkthrough for replacing the upstream O2 sensor.ocket to remove and install. Apply anti-seize compound to the threads of the new sensor if not pre-applied.
- Torque the new sensor to the manufacturer's specification, which is typically around 55 Nm (40 ft-lbs) for these vehicles.
- Clear the trouble code with the OBD-II scanner and perform a test drive to ensure the code does not return.
Parts You'll Likely Need
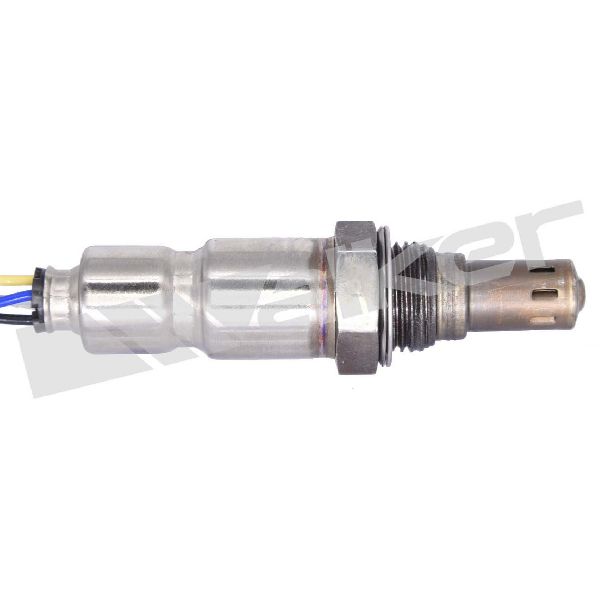
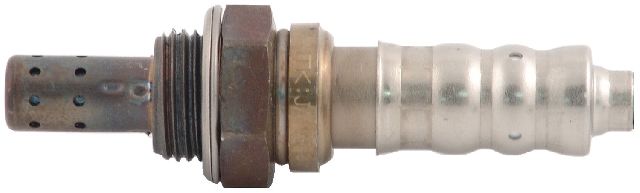
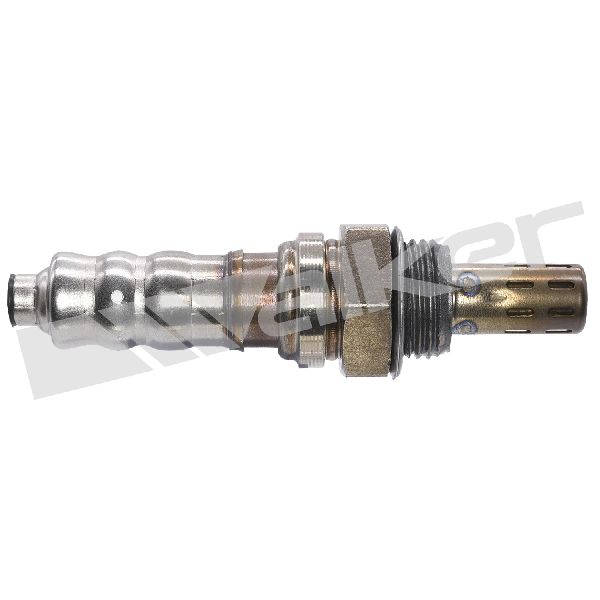
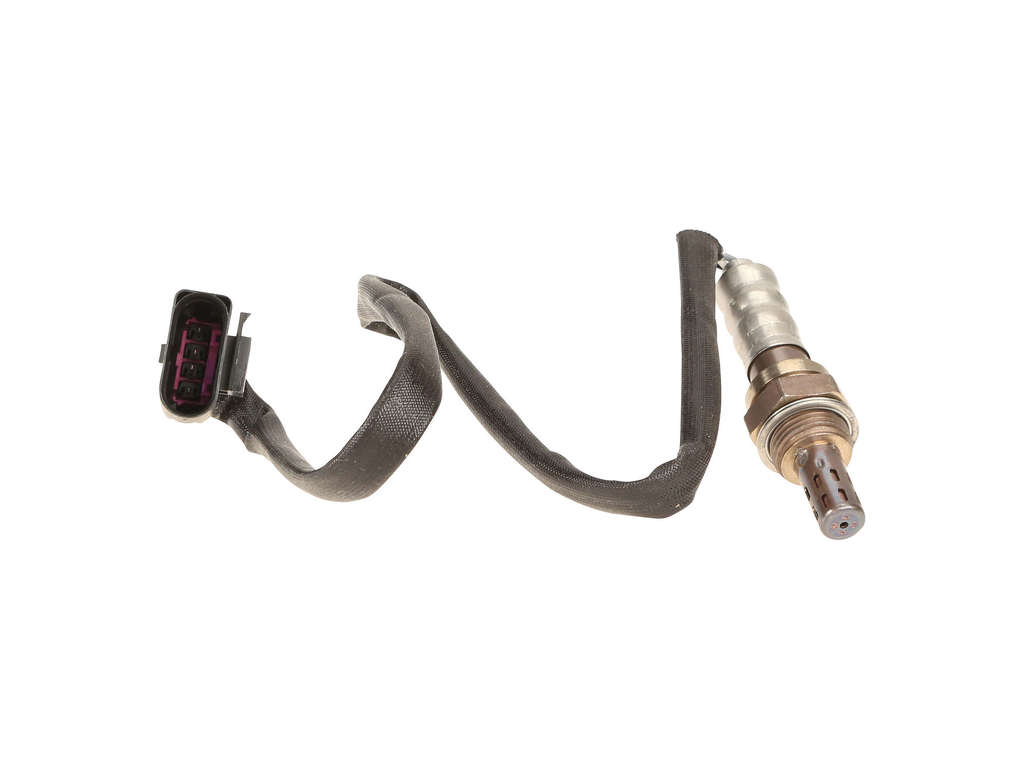
- Oxygen Sensor (Bank 1, Sensor 1)
(OEM #06E906265S (replaces 06E-906-265-F))— This is the most frequent point of failure for a P0135 code, as the internal heating element burns out over time.
Trusted brands: Bosch (OEM supplier, part #17396), NTK, Denso
OEM price range: $180-$250
Aftermarket price range: $75-$150
Related Codes That Often Appear With This One
- P1196 — This is an Audi-specific code for 'O2 Sensor Heater Circuit Bank 1 Sensor 1 Electrical Malfunction'. It is often triggered alongside P0135, as confirmed by the TSB.
- P1197 — This is another Audi-specific code that can be related to the O2 sensor heater circuits. The TSB groups it with P0135 and P1196.
- P0134 — O2 Sensor Circuit No Activity Detected (Bank 1 Sensor 1). This can occur if the heater fails and the sensor never reaches operating temperature to start sending a signal.
- P0030 — HO2S Heater Control Circuit (Bank 1 Sensor 1). This is a more generic version of the same fault and is sometimes seen with P0135, pointing directly to the control side of the heater circuit.
Technical Service Bulletins (TSBs) & Recalls
- Bulletin #01139020337671: 01 MIL on (DTC P1196/P1197/P0135, heater circuit fault lambda sensor) - Repair Authorization
Platform-Specific Known Issues
- Audi issued Technical Service Bulletin #01139020337671 which directly addresses DTC P0135, along with P1196 and P1197, for a 'heater circuit fault lambda sensor' on 2010-2012 S4 models, indicating this is a recognized issue by the manufacturer.
- The electrical connectors for the upstream O2 sensors on the 3.0T engine are located on a bracket at the back of the engine, near the firewall. Tracing the correct wire from the sensor to the correct connector is crucial to avoid misdiagnosis.
- A common point of failure is an oil leak from the oil filter housing gasket, which drips directly onto the O2 sensor wiring harness, causing it to degrade and short out.
Mechanic-Grade Diagnostic Values
- O2 Sensor Heater Resistance (Cold Sensor, Multimeter) — expected: 5 - 20 Ohms. Failure: Open circuit (OL), short circuit (0 Ohms), or outside the specified range.
- Harness-Side Connector Heater Power (Key On, Engine Off) — expected: 12V+ (Battery Voltage). Failure: 0V or significantly low voltage, indicating a blown fuse, bad relay, or wiring issue.
- O2 Sensor Heater Resistance (VCDS Measuring Block) — expected: Varies by sensor and temperature, but a known good hot sensor may read around 48 Ohms.. Failure: Extremely high resistance (e.g., 235 Ohms or 25.5 kOhms) as reported by the ECU indicates a definitive fault.
Hidden / Shadow Codes Worth Checking
- VCDS Measuring Value Blocks (MVB): While not a 'shadow code,' VCDS provides manufacturer-level data beyond generic OBD-II. For P0135, the heater circuit status and resistance can be monitored in real-time. (see via Using VCDS software, navigate to Engine (01) -> Measuring Blocks (08) and enter groups such as 036, 040, or 042 to view live data for O2 sensor heating.)
Scan Tool Commands That Help
- VCDS (VAG-COM): Measuring Value Blocks (MVB) - Groups 030-049 — Use after confirming the P0135 code to get detailed, real-time data on the heater circuit. Specifically, check Group 040 or 042 for the heater resistance as calculated by the ECU. This can confirm a failed heater element without physically removing the sensor and differentiate between a sensor failure and a wiring/power supply issue.
Wiring & Ground Locations
- O2 Sensor Heater Pins (at sensor) — On the 6-pin connector of the sensor itself.. For wideband Bosch sensors of this type, the heater element pins are typically Pin 3 and Pin 4. This allows for a direct resistance test of the heater element with a multimeter.
- Terminal 15 Power Supply — This is the ignition-switched power circuit, supplied via a fuse and relay.. The O2 sensor heaters are not powered constantly; they receive 12V from the Terminal 15 circuit when the ignition is on. A fault in this circuit's relay can cut power to the heater, causing a P0135 code even if the fuse and sensor are good.
- ECU Internal Ground — Inside the Engine Control Module (ECM/ECU) itself.. In a documented edge case, persistent O2 sensor circuit faults were traced to a failed ground connection within the ECU. This is a last-resort diagnosis after the sensor, wiring, and power supply have been confirmed good.
Real Owner Repair Stories
- AudiWorld Forums user 'Nizpatel' (Audi Q5 2.0 TDI (similar Bosch wideband sensor and diagnostics)) — Initially had a P2196 (signal too rich) code. Replaced the Bank 1 Sensor 1 O2 sensor.
❌ Tried (didn't work) Replacing the Bank 1 Sensor 1 O2 sensor with a new part sourced from a high-feedback eBay seller.
✅ What actually fixed it The new sensor immediately caused a P0135 code. The conclusion was that the new part was dead on arrival (DOA). The fix was to order another replacement sensor. This highlights that a new part is not always a good part. - Ross-Tech Forums user (2012 Audi A6 C7 3.0T) — Multiple fault codes including P1110 (O2 Heater Short to Plus) and P0158 (O2 Signal Too High) for Bank 2 Sensor 2, plus other sensor codes.
❌ Tried (didn't work) A shop replaced the O2 sensor (B2S2) but the codes persisted., The owner swapped the downstream sensors from Bank 1 to Bank 2, but the fault codes did not move with the sensor, remaining on Bank 2.
✅ What actually fixed it Another forum user diagnosed this as a likely common ground wire issue in the harness or a faulty ECU, since multiple sensors were faulting and the code didn't follow the sensor swap. A separate, similar case confirmed the final fix was replacing the ECU due to a bad internal ground for the oxygen sensor circuit.
When the Usual Fixes Don't Work
- In several documented cases, replacing the oxygen sensor did not fix the P0135 code. One instance was due to a defective brand-new sensor being dead on arrival, requiring a second replacement. In a more complex case, when multiple sensor codes appeared simultaneously and did not follow the sensor when swapped to the other bank, the root cause was ultimately found to be a bad ground connection inside the Engine Control Unit (ECU), necessitating an ECU replacement.
OEM Part Supersession History
06E906265F→06E906265S— Standard part revision by the manufacturer.
Helpful Videos
Used OEM Parts in Stock
New Aftermarket Parts Available

The information in this article is provided for general reference and educational purposes only. Vehicle specifications, procedures, and part compatibility can vary by production date, trim level, and region. Always consult your vehicle's factory service manual and verify part numbers before purchasing or performing repairs. Safety-critical components such as airbags, seat belts, and braking systems should be installed by a qualified professional.
- Audi S4:
- 🎬 Helpful Videos
- 🛍️ Shop This Part
- What's Unique About the 2010-2012 Audi S4
- Diagnostic Flowchart
- Symptoms You May Notice
- Most Likely Causes
- Rare But Worth Checking
- Diagnosis Steps
- Parts You'll Likely Need
- Related Codes That Often Appear With This One
- Technical Service Bulletins (TSBs) & Recalls
- Platform-Specific Known Issues
- Mechanic-Grade Diagnostic Values
- Hidden / Shadow Codes Worth Checking
- Scan Tool Commands That Help
- Wiring & Ground Locations
- Real Owner Repair Stories
- When the Usual Fixes Don't Work
- OEM Part Supersession History
- 🎟️ Get 5% Off