

OBD-II Code P0111: Intake Air Temperature Sensor Performance Problem
What P0111 means, why it triggers, and how to fix it
- P0111 indicates an illogical temperature reading, requiring a 'cold soak' test where the IAT, Engine Coolant, and Ambient Temperature sensors must read within 3°F of each other before starting the engine.
- A faulty IAT sensor causes 70% of P0111 codes, but always rule out a $20 clogged engine air filter or an oil-contaminated sensor tip before buying replacement parts.
- Driving with an active P0111 code drops fuel economy by up to 15% and causes a rich-running condition that destroys a $1,500 catalytic converter within 6 months.
- Volkswagen and Audi owners must check TSB 01-20-05 first; a known 'heat soak' issue triggers false P0111 codes and requires a $60 hood insulation blanket rather than a new sensor.
What Does P0111 Mean?

The P0111 code means the Engine Control Module (ECM) detects the Intake Air Temperature (IAT) sensor signal is illogical or stuck. The ECM continuously compares the IAT reading with the engine coolant temperature (ECT) and ambient air temperature (AAT) sensors during a cold start. If the reading is stuck at 150°F on a 30°F morning, or fails to respond to changing engine conditions, the computer flags a 'performance' problem rather than a purely electrical fault.
Technical definition: The SAE/OBD-II definition is "Intake Air Temperature Sensor 1 Circuit Range/Performance." The powertrain control module (PCM) determines the sensor's signal is outside its expected range or performs erratically compared to other sensor inputs. The sensor provides a signal, but it is inaccurate for the current operating conditions based on the PCM's rationality checks.
Can I Drive With P0111?
Yes, But With Caution. Yes, you can drive with this code, but you must fix it within two weeks. You will experience poor fuel economy, engine hesitation, and hard starting. Driving for several hundred miles with a P0111 code causes the engine to run consistently rich or lean, leading to severe carbon buildup. In a worst-case scenario, this destroys the catalytic converter, a repair costing over $1,500.
Common Causes

- Faulty Intake Air Temperature (IAT) Sensor (Very Common) — The sensor's internal thermistor degrades, cracks, or wears out over time. This causes it to send incorrect, stuck, or erratic temperature signals to the computer, accounting for the vast majority of P0111 cases.
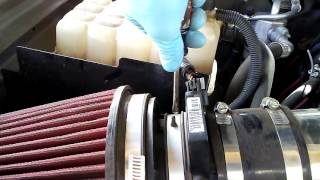
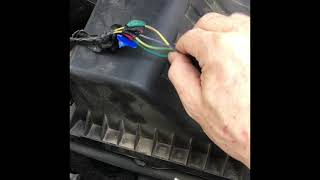
- Contaminated or Dirty Sensor (Common) — Oil vapor from the PCV system, dirt, or carbon builds up on the sensor's tip, insulating it from incoming air. This prevents accurate temperature readings and causes a delayed response, especially if the IAT is integrated into the MAF sensor. 🎬 Watch this walkthrough on replacing a combined MAF/IAT sensor.
- Damaged Wiring, Connector, or Ground (Common) — Wires leading to the IAT sensor fray, break, or corrode from engine heat and vibration. A loose connector, moisture intrusion, or a corroded ground connection disrupts the 5-volt reference signal, causing erratic readings.
- Dirty or Clogged Engine Air Filter (Less Common) — A severely clogged air filter restricts and alters airflow across the sensor, leading to inaccurate readings. The sensor functions perfectly, but the physical conditions it measures are skewed.
- Intake Air Leaks (Less Common) — A vacuum leak from a cracked intake hose or an improperly seated intake plenum allows unmetered air into the engine. This alters the temperature profile enough to throw off the sensor's readings.
- Faulty Engine Control Module (ECM) (Rare) — Internal circuit board issues, software glitches, or a failing 5-volt reference circuit cause the computer to misinterpret a perfectly good sensor signal. This requires a dealership software update or module replacement.
Symptoms

- Check Engine Light is On — The ECM illuminates the malfunction indicator lamp immediately upon failing the sensor rationality check.
- Poor Fuel Economy and Black Smoke — The ECM uses air temperature to calculate the air-fuel mixture. An incorrect reading forces a rich condition, dropping MPG by up to 15% and occasionally causing black exhaust smoke.
- Engine Hesitation or Rough Idle — The engine stumbles during acceleration, feels sluggish, or runs unevenly at a stop due to the incorrect air-fuel mixture disrupting combustion.
- Hard Starting — The engine struggles to start in very hot or cold weather because the ECM provides the wrong fuel mixture for the actual ambient conditions.
- Failed Emissions Test — An active P0111 code causes an automatic failure of an OBD-II emissions test and increases harmful tailpipe emissions like hydrocarbons (HC).
Diagnostic Flowchart
Tap your situation to follow the diagnostic path that matches what you're seeing on this code.
Common Fixes & Costs
- Replace the IAT Sensor
— Parts: $30-$90, Labor: $60-$120, ~0.5 hr book time
(DIY)
Volkswagen (Jetta/Golf): OEM 06B905379G (Alt: Bosch: 0280130085)
Ford F-150 (EcoBoost): OEM DS7Z-12A697-A (Alt: Standard Motor Products: AX422)
Chevrolet/GMC Silverado: OEM 55569992 (Alt: ACDelco: 213-4696) - Clean the IAT and MAF Sensor — Parts: $10-$20, Labor: $0, ~0.2 hr book time (DIY)
- Replace the Engine Air Filter — Parts: $20-$40, Labor: $0, ~0.1 hr book time (DIY)
- Repair Damaged Wiring or Connector — Parts: $5-$30, Labor: $100-$250, ~1.5 hr book time (Intermediate)
- ECM Software Update — Parts: $0, Labor: $100-$200, ~1.0 hr book time (Professional)
DIY vs Professional
- Replace the Engine Air Filter — Beginner:
Tools: Basic hand tools (screwdriver/socket) - Clean the IAT/MAF Sensor — Beginner:
Tools: Screwdriver, dedicated MAF sensor cleaner spray - Replace the IAT Sensor — Beginner:
Tools: Basic hand tools (screwdriver, socket set, pliers) - Repair Damaged Wiring or Connector — Beginner:
Tools: Multimeter, wire strippers, soldering iron, heat shrink tubing - ECM Software Update — Beginner:
Tools: Proprietary dealership scan tools and software
Used vs. New Parts: Buying Guide
When a used part is worth it: Buying a used standalone IAT sensor never makes sense due to low new part costs. Only consider a used part if the IAT is integrated into an expensive MAF sensor assembly.
Donor-vehicle mileage cap: roughly under 50000 miles for the part to have meaningful remaining life.
Donor quality checklist:
- Ensure the part number matches exactly.
- Avoid parts from vehicles with high mileage or signs of severe engine oil leaks.
Decision logic:
- If The part is a standalone IAT sensor → Always buy new. The cost savings are negligible and the risk is high.
- If The part is an integrated MAF/IAT sensor assembly costing over $250 new → A used part from a low-mileage donor is a cost-effective option.
Warranty tradeoff: Used salvage parts offer 30-90 day warranties. New aftermarket parts offer 1-year to lifetime warranties. New OEM parts carry a 1-year/12,000-mile warranty.
Worst-case if a used part fails: $150 if a used integrated MAF/IAT fails, requiring repeat labor and diagnosis.
What Happens If You Wait — Timeline
- 0-1 month: Check Engine Light illuminates. A slight drop in fuel economy occurs with no major drivability symptoms. (MPG impact: 0-5%% · Added cost: $0-$30 in wasted fuel)
- 1-3 months: Fuel economy drops noticeably. The engine hesitates on acceleration and idles roughly when cold. (MPG impact: 5-10%% · Added cost: $50-$100 in wasted fuel)
- 3-6 months: The engine runs consistently rich. Carbon builds up on spark plugs and O2 sensors, causing frequent hard starting. (MPG impact: 10-15%% · Added cost: $150-$400 (spark plug or O2 sensor replacement))
- 6+ months: A prolonged rich condition overheats the catalytic converter, melting the internal substrate and guaranteeing emissions failure. (MPG impact: 15-20%% · Added cost: $1,200-$2,800 (catalytic converter replacement))
Cost of Not Fixing It
- 0-1 month: Noticeable drop in fuel economy and engine hesitation. (Added cost: $20-$60 per month in extra fuel costs.)
- 1-6 months: Consistently rich fuel mixtures cause carbon buildup on spark plugs and oxygen sensors. (Added cost: $150-$400 for spark plug and O2 sensor replacement.)
- 6+ months: A prolonged rich condition overheats and melts the catalytic converter. (Added cost: $1,200-$2,800 for catalytic converter replacement.)
Diagnosis Steps

- Analyze Live Sensor Data (Cold Soak Test)
With a cold engine (off for at least 8 hours), use a scanner to view live data. Compare the IAT, Engine Coolant Temperature (ECT), and Ambient Air Temperature (AAT) readings. They must all be within 3°F of each other. A difference greater than 10°F points directly to a faulty IAT sensor or circuit.
Tools: OBD-II Scanner with Live Data capability (Beginner) - Check for Other Codes
Scan for additional trouble codes. Codes like P0110, P0112, P0113 (IAT circuit faults) or P0101 (MAF fault) point to a specific electrical or airflow issue. Fix these codes first, as they trigger P0111 as a secondary fault.
Tools: OBD-II Scanner (Beginner) - Visual Inspection & Air Filter Check
Inspect the IAT sensor, connector, and wiring harness for broken wires or green corrosion. Open the air filter box and replace the engine air filter if it is clogged. Ensure all intake hoses are tightly clamped with no cracks.
Tools: Flashlight, Screwdriver (Beginner) - Test the Sensor's Response
With the engine running and scanner on live data, watch the IAT reading. It must slowly and steadily increase as the engine bay warms up. Alternatively, gently warm the sensor tip with a hairdryer and watch for a smooth temperature change on the scanner. A stuck reading confirms a dead sensor.
Tools: OBD-II Scanner with Live Data, Hairdryer (Intermediate) - Test Sensor Resistance
Disconnect the sensor and set a multimeter to Ohms (Ω). Measure resistance between the sensor's two terminals and compare it to the manufacturer's chart (typically ~2,500 Ω at 68°F). A reading of infinite (OL) or zero indicates internal failure.
Tools: Multimeter, Vehicle Service Manual (Intermediate) - Check Voltage and Ground (Voltage Drop Test)
With the key 'On' (engine off), check the connector harness. One wire must have a 5-volt reference signal. Back-probe the ground wire with the engine running; a reading above 0.1 volts (100mV) indicates excessive resistance in the ground circuit requiring repair.
Tools: Multimeter with back-probe pins (Advanced) - Use an Oscilloscope for Intermittent Issues
Connect an oscilloscope to the sensor's signal wire. The waveform must be a smooth DC voltage that changes with temperature. Glitches, dropouts, or excessive electrical noise indicate a failing sensor or wiring interference.
Tools: Automotive Oscilloscope (Professional)
When This Code Triggers (Freeze-Frame Conditions)
- Engine Coolant Temp: 70-210°F (21-99°C) (The code sets when the IAT fails to change logically as the engine warms up to operating temperature.)
- RPM: 1500-2500 (The ECM expects to see the IAT change with varying airflow during steady cruise or light acceleration.)
- Engine Load: 20-50% (Triggered under normal driving conditions, not typically at idle or full throttle.)
- Vehicle Speed: 30-60 mph (48-97 km/h) (A stuck IAT reading during consistent highway airflow is a clear rationality fault.)
Related Codes
- P0110 — P0110 indicates a complete electrical circuit malfunction (open or short). P0111 is a rationality fault where the sensor sends a signal, but it is illogical compared to other sensors.
- P0112 — Indicates the IAT circuit input is low (short circuit), interpreted as a very high temperature (250°F+). P0111 is merely implausible, not shorted to a specific extreme.
- P0113 — Indicates the IAT circuit input is high (open circuit), interpreted as a very low temperature (-40°F). A disconnected sensor triggers P0113 immediately.
- P0101 — Indicates a MAF sensor performance issue. Because the IAT is often integrated into the MAF housing, a shared wiring fault or vacuum leak triggers both codes simultaneously.
Climate & Environmental Factors

- Extreme Cold: Makes hard starting symptoms severe. The ECM relies heavily on an accurate cold IAT reading for the correct cold-start fuel mixture.
- Extreme Heat / Heat Soak: Causes a temporary, false high temperature reading after the engine shuts off, triggering P0111 on the next startup. This is a documented flaw on many VW models.
- High Humidity / Moisture: Accelerates corrosion on connector pins and causes moisture intrusion into cracked wiring, leading to high resistance in the IAT circuit.
- High Altitude: The ECM uses temperature and pressure data to calculate air density. An inaccurate sensor at altitude causes severe performance and efficiency drops.
How to Talk to a Mechanic About This Code
Say this: "I have a P0111 code. Please start with a cold soak test, comparing the IAT, ECT, and ambient temp sensor readings on a scan tool before starting the engine. Also, check the air filter and look up any TSBs related to this code for my vehicle."
This directs the technician to the most important test (cold soak data comparison) and prevents them from blindly replacing the sensor. Mentioning TSBs is critical for VW, Audi, and Subaru owners.
Avoid saying:
- 'My check engine light is on, can you look at it?'
- 'Just replace the IAT sensor.'
- 'I think it's a sensor, just fix it.'
Questions to ask before authorizing the repair:
- What were the exact temperature readings for the IAT, ECT, and Ambient Air sensors during the cold soak test?
- Did you inspect the wiring and connector for corrosion or damage?
- Can you show me the failed test result (the live data or resistance reading) before replacing the sensor?
- What is the warranty on the parts and labor for this repair?
Where to Take It: Dealer vs Independent vs Chain
- Dealer:
Best for: Vehicles under powertrain or emissions warranty., Known manufacturer quirks like VW/Audi 'heat soak' TSBs or Subaru ECM software updates., Complex electrical issues after an independent shop rules out the sensor and wiring.
Downsides: Higher labor rates., Prefers replacing expensive harness sections over performing simple wiring repairs. (Typical cost: +50% vs. baseline) - Independent Shop:
Best fit for most situations. A competent independent shop easily performs the required live data tests and sensor replacement.
Best for: Most out-of-warranty P0111 repairs., Straightforward diagnosis and replacement of the IAT sensor, wiring, or air filter.
Downsides: Diagnostic skill varies; look for ASE certifications., Lacks access to dealer-only software updates. (Typical cost: +0% vs. baseline) - Chain Shop:
Avoid for initial diagnosis due to the high risk of misdiagnosis and being sold unneeded parts.
Best for: Selling you an engine air filter.
Downsides: Technician skill varies dramatically., High pressure to upsell unnecessary services., Not equipped for nuanced diagnostic work like checking TSBs or performing software updates. (Typical cost: -10% vs. baseline)
When to Walk Away From the Repair
If the estimated repair cost exceeds 40% of the car's private-party value, consider alternatives like selling the car as-is.
- Car worth $4000, fix is $250: Fix it. This is a minor repair cost relative to the car's value.
- Car worth $1500, fix is $250: Fix it. The repair makes the car sellable and usable.
- Car worth $2500, fix is $1800: Walk away. This implies severe catalytic converter damage. The repair cost is not justified.
What Scan Tool You Need for This Code
Minimum: An OBD-II scanner that displays live sensor data (PIDs) for Intake Air Temp (IAT), Engine Coolant Temp (ECT), and Ambient Air Temp (AAT).
A basic $20 code reader only shows the 'P0111' code. It cannot perform the essential 'cold soak' diagnostic test, which requires comparing live temperature readings to find the fault.
Budget: BlueDriver Pro or Ancel BD310 (~$60-100) — Connects to a smartphone app to read codes and display live data streams for the IAT and ECT sensors, allowing a DIYer to confirm a P0111 fault.
Mid-range: Innova 5610 or Foxwell NT510 Elite (~$150-350) — Dedicated handheld units offering robust live data graphing, freeze frame data analysis, and manufacturer-specific codes.
Professional: Autel MaxiCOM MK808 (~$400-600) — Provides full-system diagnostics and access to manufacturer-specific PIDs needed for complex cases on brands like Ford or VW.
Rent vs buy: Auto parts stores like AutoZone offer a loaner tool program. You can rent a capable OBD-II scanner for free by leaving a refundable deposit.
How to Clear the Code After You Fix It
- Use an OBD-II scan tool to clear the diagnostic trouble code (DTC).
- Perform a complete OBD-II drive cycle to allow readiness monitors to run.
- Do not disconnect the battery to clear codes, as this resets all readiness monitors and radio presets.
Drive cycle (~20 minutes): Start with a cold engine (sat for 8+ hours). Idle for 3 minutes with A/C and defroster on. Drive for 10 minutes at a steady 55 mph. Perform 10 minutes of stop-and-go city driving. Allow the vehicle to cool down.
Readiness monitors affected: Catalyst (CAT) monitor, Evaporative (EVAP) System monitor, Oxygen (O2) Sensor monitor
Watch out for:
- Disconnecting the battery clears the code but resets all readiness monitors, causing an immediate emissions test failure.
- The code returns immediately if the underlying wiring fault or vacuum leak was not fixed.
- Failing to complete a full drive cycle leaves monitors 'Not Ready'.
Will This Fail Emissions / State Inspection?
Yes — this code typically fails an OBD-II emissions inspection.
- California: An active P0111 code is an automatic failure. All OBD readiness monitors must be 'Ready' to pass, requiring a complete drive cycle after repair.
- New York: A P0111 code causes the vehicle to fail the mandatory OBD-II emissions portion of the NYS DMV inspection.
- Texas: In the 17 counties requiring emissions testing, an active P0111 trouble code results in an immediate inspection failure.
Most Commonly Affected Vehicles
- Volkswagen Golf, Jetta, GTI, Beetle (2013-2021) — Extremely common. A known 'heat soak' issue triggers P0111 on startup. VW TSB 01-20-05 fixes this with a hood insulation blanket. Swapping identical pre-throttle and manifold sensors during maintenance also triggers this code.
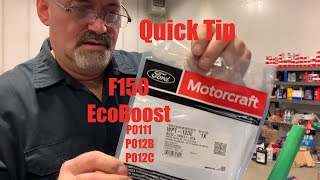
- Ford F-150 (with EcoBoost) (2011-2021) — These engines use up to three temperature sensors. P0111 sets when the PCM finds a disagreement of 30°F or more between them on a cold start. Diagnosis requires checking live data for all sensors to find the outlier.
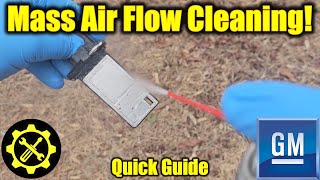
- Chevrolet / GMC Silverado, Sierra (2014-2019) — The IAT is integrated into the MAF sensor. Cleaning the MAF sensor assembly with dedicated cleaner is the required first diagnostic step before replacing the $150+ unit.
- BMW 3 Series, 5 Series, X3, X5 (2000-2014) — A frequent misdiagnosis is replacing the sensor when the actual cause is an unmetered air leak from an improperly seated intake plenum after routine service.
- Kia / Hyundai Niro, Elantra (2017-2022) — The ECM strictly compares the IAT, ECT, and ambient sensors at startup. A deviation of just a few degrees sets the code, often caused by a dirty air filter skewing airflow.
- Subaru Impreza, Forester, Crosstrek (2012-2018) — P0111 cases on these models frequently trace back to software glitches. An ECM software update from the dealer is often the required fix after verifying the sensor is good.
- Nissan Rogue, Pathfinder, Altima (2014-2020) — Prone to IAT sensor failure due to internal wear at higher mileage. The IAT is integrated into the MAF sensor, requiring replacement of the entire unit.
- Toyota Camry, Corolla (2015-2021) — Wiring harness damage is a more frequent cause of P0111 than sensor failure. Check for frayed or rodent-damaged wires near the intake manifold first.
- Honda Accord, Civic (2013-2018) — Issues frequently trace back to a dirty air filter restricting airflow or corroded pins in the sensor harness connector.
Manufacturer-Specific Notes
- Volkswagen/Audi: Turbocharged engines use two identical TMAP sensors. Swapping them during repairs guarantees a P0111. Additionally, TSB 01-20-05 addresses a 'heat soak' issue fixed by installing a hood insulation blanket.
- Ford: EcoBoost engines cross-check up to three intake air temp sensors on a cold start. If one disagrees by more than 30°F, P0111 sets. Diagnosis requires a scan tool displaying all IAT PIDs.
- General Motors (GM): The ECM runs a 'stuck sensor' routine. If the IAT reading doesn't change by at least 5.4°F after specific engine run time and airflow, it sets P0111.
- Subaru: Subaru issues ECM software updates to resolve false P0111 codes. The update refines rationality parameters. Always check for TSBs before replacing parts.
Real Owner Stories
2018 Nissan Rogue at 186k miles - A Misdiagnosis Journey
After a transmission replacement, a P0101 (MAF) code appeared. The owner replaced the MAF sensor, clearing the P0101 but immediately triggering a P0111 code.
Outcome: The owner discovered the replacement aftermarket MAF sensor was defective out of the box, causing the rationality fault.
Lesson: If a new code appears immediately after installing an aftermarket sensor, the new part is likely defective or incompatible. Stick to OEM sensors for critical engine management components.
2014 Ford Fusion 2.0L EcoBoost - An Intermittent Problem
P0111 code appeared only at full throttle, causing the car to lose acceleration. The cold air intake pipe was extremely hot to the touch.
Outcome: The owner wrapped the sensor and its wiring with heat tape. This eliminated the issue, proving radiant engine heat was skewing the sensor's reading under high load.
Lesson: For intermittent P0111 codes under high load, consider heat soak. Insulating the components is a valid diagnostic step and potential permanent fix.
2013 VW Jetta - The Classic VW Heat Soak Issue
Owner experienced a P0111 code exclusively on hot days. The cooling fans ran excessively loud, indicating the car thought ambient temperatures were extreme.
Outcome: The owner installed a hood insulation blanket (Part No. 5GM 863 831) per VW TSB 01-20-05, shielding the sensor from radiant hood heat and permanently fixing the code.
Lesson: Always check for Technical Service Bulletins (TSBs). The fix for a sensor code is sometimes a $60 insulation blanket rather than a new electronic part.
How to Prevent This Code From Triggering
- Replace engine air filter at recommended intervals (Every 15,000-30,000 miles) — A clean filter ensures unrestricted airflow across the IAT sensor, preventing skewed readings that trigger P0111.
- Clean the IAT/MAF sensor during tune-ups (Every 30,000 miles) — Oil vapor and dust coat the sensor, slowing its response time. Cleaning restores accuracy.
- Visually inspect sensor wiring (Annually) — Engine heat makes wiring brittle. Catching chafed wires early prevents intermittent shorts.
- Apply dielectric grease to the sensor connector (Whenever disconnected) — Seals the connection from moisture, preventing corrosion on the pins.
Frequently Asked Questions
How much does it cost to fix code P0111?
A DIY IAT sensor replacement costs $30-$90 for the part. A professional repair ranges from $150 to $300 including diagnosis and labor. Complex wiring repairs or ECM updates cost between $100 and $250.
Can I just clean the IAT sensor to fix it?
Yes, if the sensor is coated in oil or carbon, cleaning it with dedicated MAF spray restores function. However, if the internal thermistor is broken, cleaning fails and replacement is mandatory.
Where is the IAT sensor located?
The IAT sensor sits in the engine's air intake duct after the air filter. On many modern vehicles, it is integrated directly into the Mass Airflow (MAF) sensor housing.
Why did the P0111 code come back after replacing the sensor?
If the code returns, the sensor was not the root cause. The actual problem is hidden wiring damage, a corroded connector, an unaddressed intake leak, or an ECM software glitch.
What are the most common misdiagnosis mistakes for P0111?
The most common mistake is replacing the IAT sensor without performing a 'cold soak' live data test. Technicians often overlook simpler issues like a clogged air filter or swapped sensors on VW models.
Will a bad IAT sensor cause my car to fail an emissions test?
Yes. An active P0111 code illuminates the Check Engine Light, causing an automatic OBD-II emissions test failure. The resulting rich or lean fuel condition also increases harmful tailpipe emissions.
What happens if I just unplug my IAT sensor?
Unplugging the sensor forces the ECM to detect an open circuit and set a P0113 code. The vehicle enters a failsafe mode with a default temperature value, causing poor performance and terrible fuel economy. Do not do this.
Key Takeaways
- P0111 indicates an illogical temperature reading, requiring a 'cold soak' test where the IAT, Engine Coolant, and Ambient Temperature sensors must read within 3°F of each other before starting the engine.
- A faulty IAT sensor causes 70% of P0111 codes, but always rule out a $20 clogged engine air filter or an oil-contaminated sensor tip before buying replacement parts.
- Driving with an active P0111 code drops fuel economy by up to 15% and causes a rich-running condition that destroys a $1,500 catalytic converter within 6 months.
- Volkswagen and Audi owners must check TSB 01-20-05 first; a known 'heat soak' issue triggers false P0111 codes and requires a $60 hood insulation blanket rather than a new sensor.
Helpful Videos


The information in this article is provided for general reference and educational purposes only. Vehicle specifications, procedures, and part compatibility can vary by production date, trim level, and region. Always consult your vehicle's factory service manual and verify part numbers before purchasing or performing repairs. Safety-critical components such as airbags, seat belts, and braking systems should be installed by a qualified professional.
- 🎬 Helpful Videos
- What Does P0111 Mean?
- Can I Drive With P0111?
- Common Causes
- Symptoms
- Diagnostic Flowchart
- Common Fixes & Costs
- DIY vs Professional
- Used vs. New Parts: Buying Guide
- What Happens If You Wait — Timeline
- Cost of Not Fixing It
- Diagnosis Steps
- When This Code Triggers (Freeze-Frame Conditions)
- Related Codes
- Climate & Environmental Factors
- How to Talk to a Mechanic About This Code
- Where to Take It: Dealer vs Independent vs Chain
- When to Walk Away From the Repair
- What Scan Tool You Need for This Code
- How to Clear the Code After You Fix It
- Will This Fail Emissions / State Inspection?
- Most Commonly Affected Vehicles
- Manufacturer-Specific Notes
- Real Owner Stories
- 2018 Nissan Rogue at 186k miles - A Misdiagnosis Journey
- 2014 Ford Fusion 2.0L EcoBoost - An Intermittent Problem
- 2013 VW Jetta - The Classic VW Heat Soak Issue
- How to Prevent This Code From Triggering
- Frequently Asked Questions
- How much does it cost to fix code P0111?
- Can I just clean the IAT sensor to fix it?
- Where is the IAT sensor located?
- Why did the P0111 code come back after replacing the sensor?
- What are the most common misdiagnosis mistakes for P0111?
- Will a bad IAT sensor cause my car to fail an emissions test?
- What happens if I just unplug my IAT sensor?
- Key Takeaways
- 🎟️ Get 5% Off