

OBD-II Code P0110: Intake Air Temperature (IAT) Sensor Circuit Malfunction
The definitive guide to diagnosing and fixing P0110 for mechanics and DIYers.
- P0110 is an electrical circuit fault, requiring you to verify the 5-volt reference and ground before replacing any parts.
- On modern vehicles from Toyota, Honda, Ford, and GM, the IAT is integrated into the Mass Airflow (MAF) sensor, making a $150 to $350 MAF replacement the most common fix.
- A live data scanner reading stuck at -40°F indicates an open circuit like a broken wire, while a reading stuck above 280°F confirms a short circuit.
- Driving with an active P0110 code drops fuel economy by up to 15% and causes a persistently rich fuel mixture that destroys a $1,500 catalytic converter within 6 months.
What Does P0110 Mean?

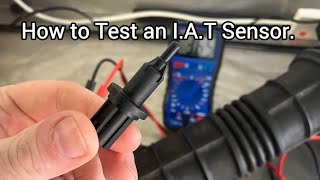
Your Powertrain Control Module (PCM) detected an electrical malfunction in the Intake Air Temperature (IAT) sensor 1 circuit. This thermistor measures the temperature of air entering the engine, allowing the PCM to calculate air density and optimize the air-fuel ratio. Code P0110 specifically indicates a circuit fault 🎬 Watch: A complete overview of P0110 causes and solutions.—an open wire, a short, or an invalid voltage signal—rather than a simple inaccurate reading.
Technical definition: SAE/OBD-II defines P0110 as "Intake Air Temperature Sensor 1 Circuit Malfunction". The PCM triggers this when the IAT sensor's voltage signal falls outside the predefined acceptable range. Because the IAT is a Negative Temperature Coefficient (NTC) sensor (high resistance when cold, low when hot), a missing or stuck voltage signal points directly to an electrical break or short.
Can I Drive With P0110?
Yes, But With Caution. Yes, but fix it within two weeks. The engine's computer (PCM) defaults to a pre-set temperature value, causing poor fuel economy, rough running, and hard starting. Ignoring this causes a persistently rich fuel mixture that destroys the catalytic converter—a $1,100 to $3,500+ repair. If the Check Engine Light flashes, stop driving immediately to prevent catastrophic engine damage.
Common Causes

- Faulty Intake Air Temperature (IAT) Sensor (Very Common) — The internal thermistor fails from age, heat cycles, or corrosion. This accounts for the majority of P0110 cases.
- Damaged Wiring or Corroded Connector (Common) — Engine heat and vibration make wires brittle or frayed. Connector pins corrode or loosen, disrupting the signal, especially in regions using road salt.
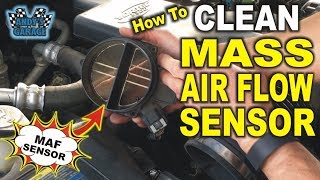
- Faulty Mass Airflow (MAF) Sensor Assembly (Common) — Most modern vehicles integrate the IAT sensor into the MAF assembly. A failure inside the MAF unit triggers P0110, often alongside a P0101 MAF code.
- Dirty or Contaminated Sensor Tip (Common) — Oil vapor from the PCV system and dirt coat the sensor tip. This buildup insulates the thermistor, preventing accurate air temperature readings.
- Vacuum Leaks (Less Common) — A significant vacuum leak downstream of the IAT sensor allows unmetered air into the intake manifold, skewing sensor readings.
- Rodent Damage to Wiring (Less Common) — Rodents chew the soy-based insulation on modern vehicle wiring, causing open or short circuits in the IAT harness.
- Aftermarket Cold Air Intake Issues (Less Common) — Improperly installed intakes stretch or damage the wiring harness, or relocate the IAT sensor to an area of turbulent airflow.
- Poor ECM Power Supply or Ground (Rare) — A weak battery, failing alternator, or loose ECM ground strap destabilizes the module's internal 5V reference voltage, causing false sensor faults.
- Faulty Powertrain Control Module (PCM) (Very Rare) — The PCM's internal IAT circuit fails. Consider this only after exhaustively testing all wiring and sensors.
Symptoms

- Check Engine Light is On — This is the most common and often the only initial symptom a driver notices.
- Rough Idle or Stalling — The engine runs unevenly on cold starts because the air-fuel mixture ignores actual air temperature.
- Hesitation or Sluggish Acceleration — The vehicle feels underpowered and slow to respond to throttle input.
- Hard Starting — The engine cranks longer before starting in extreme hot or cold weather.
- Failed Emissions Test — An active P0110 code automatically fails state emissions inspections.
- Black Smoke from Exhaust — The default rich fuel mixture pushes unburnt fuel out the tailpipe as visible black smoke.
- Decreased Fuel Economy (also visible on scanner) — The PCM defaults to a rich fuel mixture, increasing fuel consumption by 5-15%.
Diagnostic Flowchart
Tap your situation to follow the diagnostic path that matches what you're seeing on this code.
Common Fixes & Costs
- Clean IAT/MAF Sensor — Parts: $10-$15, Labor: $0, ~0.3 hr book time (DIY)
- Replace Standalone Intake Air Temperature (IAT) Sensor — Parts: $20-$75, Labor: $50-$100, ~0.5 hr book time (DIY)
- Replace Mass Airflow (MAF) Sensor Assembly (with integrated IAT)
— Parts: $100-$350, Labor: $50-$150, ~0.5 hr book time
(DIY)
: OEM ACDelco/GM: 15865791, 19330121, 97381182 (Alt: Bosch, Denso, Duralast.)
: OEM Motorcraft AFLS139 (Alt: Hitachi, SKP, Spectra Premium, Bosch.)
: OEM Toyota/Denso: 22204-31020, 22204-0V020, 22204-75040 (Alt: Denso, Walker, NTK.) - Repair Wiring or Replace Connector Pigtail
— Parts: $15-$40, Labor: $100-$250, ~1.5 hr book time
(Intermediate)
: OEM ACDelco/GM: PT307, PT2301, 12102620 (Alt: Dorman 85110, Standard Motor Products S556.)
: OEM Motorcraft WPT-931 (Alt: Dorman, Standard Motor Products.)
: OEM Toyota 90980-11019 (Alt: Various online suppliers.) - Replace Engine Air Filter — Parts: $15-$50, Labor: $0, ~0.2 hr book time (DIY)
DIY vs Professional
- Clean IAT/MAF Sensor — Beginner: Yes
Tools: Screwdriver or socket set, MAF Sensor Cleaner spray. - Replace IAT/MAF Sensor — Beginner: Yes
Tools: Basic hand tools (screwdriver, socket set). - Repair Wiring or Replace Connector Pigtail — Beginner: No
Tools: Multimeter, wire strippers, wire crimpers or soldering iron, heat shrink tubing, replacement pigtail.
Used vs. New Parts: Buying Guide
When a used part is worth it: For an integrated MAF/IAT assembly on a vehicle with over 150,000 miles where a new OEM part exceeds $250.
Donor-vehicle mileage cap: roughly under 80000 miles for the part to have meaningful remaining life.
Donor quality checklist:
- Verify the donor vehicle's mileage and ensure it was not scrapped for an engine-related failure.
- Match the part number exactly. Even sensors that look identical have different calibrations.
- Inspect the connector pins for any signs of corrosion or damage.
Decision logic:
- If The part is a simple, standalone IAT sensor → Buy new. Cost savings are under $20 and not worth the risk.
- If The part is an integrated MAF/IAT sensor and the vehicle is less than 10 years old → Buy new OEM or premium aftermarket (Bosch, Denso). Engine performance relies heavily on this calibration.
- If Budget is the primary concern on an older vehicle → Buy a used OEM assembly from a reputable recycler, but inspect connector pins for corrosion first.
Warranty tradeoff: Used parts typically offer a 30-90 day warranty. New aftermarket parts usually come with a 1-year to limited lifetime warranty. New OEM parts carry a 1-year warranty.
Worst-case if a used part fails: $150-$300 if a used sensor fails after the warranty period, requiring repeat labor costs and the purchase of another part.
What Happens If You Wait — Timeline
- 0-1 month: Check Engine Light is on. PCM defaults to a pre-set temperature, causing a rich fuel mixture. No other major symptoms may be perceived by the driver. (MPG impact: 5-10%% · Added cost: $10-$30 in wasted fuel.)
- 1-4 months: Noticeable drop in fuel economy. Engine may be hard to start in cold weather or exhibit a rough idle. The persistently rich mixture increases the operating temperature of the catalytic converter. (MPG impact: 10-15%% · Added cost: $50-$150 in wasted fuel.)
- 4-12 months: Catalyst substrate coats with soot and overheats from burning excess fuel. This leads to partial melting and cracking of the internal ceramic honeycomb, creating an exhaust restriction. (MPG impact: 12-20%% · Added cost: $1,000-$2,500 (catalytic converter now requires replacement).)
- 12+ months: Catastrophic failure of the catalytic converter. The internal structure melts down, creating a severe exhaust blockage. The engine suffers significant power loss, stalls, and extreme heat damages downstream O2 sensors. (MPG impact: 20-50%+% · Added cost: $1,500-$4,000 (catalytic converter and potentially O2 sensors now require replacement).)
Cost of Not Fixing It
- 0-1 month: PCM defaults to a rich fuel mixture. Fuel economy drops 5-15%. (Added cost: $20-$60 in wasted fuel.)
- 1-6 months: Persistently rich mixture overheats the catalytic converter, causing partial clogs and performance loss. (Added cost: $1,000-$3,000 for potential catalytic converter replacement.)
- 6+ months: Catastrophic catalytic converter failure. Internal honeycomb melts, blocking exhaust flow and destroying downstream O2 sensors. (Added cost: $1,500-$4,000+ for catalytic converter and O2 sensor replacement.)
Diagnosis Steps

- Verify Code and Review Freeze Frame Data
Use an OBD-II scanner to confirm P0110 is present. Note any other codes. Review the freeze frame data to see the engine conditions (speed, load, temperature) when the code was set.
Tools: OBD-II Scanner (Beginner) - Visual Inspection
Locate the IAT sensor (in the intake duct, air filter box, or part of the MAF sensor). Inspect the wiring for obvious signs of damage like burns, breaks, or rodent chew marks. Ensure the connector is securely plugged in and check for corrosion on the pins.
Tools: Flashlight (Beginner) - Analyze Live Data (Key On, Engine Off)
With the ignition on but the engine off, view the IAT sensor live data on your scanner. The reading should be close to ambient air temperature. An extreme reading like -40°F (-40°C) indicates an open circuit (P0113), while a very high reading like 284°F (140°C) indicates a short circuit (P0112).
Tools: OBD-II Scanner with Live Data (Beginner) - Pro Tip: Compare IAT and ECT on a Cold Engine
After the vehicle sits overnight, the IAT and Engine Coolant Temperature (ECT) sensors should read within 5°F (3°C) of each other. If there is a significant discrepancy, the sensor furthest from the actual ambient temperature is faulty.
Tools: OBD-II Scanner with Live Data (Intermediate) - Test the Circuit's Voltage and Ground
With the sensor unplugged and the key on, test the connector harness. One wire provides the reference voltage, typically 5 volts from the PCM. The other wire is the ground. Use a multimeter to confirm both exist. If either is missing, the fault is in the wiring between the connector and the PCM.
Tools: Multimeter (Intermediate) - Test the Sensor's Resistance
Unplug the sensor and use a multimeter set to Ohms (Ω). Measure the resistance between the sensor's two terminals. A typical sensor reads 2,000-3,000 Ω at room temperature (68°F/20°C). An infinite reading (OL) means it's open, and near-zero resistance means it's shorted. Both require replacement.
Tools: Multimeter (Intermediate) - Pro Tip: Perform a "Wiggle Test"
With the scanner displaying live IAT data, gently wiggle the wiring harness at the sensor connector and along its path to the PCM. If the temperature reading jumps or cuts out, you have an intermittent break or short in the harness.
Tools: OBD-II Scanner with Live Data (Advanced) - Advanced: Validate Signal Voltage Range
Back-probe the sensor's signal wire with it connected and the key on. The voltage should be between 0.5V (hot) and 4.5V (cold). A voltage fixed at ~5V confirms an open circuit, while a voltage fixed near 0V confirms a short to ground. Any reading outside 0.5V-4.5V points to a circuit or sensor failure.
Tools: Multimeter, Back-probe pins (Advanced) - Advanced: Test Resistance vs. Temperature
Compare the sensor's resistance to its specified temperature chart. Use a heat gun or hair dryer to warm the sensor tip and watch the resistance drop. A good sensor closely follows a predictable curve. Example values: 7,500 Ω @ 40°F (4°C), 3,400 Ω @ 70°F (21°C), 1,800 Ω @ 100°F (38°C).
Tools: Multimeter, Heat Gun or Hair Dryer, Infrared Thermometer (Advanced) - Pro Tip: Analyze the Sensor with a Lab Scope
Use an oscilloscope to back-probe the sensor's signal wire. A good sensor shows a clean, stable DC voltage line that smoothly changes as temperature changes. A bad sensor or noisy circuit shows a fuzzy, erratic line, or a flat line at 0V or 5V.
Tools: Oscilloscope (Lab Scope), Back-probe pins (Advanced)
When This Code Triggers (Freeze-Frame Conditions)
- Engine Coolant Temp: 80-110°C (176-230°F) (Engine is fully warmed up and in closed-loop operation.)
- RPM: 1500-2500 (Steady cruise or light acceleration.)
- Engine Load: 30-60% (The engine is operating under a moderate load, not idling but not at full throttle.)
- Vehicle Speed: 35-60 mph (56-97 km/h) (Sustained city or highway driving when the PCM runs continuous circuit checks.)
Related Codes
- P0111 — P0110 is an electrical circuit fault; P0111 is a 'Range/Performance' issue where the signal exists but is illogical (e.g., temperature never changes).
- P0112 — Circuit Low Input. The PCM sees abnormally low voltage, interpreted as extreme heat. Almost always caused by a short circuit. Scanners show 284°F (140°C) or higher.
- P0113 — Circuit High Input. The PCM sees high voltage, interpreted as extreme cold. Caused by an open circuit (unplugged sensor, broken wire). Scanners show -40°F/-40°C.
- P0101 — MAF Range/Performance. Seeing P0101 and P0110 together confirms the fault lies within the integrated MAF/IAT sensor assembly or its shared wiring.
Climate & Environmental Factors
- Cold Climates with Road Salt: Salt spray penetrates engine bays, accelerating corrosion on connector pins and wicking into wires to cause high resistance or shorts.
- Extreme Heat: High under-hood temperatures bake plastic wiring insulation and connector housings until they crack from engine vibration, exposing wires.
- High Humidity: Moisture collects inside aging electrical connectors, accelerating corrosion and causing intermittent signal dropouts.
How to Talk to a Mechanic About This Code
Say this: "I have a P0110 Intake Air Temperature circuit code. I'd like to schedule a diagnostic to test the sensor and the wiring. Please check for the 5-volt reference and ground at the connector before recommending a part replacement."
This signals that you understand P0110 is a circuit fault, not just a bad sensor. It directs the mechanic to perform a proper electrical diagnosis, preventing them from simply replacing an expensive part like a MAF sensor without confirming the root cause.
Avoid saying:
- 'My check engine light is on, can you just fix it?'
- 'My friend said it's the sensor, just replace it.'
- 'Just do whatever you think is best.'
Questions to ask before authorizing the repair:
- Did you test the sensor's resistance, and what were the readings?
- Did you confirm the 5-volt reference and a good ground at the sensor connector?
- If you're recommending a new sensor, how did you rule out a wiring or connector issue?
- What is the warranty on the proposed repair, including both parts and labor?
Where to Take It: Dealer vs Independent vs Chain
- Dealer:
Best for: Vehicles under warranty, Complex, model-specific electrical issues (e.g., known TSBs for wiring harnesses), Newer German vehicles where specialized diagnostic tools are often required
Downsides: Highest labor rates, often 1.5x to 2x an independent shop., May default to replacing a larger, more expensive assembly (like a full MAF) when a simpler fix is possible. (Typical cost: +50% vs. baseline) - Independent Shop:
Best fit. P0110 is a bread-and-butter electrical diagnostic job. A reputable independent mechanic can diagnose and repair the sensor, connector, or wiring efficiently and cost-effectively.
Best for: Most out-of-warranty vehicles, Common diagnostic codes like P0110, Customers looking for the best value
Downsides: Quality and expertise vary widely; check for ASE certifications and online reviews., May not have the very latest manufacturer-specific tools for brand-new models. (Typical cost: +0% vs. baseline) - Chain Shop:
Use with caution. Acceptable if you've confirmed the sensor is bad and just need it replaced. Avoid for initial diagnosis of an intermittent electrical problem, as they may lack the time or expertise for a proper wiring check.
Best for: Simple, clear-cut part replacements when you've already performed the diagnosis yourself., Basic maintenance like oil changes and tires.
Downsides: Technician skill can be inconsistent., Business model may pressure technicians to upsell services or replace parts without a thorough diagnosis. (Typical cost: -10% vs. baseline)
When to Walk Away From the Repair
If the estimated repair cost for P0110 exceeds 40-50% of your car's private-party market value, it's time to pause and evaluate your options. Since a P0110 fix is rarely more than $500, this threshold is typically only crossed on very old, high-mileage vehicles with low resale value.
- Car worth $6000, fix is $450: Fix it. The repair cost is less than 10% of the vehicle's value and is essential for performance and fuel economy.
- Car worth $2000, fix is $450: Borderline. The repair is nearly 25% of the car's value. If the car is otherwise in good shape, it's worth fixing. If it needs other major repairs, consider selling as-is.
- Car worth $1200, fix is $450: Walk away. The repair cost is nearly 40% of the car's value. It is not economically sensible unless you can perform the repair yourself for under $100.
What Scan Tool You Need for This Code

Minimum: A scanner that can read and graph live sensor data. A simple code reader that only provides the P-code is insufficient for diagnosing P0110.
To diagnose a P0110, you must see what the sensor is reporting. Live data instantly shows if the reading is stuck at -40° (open circuit), 285°+ (short circuit), or if it's just not responding correctly to temperature changes. This is impossible with a basic code-only reader.
Budget: BlueDriver Pro or Autel AP200 (~$100) — These Bluetooth dongles connect to your smartphone and provide excellent live data streaming and graphing capabilities, which are essential for watching the IAT sensor's output during a 'wiggle test' or while applying heat.
Mid-range: Foxwell NT510 Elite (~$180) — This handheld unit offers robust live data, including graphing. Its main advantage is offering some manufacturer-specific data and bidirectional controls, which can be useful for more advanced diagnostics on other vehicle systems.
Professional: Autel MaxiCOM MK808S (~$450) — Provides full-system diagnostics, extensive live data graphing, and bidirectional controls. While overkill for just a P0110, it's a powerful tool for serious DIYers who want to diagnose any system on their car like a professional.
Rent vs buy: For a one-time fix, use the free tool loaner program at stores like AutoZone or O'Reilly. Ensure the tool they provide can display live data, not just read codes. If you plan to do your own maintenance regularly, buying a budget pick like the BlueDriver is a worthwhile investment.
How to Clear the Code After You Fix It
- Use an OBD-II scan tool to clear the P0110 code.
- Ensure the fuel tank is between 30% and 70% full.
- Perform a complete drive cycle to reset readiness monitors.
Drive cycle (~20 minutes): Start cold. Idle 3 minutes. Drive mixed city/highway, holding 55 mph for 5 minutes. Perform several gradual decelerations without braking.
Readiness monitors affected: Catalyst Monitor, Evaporative System (EVAP) Monitor, Oxygen (O2) Sensor Monitor
Before emissions retest: drive at least 50 miles to fully set monitors.
Watch out for:
- Disconnecting the battery clears the code but resets all readiness monitors, guaranteeing an emissions test failure.
- The code returns within two drive cycles if the wiring fault remains.
Will This Fail Emissions / State Inspection?
Yes — this code typically fails an OBD-II emissions inspection.
- California: Active Check Engine Light is an automatic failure. All monitors must be 'Ready', making a post-repair drive cycle mandatory.
- New York: OBD-II scan detects P0110 and immediately fails the emissions portion of the inspection.
- Texas: Vehicles in the 17 emissions-testing counties fail instantly with an illuminated Check Engine Light for P0110.
Most Commonly Affected Vehicles
- Chevrolet Silverado, Cruze, Malibu (2005-2020) — The IAT is integrated into the MAF sensor. Wiring harness damage near the intake is also common.
- Ford F-150, Focus, Fiesta (2004-2024) — On 2015+ F-150 EcoBoost engines, the sensor is easily accessible on the intake tube. The 5.0L V8 integrates it into the MAP sensor on the rear of the manifold.
- Toyota Camry, Corolla, Tacoma (1998-2024) — The IAT sensor is almost always integrated into the MAF sensor (part number often starts with 22204).
- Honda Accord, Civic (2003-2024) — The IAT is typically part of the MAF sensor assembly. Cleaning the MAF is a common first step, but replacement is often required.
- Hyundai Elantra, Sonata (2001-2016) — Many models from this era use a standalone IAT sensor, which is highly affordable to replace compared to an integrated MAF unit.
- Subaru Impreza, Forester, Outback (2008-2018) — IAT is commonly part of the MAF sensor. These sensors are highly sensitive to oil contamination from aftermarket air filters.
- Volkswagen Golf, Jetta, Passat, Tiguan (2005-2020) — Frequently affected by failure of the integrated IAT/MAF sensor. The wiring harness becomes brittle and fails near the connector.
- BMW 3 Series, 5 Series, X3, X5 (2004-2018) — These models are known for brittle wiring harnesses in the engine bay that lead to intermittent P0110 and other sensor faults.
- Nissan Altima, Rogue, Sentra (2002-2019) — The IAT sensor is combined with the MAP or MAF sensor. Wiring corrosion due to road salt is a known point of failure.
Manufacturer-Specific Notes
- Toyota: Triggers a fail-safe mode assuming a default IAT value of 68°F (20°C) for all fuel calculations when P0110 is active.
- Ford: F-150 IAT wiring harnesses frequently route too close to engine heat sources, causing intermittent open/short circuits that require a wiggle test to find.
- BMW: Plastic wiring insulation on mid-2000s to mid-2010s models turns brittle and flakes off, causing a high incidence of P0110 short circuits.
- Subaru: MAF/IAT sensors are highly sensitive to aftermarket oiled air filters. Oil coats the sensor element, triggering P0110. Use OEM dry filters.
Real Owner Stories
2012 Ford F-150 EcoBoost at 115K miles - Easy Fix
Check Engine Light came on, code P0110. Owner noticed slightly rougher idle and fuel economy dropped by about 2 MPG.
What they tried:
- Visual inspection revealed a very dirty engine air filter.
- Removed the integrated MAF/IAT sensor and saw that the sensor tip was coated in fine dust and oily residue.
Outcome: Replaced the engine air filter ($25) and cleaned the MAF/IAT sensor using dedicated MAF cleaner spray ($12). Cleared the code with a scanner. The fix took 20 minutes. The code has not returned in over a year, and fuel economy returned to normal.
Lesson: Always start with the simplest and cheapest fixes. A dirty air filter and contaminated sensor are common causes and very easy to address before suspecting complex electrical issues.
2015 Chevrolet Cruze at 85K miles - Misdiagnosis
P0110 code appeared intermittently, especially on cold, damp mornings. No major symptoms other than the light.
What they tried:
- Assuming the sensor was bad, the owner immediately bought and installed a new IAT sensor ($45).
- The P0110 code returned two days later.
Outcome: Frustrated, the owner took it to a mechanic. The mechanic performed a 'wiggle test' on the wiring harness and found the IAT reading on the scan tool would drop out. A single wire was broken inside the insulation right at the connector due to engine vibration. The mechanic replaced the connector pigtail ($20 part + $120 labor). The code was permanently resolved.
Lesson: Don't just replace parts. P0110 is a 'circuit' code, which often points to wiring. Test the circuit and sensor before spending money on new parts to avoid paying for the same repair twice.
2008 Nissan Altima at 140K miles - Unusual Cause
Car threw P0110 and P0113 codes simultaneously. Live data on the scanner showed a fixed IAT reading of -40°F. The car was hard to start and ran poorly.
What they tried:
- The owner confirmed the -40°F reading indicated an open circuit.
- Tested the sensor with a multimeter, and it showed correct resistance for the ambient temperature.
- Checked for 5V reference at the connector and it was present.
Outcome: A closer visual inspection of the connector revealed greenish-white corrosion on one of the pins, a common issue for vehicles in the salt belt. The owner cleaned the connector pins thoroughly with electrical contact cleaner and a small brush, then applied a small amount of dielectric grease to seal it from moisture. After reconnecting, the live data reading returned to normal and the codes cleared.
Lesson: An open circuit isn't always a broken wire. A corroded or loose connector pin prevents a signal from reaching the PCM just as effectively. Always inspect connectors closely, especially in wet or salty climates.
How to Prevent This Code From Triggering
- Replace engine air filter at recommended intervals. (Every 15,000-30,000 miles or as per owner's manual.) — A clean filter prevents dust and debris from being drawn into the intake and contaminating the IAT/MAF sensor tip, which insulates it and causes inaccurate readings.
- Clean the IAT/MAF sensor. (Every time the air filter is changed, or once a year.) — Removes oily residue (from PCV system) and fine dust that builds up on the sensor element, ensuring it accurately measures air temperature. Use only dedicated MAF sensor cleaner spray.
- Inspect wiring harness and apply protective sheathing. (During other under-hood maintenance.) — Check the IAT sensor wiring for signs of brittleness or chafing. In high-heat areas, adding a thermal protective sleeve prevents heat degradation and costly wiring repairs.
- Use dielectric grease on the connector seal. (When replacing the sensor or if living in a wet/salty climate.) — Applying a small amount of dielectric grease to the connector's weather-pack seal (not on the metal pins) prevents moisture and road salt from entering, stopping corrosion on the electrical terminals.
Frequently Asked Questions
Can I fix P0110 myself?
Yes, this is often a great DIY repair. Cleaning the sensor costs less than $15. Replacing a standalone IAT or an integrated MAF sensor requires only basic hand tools and saves over $100 in labor.
What's the most common mistake when fixing P0110?
The most common mistake is replacing the sensor without testing the circuit first. The actual problem is often a broken wire or corroded connector. Always test the circuit's 5-volt reference and ground before buying a new sensor.
Why did P0110 come back after replacing the sensor?
If the code returns, the fault is almost certainly an intermittent open or short in the wiring harness. Perform a 'wiggle test' on the wires while watching live scanner data to pinpoint the break. Replacing the connector pigtail usually solves this.
Can a bad battery cause a P0110 code?
Yes, a weak battery causes low voltage spikes throughout the electrical system during engine cranking. This voltage drop confuses the PCM, causing it to falsely trigger sensor circuit codes like P0110. Test your battery and alternator if multiple electrical codes appear simultaneously.
What is the difference between P0110 and P0113?
P0110 is a general circuit malfunction, while P0113 specifically means 'Circuit High Input'. P0113 almost always points to an open circuit, such as an unplugged sensor or severed wire. A scanner typically displays a P0113 fault as a fixed reading of -40°F.
Will a P0110 code clear itself?
No, the underlying electrical fault must be repaired and the code cleared with an OBD-II scanner. If you do not fix the root cause, the Check Engine Light will illuminate again within two drive cycles. Disconnecting the battery is not a permanent fix.
Can a dirty air filter really cause a P0110 code?
A severely clogged air filter allows debris to bypass the filter and coat the IAT/MAF sensor tip. This insulation causes inaccurate temperature readings and triggers the code. Replacing a $20 air filter and cleaning the sensor often resolves the issue.
Will my car fail an emissions test with a P0110 code?
Yes, an illuminated Check Engine Light results in an automatic emissions test failure in nearly all jurisdictions. Furthermore, the incorrect air-fuel ratio caused by P0110 pushes tailpipe emissions beyond allowable legal limits. You must repair the fault and complete a drive cycle before retesting.
Key Takeaways
- P0110 is an electrical circuit fault, requiring you to verify the 5-volt reference and ground before replacing any parts.
- On modern vehicles from Toyota, Honda, Ford, and GM, the IAT is integrated into the Mass Airflow (MAF) sensor, making a $150 to $350 MAF replacement the most common fix.
- A live data scanner reading stuck at -40°F indicates an open circuit like a broken wire, while a reading stuck above 280°F confirms a short circuit.
- Driving with an active P0110 code drops fuel economy by up to 15% and causes a persistently rich fuel mixture that destroys a $1,500 catalytic converter within 6 months.
Helpful Videos

The information in this article is provided for general reference and educational purposes only. Vehicle specifications, procedures, and part compatibility can vary by production date, trim level, and region. Always consult your vehicle's factory service manual and verify part numbers before purchasing or performing repairs. Safety-critical components such as airbags, seat belts, and braking systems should be installed by a qualified professional.
- 🎬 Helpful Videos
- What Does P0110 Mean?
- Can I Drive With P0110?
- Common Causes
- Symptoms
- Diagnostic Flowchart
- Common Fixes & Costs
- DIY vs Professional
- Used vs. New Parts: Buying Guide
- What Happens If You Wait — Timeline
- Cost of Not Fixing It
- Diagnosis Steps
- When This Code Triggers (Freeze-Frame Conditions)
- Related Codes
- Climate & Environmental Factors
- How to Talk to a Mechanic About This Code
- Where to Take It: Dealer vs Independent vs Chain
- When to Walk Away From the Repair
- What Scan Tool You Need for This Code
- How to Clear the Code After You Fix It
- Will This Fail Emissions / State Inspection?
- Most Commonly Affected Vehicles
- Manufacturer-Specific Notes
- Real Owner Stories
- 2012 Ford F-150 EcoBoost at 115K miles - Easy Fix
- 2015 Chevrolet Cruze at 85K miles - Misdiagnosis
- 2008 Nissan Altima at 140K miles - Unusual Cause
- How to Prevent This Code From Triggering
- Frequently Asked Questions
- Can I fix P0110 myself?
- What's the most common mistake when fixing P0110?
- Why did P0110 come back after replacing the sensor?
- Can a bad battery cause a P0110 code?
- What is the difference between P0110 and P0113?
- Will a P0110 code clear itself?
- Can a dirty air filter really cause a P0110 code?
- Will my car fail an emissions test with a P0110 code?
- Key Takeaways
- 🎟️ Get 5% Off