

P0108 on 2011-2014 Dodge Avenger: MAP Sensor Circuit High Causes and Fixes
This code almost always points to a faulty Manifold Absolute Pressure (MAP) sensor. Replacing the sensor is a simple, DIY-friendly fix that usually costs between $25 for an aftermarket part and $95 for an OEM Mopar part. The sensor is located on the intake manifold and is easily accessible on both the 2.4L and 3.6L engines.
- P0108 on a 2011-2014 Avenger is most likely caused by a failed MAP sensor.
- Symptoms include a rough idle, poor acceleration, and decreased fuel economy.
- This is a DIY-friendly repair; the sensor is accessible on the intake manifold and easy to replace.
- Before buying a new sensor, check its electrical connector and wiring for obvious damage.
- If replacing the sensor doesn't fix the issue, check for other codes, as TSBs indicate this can be part of a larger electrical problem.
What's Unique About the 2011-2014 Dodge AVENGER

On the 2011-2014 Avenger, with either the 2.4L World GE MA or 3.6L Pentastar V6 engine, the P0108 code is a straightforward fault, most commonly caused by the MAP sensor itself failing. The provided NHTSA technical service bulletins (TSBs) show that this code can appear alongside other seemingly unrelated electrical faults, such as for oil pressure sensors or even internal control processor errors (P0606). TSB 18-085-15 specifically calls for a PCM software update to resolve an issue where multiple DTCs, including P0108, can be falsely triggered on 2011 models. This suggests that while the MAP sensor is the primary suspect, it's wise to check for available PCM updates and broader wiring harness issues if replacing the sensor doesn't solve the problem.
Diagnostic Flowchart
Tap your situation to follow the diagnostic path that matches what you're seeing on this vehicle.
Symptoms You May Notice
- Check Engine Light is on
- Rough or unstable idle
- Hesitation or loss of power during acceleration
- Reduced fuel economy
- Black smoke from the exhaust
- Engine may stall when coming to a stop
- Hard starting
- Vehicle 'bucking' or jerking during driving
- Car enters 'limp mode' with severely restricted power
- Replacing spark plugs or ignition coils for a rough idle without first checking the MAP sensor data.
- Replacing oxygen sensors due to a rich running condition (black smoke) before diagnosing the P0108 code.
- Assuming a vacuum leak is present; a vacuum leak would typically cause a P0106 (performance) or P0171 (lean) code, not a P0108 (circuit high).
Most Likely Causes

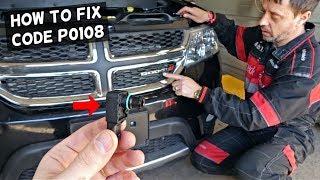
- Faulty Manifold Absolute Pressure (MAP) Sensor 🔴 High Probability The sensor is a common failure point across many Chrysler/Dodge vehicles of this era. Internal electronics can fail, causing it to send a constant high voltage signal. 🎬 Watch: Understanding P0108 causes and how to fix them. The sensor is located on the intake manifold and is exposed to heat and vibration.
How to confirm: With the key on but the engine off (KOEO), use a scan tool to read the MAP sensor voltage. It should be around 4.5-4.8 volts at sea level. When the engine starts, the voltage should drop to 1.0-2.0 volts at idle. If the voltage is stuck near 5V and doesn't change, the sensor is bad. A multimeter can also be used to back-probe the signal wire to verify the voltage readings.
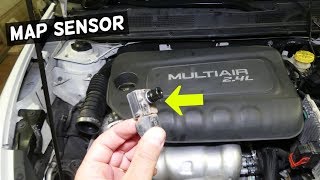
Typical fix: Replace the MAP sensor. On the 2.4L engine, it is on the front of the intake manifold. On the 3.6L V6, it is on the top of the intake manifold, easily visible after removing the plastic engine cover. 🎬 See this walkthrough for replacing the V6 MAP sensor. The sensor is typically removed by twisting it counter-clockwise to unlock it.
Est. part cost: $25-$95 - Wiring or Connector Issue 🟡 Medium Probability Engine vibration and heat can cause wiring to chafe or connectors to become loose or corroded. Oil from other leaks can also contaminate the connector and degrade the wiring insulation.
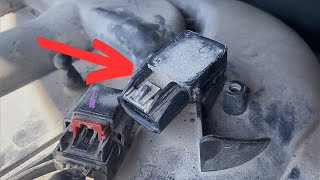
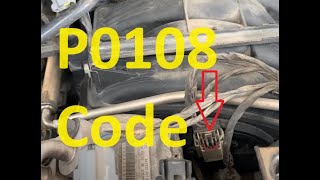
How to confirm: Visually inspect the wiring harness leading to the MAP sensor for any signs of damage, melting, or corrosion. Check the connector for bent or corroded pins and ensure the red locking tab is secure. Use a multimeter to check for a 5-volt reference and good ground at the connector with the key on.
Typical fix: Repair the damaged section of wiring or clean/replace the electrical connector pigtail.
Est. part cost: $5-$50 - Clogged Catalytic Converter ⚪ Low Probability While not specific to the Avenger, a severely clogged exhaust can create backpressure that genuinely increases manifold pressure, potentially triggering a P0108 code. This is often a secondary failure caused by long-term driving with a rich fuel condition from a bad MAP sensor.
How to confirm: A mechanic can perform an exhaust backpressure test. Other symptoms would include a significant loss of power, especially at higher RPMs, and potentially a sulfur or 'rotten egg' smell from the exhaust.
Typical fix: Replace the clogged catalytic converter.
Est. part cost: $500-$1500
Rare But Worth Checking
- Faulty Powertrain Control Module (PCM) or Outdated Software: This is rare, but TSB #1810216 mentions P0108 in conjunction with P0606 (Internal Control Processor), indicating the PCM itself can be the source of the fault. More commonly, TSB #18-085-15 indicates that a PCM software update is required to fix erroneous DTCs, including P0108, that set together on 2011 models. This should be considered if multiple unrelated codes are present or if a new MAP sensor does not fix the issue.
Diagnosis Steps

- Read all stored fault codes with an OBD-II scanner. Note any other codes that are present, as they can point to a broader electrical issue.
- Visually inspect the MAP sensor, its vacuum port on the manifold, and its electrical connector for any obvious damage, corrosion, or loose connections.
- Inspect the wiring harness leading to the sensor for chafing, breaks, or heat damage, especially where it might rub against other components.
- Using a scan tool with live data, observe the MAP sensor reading with the Key On, Engine Off (KOEO). The pressure reading should be close to your local atmospheric (barometric) pressure. The voltage should be around 4.5-5.0V at sea level.
- Start the engine. At idle, the MAP sensor voltage should drop significantly to around 1.0-2.0V as vacuum is created. If the reading remains high (near 5V) and does not respond to engine RPM changes, the sensor is very likely faulty.
- If the sensor reading is suspect, use a multimeter to verify the sensor has a 5-volt reference signal 🎬 Watch: How to test the MAP sensor circuit with a multimeter. and a solid ground connection at the connector.
- If the sensor and wiring check out, check for any available PCM software updates by contacting a dealership, especially if multiple unrelated DTCs are present, as per TSB #18-085-15.
- If all else fails, consider investigating less common causes like an exhaust restriction (clogged catalytic converter).
Parts You'll Likely Need
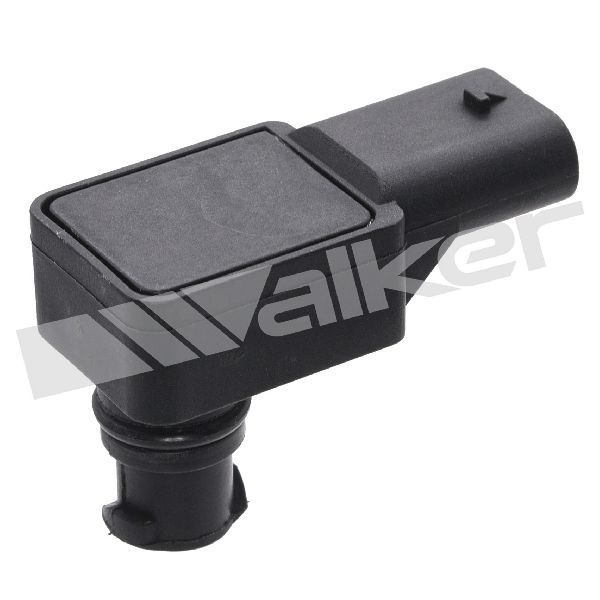
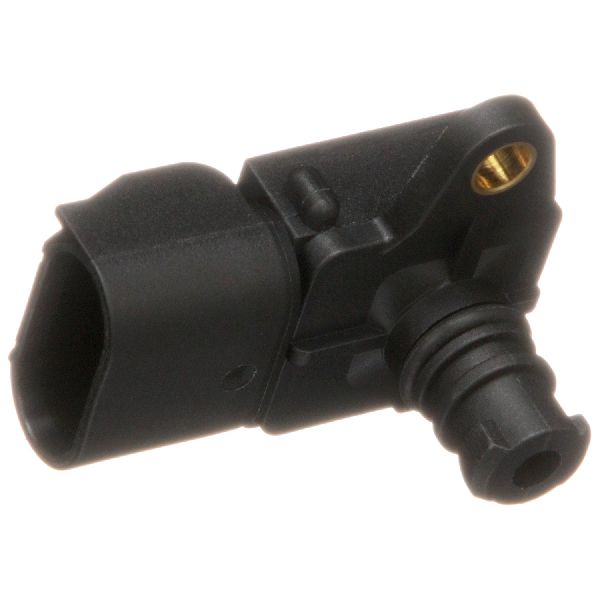
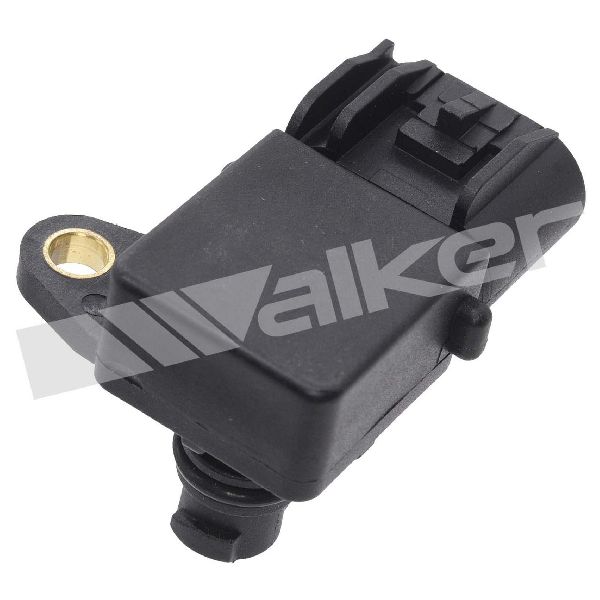
- Manifold Absolute Pressure (MAP) Sensor
(OEM #68371847AB (supersedes 5149174AB))— This is the most frequent cause of P0108. The internal electronics fail, causing an incorrect high voltage signal.
Trusted brands: Mopar, NGK/NTK, Delphi, Standard Motor Products (SMP)
OEM price range: $60-$95
Aftermarket price range: $25-$50
Related Codes That Often Appear With This One
- P0107 — This code for 'MAP Sensor Circuit Low' can appear intermittently if the sensor or wiring is failing erratically.
- P0300-P0306 — Misfire codes (like P0306 cited in TSB #1810216) can be triggered because the incorrect MAP sensor reading leads to an improper air-fuel mixture, causing combustion instability.
- P0522 — As seen in TSB #18-085-15, this code for 'Engine Oil Pressure Sensor Circuit Low' can appear with P0108, suggesting a potential shared wiring harness or a PCM software issue affecting multiple sensors.
- P0420 — A user on Reddit reported seeing P0420 ('Catalyst System Efficiency Below Threshold') along with P0108, which can happen if the rich fuel mixture caused by the bad MAP sensor damages the catalytic converter over time.
Technical Service Bulletins (TSBs) & Recalls
- 1810216: Mentions P0108 - Manifold Absolute Pressure Sensor Circuit High in a list of potential diagnostic trouble codes that can appear alongside serious faults like P0606 (Internal Control Processor).
- 18-085-15: Lists P0108 as one of several codes that can be resolved by reprogramming the PCM with new software, indicating a known software glitch on 2011 models.
Platform-Specific Known Issues
- TSB Regarding Multiple DTCs: TSB #18-085-15 for 2011 models links P0108 with several oil pressure and temperature sensor codes, pointing to a required PCM software update rather than a simple sensor failure.
- Owner Experience: Simple Sensor Swap Fix: A user on AvengerForumz with a 2012 Avenger 2.4L reported symptoms of the car bucking, stalling, and having the check engine light on with code P0108. The issue was completely resolved by replacing the MAP sensor with a new part. This is a typical repair story for this code.
Mechanic-Grade Diagnostic Values
- MAP Sensor Connector - 5V Reference Supply — expected: 4.5 to 5.0 Volts DC with ignition on, engine off (KOEO).. Failure: Voltage significantly below 4.5V indicates a wiring or PCM issue.
- MAP Sensor Signal Voltage (KOEO) — expected: Approximately 4.5 to 5.0 Volts DC at sea level.. Failure: A low or zero voltage reading points to a sensor or wiring fault.
- MAP Sensor Signal Voltage (Engine Idling) — expected: Should drop to between 1.0 and 2.0 Volts DC.. Failure: Voltage remains stuck near 5V, indicating the sensor is not reading manifold vacuum.
- MAP Sensor Ground Circuit — expected: Near 0 ohms resistance to chassis ground, or near 12V when testing between battery positive and the ground wire.. Failure: High resistance (open circuit) or no voltage indicates a bad ground connection.
Scan Tool Commands That Help
- Advanced Scan Tool (e.g., XTOOL, Autel, wiTECH): Graphing Live Data for MAP Sensor Voltage/Pressure — Used to observe the sensor's response to throttle changes. Snapping the throttle should cause a rapid change in voltage/pressure. A flat line indicates a dead sensor.
Wiring & Ground Locations

- MAP Sensor Connector (3-Pin) — On the MAP sensor itself, which is mounted to the intake manifold.. This is the primary point of failure for wiring issues. The pins must be clean and making good contact. The typical pinout for Chrysler/Dodge is: Pin 1: Sensor Ground, Pin 2: 5V Reference, Pin 3: Signal to PCM.
- MAP Sensor Connector Wires — In the harness leading to the MAP sensor.. Wire colors can help identify the function of each pin for testing. While colors can vary, a common Chrysler pattern is: Ground (Black/Light Blue or similar), 5V Supply (Orange or Violet/Yellow), and Signal (Yellow or Dark Green/Red). Always verify with a multimeter, as colors can be inconsistent.
Real Owner Repair Stories
- Reddit user in r/MechanicAdvice (2013 Dodge Avenger, 2.4L, 171k miles) — Intermittent stalling where RPMs drop to 0 and steering/brakes stiffen. Also experienced 'hiccups' where RPMs would drop suddenly while driving.
❌ Tried (didn't work) Replacing the fuel pump, Replacing ignition coils and spark plugs, Replacing the crankshaft position sensor (twice)
✅ What actually fixed it The user's mechanic suspected an issue that was not worth fixing on the high-mileage vehicle, and the user was planning to sell it. However, another user with the identical car and symptoms reported that replacing the crankshaft position sensor resolved their stalling issue, suggesting the first user may have had a faulty replacement part or a related wiring issue.
OEM Part Supersession History
5149174AA, 5149174AB→68371847AA, which was then superseded by 68371847AB— Standard part revision and consolidation by the manufacturer.
Heads up: The newest part number, 68371847AB, is the correct service replacement for all prior versions and is compatible with the 3.6L V6 engine.
Model Year Variations Within This Range
- 2011: TSB #18-085-15 specifically calls out 2011 models for a potential software glitch where P0108 can be set erroneously along with other codes like P0522 (Oil Pressure Sensor). The fix is a PCM software update, which may not be required for later model years.
Helpful Videos
We Have This Part in Stock


The information in this article is provided for general reference and educational purposes only. Vehicle specifications, procedures, and part compatibility can vary by production date, trim level, and region. Always consult your vehicle's factory service manual and verify part numbers before purchasing or performing repairs. Safety-critical components such as airbags, seat belts, and braking systems should be installed by a qualified professional.
- Dodge AVENGER:
- 🎬 Helpful Videos
- 🛍️ Shop This Part
- What's Unique About the 2011-2014 Dodge AVENGER
- Diagnostic Flowchart
- Symptoms You May Notice
- Most Likely Causes
- Rare But Worth Checking
- Diagnosis Steps
- Parts You'll Likely Need
- Related Codes That Often Appear With This One
- Technical Service Bulletins (TSBs) & Recalls
- Platform-Specific Known Issues
- Mechanic-Grade Diagnostic Values
- Scan Tool Commands That Help
- Wiring & Ground Locations
- Real Owner Repair Stories
- OEM Part Supersession History
- Model Year Variations Within This Range
- 🎟️ Get 5% Off