

P0106 on 2013-2017 Cadillac ATS: MAP Sensor Performance Causes and Fixes
Code P0106 on a Cadillac ATS often points to a faulty Manifold Absolute Pressure (MAP) sensor, a vacuum leak, or loose intake manifold bolts. On the 2.0T engine, a cracked PCV hose is a very common culprit. Before replacing the MAP sensor, inspect for these specific issues. GM TSB PIP5529B advises checking for loose intake manifold bolts if multiple engine codes are present. Replacing the MAP sensor is an easy DIY job, with the part costing $40-$120.
- P0106 on a 2013-2017 Cadillac ATS indicates a performance problem with the MAP sensor circuit.
- The most common fix is replacing the MAP sensor, which is an accessible and affordable DIY repair.
- Before replacing the sensor, always inspect for vacuum leaks (cracked hoses, bad gaskets) and check the sensor's wiring connector, as these can cause the same code.
- This code is often accompanied by others like P0068 (MAP/TPS Correlation) or P0171 (System Lean), which can help pinpoint the root cause.
- GM has issued TSBs (PIP5529B, PIP5529A) acknowledging that P0106 can be part of a larger, more complex diagnostic issue. [PIP5529B, PIP5529A]
What's Unique About the 2013-2017 Cadillac ATS
On the Cadillac ATS, the MAP sensor is crucial for managing the air-fuel mixture across all engines, but the 2.0L Turbo is especially sensitive for boost management. The key differentiator for this platform is a known issue with loose intake manifold bolts. GM issued Technical Service Bulletin (TSB) PIP5529B, which groups P0106 with a wide array of other codes (like P0068, P0101, P0171). The TSB advises that if standard diagnostics don't find a cause, technicians should inspect for loose intake manifold bolts. The official fix is to remove each bolt one at a time, apply medium-strength threadlocker, and torque to specification, which often resolves the code without replacing any parts. Additionally, the brittle plastic PCV hose assembly on the 2.0T engine is a very common failure point that creates a vacuum leak, triggering P0106 and P0171 codes.
Diagnostic Flowchart
Tap your situation to follow the diagnostic path that matches what you're seeing on this vehicle.
Symptoms You May Notice
- Check Engine Light is on
- Rough or unstable idle
- Hesitation or stumbling during acceleration
- Noticeable loss of engine power
- Decreased fuel economy
- Black smoke from the exhaust, indicating a rich fuel condition
- Engine may stall when coming to a stop
- Engine may be difficult to start
- Replacing the MAP sensor without first checking for vacuum leaks, especially the common PCV hose on the 2.0T and loose intake manifold bolts.
- Replacing the throttle position sensor (TPS) without confirming the MAP sensor is functioning correctly.
- Replacing oxygen sensors when the root cause is a vacuum leak causing a lean or rich condition.
Most Likely Causes
- Faulty Manifold Absolute Pressure (MAP) Sensor 🔴 High Probability The sensor can fail due to age, heat cycles, or contamination from oil and carbon buildup inside the intake manifold. In freezing temperatures, ice can form on the sensor during long drives, causing a temporary P0106 code that may resolve on its own after the engine warms up, an issue noted in a TSB for the related Cadillac CTS.
How to confirm: With a scan tool, check the MAP sensor reading (in kPa or volts) with the Key On, Engine Off (KOEO). It should match the barometric pressure. At idle, the reading should drop significantly. If the reading is stuck or doesn't change with engine RPM, the sensor is likely bad.
Typical fix: Replace the MAP sensor. It is typically mounted directly on the intake manifold and secured by a single bolt.
Est. part cost: $40-$120 - Vacuum Leak 🔴 High Probability On the 2.0L Turbo engine, the plastic PCV hose assembly is a very common failure point, becoming brittle and cracking over time. For all engines, TSB PIP5529B points to loose intake manifold bolts as a specific and known cause for P0106, especially when other codes are present.
How to confirm: Visually inspect the PCV hoses on top of the 2.0T engine for cracks. For all engines, check the intake manifold bolts to ensure they are torqued to spec. A hissing sound at idle is a tell-tale sign. A smoke test is the most effective way to pinpoint the source of a leak.
Typical fix: Replace the cracked PCV hose assembly (a common part is GM #12673868 for the 2.0T). If intake bolts are loose, remove them one by one, apply threadlocker, and re-torque to factory specifications as per TSB PIP5529B.
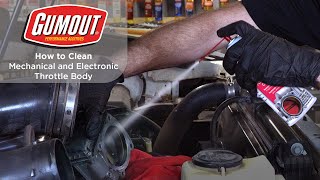
Est. part cost: $10-$150 - Dirty Throttle Body 🟡 Medium Probability Carbon and oil vapor can build up on the throttle plate and bore over time. Since the ATS uses a drive-by-wire system, this buildup can restrict the minimum airflow at idle, forcing the ECM to open the throttle plate more than expected. This can create a discrepancy between the MAP reading and the expected engine load, triggering a P0106 code. This is sometimes reported after a battery disconnect, which can cause the ECM to lose its learned idle values.
How to confirm: Visually inspect the inside of the throttle body for a ring of black carbon buildup. The engine may have an unstable idle.
Typical fix: Clean the throttle body bore and plate thoroughly with a dedicated throttle body cleaner and a soft cloth or brush. An idle relearn procedure may be necessary afterward.
Est. part cost: $5-$15 - Wiring or Connector Issue ⚪ Low Probability
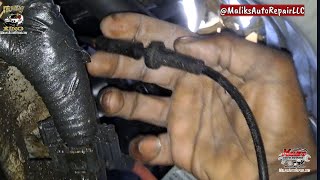
How to confirm: Inspect the MAP sensor's electrical connector for corrosion, moisture, or loose pins. Check the wiring harness for any signs of damage, chafing, or breaks. Use a multimeter to check for a 5-volt reference signal and a good ground at the connector.
Typical fix: Clean the connector terminals or repair the damaged section of the wiring harness.
Est. part cost: $5-$50
Rare But Worth Checking
- Clogged Catalytic Converter: A severely clogged catalytic converter can create excessive backpressure in the exhaust, which can affect the pressure in the intake manifold and trigger a P0106 code. This is usually accompanied by other codes and a significant loss of power. One owner of a related GM vehicle reported this as the ultimate fix after many other attempted repairs.
- Faulty Engine Control Module (ECM): This is the least likely cause. Before condemning the ECM, all other possibilities, including sensors, wiring, and vacuum leaks, must be thoroughly ruled out.
Diagnosis Steps
- Connect an OBD-II scanner and confirm the P0106 code. Check for any other stored codes (especially P0171, P0068, P0101) and review freeze-frame data.
- With the Key On, Engine Off (KOEO), read the live data from the MAP sensor. The pressure reading should be close to the barometric pressure (BARO) reading.
- Start the engine and observe the MAP sensor reading at idle. It should drop to a low pressure/high vacuum reading. Briefly snap the throttle; the reading should rise sharply and then fall.
- Perform a thorough visual inspection of the intake system. On the 2.0T engine, pay close attention to the plastic PCV hose assembly for cracks.
- Per TSB PIP5529B, inspect the intake manifold bolts to ensure they are properly torqued. If multiple codes are present, this is a high-probability cause.
- Inspect the MAP sensor's electrical connector and wiring for any signs of damage, corrosion, or loose connections.
- Inspect the throttle body for heavy carbon buildup and clean if necessary.
- If no vacuum leaks or wiring issues are found, the MAP sensor itself is the most likely culprit.
- To be certain, you can test the sensor with a multimeter. Check for a 5-volt reference signal and a good ground at the connector. Then, check the signal wire's voltage while applying vacuum with a hand pump; the voltage should change smoothly.
- If the sensor fails testing or if all other checks pass, replace the MAP sensor.
Parts You'll Likely Need
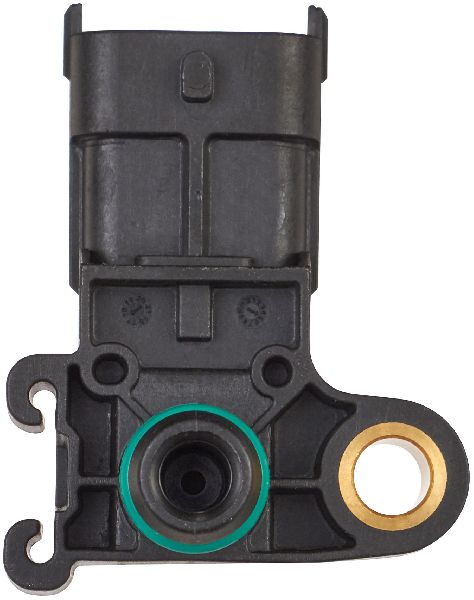
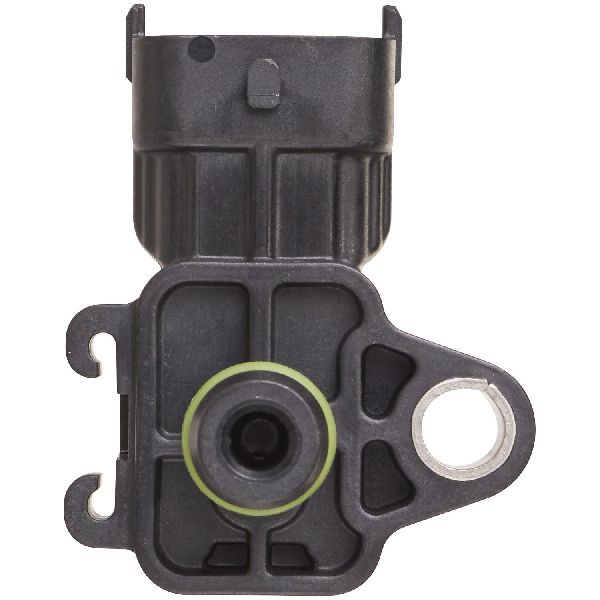
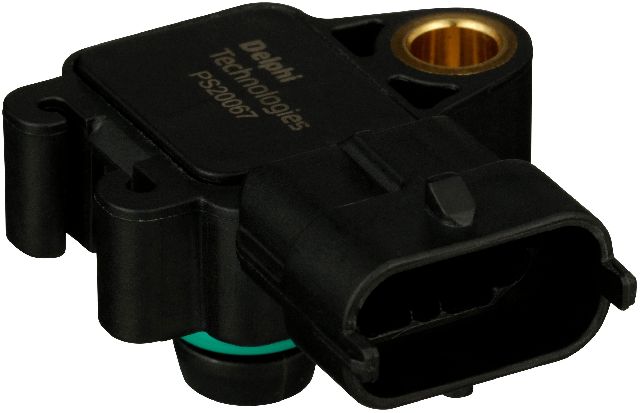
- Manifold Absolute Pressure (MAP) Sensor
(OEM #ACDelco 12650600 (for 3.6L V6) or ACDelco 213-4681 (for 2.5L/3.6L). For the 2.0T, check for 12643955 or 25203477, but verify with VIN.)— This is a frequent cause of a P0106 code, though it should only be replaced after ruling out vacuum leaks.
Trusted brands: ACDelco, Bosch, Delphi
OEM price range: $80-$150
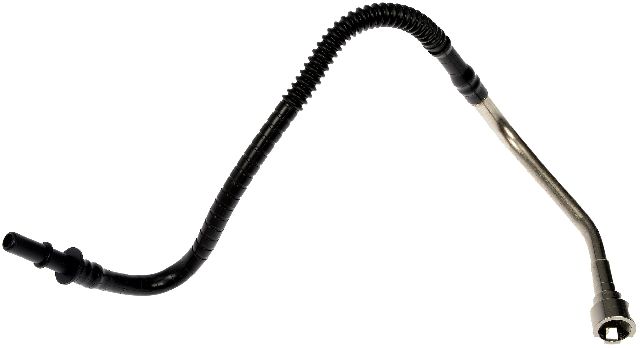
Aftermarket price range: $40-$80 - PCV Hose Assembly (2.0T)
(OEM #12673868)— A very common failure point on the 2.0L Turbo engine, this plastic hose cracks and causes a significant vacuum leak, triggering P0106 and P0171.
Trusted brands: ACDelco, GM Genuine
OEM price range: $40-$60
Aftermarket price range: $25-$45
Related Codes That Often Appear With This One
- P0068 — This code indicates a MAP/Throttle Position Correlation error. TSB PIP5529B explicitly lists this code alongside P0106 as being potentially caused by loose intake manifold bolts.
- P0171 — System Too Lean. A vacuum leak from a cracked PCV hose or loose intake manifold is a primary cause for both P0106 and P0171 appearing together on this platform.
- P0101 — Mass Air Flow (MAF) Sensor Performance. A significant vacuum leak causes a conflict between MAF and MAP sensor readings, often triggering both codes. This is also listed in TSB PIP5529B.
- P0107 — MAP/BARO Circuit Low Input. This code points more specifically to a low voltage condition from the sensor, often caused by the same faults as P0106, such as a bad sensor or wiring issue.
Technical Service Bulletins (TSBs) & Recalls
- PIP5529B: Advises technicians to check for loose intake manifold bolts when P0106 appears with a cluster of other codes, and to apply threadlocker and re-torque them as the primary fix.
- PIP5529A: An earlier version of the bulletin above, highlighting the same potential for multiple codes appearing at once due to loose intake bolts.
Platform-Specific Known Issues
- TSB PIP5529B: Loose Intake Manifold Bolts: GM Technical Service Bulletin #PIP5529B is critical for this code. It notes that P0106 can appear with a combination of other codes (P0068, P0101, P0171, etc.). Before replacing any components, technicians are advised to check if the intake manifold bolts are loose. The official repair is to remove one bolt at a time, apply medium-strength threadlocker, and re-torque to 10 Nm (7.4 ft-lbs).
Mechanic-Grade Diagnostic Values
- MAP Sensor Signal Voltage (KOEO) — expected: ~4.5 V at sea level (matches Barometric Pressure). Failure: Voltage is significantly different from BARO reading, stuck high or low.
- MAP Sensor Signal Voltage (at idle) — expected: ~1.0 - 1.5 V (high vacuum). Failure: Voltage is high (e.g., > 2.5V) at idle, suggesting a vacuum leak or bad sensor.
- MAP Sensor Voltage Change with Vacuum — expected: Voltage should drop 0.7 to 1.0 V for every 5 in. Hg of vacuum applied with a hand pump.. Failure: Voltage does not change smoothly, has dropouts, or does not respond to vacuum.
- MAP Sensor 5V Reference Circuit — expected: Approximately 5.0 V at the connector with the key on.. Failure: Voltage is low or absent, indicating a wiring or ECM issue.
- MAP Sensor Ground Circuit — expected: Less than 0.1 V (100 mV) between the ground pin and battery ground.. Failure: Higher voltage indicates a poor ground connection, which can skew sensor readings.
- Intake Manifold Bolt Torque — expected: 10 Nm (7.4 ft-lbs). Failure: Bolts are found to be loose to the touch or require less than specified torque to turn.
Scan Tool Commands That Help
- GDS2 / Professional Scan Tool: Graphing MAP Sensor Data — To diagnose an intermittent sensor fault. Graphing the sensor's voltage or pressure reading while driving or revving the engine can reveal dropouts, glitches, or slow response times that are not visible in a standard numeric live data view.
- GDS2 / Professional Scan Tool: Sensor Programming/Setup — After replacing certain OEM GM sensors. Some replacement parts may require a programming or setup procedure with a dealer-level scan tool to be properly recognized by the ECM.
Wiring & Ground Locations
- MAP Sensor Connector Pinout (Typical) — On the MAP sensor, which is mounted to the intake manifold.. Knowing the pinout is essential for testing the sensor's power, ground, and signal circuits directly at the connector. A typical GM 3-pin setup is: Pin 1 (or C) = 5V Reference (often an orange wire), Pin 2 (or A) = Ground (often black/white), Pin 3 (or B) = Signal (wire color varies).
- G101 — Typically located on the lower front of the engine block.. This ground point is often used for the Engine Control Module (ECM). A poor connection at G101 can cause erratic behavior from multiple sensors, including the MAP sensor.
- G104 — On the cylinder head. For 3.6L engines, it's on the front of the right cylinder head. For 4-cylinder engines, it's on the lower rear of the cylinder head.. This is a primary engine ground point. A loose or corroded G104 can cause incorrect readings from sensors grounded to the engine block or head.
Real Owner Repair Stories
- CadillacForums User Experience (2013 Cadillac ATS 2.0T) — Check Engine Light with codes P0106, P0101, and P0171.
❌ Tried (didn't work) Replacing the MAP sensor
✅ What actually fixed it The owner found that the intake manifold bolts were loose. After tightening the bolts to the proper torque specification, the codes were resolved. This directly confirms the issue described in GM TSB #PIP5529B.
OEM Part Supersession History
12653415→25203482— Part update or revision by the manufacturer.
Heads up: Always verify the correct part number with the vehicle's VIN, as multiple MAP sensors were used across different engines and model years.
Model Year Variations Within This Range
- 2013-2017: The 3.6L V6 engine was updated for the 2016 model year. 2013-2015 models used the LFX engine (321 hp), while 2016-2017 models used the significantly redesigned LGX engine (335 hp). The LGX features a stiffer block, improved direct injection, and Active Fuel Management. While the P0106 diagnostic process is similar, technicians should be aware of which engine they are working on as some components and software calibrations differ.
Helpful Videos

![How to Fix P0106 Engine Code in 2 Minutes [1 DIY Method / Only $11.78]](https://img.youtube.com/vi/p7cjbS5B6OI/mqdefault.jpg)
We Have This Part in Stock


The information in this article is provided for general reference and educational purposes only. Vehicle specifications, procedures, and part compatibility can vary by production date, trim level, and region. Always consult your vehicle's factory service manual and verify part numbers before purchasing or performing repairs. Safety-critical components such as airbags, seat belts, and braking systems should be installed by a qualified professional.
- Cadillac ATS:
- 🎬 Helpful Videos
- 🛍️ Shop This Part
- What's Unique About the 2013-2017 Cadillac ATS
- Diagnostic Flowchart
- Symptoms You May Notice
- Most Likely Causes
- Rare But Worth Checking
- Diagnosis Steps
- Parts You'll Likely Need
- Related Codes That Often Appear With This One
- Technical Service Bulletins (TSBs) & Recalls
- Platform-Specific Known Issues
- Mechanic-Grade Diagnostic Values
- Scan Tool Commands That Help
- Wiring & Ground Locations
- Real Owner Repair Stories
- OEM Part Supersession History
- Model Year Variations Within This Range
- 🎟️ Get 5% Off