

P0071 on 2017-2024 Chrysler Pacifica: Ambient Air Temp Sensor Causes and Fixes
P0071 on a Chrysler Pacifica most often means the Ambient Air Temperature (AAT) sensor has failed or its wiring is damaged. This sensor is usually clipped to the active grille shutter assembly behind the front bumper. Expect to pay $20-$50 for a new sensor and spend under an hour on this simple DIY fix, which often doesn't require full bumper removal.
- P0071 on a Pacifica is almost always caused by a bad ambient air temperature sensor or its wiring.
- Key symptoms are a wrong outside temperature on the dash and problems with the automatic A/C.
- The sensor is located behind the front bumper/grille, clipped to the active shutter assembly, making it a common victim of road debris.
- This is a simple and inexpensive DIY repair that usually does not require removing the entire front bumper.
What's Unique About the 2017-2024 Chrysler PACIFICA

On many Chrysler vehicles, including the Pacifica, the AAT sensor is located in a vulnerable spot clipped to the lower part of the Active Grille Shutter (AGS) assembly. This location, directly behind the front grille, makes it highly susceptible to damage from road debris, water intrusion from rain and car washes, and minor parking lot bumps. The wiring harness is also exposed. Chrysler has issued multiple Technical Service Bulletins (TSBs) for this code on various models, indicating it's a recognized issue. The primary 🎬 Watch: A quick overview of P0071 symptoms and common causes symptoms owners notice are an incorrect outside temperature display and erratic automatic climate control operation because the system relies on this reading to function.
Diagnostic Flowchart

Tap your situation to follow the diagnostic path that matches what you're seeing on this vehicle.
Symptoms You May Notice
- Check Engine Light is on
- Inaccurate outside temperature reading on the dashboard or infotainment screen (may be stuck at a nonsensical value like -40°F)
- Automatic climate control (A/C and heat) does not work correctly or blows air at the wrong temperature
- Engine start/stop system may be disabled
- Remote start may not function
- A/C system may blow only hot air as a default failsafe
- Recharging the A/C system or replacing A/C components before diagnosing the AAT sensor. A faulty sensor is a common cause of A/C problems and should be checked first when P0071 is present.
Most Likely Causes

- Failed Ambient Air Temperature (AAT) Sensor 🔴 High Probability The sensor is an electronic component exposed to harsh environmental conditions (rain, snow, road salt, impacts) at the front of the vehicle, leading to a higher failure rate. Its placement on the active shutter assembly also subjects it to constant vibration.
How to confirm: After locating the sensor behind the front grille, check for physical damage. Use a multimeter set to Ohms (Ω) to test its resistance; the reading should change when gently heated with a hairdryer. If the resistance is infinite (open circuit), zero (short circuit), or doesn't change with temperature, the sensor is bad.
Typical fix: Replace the ambient air temperature sensor. It is typically held in place by a simple clip or a single screw and is a plug-and-play part. Access can often be gained by removing the plastic radiator cover on top and reaching down, avoiding full bumper removal.
Est. part cost: $20-$50 - Damaged Wiring or Connector 🟡 Medium Probability The sensor's location makes its wiring harness vulnerable to being snagged, cut by road debris, or corroded from water and salt spray. The wires can also fatigue and break right at the connector from vibration.
How to confirm: Visually inspect the wiring leading to the AAT sensor for any signs of fraying, pinching, or breaks. Check the connector for green or white corrosion, moisture, or pushed-out pins. Wiggle the connector and wiring while observing live data on a scan tool to see if the temperature reading fluctuates, indicating an intermittent connection.
Typical fix: Repair the damaged section of wire using weatherproof butt connectors or solder and heat shrink. If the connector itself is damaged, replace it with a new pigtail connector.
Est. part cost: $10-$30
Rare But Worth Checking
- Powertrain Control Module (PCM) Issue: This is very rare and should only be considered after the sensor and wiring have been thoroughly tested and proven to be good. A faulty PCM can misinterpret a valid sensor signal.
- Active Grille Shutter (AGS) Malfunction: In some cases, a fault within the AGS assembly, which houses the sensor, can damage the sensor or its wiring. If you also have codes like U11E9 or P059F, the AGS system should be inspected as the root cause.
Diagnosis Steps
- Read the code with an OBD-II scanner to confirm P0071 is active.
- Check the outside temperature display on your dashboard. If it's stuck, blank, or clearly wrong (e.g., -40°F on a warm day), it points strongly to the AAT circuit.
- Locate the AAT sensor. On the Pacifica, it is typically found clipped into the lower, driver's side of the active grille shutter assembly, visible through the lower grille opening.
- Visually inspect the sensor and its connector for obvious damage, corrosion, or loose connections. Look for broken wires right at the back of the connector.
- Disconnect the sensor. Inspect the connector terminals for moisture or damage. Clean with electrical contact cleaner if necessary.
- Use a multimeter to test the sensor. Measure the resistance across its two pins. The value should change with temperature (a thermistor). If you see an open circuit (infinite resistance), the sensor is bad.
- If the sensor seems okay, test the wiring. With the key on and sensor unplugged, one wire in the connector should have a 5-volt reference signal from the PCM, and the other should be a good ground.
- If wiring and sensor test good, the issue may be an intermittent connection. Securely reconnect everything, clear the code, and drive to see if it returns. A wiggle test on the harness while watching live data can expose intermittent faults.
Parts You'll Likely Need
- Ambient Air Temperature Sensor
(OEM #68526273AA (may be superseded by 68612852AA))— This sensor is the most common failure point for the P0071 code due to its exposed location and electronic nature.
Trusted brands: Mopar, Dorman, Standard Motor Products (SMP), NTK
OEM price range: $35-$50
Aftermarket price range: $20-$40
Related Codes That Often Appear With This One
- P0072 — This code indicates 'Ambient Air Temperature Sensor Circuit Low,' often pointing to a short in the wiring. TSB #18-044-26 lists it alongside P0071.
- P0073 — This code indicates 'Ambient Air Temperature Sensor Circuit High,' often pointing to an open circuit, broken wire, or unplugged sensor.
- P0111 — This code relates to the 'Intake Air Temperature Sensor 1 Circuit Range/Performance.' The PCM compares the AAT and IAT sensor readings, so a fault in one can sometimes be flagged in relation to the other, as noted in TSB #18-044-26.
Technical Service Bulletins (TSBs) & Recalls

- 9004547: Addresses P0071 on Pentastar Upgrade Engines and the diagnostic path.
- 18-044-26: Notes P0071-00 as a possible code for 2017 models related to temperature sensor performance.
Platform-Specific Known Issues
- TSB #9004547: Specifically mentions code P0071 for vehicles with the Pentastar Upgrade Engine and 🎬 See this easy sensor fix on a Pentastar 3.6L engine advises following the standard diagnostic procedure, which may lead to sensor replacement.
- TSB #18-044-26: Lists P0071-00 as a potential Diagnostic Trouble Code (DTC) for 2017 models, grouping it with other temperature sensor rationality codes and suggesting a potential PCM software update may be part of the fix.
- Owner Experience: Successful DIY Repair: A user on pacificaforums.com with a 2018 Pacifica reported the P0071 code along with a disabled start/stop system and incorrect temperature display. They were able to access the sensor by removing the top radiator shroud, reaching down behind the grille, and unclipping the sensor from the active shutter assembly. After replacing the sensor (Mopar part 68526273AA), all symptoms were resolved and the code was cleared. This confirms a bumper removal is not always necessary.
Mechanic-Grade Diagnostic Values
- AAT Sensor Signal Voltage (at connector, unplugged, key on) — expected: ~5.0 Volts. Failure: Voltage significantly lower than 5.0V indicates a wiring issue to the PCM. A Chrysler diagnostic document notes to check if voltage is above 5.2V as part of a short-to-voltage test.
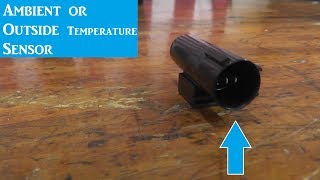
- AAT Sensor Resistance — expected: General specs are often between 1k-10k ohms at room temperature. The resistance should decrease as temperature increases and vice-versa.. Failure: An infinite reading (OL) indicates an open circuit, while a near-zero reading indicates a short. No change in resistance when heated or cooled also indicates 🎬 Watch: How to test and replace the sensor to fix A/C issues a failed sensor.
- PCM Rationality Check Parameters — expected: After a cold soak of over 480 minutes, the PCM compares AAT, IAT, and ECT sensor values.. Failure: A fault is set if the AAT sensor value is not within a calibrated range (e.g., +/- 10°C or 18°F) of the other two sensors.
Wiring & Ground Locations
- G917a — Front engine bay area, related to the headlamp and dash harness.. TSB #08-175-22 for 2022 models identifies this ground as a potential point for water intrusion, which can lead to AAT sensor codes like P0073 and communication codes like U11E9. Resealing this ground is a specific repair procedure.
- AAT Sensor Connector — Plugged into the AAT sensor, located behind the front lower grille on the active shutter assembly.. This is the primary connection point to test for the 5V reference from the PCM and the sensor's resistance. It is a 2-wire connector.
Real Owner Repair Stories
- Chrysler Forum user (2005 Chrysler Pacifica) — P0072 code (Circuit Low), Check Engine Light, A/C not functioning, HVAC display stuck at -40°F.
❌ Tried (didn't work) Replacing the AAT sensor.
✅ What actually fixed it The owner replaced the sensor pigtail harness by splicing in a new one. While this cleared the P0072 code and the PCM read the correct temperature via a scan tool, the HVAC display remained at -40°F initially. This highlights that even after a successful electrical repair, the body control or HVAC module may not update the display instantly.
OEM Part Supersession History
68526273AA→68612852AA— Unknown. Part number supersessions are common for revisions or manufacturer changes.
Heads up: No incompatibility is noted in public sources; 68612852AA is likely the correct current service part. However, the search results did not provide a definitive official supersession document, only vendor data suggesting the change.
Helpful Videos

We Have This Part in Stock


The information in this article is provided for general reference and educational purposes only. Vehicle specifications, procedures, and part compatibility can vary by production date, trim level, and region. Always consult your vehicle's factory service manual and verify part numbers before purchasing or performing repairs. Safety-critical components such as airbags, seat belts, and braking systems should be installed by a qualified professional.
- Chrysler PACIFICA:
- 🎬 Helpful Videos
- 🛍️ Shop This Part
- What's Unique About the 2017-2024 Chrysler PACIFICA
- Diagnostic Flowchart
- Symptoms You May Notice
- Most Likely Causes
- Rare But Worth Checking
- Diagnosis Steps
- Parts You'll Likely Need
- Related Codes That Often Appear With This One
- Technical Service Bulletins (TSBs) & Recalls
- Platform-Specific Known Issues
- Mechanic-Grade Diagnostic Values
- Wiring & Ground Locations
- Real Owner Repair Stories
- OEM Part Supersession History
- 🎟️ Get 5% Off