

OBD-II Code P0070: Ambient Air Temperature Sensor Circuit
The Ultimate Guide to What P0070 Means, Why It Triggers, and How to Fix It for Good
- P0070 triggers when the Powertrain Control Module detects an electrical fault in the outside air temperature sensor circuit, which automatically disables your A/C compressor to prevent system damage.
- A dashboard temperature reading stuck at -40°F confirms an open circuit, meaning the sensor is unplugged, a wire is completely severed, or the sensor failed internally.
- Inspect the wiring harness and connector before buying parts; broken wires inside the driver's door jamb boot cause the majority of P0070 codes on 2019-2024 Ram trucks.
- You can safely drive with a P0070 code, but the vehicle automatically fails state emissions inspections until you repair the circuit and complete a 20-minute drive cycle.
What Does P0070 Mean?

P0070 means your car's Powertrain Control Module (PCM) detects an electrical malfunction in the ambient air temperature (AAT) sensor circuit. This sensor, a basic thermistor, measures outside air temperature. The computer uses this data to display the dashboard temperature, regulate the A/C system, and cross-reference the Intake Air Temperature (IAT) and Engine Coolant Temperature (ECT) sensors to ensure all readings are logical.
Technical definition: The SAE/OBD-II definition for P0070 is "Ambient Air Temperature Sensor Circuit". The PCM triggers this code when the sensor's signal voltage falls outside the expected 0.1V to 4.9V range. The fault sets during a 'cold soak' check; if the vehicle sits for 8 hours, the AAT, IAT, and ECT sensors must read within a few degrees of each other. A significant deviation from the AAT sensor triggers P0070.
Can I Drive With P0070?
Yes. Driving with a P0070 code is safe and will not cause engine or transmission damage. However, it disables your automatic climate control and A/C compressor as a protective measure. You will experience hard starts in extreme temperatures and a 2-5% decrease in fuel economy. The vehicle automatically fails emissions tests, requiring repair before any state inspection.
Common Causes

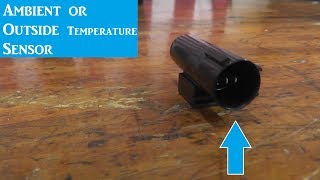
- Damaged or Failed Ambient Air Temperature (AAT) Sensor (Very Common) — The sensor itself is the most frequent point of failure. Located in the front grille, lower bumper, or a side mirror, it is highly vulnerable to damage from road debris, minor collisions, snowbanks, and high-pressure car washes.
- Severed or Corroded Wiring (Common) — The wiring harness leading to the sensor constantly faces road salt and moisture, causing rapid corrosion. Wires also fray or snap. On 2019-2024 Ram trucks, repeated flexing breaks the wires inside the driver's door jamb boot.
- Corroded or Loose Electrical Connector (Common) — The electrical plug connecting the wiring to the sensor vibrates loose or fills with moisture. Green or white crusty buildup on the connector pins interrupts the 5-volt signal as effectively as a broken wire.
- Disconnected Sensor After Body Work (Less Common) — Body shop technicians frequently forget to plug the AAT sensor back in after replacing a front bumper cover or side mirror. Installing aftermarket tow mirrors without an integrated sensor also causes an immediate open circuit.
- Physical Obstruction or Debris (Less Common) — Mud, snow, or ice covers the sensor, insulating it from the outside air and causing it to send static or delayed readings to the PCM.
- Faulty Powertrain Control Module (PCM) (Very Rare) — The PCM itself rarely fails. You must only consider this after thoroughly testing the sensor, wiring, and connectors for continuity and proper voltage.
Symptoms

- Check Engine Light is On — The primary indicator that the PCM detected a circuit fault.
- Incorrect Outside Temperature Display — The dashboard temperature shows dashes (---) or defaults to exactly -40°F/-40°C, indicating an open circuit.
- Air Conditioning (A/C) Disabled — The A/C compressor refuses to turn on because the computer thinks it is freezing outside, a safety measure to prevent evaporator damage.
- Automatic Climate Control Fails — The 'Auto' setting for cabin temperature stops working or behaves erratically without an accurate outside temperature baseline.
- Hard Starting in Extreme Temperatures — The PCM uses AAT data for cold-start calculations. A faulty signal causes rough or extended cranking in very hot or cold weather.
- Decreased Fuel Economy (also visible on scanner) — The engine computer uses ambient temperature for minor fuel trim adjustments. An incorrect reading causes a 2-5% drop in fuel efficiency. 🎬 Watch: A breakdown of common bad sensor symptoms
Diagnostic Flowchart
Tap your situation to follow the diagnostic path that matches what you're seeing on this code.
Common Fixes & Costs
- Replace the Ambient Air Temperature Sensor — Parts: $15-$70, Labor: $50-$150, ~0.5 hr book time (DIY)
- Repair Damaged Wiring — Parts: $10-$30, Labor: $100-$250, ~1.5 hr book time (Intermediate)
- Clean or Replace the Electrical Connector Pigtail — Parts: $5-$45, Labor: $50-$100, ~0.8 hr book time (Intermediate)
- Reconnect Sensor After Body Work — Parts: $0, Labor: $0-$50, ~0.2 hr book time (DIY)
Used vs. New Parts: Buying Guide
When a used part is worth it: Buying a used AAT sensor rarely makes sense. The part is inexpensive new, and its exposed location means used parts have an unknown history of weather damage. Only buy used if the sensor is integrated into an expensive assembly, like a complete side mirror.
Donor-vehicle mileage cap: roughly under 40000 miles for the part to have meaningful remaining life.
Donor quality checklist:
- Verify the part number matches exactly.
- Inspect the connector pins on the used part for any signs of green or white corrosion.
- Avoid parts from vehicles in the 'Salt Belt' or coastal areas.
Decision logic:
- If The new aftermarket or OEM sensor costs less than $75 → Always buy new. The savings from a used part are minimal and not worth the risk of premature failure.
- If The sensor is integrated into an expensive assembly (e.g., side mirror over $300) → A used assembly from a low-mileage, accident-free donor is a cost-effective option.
- If The vehicle is very old and budget is the absolute top priority → A tested, working used sensor is acceptable, but it will not last as long as a new part.
Warranty tradeoff: Used parts from a salvage yard typically have a 30-90 day warranty. New aftermarket parts carry a 1-year to limited lifetime warranty. New OEM parts have at least a 1-year warranty.
Worst-case if a used part fails: $100-$250 if a used part fails shortly after installation, requiring repeat labor for diagnosis and replacement.
What Happens If You Wait — Timeline
- 0-1 month: Check Engine Light illuminates. The outside temperature display reads -40°F and the automatic A/C system disables itself. No mechanical drivability symptoms occur. (MPG impact: 0-2%% · Added cost: $0)
- 1-6 months: Continued lack of A/C. Cold starting becomes slightly rougher as the PCM lacks a key data point for fuel calculations, causing a minor drop in fuel economy. (MPG impact: 2-5%% · Added cost: $20-$50 in wasted fuel.)
- 6-12 months: The vehicle automatically fails required state emissions inspections, leading to fines or an inability to renew vehicle registration. No cascading mechanical damage occurs. (MPG impact: 2-5%% · Added cost: $50-$250 in potential fines or failed inspection fees.)
Cost of Not Fixing It
- 0-3 months: Inoperable A/C, incorrect temperature display, and automatic failure of any emissions test. Possible 2-5% decrease in fuel economy. (Added cost: Negligible)
- 3-12 months: Continued discomfort from lack of A/C. Minor effects on cold-start fuel calculations cause slightly rougher starts. No mechanical damage occurs. (Added cost: $0)
- 12+ months: The primary cost is the inability to pass mandatory state inspections, leading to fines or inability to renew vehicle registration. (Added cost: Potential fines or late registration fees.)
Diagnosis Steps
- Read Codes and Review Freeze Frame Data
Use an OBD-II scanner to confirm P0070. Note any related codes (P0071, P0072, P0073) or U-series codes like U11E9, which point to shared wiring faults. Review freeze-frame data to see the exact engine temperature and vehicle speed when the code triggered.
Tools: OBD-II Scanner (Beginner) - Visually Inspect the Sensor and Connector
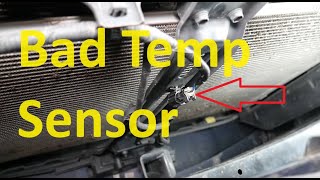
Locate the AAT sensor behind the front grille, in a lower bumper opening, or under a side mirror. Look for physical damage, severed wires, or debris. Unplug the connector and inspect for bent pins or green/white corrosion. Ensure it clicks securely when reconnected.
Tools: Flashlight (Beginner) - Perform a 'Cold Soak' Sensor Comparison
Let the car sit overnight (8+ hours). Before starting the engine, use a scanner to view live data for the AAT, IAT, and ECT sensors. All three must read within a few degrees of the actual outside temperature. If the AAT reads -40°F while the others are correct, the AAT circuit has a definitive open fault.
Tools: Advanced OBD-II Scanner (Beginner) - Check for 5V Reference and Ground at the Connector
Turn the ignition to 'On' (engine off). Disconnect the sensor and set your multimeter to DC Volts. Probe the wiring harness terminals. One wire must show a 5-volt reference signal from the PCM, and the other must be a ground (near 0 volts). Missing voltage confirms a wiring break between the sensor and the PCM.
Tools: Multimeter (Intermediate) - Test Sensor Resistance Against Temperature Charts
Set a multimeter to Ohms (Ω) and probe the disconnected sensor's pins. A common 10kΩ NTC thermistor reads roughly 10,000 Ohms at 77°F (25°C). Warm the sensor with your hand; the resistance must decrease smoothly. Infinite resistance (OL) means the sensor is internally broken and requires replacement.
Tools: Multimeter, Infrared Thermometer, Service Manual (Intermediate) - Conduct a Harness 'Wiggle Test'
If you suspect an intermittent connection, watch the live AAT data on a scanner while gently wiggling the wiring harness. Focus on areas where the harness bends, passes through door jambs, or clips to the frame. If the temperature reading jumps or drops to -40°F, you found the exact location of the wiring break.
Tools: Advanced OBD-II Scanner (Intermediate) - Perform a Voltage Drop Test for Wiring Faults
Back-probe the 5V reference wire at the sensor connector with the sensor plugged in and key on. Connect the positive multimeter lead to the battery positive post and the negative lead to your back-probe. A reading above 0.2 volts indicates excessive resistance (corrosion or partial break) in that wire. Repeat for the ground side.
Tools: Multimeter with back-probe pins (Advanced)
When This Code Triggers (Freeze-Frame Conditions)
- Engine Coolant Temp: Below 122°F / 50°C (During a cold start check where AAT, IAT, and ECT are compared.)
- RPM: 0 or 800-2500 (Code sets with key-on engine-off, or during steady driving.)
- Calculated Load: 15-40% (Normal light to moderate driving load when the fault is detected.)
- Vehicle Speed: 0-60 mph (Triggers while stationary or at highway speeds if an intermittent wiring fault occurs.)
Related Codes
- P0071 — Indicates 'Sensor Range/Performance'. The PCM sees a signal, but it is illogical (e.g., stuck at 50°F for an entire drive). P0070 is a general circuit fault, while P0071 points to an irrational reading.
- P0072 — Indicates 'Circuit Low'. The signal voltage is too low, proving a short to ground in the wiring or an internally shorted sensor. The scanner shows an impossibly high temperature reading.
- P0073 — Indicates 'Circuit High'. The signal voltage is too high, proving an open circuit. This is caused by a severed wire, unplugged connector, or missing sensor, resulting in a default -40°F reading.
- P0074 — Indicates 'Circuit Intermittent'. The signal cuts in and out, caused by a loose connection, corroded connector pins, or a frayed wire making intermittent contact.
Climate & Environmental Factors
- Road Salt & Humidity: Vehicles in the 'Salt Belt' or coastal areas experience rapid corrosion of the sensor's connector pins and wiring, leading directly to open circuits.
- Cold Climates & Snow: Sensors mounted low in the bumper are frequently crushed by impacts with snowbanks or ice chunks. Freeze-thaw cycles force moisture into the connector.
- Road Debris: The sensor's exposed location behind the front grille makes it a prime target for rocks and tire tread kicked up at highway speeds.
How to Talk to a Mechanic About This Code
Say this: "I have a P0070 code for the ambient air temperature sensor circuit, and my A/C isn't working. Before quoting a major wiring repair, please test the sensor itself and check for the 5-volt reference at the connector, since I know the sensor and connector are the most common points of failure."
This signals you've done your research and directs the mechanic to the least expensive fixes first. It prevents them from immediately quoting a high-priced diagnostic fee for a complex wiring trace.
Avoid saying:
- 'My check engine light is on, can you look at it?' (Too vague, invites unnecessary diagnostics).
- 'Just fix whatever is wrong.'
- 'My A/C doesn't work.' (Ignores the specific trouble code you already know).
Questions to ask before authorizing the repair:
- Did you test the sensor's resistance and compare it to spec?
- Did you confirm there is a 5-volt reference and a good ground at the sensor's connector?
- If you're recommending a wiring repair, can you show me exactly where the wire is broken or corroded?
- Is the price you're quoting for an OEM or aftermarket sensor?
Where to Take It: Dealer vs Independent vs Chain
- Dealer:
Recommended only for warranty work or complex TSBs. Otherwise, it is not cost-effective for this common fault.
Best for: Vehicles still under the basic or emissions warranty., Known manufacturer-specific issues covered by a Technical Service Bulletin (TSB), like the Ram door harness problem.
Downsides: Highest labor rates, often $150-$250 per hour., May replace an entire assembly (e.g., a whole side mirror) when only a small wire is broken. (Typical cost: +50% vs. baseline) - Independent Shop:
Best fit. A reputable independent mechanic is perfectly equipped to handle a P0070 code efficiently and cost-effectively.
Best for: Out-of-warranty vehicles where cost is a factor., Diagnosing common electrical faults like a bad sensor, corroded connector, or broken wire.
Downsides: Shop quality and diagnostic skill vary. Vet the shop through online reviews and ask if they are comfortable with electrical diagnosis. (Typical cost: +0% vs. baseline) - Chain Shop:
Acceptable for a straightforward sensor swap, but avoid for any diagnosis beyond that. If replacing the sensor doesn't fix it, they will likely be unable to solve the underlying wiring issue.
Best for: Simple, clear-cut sensor replacement if you are certain that is the problem.
Downsides: Technicians lack the diagnostic experience to trace a wiring fault., High pressure to 'upsell' services leads to recommendations for unnecessary repairs. (Typical cost: -10% vs. baseline)
When to Walk Away From the Repair
A P0070 repair is never a 'walk away' issue on its own, as the typical cost is very low ($100-$250). However, if a car has multiple problems, reconsider repairs if the total cost exceeds 40-50% of the car's private-party value.
- Car worth $5000, fix is $250: Fix it. The repair cost is minor compared to the vehicle's value and is necessary to pass emissions.
- Car worth $2000, fix is $250: Fix it. Even on an older car, this is a manageable cost to restore A/C function and ensure it can be legally registered.
- Car worth $2500, fix is $1800: Walk away. While the P0070 portion is small, the total repair cost approaches the car's value. Consider selling 'as-is'.
What Scan Tool You Need for This Code

Minimum: A scanner that reads and clears codes and displays live sensor data.
A $20 code reader only tells you the P0070 code is present. It cannot show the live temperature reading. Seeing a reading of -40°F (open circuit) or 250°F (short circuit) instantly tells you where to start looking, saving hours of guesswork.
Budget: BlueDriver Bluetooth Pro or Foxwell NT301 (~$100) — Connects to your phone or works as a handheld to display live data from the AAT, IAT, and ECT sensors. This is enough to perform the 'cold soak' test and confirm if the sensor's reading is illogical.
Mid-range: Autel MaxiCheck MX808S or Innova 5610 (~$350) — Provides advanced features like graphing multiple temperature sensors at once, making spotting intermittent drops from a bad wire much easier. These tools also read manufacturer-specific codes (like BMW's 2F9A).
Professional: Autel MaxiCOM MK906BT or similar (~$500-1200) — Offers full, professional-level diagnostics, including component testing and wiring diagrams directly on the tool. This is overkill for a single P0070 code but is a worthwhile investment for a serious DIYer.
Rent vs buy: For a one-time fix, major auto parts stores have a 'loan-a-tool' program where you borrow a scanner for free with a refundable deposit. If you do your own maintenance regularly, buying a budget pick like the BlueDriver is a smart investment.
How to Clear the Code After You Fix It
- Use an OBD-II scan tool to clear the active and pending codes.
- Perform a 'cold soak' by letting the vehicle sit for 8+ hours.
- Start the vehicle and let it idle for 2-3 minutes.
- Drive the vehicle through a complete drive cycle to run all readiness monitors.
Drive cycle (~20 minutes): After a cold start, idle for 2-3 minutes. Drive for 15-20 minutes with a mix of city (stop-and-go) and highway (steady speed around 55 mph for 5+ minutes) driving. Include several deceleration periods without using the brake.
Readiness monitors affected: Comprehensive Component Monitor, Catalyst Monitor, EVAP System Monitor, Oxygen Sensor Monitor
Before emissions retest: drive at least 50 miles to fully set monitors.
Watch out for:
- Clearing the code resets all readiness monitors, causing an immediate emissions test failure if not followed by a proper drive cycle.
- The code returns immediately if the underlying electrical fault (bad sensor, broken wire) is not actually fixed.
- Some EVAP monitors require the fuel tank to be between 15% and 85% full to run.
Will This Fail Emissions / State Inspection?
Yes — this code typically fails an OBD-II emissions inspection.
- California: An illuminated Check Engine Light is an automatic failure for the smog check. After repair, a complete OBD-II drive cycle must be performed to set all readiness monitors before a re-test.
- New York: A vehicle fails the annual safety/emissions inspection if the Check Engine Light is on. After clearing the code, the vehicle must be driven to reset the readiness monitors.
- Texas: In counties requiring an emissions test, an illuminated Check Engine Light is an automatic failure. After repair, drive 50-100 miles for the readiness monitors to complete before re-inspection.
Most Commonly Affected Vehicles

- Ram 1500/2500/3500 (2016-2024) — For 2019+ models, the sensor is in the driver's side mirror. The definitive cause is broken black and white wires inside the flexible rubber boot between the door and cab. TSBs S2208000080 and 9100463REV1 address this.
- Ford F-150 (2014-2023) — On 2014-2017 models, the sensor is behind the grille. On 2018-2023 models, Ford moved it to the passenger-side mirror. Installing aftermarket tow mirrors without the sensor triggers the code immediately.
- Chevrolet / GMC Cruze, Sonic, Silverado, Sierra (2010-2019) — On the Cruze and Sonic, the sensor sits extremely low on the front bumper and is easily crushed by parking blocks. On trucks, wiring damage behind the grille is the primary fault.
- BMW 3-Series (E90), 5-Series, X3, X5 (2006-2015) — Often paired with BMW-specific code 2F9A. The sensor sits in the lower driver's side wheel well and is frequently destroyed by road debris or parking curbs.
- Mercedes-Benz C-Class (W204), E-Class (W212) (2007-2017) — The sensor rarely fails; heavy corrosion on the wiring connector pigtail is the root cause. The connector must be cut out and replaced.
- Honda Accord, Civic (2003-2024) — The sensor sits behind the lower front bumper. Failure is almost always a straightforward, inexpensive sensor replacement due to age or minor impact.
- Chrysler / Dodge Pacifica, Voyager, Grand Caravan (2017-2024) — Linked to the Active Grille Shutter (AGS) system. If code U11E9 is present, the fault is a shared wiring issue in the AGS harness, not the AAT sensor.
Manufacturer-Specific Notes
- Ram (Dodge): On 2019+ trucks, broken wires inside the rubber boot between the driver's door and the cab cause 80% of P0070 codes. Do not replace the mirror assembly before checking these wires.
- Ford: Ford moved the sensor from the grille to the passenger side mirror in 2018. Owners frequently replace the wrong part. An HVAC module reset procedure is required after fixing the circuit.
- BMW: A generic scanner shows P0070, but a BMW scanner shows code 2F9A. The cause is almost always physical impact destroying the sensor in the lower bumper.
- Chrysler/Dodge/Jeep: On vehicles with Active Grille Shutters (AGS), P0070 is a symptom of a severed wire in the shared AGS harness. Code U11E9 confirms the AGS harness is the root cause.
Real Owner Stories
2019 Ram 1500 with 50K miles
Check Engine Light came on, A/C stopped blowing cold, and the outside temperature display stuck at -40°F.
What they tried:
- Initially suspected a bad sensor and considered replacing the entire side mirror assembly.
Outcome: The owner inspected the wiring inside the rubber boot between the driver's door and the truck's body. They found two broken wires (black and white). Soldering the wires and applying heat-shrink tubing immediately cleared the code and restored A/C function.
Lesson: On 2019+ Ram trucks, always inspect the driver's door jamb wiring boot for broken wires before replacing the sensor or mirror. This is the definitive cause of P0070 on these vehicles.
2020 Kia Telluride with A/C failure
A/C stopped working in 90°F weather, and the dash temperature display stuck below 20°F, triggering code P0070.
What they tried:
- Replaced the AAT sensor located in the front bumper twice with no change.
- Tested all three sensors with a multimeter and confirmed they worked.
- Mechanic suggested a major computer (PCM) failure.
Outcome: The owner traced the wiring harness and found a corroded ground wire near the bumper bracket. Repairing the wire fixed the issue.
Lesson: If replacing the sensor doesn't fix the code, the problem is in the wiring or connector. Never assume the PCM is faulty until you test the entire circuit for continuity and voltage.
2008 BMW 328xi (E90) after hitting road debris
The check engine light appeared, and the dash temperature fluctuated wildly between -40° and +122°F. The generic code was P0070, and the BMW-specific code was 2F9A.
What they tried:
- Inspected the sensor located in the front driver's side wheel well area.
Outcome: The sensor was knocked out of its mounting bracket and crushed by road debris. The owner replaced the sensor (Part #65816905133), cleared the codes, and resolved the problem.
Lesson: On many BMWs, the sensor sits in a highly vulnerable position in the lower bumper. Physical impact is the primary cause of failure; a visual inspection is the mandatory first step.
How to Prevent This Code From Triggering
- Apply Dielectric Grease to the Connector (Anytime the connector is unplugged) — Applying dielectric grease into the connector housing seals out moisture and road salt, preventing the corrosion that causes 50% of electrical failures for this exposed sensor.
- Secure Wiring Harness Away from Damage (During any front-end service) — Securing the sensor's wiring with zip ties keeps it away from sharp edges, moving parts, and impact zones, preventing chafed insulation and severed wires.
- Regularly Wash the Vehicle's Undercarriage (Monthly, especially in winter) — Washing the front bumper removes corrosive road salt and magnesium chloride that rapidly decay wiring insulation and connector pins.
Frequently Asked Questions
Can I drive my car with a P0070 code?
Yes, it is safe to drive. The code does not affect the primary functions of the engine or braking systems. The main inconvenience is a lack of properly functioning automatic A/C and an incorrect temperature display.
Why did my A/C stop working when I got the P0070 code?
Your car's computer uses the ambient air temperature sensor to protect the A/C system. If the sensor fails and sends a default -40°F signal, the computer prevents the A/C compressor from turning on to avoid freezing the evaporator core.
My temperature display says -40°F, what does that mean?
A reading of -40°F is a default value the computer displays when it detects an open circuit. This means the sensor is unplugged, a wire is completely broken, or the sensor failed internally. This is a classic symptom of a P0073 'Circuit High' code accompanying P0070.
I replaced the sensor, but the P0070 code came back. What now?
If a new sensor fails to fix the issue, the problem is in the wiring or the connector. Carefully inspect the wires for breaks or corrosion, especially in vulnerable areas like door jambs or near the front bumper. Test the wiring for the 5-volt reference and ground signals before replacing more parts.
Will a P0070 code clear itself?
No, the code does not clear itself. The Check Engine Light remains illuminated until you repair the underlying electrical fault. After the repair, clear the code with a scanner and complete a drive cycle.
Will my car fail an emissions test with a P0070 code?
Yes, any active Check Engine Light automatically fails a state emissions or smog inspection.
What's the difference between the AAT and IAT sensors?
The AAT sensor measures outside air for the climate control system and dashboard display. The IAT sensor sits in the engine's air intake and measures incoming air temperature, which is critical for calculating fuel mixture and ignition timing.
How much does it cost to fix a P0070 code?
A DIY repair costs between $15 and $70 for a new sensor. Professional repair ranges from $95 to $250, depending on whether it requires a simple sensor swap or a complex wiring trace.
Key Takeaways
- P0070 triggers when the Powertrain Control Module detects an electrical fault in the outside air temperature sensor circuit, which automatically disables your A/C compressor to prevent system damage.
- A dashboard temperature reading stuck at -40°F confirms an open circuit, meaning the sensor is unplugged, a wire is completely severed, or the sensor failed internally.
- Inspect the wiring harness and connector before buying parts; broken wires inside the driver's door jamb boot cause the majority of P0070 codes on 2019-2024 Ram trucks.
- You can safely drive with a P0070 code, but the vehicle automatically fails state emissions inspections until you repair the circuit and complete a 20-minute drive cycle.
Helpful Videos

The information in this article is provided for general reference and educational purposes only. Vehicle specifications, procedures, and part compatibility can vary by production date, trim level, and region. Always consult your vehicle's factory service manual and verify part numbers before purchasing or performing repairs. Safety-critical components such as airbags, seat belts, and braking systems should be installed by a qualified professional.
- 🎬 Helpful Videos
- What Does P0070 Mean?
- Can I Drive With P0070?
- Common Causes
- Symptoms
- Diagnostic Flowchart
- Common Fixes & Costs
- Used vs. New Parts: Buying Guide
- What Happens If You Wait — Timeline
- Cost of Not Fixing It
- Diagnosis Steps
- When This Code Triggers (Freeze-Frame Conditions)
- Related Codes
- Climate & Environmental Factors
- How to Talk to a Mechanic About This Code
- Where to Take It: Dealer vs Independent vs Chain
- When to Walk Away From the Repair
- What Scan Tool You Need for This Code
- How to Clear the Code After You Fix It
- Will This Fail Emissions / State Inspection?
- Most Commonly Affected Vehicles
- Manufacturer-Specific Notes
- Real Owner Stories
- 2019 Ram 1500 with 50K miles
- 2020 Kia Telluride with A/C failure
- 2008 BMW 328xi (E90) after hitting road debris
- How to Prevent This Code From Triggering
- Frequently Asked Questions
- Can I drive my car with a P0070 code?
- Why did my A/C stop working when I got the P0070 code?
- My temperature display says -40°F, what does that mean?
- I replaced the sensor, but the P0070 code came back. What now?
- Will a P0070 code clear itself?
- Will my car fail an emissions test with a P0070 code?
- What's the difference between the AAT and IAT sensors?
- How much does it cost to fix a P0070 code?
- Key Takeaways
- 🎟️ Get 5% Off