

OBD-II Code P0064: HO2S Heater Control Circuit High (Bank 2 Sensor 3)
What P0064 means, why it triggers, and how to fix it
- Code P0064 indicates a high-voltage electrical fault in the Bank 2, Sensor 3 oxygen sensor heater, requiring a multimeter to test for a burned-out internal element.
- Driving with a P0064 code drops fuel economy by up to 15% and guarantees an emissions test failure, so repair it within 14 days to prevent a $1,500 catalytic converter replacement.
- Replacing the $50-$250 oxygen sensor resolves 80% of P0064 cases, taking about 1 hour with a specialized 22mm O2 sensor socket.
- Jaguar and Land Rover owners with 2013-2017 models must check TSB JTB-00392-NAS-3, as fixing this code often requires a dealer-only PCM software update covered by a 15-year warranty.
What Does P0064 Mean?
P0064 means your car's Powertrain Control Module (PCM) detects a high-voltage problem with the heater inside the 'Bank 2, Sensor 3' oxygen sensor. This sensor must reach 600°F quickly to work correctly, and the heater's job is to get it to that temperature. A 'high' circuit fault means the PCM detects higher-than-normal voltage, pointing directly to an open circuit (like a burned-out heater element) or a short to power.
Technical definition: The official SAE/OBD-II definition is "HO2S Heater Control Circuit High (Bank 2 Sensor 3)". This indicates the Powertrain Control Module (PCM) detects voltage or resistance in the third oxygen sensor's heater circuit on the second engine bank above the normal specified range, confirming an open circuit or a short to a voltage source.
Can I Drive With P0064?
Yes, But With Caution. Yes, you can drive the vehicle, but fix it within two weeks. Ignoring it causes poor fuel economy, guarantees a failed emissions test, and leads to expensive catalytic converter damage. Driving with a faulty sensor heater prevents the PCM from accurately managing the fuel mixture, which overheats the catalytic converter and adds $800 to $2,500 to your repair bill.
Common Causes
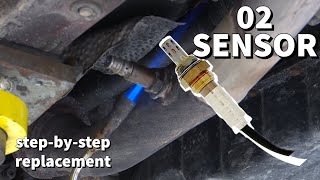
- Faulty Bank 2, Sensor 3 Oxygen Sensor (Very Common) — The internal heater element within the oxygen sensor is the most common failure point. It burns out, creating an open circuit the PCM reads as infinite resistance (high). This single component accounts for the vast majority of P0064 cases. 🎬 Watch: How to replace a faulty oxygen sensor
- Damaged or Shorted Wiring (Common) — The wiring harness leading to the oxygen sensor is exposed to extreme heat, road debris, and moisture. Wires melt, chafe against the frame, or corrode, leading to a short circuit to power that sends excessive voltage down the line.
- Corroded or Damaged Connector (Common) — The electrical connector where the sensor plugs into the vehicle's wiring harness becomes contaminated with water, oil, or dirt. This causes corrosion on the pins, resulting in high resistance or a short between pins.
- Exhaust Leaks (Less Common) — A significant exhaust leak upstream of the O2 sensor allows outside air into the exhaust stream. This alters sensor readings and causes the PCM to misinterpret sensor heater performance.
- Blown Fuse or Faulty Relay (Rare) — A blown fuse creates an open circuit, interpreted as a high voltage/resistance condition by the PCM. A stuck relay also causes this issue.
- Poor Ground Connection (Rare) — The heater circuit relies on a solid ground. A corroded or loose ground strap creates high resistance, which the PCM interprets as a high voltage fault.
- Software or Calibration Glitch (Rare) — On vehicles like Jaguar, the PCM's sensitivity for monitoring the heater circuit is too high. The sensor and wiring are fine, but a software glitch triggers the code, requiring a dealer PCM update.
- Faulty Powertrain Control Module (PCM) (Very Rare) — The internal driver circuit controlling power to the O2 sensor heater fails and gets stuck 'on', sending incorrect voltage. Consider this only after exhausting all other possibilities.
Symptoms
- Check Engine Light is On — The Check Engine Light steadily illuminates on the dashboard. This is often the only symptom the driver notices.
- Failed Emissions Test — A vehicle with an active P0064 code automatically fails a smog inspection because the malfunctioning heater disables the emissions readiness monitors.
- Rough Idle or Hesitation on Cold Starts — The PCM relies on a fast-acting oxygen sensor for cold starts. A delayed heater causes the engine to run rough or hesitate for the first few minutes.
- Reduced Fuel Economy (also visible on scanner) — The sensor takes longer to provide accurate readings, forcing the engine to run inefficiently in open-loop mode and burn 5-15% more gasoline.
- Delayed Closed-Loop Operation (scan-tool only — no driver-felt sign) — The PCM remains in 'open-loop' fuel control longer than usual after a cold start, observable via live scan tool data.
Diagnostic Flowchart
Tap your situation to follow the diagnostic path that matches what you're seeing on this code.
Common Fixes & Costs
- Replace Bank 2, Sensor 3 Oxygen Sensor — Parts: $50-$250, Labor: $80-$150, ~1 hr book time (DIY)
- Repair Damaged Wiring Harness — Parts: $10-$50, Labor: $100-$300, ~1.5 hr book time (Intermediate)
- Clean or Replace Sensor Connector — Parts: $5-$30, Labor: $50-$100, ~0.5 hr book time (DIY)
- Replace Blown Fuse — Parts: $1-$5, Labor: $0-$50, ~0.1 hr book time (DIY)
- Perform PCM Software Update — Parts: $0, Labor: $100-$250, ~1 hr book time (Professional)
- Replace Powertrain Control Module (PCM) — Parts: $600-$900, Labor: $200-$400, ~1.5 hr book time (Professional)
DIY vs Professional
- Replace Oxygen Sensor — Beginner:
Tools: Jack stands, ratchet, 22mm oxygen sensor socket, penetrating oil, torque wrench. - Repair Wiring Harness — Beginner:
Tools: Multimeter, wire strippers, soldering iron, heat shrink tubing, wiring diagrams. - Clean/Replace Connector — Beginner:
Tools: Electrical contact cleaner, small pick or brush, dielectric grease. - Replace Fuse — Beginner:
Tools: Fuse puller or small pliers, owner's manual.
Used vs. New Parts: Buying Guide
When a used part is worth it: Buying a used oxygen sensor is never recommended. They are sensitive wear-and-tear electronic components with a finite lifespan.
Donor-vehicle mileage cap: roughly under 20000 miles for the part to have meaningful remaining life.
Donor quality checklist:
- Only consider from a very low-mileage vehicle that was wrecked.
- Ensure the part number is an exact match.
- Avoid parts from vehicles in the rust belt, as corrosion damages the sensor body and connector.
Decision logic:
- If The cost of a new OEM or quality aftermarket sensor is less than $150 → Always buy new. The risk and potential repeat labor cost of a used part is not worth the minimal savings.
- If The vehicle is very old and has high mileage (>200k miles) → A used sensor might be a temporary, budget-conscious fix, but expect it to have a very limited remaining life.
- If The part is an O2 sensor → Favor new. Unlike a durable mechanical part, this is a sensitive electronic component exposed to extreme heat and contaminants.
Warranty tradeoff: Used parts typically have a 30-day warranty at best. New aftermarket sensors often have a 1-year to limited lifetime warranty. OEM parts carry a 1-year/12,000-mile warranty.
Worst-case if a used part fails: $150-$300 if a used sensor fails after installation, requiring repeat labor and the purchase of a new sensor anyway.
What Happens If You Wait — Timeline
- 0-2 weeks: Heater fails, sensor is slow to activate on cold starts. (MPG impact: 0-2%% · Added cost: $0)
- 2 weeks - 3 months: Vehicle runs in open-loop mode longer. Noticeable drop in fuel economy and rough idle. (MPG impact: 3-8%% · Added cost: $30-$80 in wasted fuel)
- 3-8 months: Incorrect air-fuel mixture overheats the catalytic converter, stressing the ceramic substrate. (MPG impact: 5-15%% · Added cost: $50-$150 in wasted fuel, plus increasing risk of permanent catalyst damage.)
- 8+ months: Catalytic converter substrate melts or clogs, creating a major exhaust restriction. (MPG impact: 15-25%% · Added cost: $1,000-$3,000 for catalytic converter replacement.)
Cost of Not Fixing It
- 0-1 month: Reduced fuel economy by 5-15% and guaranteed emissions test failure. (Added cost: $20-$60 per month in extra fuel costs.)
- 1-6 months: The engine runs consistently rich, overheating the catalytic converter and degrading its internal ceramic structure. (Added cost: $0, but risk of major damage is increasing.)
- 6+ months: Sustained overheating melts the catalytic converter substrate, causing a major exhaust restriction and complete failure. (Added cost: $1,000-$3,000 for catalytic converter replacement.)
Diagnosis Steps
- Read the Code and Freeze Frame Data
Use an OBD-II scanner to confirm P0064 is the active code. Look at the freeze frame data to see the engine conditions when the code triggered. Note any other codes present.
Tools: OBD-II Scan Tool (Beginner) - Check for Blown Fuses
Consult your owner's manual to find the fuse box and locate the fuse for the 'HO2S' or 'O2 Sensor' heater circuit. If it is blown, replace it. If it blows again immediately, you have a short circuit.
Tools: Owner's Manual, Fuse Puller or Pliers (Beginner) - Visually Inspect Wiring and Connector
Safely raise the vehicle to locate Bank 2, Sensor 3. Carefully inspect the wiring harness and connector for melting, burns, chafing against the chassis, or corrosion.
Tools: Jack and Jack Stands, Flashlight (Intermediate) - Analyze Live Data
Use a professional scan tool to view live data. Monitor the PID for 'O2 Sensor Heater B2S3'. If the PCM commands the heater 'On' but the voltage is pegged at battery voltage (12V+) and not dropping, it confirms an open circuit or high resistance.
Tools: Advanced OBD-II Scan Tool (Advanced) - Test the Sensor's Heater Circuit Resistance
Unplug the O2 sensor and measure the resistance between the two heater pins using a multimeter set to Ohms (Ω). A healthy sensor reads between 2 and 15 Ohms. A reading of 'OL' (Open Line) confirms the internal heater element is burned out. A reading near zero indicates a shorted element. In either failure case, replace the sensor.
Tools: Multimeter (Intermediate) - Check for Voltage and Ground at the Connector
With the sensor unplugged and the ignition key 'On' (engine off), use a multimeter to check for battery voltage (12V) on the power supply wire of the vehicle-side connector. A reading below 12V points to an upstream wiring problem. Check the ground wire for continuity to the chassis ground.
Tools: Multimeter, Wiring Diagram (Intermediate) - Check for a Short to Power
With the sensor unplugged and key off, set your multimeter to Ohms. Check for continuity between the heater circuit's control wire on the harness side and the positive battery terminal. There should be no continuity ('OL'). If it shows low resistance, that wire is shorted to a power source.
Tools: Multimeter (Advanced) - Perform a PCM Driver Test
To rule out a faulty PCM, use a test light connected to the battery positive. Probe the PCM-controlled ground wire in the sensor connector. Command the heater 'On' with a scan tool. The test light should illuminate. If it doesn't, the PCM driver is faulty.
Tools: Advanced OBD-II Scan Tool, Test Light, Multimeter (Professional)
When This Code Triggers (Freeze-Frame Conditions)
- Engine Coolant Temp: 170-220°F (Fully warmed up. The heater test often runs after the engine reaches operating temperature.)
- RPM: 1200-2500 (Cruise or steady throttle. The test is often performed during steady-state driving, not during heavy acceleration or deceleration.)
- Engine Load: 20-60% (Light to moderate load, consistent with highway cruising.)
- Vehicle Speed: 40-65 mph (Steady highway driving. Many O2 sensor monitor tests require a period of stable speed to run.)
Related Codes
- P0063 — The direct companion code. P0064 (High) points to an open circuit or short to voltage, while P0063 (Low) indicates a short to ground.
- P0062 — Indicates a Range/Performance issue. Seeing P0062 and P0064 intermittently confirms a wire rubbing and making intermittent contact with both power and ground.
- P0162, P0163, P0164 — Relate to the signal circuit, not the heater. Having P0064 alongside these proves the entire sensor has failed. Diagnose P0064 first.
Climate & Environmental Factors
- Cold Weather: Intense thermal cycling in sub-zero climates accelerates the failure of the heater element, making P0064 more common in northern regions.
- High Humidity / Salt Belt Regions: Road salt creates a corrosive environment, leading to corrosion inside the O2 sensor's electrical connector and causing the sensor body to seize in the exhaust pipe.
How to Talk to a Mechanic About This Code
Say this: "I have a P0064 code for the Bank 2, Sensor 3 heater circuit. Please test the sensor's heater resistance and check the wiring, connector, and fuse before recommending a replacement part."
Directs the technician to perform a proper electrical diagnosis rather than blindly replacing the sensor.
Avoid saying:
- 'My check engine light is on, can you look at it?' (This is too vague and invites a costly, open-ended diagnostic process).
- 'Just fix whatever is wrong.' (Gives a blank check).
- 'I think I need a new oxygen sensor.' (Encourages parts-swapping without diagnosis).
Questions to ask before authorizing the repair:
- What was the Ohm reading on the heater circuit?
- Did you verify 12-volt power and ground at the connector?
- Will you provide a written estimate with a full breakdown of parts and labor costs?
- What is the warranty on the repair, including both the parts and your labor?
Where to Take It: Dealer vs Independent vs Chain
- Dealer:
Best for: Vehicles still under powertrain or emissions warranty., Vehicles with known manufacturer-specific quirks, like Jaguars that require a PCM software update after sensor replacement.
Downsides: Higher labor rates and parts costs compared to independent shops., May be more inclined to replace entire assemblies rather than perform a targeted wiring repair. (Typical cost: +50% vs. baseline) - Independent Shop:
Best fit. Reputable shops diagnose wiring faults accurately at lower labor rates.
Best for: Most out-of-warranty vehicles., Diagnosing common electrical faults like a failed sensor or damaged wiring.
Downsides: Quality varies significantly; check for ASE certifications and online reviews., May not have access to the latest manufacturer-specific software for updates. (Typical cost: +0% vs. baseline) - Chain Shop:
Avoid for initial diagnosis. Acceptable only if you already diagnosed a bad sensor and just need it swapped.
Best for: Simple, straightforward parts replacement when you are certain the sensor is the only fault.
Downsides: Technician skill and diagnostic capability can be inconsistent., Often have high pressure to meet sales goals, which can lead to upselling unnecessary services. (Typical cost: -10% vs. baseline)
When to Walk Away From the Repair
If the estimated repair cost exceeds 50% of the car's private-party value, replace the vehicle.
- Car worth $4000, fix is $2200: Walk away. The repair cost is over 50% of the car's value, making it a poor investment.
- Car worth $12000, fix is $800: Fix it. The repair cost is well below the 50% threshold and is a reasonable expense to keep a valuable car running properly.
- Car worth $2500, fix is $450: Borderline, but likely worth fixing. While the car's value is low, the repair cost is also relatively low. Consider the car's overall health before deciding.
What Scan Tool You Need for This Code
Minimum: A scanner that can read and graph live O2 sensor data. A basic code reader that only provides the P-code is not sufficient for proper diagnosis.
A basic $20 code reader will only tell you the P0064 code exists. It cannot show you the live voltage of the heater circuit or the sensor's signal, which is necessary to determine if the fault is with the sensor itself or the wiring.
Budget: BlueDriver Pro (~$100) — Graphs live O2 sensor data via Bluetooth to distinguish between sensor and wiring faults.
Mid-range: Innova 5610 (~$330) — Offers bi-directional control to command the O2 sensor heater on and off.
Professional: Autel MaxiCOM MK808 (~$450) — Full-system diagnostics and bi-directional controls for serious DIYers.
Rent vs buy: Many auto parts stores (like AutoZone) offer a free loaner tool program for OBD scanners. If this is a one-time repair, you can 'rent' a scanner for free with a refundable deposit. Buy a scanner only if you plan to perform your own diagnostics more than once a year.
How to Clear the Code After You Fix It
- Use an OBD-II scan tool to clear the P0064 trouble code.
- Perform a complete drive cycle to allow the readiness monitors to run.
- Check the readiness monitor status with the scan tool to confirm the O2 sensor and catalyst monitors have completed.
Drive cycle (~20 minutes): 1. Cold start (coolant below 122°F). 2. Idle for 3 minutes with A/C on. 3. Accelerate to 55 mph and hold steady for 5 minutes. 4. Decelerate to 20 mph without braking. 5. Accelerate to 60 mph and hold for 5 minutes.
Readiness monitors affected: O2 sensor monitor, O2 sensor heater monitor, Catalyst monitor
Before emissions retest: drive at least 50 miles to fully set monitors.
Watch out for:
- Disconnecting the battery clears the code but resets all readiness monitors, causing an immediate emissions failure.
- The code returns immediately if a wiring short remains unfixed.
- Not driving long enough or under the correct conditions leaves monitors 'Not Ready'.
Will This Fail Emissions / State Inspection?
Yes — this code typically fails an OBD-II emissions inspection.
- California: An illuminated Check Engine Light is an automatic failure. A full drive cycle must set all readiness monitors before a re-test.
- New York: Causes an automatic failure. The O2 sensor heater monitor must run and complete successfully.
- Texas: Results in an automatic failure. Drive 50-100 miles to reset readiness monitors after repair.
Most Commonly Affected Vehicles
- Jaguar F-TYPE, XF, XJ (2013-2017) — Extremely common. Bank 2 is the DRIVER'S side on LHD models. TSBs JTB-00392-NAS-3 and SSM72477 note the sensor fails and requires a PCM software update. An extended warranty (15 years/150,000 miles) covers this repair.
- Ford F-150 (2009-2014) — On V8 models, Bank 2 Sensor 3 is on the passenger side. The wiring harness is exposed and rubs against the frame or crossmember, causing a short.
- Chevrolet / GMC Silverado, Sierra, Tahoe, Suburban (2007-2013) — On 4WD models, the wiring harness routes near the front driveshaft, which chafes through the insulation and causes a short.
- Dodge / Chrysler / Jeep Grand Cherokee, Ram 1500, Charger (2005-2015) — On HEMI V8 and V6 models, the sensor's internal heater element burns out after years of heat cycles.
- Subaru Outback, Forester (2015-2019) — 4-cylinder models don't have a 'Bank 2'. Generic code readers misinterpret the fault from the single downstream sensor (Sensor 2).
- Honda Accord, Odyssey, Pilot (2003-2024) — On V6 models, Bank 2 is the front bank. Rodent damage to the soy-based wiring harness is a known issue.
- Hyundai / Kia Santa Fe, Sorento, Sonata (2010-2020) — Heater circuit codes are a common sign of an aging oxygen sensor burning out.
- German Luxury Brands (BMW, Mercedes-Benz, Audi) Various Models (2000-2012) — Aging oxygen sensors and brittle wiring insulation from repeated heat cycles frequently trigger P0064 on these models.
Manufacturer-Specific Notes
- Jaguar / Land Rover: TSB JTB-00392-NAS-3 requires a PCM software update after sensor replacement. Covered by a 15-year/150,000-mile extended emissions warranty.
- Ford: The passenger side wiring harness pinches between the frame and crossmember. Inspect the entire harness path before condemning the sensor.
- GM (Chevrolet / GMC): On 4x4 trucks, the spinning front driveshaft chafes through the O2 sensor wiring loom, causing a short circuit.
- Subaru: A 'ghost code' on 4-cylinder engines. These engines lack a Bank 2; the fault lies with the single rear O2 sensor (Bank 1, Sensor 2).
Real Owner Stories
2014 Jaguar XF 3.0 at 75,000 miles
Check Engine Light came on with code P0064. No noticeable driving issues. Owner found TSB JTB-00392-NAS-3 online.
What they tried:
- Owner first checked wiring and connector, found no visible damage.
- Based on the TSB, they decided to replace the sensor.
Outcome: Replaced Bank 2 Sensor 3 with a Bosch part and got the dealer PCM software update per TSB JTB-00392-NAS-3. Code permanently resolved.
Lesson: For specific makes like Jaguar, always search for Technical Service Bulletins (TSBs). It saves diagnostic time and points directly to a known issue and the required fix, which may include a software update.
2011 Ford F-150 5.0L at 120,000 miles
P0064 code appeared intermittently, sometimes with a P0063 (Heater Circuit Low) code. MPG seemed slightly lower than usual.
What they tried:
- Replaced the Bank 2, Sensor 3 O2 sensor, but the code came back within a day.
- Inspected the wiring harness more closely and found a section where the loom had rubbed against a frame crossmember, exposing a wire.
Outcome: Repaired the chafed wire with a weatherproof butt connector. Rerouted the harness slightly to prevent it from rubbing again. The code was cleared and did not return.
Lesson: If a code returns immediately after replacing a sensor, the problem is very likely in the wiring or connector. A thorough visual inspection of the entire harness path is critical.
2008 Dodge Grand Caravan at 150,000 miles
CEL on for P0064. The owner had no advanced tools and was deciding between a DIY replacement and taking it to a shop.
What they tried:
- First, checked the fuse for the O2 sensor heaters in the under-hood fuse box and found it was intact.
- Decided to replace the sensor as it was the most likely cause at this mileage.
Outcome: Checked fuse (intact). Replaced the original sensor at 150k miles using penetrating oil and an O2 socket. Passed emissions.
Lesson: For high-mileage vehicles, the sensor's internal heater element is a very common failure point. Often, a simple and inexpensive fuse check followed by sensor replacement is the correct and complete repair.
How to Prevent This Code From Triggering
- Use Top-Tier certified gasoline (Every fill-up) — Prevents carbon deposit buildup, reducing contaminants that foul O2 sensors.
- Perform regular engine maintenance (spark plugs, air filter) (Per manufacturer's schedule (e.g., every 30k-100k miles)) — Worn spark plugs cause misfires, sending unburned fuel into the exhaust that damages the O2 sensor.
- Address engine oil and coolant leaks promptly (As needed) — Oil or antifreeze leaking onto the exhaust permanently poisons the O2 sensor's sensing element.
- Avoid long periods of idling (Daily habit) — Extended idling causes incomplete combustion and carbon buildup.
- Proactively replace upstream O2 sensors (Once per 80,000-100,000 miles) — Replace upstream O2 sensors every 100,000 miles to maintain efficiency and protect the catalytic converter.
Frequently Asked Questions
What does 'Bank 2, Sensor 3' mean?
'Bank 2' is the engine side without the #1 cylinder. 'Sensor 3' is the third sensor in the exhaust stream, located furthest downstream after the final catalytic converter.
What is the difference between P0064 and P0063?
Both refer to the Bank 2, Sensor 3 heater circuit. P0064 means voltage is too HIGH (open circuit or short to power). P0063 means voltage is too LOW (short to ground).
What is the most common misdiagnosis for P0064?
The most common misdiagnosis is replacing the wrong oxygen sensor by confusing Bank 1 with Bank 2. Another mistake is replacing the sensor without inspecting the wiring harness for damage, causing the code to return immediately.
Can I fix P0064 myself?
Yes, replacing the sensor requires basic hand tools and a 22mm oxygen sensor socket. Checking fuses and inspecting wiring are also straightforward beginner tasks.
Will code P0064 clear itself?
No, P0064 indicates a hard electrical fault requiring repair. Clear the code with a scan tool after the fix, or it turns off automatically after several successful drive cycles.
Why did the P0064 code come back after I replaced the sensor?
The original problem was likely a missed wiring short, a corroded connector, or a low-quality aftermarket sensor. Jaguar models specifically require a PCM software update after installation to keep the code away.
My 4-cylinder car has a P0064 code, but it doesn't have a 'Bank 2'. What's wrong?
This occurs when a generic code reader misinterprets the fault on vehicles like Subarus. The computer incorrectly assigns a 'Bank 2' code to the single downstream sensor. Focus diagnosis on the post-catalytic converter oxygen sensor circuit.
Can a blown fuse cause P0064?
Yes. A blown fuse creates an open circuit, which many PCMs interpret as a 'high' fault due to the lack of current flow. Always check the O2 heater fuse first.
What tools do I need to fix P0064?
You need a jack, jack stands, a ratchet set, a 22mm oxygen sensor socket, and penetrating oil. A multimeter and a vehicle-specific wiring diagram are highly recommended for electrical testing.
Key Takeaways
- Code P0064 indicates a high-voltage electrical fault in the Bank 2, Sensor 3 oxygen sensor heater, requiring a multimeter to test for a burned-out internal element.
- Driving with a P0064 code drops fuel economy by up to 15% and guarantees an emissions test failure, so repair it within 14 days to prevent a $1,500 catalytic converter replacement.
- Replacing the $50-$250 oxygen sensor resolves 80% of P0064 cases, taking about 1 hour with a specialized 22mm O2 sensor socket.
- Jaguar and Land Rover owners with 2013-2017 models must check TSB JTB-00392-NAS-3, as fixing this code often requires a dealer-only PCM software update covered by a 15-year warranty.
Helpful Videos
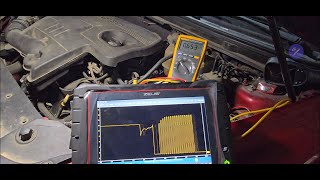
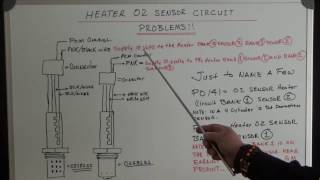
![How to Fix P0064 Engine Code in 2 Minutes [1 DIY Method / Only $19.99]](https://img.youtube.com/vi/WxPt6F88d-s/mqdefault.jpg)

The information in this article is provided for general reference and educational purposes only. Vehicle specifications, procedures, and part compatibility can vary by production date, trim level, and region. Always consult your vehicle's factory service manual and verify part numbers before purchasing or performing repairs. Safety-critical components such as airbags, seat belts, and braking systems should be installed by a qualified professional.
- 🎬 Helpful Videos
- What Does P0064 Mean?
- Can I Drive With P0064?
- Common Causes
- Symptoms
- Diagnostic Flowchart
- Common Fixes & Costs
- DIY vs Professional
- Used vs. New Parts: Buying Guide
- What Happens If You Wait — Timeline
- Cost of Not Fixing It
- Diagnosis Steps
- When This Code Triggers (Freeze-Frame Conditions)
- Related Codes
- Climate & Environmental Factors
- How to Talk to a Mechanic About This Code
- Where to Take It: Dealer vs Independent vs Chain
- When to Walk Away From the Repair
- What Scan Tool You Need for This Code
- How to Clear the Code After You Fix It
- Will This Fail Emissions / State Inspection?
- Most Commonly Affected Vehicles
- Manufacturer-Specific Notes
- Real Owner Stories
- 2014 Jaguar XF 3.0 at 75,000 miles
- 2011 Ford F-150 5.0L at 120,000 miles
- 2008 Dodge Grand Caravan at 150,000 miles
- How to Prevent This Code From Triggering
- Frequently Asked Questions
- What does 'Bank 2, Sensor 3' mean?
- What is the difference between P0064 and P0063?
- What is the most common misdiagnosis for P0064?
- Can I fix P0064 myself?
- Will code P0064 clear itself?
- Why did the P0064 code come back after I replaced the sensor?
- My 4-cylinder car has a P0064 code, but it doesn't have a 'Bank 2'. What's wrong?
- Can a blown fuse cause P0064?
- What tools do I need to fix P0064?
- Key Takeaways
- 🎟️ Get 5% Off