

OBD-II Code P0062: Heated Oxygen Sensor Heater Control Circuit Problem (Bank 2, Sensor 3)
The Ultimate Guide to Diagnosing and Fixing P0062
- Code P0062 indicates the internal heater in the Bank 2, Sensor 3 oxygen sensor failed to reach its 600°F operating temperature within the expected 10 to 30 seconds.
- The most common fix is replacing the oxygen sensor, which costs between $150 and $550 for parts and labor.
- Always test the sensor's heater resistance (typically 5 to 20 Ohms) and verify 12V power at the harness before buying replacement parts.
- For 2013-2016 Jaguar and Land Rover models, permanently clearing this code requires a mandatory PCM software update alongside the new sensor.
What Does P0062 Mean?
Your car's Powertrain Control Module (PCM) detected a fault in the heater circuit of the Bank 2, Sensor 3 oxygen sensor. This sensor uses an internal electric heater to reach its 600°F operating temperature within 10 to 30 seconds of a cold start. When the heater circuit malfunctions, the sensor takes too long to activate, compromising catalytic converter monitoring and triggering the check engine light.
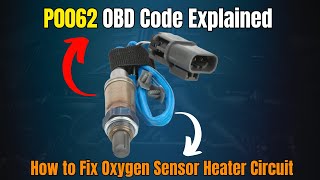
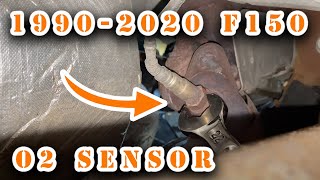
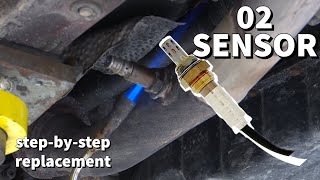
Technical definition: The SAE/OBD-II definition is "HO2S Heater Control Circuit (Bank 2 Sensor 3)". The PCM detected voltage or resistance in the heated oxygen sensor (HO2S) control circuit outside the expected range. The PCM 🎬 Watch: A quick overview of the P0062 code and fix. controls this heater using a pulse-width modulated (PWM) 12V signal and sets P0062 when it detects low voltage (below 9V), high resistance, an open circuit, or a short.
Can I Drive With P0062?
Yes, But With Caution. Yes, you can drive with code P0062, but address it promptly. Your vehicle experiences higher emissions, loses 2-4 MPG in fuel economy, and automatically fails emissions tests. Driving more than a few hundred miles leaves the catalytic converter unmonitored, risking permanent damage that costs $800 to $2,500 to repair.
Common Causes
- Failed Bank 2, Sensor 3 Oxygen Sensor (Very Common) — The internal heater element burns out from age and extreme exhaust heat. 2013-2016 Jaguar and Land Rover models suffer from well-documented manufacturing defects causing premature failure.
- Damaged Wiring or Connectors (Common) — Exhaust heat, road debris, or corrosion damages the wiring harness and connector. This creates an open circuit or short to ground, preventing power delivery to the heater.
- Blown Heater Circuit Fuse (Less Common) — A short circuit in the wiring or sensor blows the dedicated heater circuit fuse. Replacing the fuse without finding the short guarantees the new fuse blows immediately.
- Poor Ground Connection (Less Common) — Corroded or broken ground straps on the exhaust or engine block create high resistance. This prevents the circuit from completing its path.
- Incorrect Aftermarket Sensor (Less Common) — Generic or universal sensors often have incorrect internal resistance, causing the code to persist. Bank 1 and Bank 2 sensors frequently use physically different connectors.
- Fluid Contamination (Rare) — Oil from a leaking valve cover or coolant drips onto the sensor connector. This saturates the pins, causing corrosion and short circuits.
- Faulty PCM or Software Issue (Rare) — The PCM's internal driver circuit fails, or a software glitch falsely triggers the code. Jaguar and Land Rover issued Technical Service Bulletins (TSBs) requiring software updates to fix this.
Symptoms
- Check Engine Light is On — The Malfunction Indicator Lamp (MIL) illuminates immediately after the PCM detects the heater circuit fault.
- Failed Emissions Test — An active P0062 code automatically fails an OBD-II emissions inspection.
- Reduced Fuel Economy — The PCM remains in an inefficient 'open-loop' fuel strategy longer, causing a 2-4 MPG drop.
- Rough Idle on Cold Starts — The engine idles roughly or stumbles for 5-10 seconds after a cold start while the PCM waits for a valid sensor signal.
- 'Rotten Egg' Smell from Exhaust — A rich fuel condition produces black smoke or a sulfur smell, indicating inefficient catalytic converter operation.
Diagnostic Flowchart
Tap your situation to follow the diagnostic path that matches what you're seeing on this code.
Common Fixes & Costs
- Replace Bank 2, Sensor 3 Oxygen Sensor
— Parts: $50-$250, Labor: $100-$300, ~1.2 hr book time
(DIY)
Jaguar XF/XJ (2013-2016, 3.0L/5.0L): OEM C2D23702 (Alt: {'Bosch': '17493', 'Denso': '234-4971', 'NTK': '25753'})
Land Rover Range Rover/LR4 (2013-2016, 3.0L/5.0L): OEM LR098290 (Alt: {'Bosch': '17493', 'Denso': '234-4971', 'NTK': '25753'})
Ford F-150 (2011-2014, 5.0L): OEM BL3Z-9G472-B (Alt: {'Bosch': '15719', 'Denso': '234-4490', 'NTK': '22500'}) - Repair Damaged Wiring or Connector — Parts: $10-$50, Labor: $100-$250, ~1.5 hr book time (Intermediate)
- Replace Blown O2 Sensor Heater Fuse — Parts: $1-$5, Labor: $50-$100, ~0.5 hr book time (DIY)
- Update or Reprogram Powertrain Control Module (PCM) — Parts: $0, Labor: $150-$250, ~1.0 hr book time (Professional)
- Replace Powertrain Control Module (PCM) — Parts: $600-$900, Labor: $200-$300, ~2.0 hr book time (Professional)
DIY vs Professional
- Replace Bank 2, Sensor 3 Oxygen Sensor — Beginner:
- Repair Damaged Wiring or Connector — Beginner:
- Replace Blown O2 Sensor Heater Fuse — Beginner:
- Update or Reprogram Powertrain Control Module (PCM) — Beginner:
Used vs. New Parts: Buying Guide
When a used part is worth it: Buying a used oxygen sensor never makes sense. It is a wear-and-tear component with a finite lifespan, and its internal condition is impossible to verify.
Donor-vehicle mileage cap: roughly under 10000 miles for the part to have meaningful remaining life.
Donor quality checklist:
- Only consider a used sensor if it comes from a very low-mileage wreck and shows no signs of contamination.
- The part number must be an exact match for the specific bank and sensor position.
- Avoid sensors from vehicles in the Rust Belt.
Decision logic:
- If The part is an oxygen sensor. → Buy a new OEM or high-quality aftermarket (Bosch, NTK, Denso) part. The risk of a used part failing quickly is too high.
- If The cost of a new sensor is a significant financial burden. → A new, budget-friendly aftermarket sensor is still a better choice than a used one.
- If The part has a known wear-out failure mode (like an O2 sensor's heater element). → Always favor new to ensure maximum lifespan.
Warranty tradeoff: Used sensors offer no warranty or a 30-day max warranty. New aftermarket sensors offer 1-year to limited lifetime warranties. New OEM sensors include at least a 1-year warranty.
Worst-case if a used part fails: $200-$400 if a used sensor fails after installation, requiring a second part purchase and repeat labor costs.
What Happens If You Wait — Timeline
- 0-2 weeks: Code P0062 is set and the Check Engine Light is on. The heater monitor fails its test on cold starts. No other symptoms are perceived by the driver. (MPG impact: 0-2%% · Added cost: $0)
- 2 weeks - 3 months: A noticeable drop in fuel economy (2-4 MPG) occurs as the PCM stays in open-loop mode longer. The vehicle automatically fails any OBD-II emissions test. (MPG impact: 5-10%% · Added cost: $25-$75 in wasted fuel)
- 3-8 months: The PCM cannot effectively monitor catalytic converter health. An underlying rich condition begins to overheat and degrade the catalyst substrate without alerting the driver. (MPG impact: 5-15%% · Added cost: $500-$1500 (Risk of early-stage catalytic converter damage increases significantly))
- 8+ months: Prolonged operation with an unmonitored catalytic converter leads to a complete meltdown of the catalyst substrate. This creates an exhaust restriction, causing severe loss of power. (MPG impact: 10-25%% · Added cost: $1,200-$2,800 for a new catalytic converter.)
Cost of Not Fixing It
- 0-1 month: Reduced fuel economy (2-4 MPG loss) and an automatic emissions test failure. (Added cost: $20-$50 in extra fuel costs per month.)
- 1-6 months: The engine runs consistently rich, sending unburnt fuel into the exhaust. This overheats and damages the catalytic converter. (Added cost: Negligible, but risk of major expense increases.)
- 6+ months: Prolonged exposure to unburnt fuel permanently melts the catalytic converter's internal structure, requiring replacement. (Added cost: $1,200-$2,800 for catalytic converter replacement.)
Diagnosis Steps
- Visually Inspect Sensor and Wiring
Safely raise the vehicle and locate the Bank 2, Sensor 3 oxygen sensor after the rearmost catalytic converter. Inspect the sensor body, connector, and wiring harness for burnt wires, chafing, or heavy corrosion.
Tools: Jack and jack stands, flashlight (Beginner) - Check Heater Circuit Fuse
Locate the O2 sensor heater fuse in the fuse box using the owner's manual. Pull the fuse and visually inspect it for a broken filament.
Tools: Owner's manual, fuse puller or needle-nose pliers (Beginner) - Test Sensor Heater Resistance
Unplug the sensor. Set a multimeter to Ohms (Ω) and probe the two heater circuit pins on the sensor. A functional cold sensor reads 5-20 Ohms; infinity (OL) means an open circuit, and 0 Ohms means a short.
Tools: Digital multimeter, vehicle-specific wiring diagram (Intermediate) - Check for Power at Connector
Turn the ignition 'On' (engine off). Set the multimeter to DC Volts. Ground the black probe and touch the red probe to the heater power wire on the harness side. It must read battery voltage (11-14V).
Tools: Digital multimeter, vehicle-specific wiring diagram (Intermediate) - Check Ground Circuit Integrity
Set the multimeter to continuity. Place one probe on the harness ground pin and the other on a clean chassis ground. A beep confirms a solid ground path.
Tools: Digital multimeter, vehicle-specific wiring diagram (Intermediate) - [PRO TIP] Monitor Live Data PIDs
Use an advanced scan tool to monitor 'O2 Heater B2S3' live data. During a cold start, the heater must turn 'On' and draw 0.8-2.0 amps. 0A current confirms a circuit failure.
Tools: Advanced OBD-II scan tool with live data (Advanced) - [PRO TIP] Voltage Drop Test
Reconnect the sensor and start the engine. Back-probe the ground wire at the connector with a multimeter set to DC Volts. A reading above 0.3V indicates excessive ground resistance requiring repair.
Tools: Digital multimeter with back-probe pins (Advanced) - [PRO TIP] Analyze with Oscilloscope
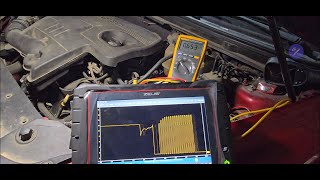
Connect an oscilloscope to the heater control wire. A cold start must produce a square wave (PWM) pattern. A flat line at 0V or 12V indicates a broken wire or faulty PCM driver.
Tools: Automotive oscilloscope, wiring diagram (Advanced) - Check for PCM Software Updates
Search for Technical Service Bulletins (TSBs) related to P0062. Dealerships must update the PCM software on specific Jaguar, Land Rover, and GM vehicles to permanently clear the code.
Tools: Access to TSB database, manufacturer-specific scan tool (Professional)
When This Code Triggers (Freeze-Frame Conditions)
- Engine Coolant Temp: Below 122°F (50°C) (During a cold start, as this is when the heater circuit is most critical and when the diagnostic monitor typically runs.)
- RPM: Idle (700-900 RPM) (The heater monitor runs within the first few minutes of idling after a cold start.)
- System Voltage: Below 9V (The freeze frame shows a voltage for the heater circuit below the expected 12V, triggering the fault.)
- Engine Load: Low (under 20%) (The fault is detected under no-load or low-load conditions shortly after startup, before exhaust gases heat the sensor.)
Related Codes
- P0042 — The identical heater circuit code for Bank 1, Sensor 3. These sensors fail around the same time, and TSBs often address both codes simultaneously.
- P0162 — A general malfunction code for the Bank 2, Sensor 3 circuit. P0062 points directly to testing the heater element and its power/ground.
- P0063 — Indicates LOW voltage in the heater control circuit for Bank 2, Sensor 3. Diagnosis focuses on high resistance in the wiring, a poor ground, or a weak power supply.
- P0064 — Indicates HIGH voltage in the heater control circuit for Bank 2, Sensor 3. Diagnosis focuses on finding a short to power in the wiring harness.
- P0061 — Points specifically to a problem with the heater's RESISTANCE for Bank 2, Sensor 3. Directs technicians to perform a resistance test on the sensor itself.
Climate & Environmental Factors
- Cold Climates: In freezing weather, the PCM's diagnostic test runs under demanding conditions. Marginal weaknesses in the heater element trigger code P0062 because the sensor takes too long to reach 600°F.
- High Humidity / Road Salt: Road salt accelerates corrosion on the oxygen sensor's electrical connector, wiring pins, and chassis ground points. This creates high resistance, a primary cause of heater circuit codes.
- Condensation: Condensation forms inside the exhaust and enters the O2 sensor. The sudden temperature change fractures the internal ceramic element or heater.
How to Talk to a Mechanic About This Code
Say this: "I have a P0062 code for the Bank 2, Sensor 3 heater circuit. Please test the sensor's heater resistance and verify 12V power and ground at the connector before replacing the sensor."
This signals you understand the problem is the circuit, not just the sensor. It directs the technician to perform a proper diagnosis instead of immediately replacing the most common part, saving you money on unnecessary labor.
Avoid saying:
- 'My check engine light is on, can you look at it?'
- 'Just fix whatever is wrong.'
- 'The internet says I need a new oxygen sensor.'
Questions to ask before authorizing the repair:
- What was the resistance reading on the sensor's heater circuit?
- Did you confirm there is battery voltage and a good ground at the harness connector?
- If the sensor needs to be replaced, can you show me the old part?
- What is the warranty on the new part and your labor?
Where to Take It: Dealer vs Independent vs Chain
- Dealer:
Recommended for 2013-2016 Jaguar/Land Rover vehicles due to software update requirements; otherwise, an independent shop is more cost-effective.
Best for: Vehicles under warranty (especially Jaguar/Land Rover with known TSBs)., Repairs requiring a mandatory PCM software update after sensor replacement.
Downsides: Highest labor rates, typically 1.5-2x more than independent shops., Recommends replacing parts that an independent shop repairs (e.g., a section of wiring). (Typical cost: +50% vs. baseline) - Independent Shop:
Best fit for most vehicles with this code, provided no manufacturer-specific software update is needed.
Best for: Out-of-warranty vehicles where cost is a primary concern., Straightforward diagnosis and replacement of the sensor or wiring.
Downsides: Shop quality and diagnostic skill vary greatly; check for ASE certifications., Lacks access to manufacturer-specific tools for required software updates. (Typical cost: +0% vs. baseline) - Chain Shop:
Acceptable for a simple sensor swap if you diagnosed the issue yourself, but use caution for initial diagnosis.
Best for: Simple, clear-cut part replacements when you are certain the sensor itself failed.
Downsides: Technician skill varies widely, and there is high pressure to upsell additional services., Lacks advanced diagnostic experience for circuit-level problems or manufacturer-specific issues. (Typical cost: -10% vs. baseline)
When to Walk Away From the Repair
If the estimated repair cost exceeds 50% of the car's current private-party value, seriously consider replacing the vehicle instead of repairing it.
- Car worth $4000, fix is $2200: Walk away. The repair cost is over 50% of the car's value.
- Car worth $12000, fix is $450: Fix it. The repair is a small fraction of the vehicle's value.
- Car worth $2500, fix is $1500: Walk away. The repair cost is 60% of the car's value, making it a poor investment.
What Scan Tool You Need for This Code
Minimum: A code reader that displays live data for O2 sensor voltage and heater circuit status.
A basic $20 reader only gives you the P0062 code, leading to guesswork. To properly diagnose, you need live data to confirm if the heater circuit is commanded 'On' and if the sensor voltage responds.
Budget: BlueDriver Pro Scan Tool (~$100) — Connects to your smartphone and provides freeze-frame data, live O2 sensor graphing, and access to O2 sensor heater monitoring PIDs.
Mid-range: Foxwell NT510 Elite (~$180) — Offers manufacturer-specific diagnostics, allowing you to see OEM-level data for the heater circuit. It offers limited bidirectional controls to actively test the heater circuit.
Professional: Autel MaxiCOM MK808BT PRO (~$550) — Provides full bidirectional control to command the O2 heater circuit on and off manually, offering definitive proof of whether the circuit and sensor function.
Rent vs buy: If this is a one-time repair, AutoZone's Loan-A-Tool program allows you to borrow a basic OBD-II scanner for free after paying a refundable deposit. Buy a scanner only if you perform vehicle diagnostics regularly.
How to Clear the Code After You Fix It
- Use an OBD-II scan tool to clear the P0062 trouble code.
- Perform a complete drive cycle to allow the vehicle's readiness monitors to reset.
- Disconnecting the battery clears memory but does not guarantee readiness monitors reset quickly.
Drive cycle (~20 minutes): A generic drive cycle includes: a cold start, idling for 2-5 minutes, driving at a steady 55 mph for 3-5 minutes, and decelerating to 20 mph without using the brakes.
Readiness monitors affected: O2 Sensor Monitor, O2 Sensor Heater Monitor, Catalyst Monitor
Before emissions retest: drive at least 50 miles to fully set monitors.
Watch out for:
- Clearing the code and immediately going for an emissions test results in failure due to 'Not Ready' monitors.
- The code returns if the root cause (e.g., bad wiring, blown fuse) remains unfixed, even with a new sensor.
- Fuel levels outside the 15-85% range prevent EVAP monitors from running, blocking test readiness.
Will This Fail Emissions / State Inspection?
Yes — this code typically fails an OBD-II emissions inspection.
- California: An active Check Engine Light results in an automatic smog check failure. All readiness monitors must be 'Ready'. After repair, a specific drive cycle must be completed, taking 50-100 miles of driving before retesting.
- New York: A vehicle with an illuminated Check Engine Light automatically fails the emissions portion of the NYS inspection. Clearing the code leaves monitors 'Not Ready', also resulting in failure.
- Texas: In the 17 counties requiring emissions testing, an illuminated Malfunction Indicator Lamp (MIL) is an automatic failure. P0062 fails both the MIL command status and readiness monitor checks.
Most Commonly Affected Vehicles
- Jaguar XF, XJ, F-TYPE (2013-2016) — A common issue caused by a faulty sensor and a required PCM software update per TSBs JTB-00392-NAS-3 and SSM72477. Left and right bank sensors use different connectors.
- Land Rover LR4, Range Rover, Range Rover Sport, Evoque (2013-2016) — Caused by a manufacturing defect noted in TSBs SSM72556 and LTB00671NAS3. An extended warranty (15 years / 150,000 miles) covers this on some models. OEM part LR098290 supersedes older versions.
- Ford F-150, Explorer (2011-2016) — Appears due to standard sensor or wiring failures. On some F-150 models, persistent codes after sensor replacement trace back to a faulty PCM.
- Chevrolet / GMC Silverado, Sierra, Express, Savana (2011-2018) — Recall 14096A addresses 2011-2013 Express/Savana vans where condensation fractures the sensor, requiring replacement and a PCM reprogram.
- Volkswagen / Audi Jetta, A4, various models (2008-2018) — Audi issued a limited warranty extension (10 years / 120,000 miles) for failed rear oxygen sensors under campaign U42.
- BMW X5, 3 Series (2007-2018) — Follows the standard diagnostic path. Using OEM or high-quality OEM-supplier sensors is mandatory to prevent recurring codes.
- Hyundai / Kia Santa Fe, Sorento (2010-2019) — Typically caused by a failed oxygen sensor heater element or a break in the circuit wiring.
- Mercedes-Benz C-Class, E-Class (2008-2018) — Requires a high-quality OEM-spec sensor. Verify power and ground signals before assuming the sensor is the only fault.
Manufacturer-Specific Notes
- Jaguar / Land Rover: For 2013-2016 models, this code stems from a supplier manufacturing defect. The fix requires replacing the sensor and updating the PCM software to prevent recurrence. An extended warranty covers this up to 15 years / 150,000 miles.
- Ford: On F-150s with persistent P0062 codes that survive sensor replacement and wiring checks, the PCM's internal driver for the heater circuit fails, requiring PCM repair or replacement.
- Chevrolet / GM: A persistent P0062 code on Silverado and Sierra trucks requires a dealer-level ECU software calibration reflash. Recall 14096A for Express and Savana vans addresses O2 sensors fracturing from internal condensation.
- Volkswagen / Audi: The wiring harness for downstream O2 sensors routes poorly, making it prone to chafing against heat shields or suspension components. Audi offers a rear oxygen sensor limited warranty extension under campaign U42.
Real Owner Stories
2015 Land Rover LR4 - Easy Fix
Check Engine Light appeared with code P0062. No other symptoms were noticeable.
What they tried:
- Owner confirmed the location was the driver's side, post-catalyst sensor.
- Attempted removal with wrenches but the sensor was seized.
- Successfully removed the old sensor after applying penetrating oil and heat from a torch.
Outcome: Installed a new Bosch sensor (Part No. LR098290) for $48. Cleared the code with a scanner and resolved the issue in 1 hour.
Lesson: For Land Rover/Jaguar, this is a common failure with a known part. Expect the old sensor to be seized and plan on using heat and penetrating oil for removal.
2014 Jaguar XF - Misdiagnosis Story
Car threw a P0042 code (Bank 1 equivalent of P0062). A few years prior, the car had a P0062 fixed by replacing the sensor.
What they tried:
- Owner was reluctant to pay the dealer price of over $300 for a new sensor.
- Sought advice on whether a cheaper aftermarket sensor from a local auto parts store would work.
Outcome: Forum consensus and TSBs strongly advise using OEM or OEM-supplier sensors. Generic aftermarket sensors fail quickly or have the wrong connectors, causing the code to return. The owner purchased the correct OEM part.
Lesson: For European vehicles, using a generic part to save money leads to repeat repairs. Always verify the correct part number and use a quality brand, as left and right bank sensors use different connectors.
2017 Range Rover Sport - Unusual Root Cause
A P0062 code appeared after filling up with suspected poor-quality gasoline.
What they tried:
- The owner scanned the code and asked for advice on a forum regarding a DIY fix.
Outcome: While bad fuel seemed to trigger it, the underlying issue is a manufacturing defect in the sensor itself, acknowledged by Land Rover TSBs. The fix required replacing the sensor and updating the PCM software.
Lesson: External factors push marginal components to fail. For 2013-2016 JLR vehicles, the root cause of P0062 is almost always the sensor itself due to known defects.
How to Prevent This Code From Triggering
- Use Top-Tier Certified Gasoline (Every fill-up) — Top-Tier gas contains detergents that prevent carbon deposit buildup. This ensures complete combustion, reducing the load on the catalytic converter and preventing O2 sensor contamination.
- Replace Upstream (Pre-Catalyst) O2 Sensors Proactively (Every 100,000 miles) — Upstream sensors control the air-fuel mixture. As they age, their response slows, leading to inefficient combustion that overheats the catalytic converter and shortens downstream sensor life.
- Address Engine Oil and Coolant Leaks Promptly (As needed) — Fluids leaking from gaskets contaminate the oxygen sensor's sensing element or electrical connector. Coolant contamination is particularly damaging to O2 sensors.
- Avoid Short Trips and Extended Idling (Daily habit) — Short trips prevent the exhaust system from reaching full operating temperature, allowing condensation to build up. This moisture damages the sensor's internal heater and ceramic element.
- Ensure Proper Sensor Installation and Positioning (During any exhaust work) — Mounting a sensor between the 9 and 3 o'clock positions prevents condensation from pooling on and shocking the hot sensor element. Ensure wiring is secured away from hot exhaust components.
Frequently Asked Questions
What does Bank 2 Sensor 3 mean?
Bank 2 is the side of the engine that does not contain cylinder #1. Sensor 3 is the third sensor in the exhaust stream, located after the final catalytic converter. It monitors the catalyst's long-term efficiency.
Can I replace just the oxygen sensor myself?
Yes, replacing the sensor is a manageable DIY repair. However, sensors frequently seize in the exhaust pipe due to rust, requiring a special socket, breaker bar, and heat torch for removal. Always apply anti-seize compound to the new sensor's threads.
What are the most common mistakes when diagnosing P0062?
The biggest mistake is replacing the oxygen sensor without testing the circuit first. Always check the fuse and use a multimeter to verify 12V power and a solid ground at the connector. Another common error is replacing the Bank 1 sensor instead of Bank 2.
Why did the code come back after I replaced the sensor?
If the code returns, the actual fault lies in the wiring, fuse, or ground connection. You also might have used a cheap aftermarket sensor with incorrect internal resistance. Finally, some vehicles require a mandatory PCM software update alongside the new sensor to permanently clear the fault.
Is it okay to use a cheaper aftermarket oxygen sensor?
Using cheap aftermarket sensors is highly discouraged, especially for European vehicles. Generic sensors frequently have incorrect internal resistance values that trigger the P0062 code immediately. Always use an OEM part or a direct-fit replacement from Bosch, NTK, or Denso.
How long can I drive with a P0062 code?
You can drive for a few weeks or a few hundred miles without getting stranded. However, ignoring the code causes poor fuel economy and guarantees an emissions test failure. Prolonged driving risks permanent, expensive damage to the catalytic converter.
Where is Bank 2 on my Ford F-150 / Chevy Silverado / Jaguar XF?
On Ford and GM V8/V6 engines, Bank 2 is typically the driver's side. For Jaguar V6/V8 engines, Bank 2 is also the driver's side on left-hand-drive vehicles. Bank 1 is always the side containing cylinder #1.
Key Takeaways
- Code P0062 indicates the internal heater in the Bank 2, Sensor 3 oxygen sensor failed to reach its 600°F operating temperature within the expected 10 to 30 seconds.
- The most common fix is replacing the oxygen sensor, which costs between $150 and $550 for parts and labor.
- Always test the sensor's heater resistance (typically 5 to 20 Ohms) and verify 12V power at the harness before buying replacement parts.
- For 2013-2016 Jaguar and Land Rover models, permanently clearing this code requires a mandatory PCM software update alongside the new sensor.
Helpful Videos
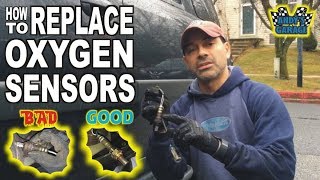


The information in this article is provided for general reference and educational purposes only. Vehicle specifications, procedures, and part compatibility can vary by production date, trim level, and region. Always consult your vehicle's factory service manual and verify part numbers before purchasing or performing repairs. Safety-critical components such as airbags, seat belts, and braking systems should be installed by a qualified professional.
- 🎬 Helpful Videos
- What Does P0062 Mean?
- Can I Drive With P0062?
- Common Causes
- Symptoms
- Diagnostic Flowchart
- Common Fixes & Costs
- DIY vs Professional
- Used vs. New Parts: Buying Guide
- What Happens If You Wait — Timeline
- Cost of Not Fixing It
- Diagnosis Steps
- When This Code Triggers (Freeze-Frame Conditions)
- Related Codes
- Climate & Environmental Factors
- How to Talk to a Mechanic About This Code
- Where to Take It: Dealer vs Independent vs Chain
- When to Walk Away From the Repair
- What Scan Tool You Need for This Code
- How to Clear the Code After You Fix It
- Will This Fail Emissions / State Inspection?
- Most Commonly Affected Vehicles
- Manufacturer-Specific Notes
- Real Owner Stories
- 2015 Land Rover LR4 - Easy Fix
- 2014 Jaguar XF - Misdiagnosis Story
- 2017 Range Rover Sport - Unusual Root Cause
- How to Prevent This Code From Triggering
- Frequently Asked Questions
- What does Bank 2 Sensor 3 mean?
- Can I replace just the oxygen sensor myself?
- What are the most common mistakes when diagnosing P0062?
- Why did the code come back after I replaced the sensor?
- Is it okay to use a cheaper aftermarket oxygen sensor?
- How long can I drive with a P0062 code?
- Where is Bank 2 on my Ford F-150 / Chevy Silverado / Jaguar XF?
- Key Takeaways
- 🎟️ Get 5% Off