

OBD-II Code P0060: HO2S Heater Resistance Problem (Bank 2, Sensor 2)
The Ultimate Guide to Diagnosing and Fixing P0060
- P0060 indicates a failure in the internal heater circuit of the downstream oxygen sensor (Bank 2, Sensor 2), preventing it from reaching its 600°F operating temperature.
- Test the sensor's heater resistance with a multimeter before replacing it; a healthy sensor reads between 3 and 10 Ohms.
- Check the O2 heater fuse and verify 12-volt power at the wiring harness connector to rule out electrical shorts before buying a $50-$150 replacement sensor.
- Driving with an active P0060 code reduces fuel economy by up to 10% and risks permanent catalytic converter damage, a repair costing upwards of $1,000.
What Does P0060 Mean?

P0060 means the Powertrain Control Module (PCM) detected a problem with the internal heater of an oxygen sensor. This specific sensor is 'Sensor 2' on 'Bank 2', the downstream sensor (after the catalytic converter) on the side of the engine without cylinder #1. The heater warms the sensor to its 600°F-800°F operating temperature quickly upon startup, which is crucial for monitoring catalytic converter efficiency.
Technical definition: The SAE/OBD-II definition is "HO2S Heater Resistance (Bank 2 Sensor 2)". This indicates the electrical resistance within the heater circuit for the downstream oxygen sensor on Bank 2 is outside the manufacturer's specified range. The PCM checks this resistance on startup; if it varies by more than 10% from the expected value (typically around 8 ohms), it sets the P0060 code.
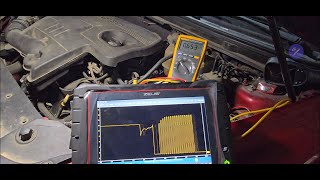
🎬 Watch: How to test oxygen sensor heater circuitsCan I Drive With P0060?
Yes, But With Caution. You can drive, but do not ignore it. Ignoring the code causes poor fuel economy and a guaranteed failed emissions test. Prolonged driving leads to catalytic converter failure, a repair costing between $1,000 and $4,000. In some vehicles, this code triggers a 'limp mode,' limiting engine power and speed.
Common Causes

- Faulty Bank 2, Sensor 2 Oxygen Sensor (Very Common) — The internal heater element inside the oxygen sensor acts like a light bulb filament; it burns out, shorts, or degrades over time. This is the most frequent cause of code P0060. 🎬 See this guide for removing stuck oxygen sensors easily
- Damaged Wiring or Connectors (Common) — The wiring harness leading to the sensor sits close to the hot exhaust and suffers damage from heat, road debris, or water corrosion. This creates a short, an open circuit, or high resistance.
- Blown Fuse or Faulty Relay (Less Common) — A dedicated fuse and relay protect the heater circuit. A short in the wiring or water intrusion in the sensor connector blows the fuse, instantly cutting power to the heater.
- Sensor Contamination (Oil/Coolant) (Less Common) — Engine oil or coolant leaks drip onto the oxygen sensor or its electrical connector. This contamination destroys the sensor's internals or shorts out the wiring.
- Poor Ground Connection (Less Common) — The heater circuit requires a solid ground to complete its path. A corroded or loose ground connection at the chassis or engine block increases circuit resistance, triggering the code.
- Faulty Powertrain Control Module (PCM) (Rare) — The internal driver circuit within the computer that controls and monitors the heater fails. Consider this only after thoroughly ruling out all wiring and sensor issues.
- Software Calibration Issue (Rare) — An outdated PCM software calibration misinterprets a normal sensor heater's resistance, causing a false P0060 code. A technical service bulletin (TSB) dictates a software update to resolve this.
Symptoms

- Check Engine Light On — This is the most common and often the only symptom the driver notices. The light illuminates steadily.
- Failed Emissions Test — This sensor monitors catalytic converter efficiency. A heater circuit fault disables this monitor, resulting in an automatic failure of state OBD-II emissions tests.
- Rough Engine Performance When Cold — The engine runs rough, hesitates, or idles poorly for the first few minutes after a cold start until the exhaust gas naturally heats the sensor.
- Engine Enters Failsafe/Limp Mode — Certain vehicle models engage a 'limp mode' to protect the engine and emissions systems when this fault is detected, severely limiting speed and RPMs.
- Decreased Fuel Economy and Rich Running (also visible on scanner) — Because the sensor heats up slowly, the PCM defaults to a richer fuel mixture for longer than necessary. This wastes fuel and occasionally causes black smoke from the exhaust.
Diagnostic Flowchart

Tap your situation to follow the diagnostic path that matches what you're seeing on this code.
Common Fixes & Costs
- Replace Bank 2, Sensor 2 Oxygen Sensor
— Parts: $50-$150, Labor: $100-$200, ~1.0 hr book time
(DIY)
2015 Ford F-150 (5.0L V8): OEM Ford/Motorcraft: FL3Z-9G444-D (Alt: Denso: 234-4494, Bosch: 15284, NTK: 22069)
2013 Chevrolet Silverado 1500 (5.3L V8): OEM ACDelco/GM: 12589321 (Alt: Denso: 234-4668, Bosch: 15284, NTK: 21066)
2017 Toyota Camry (3.5L V6): OEM Toyota: 89465-06290 (Alt: Denso: 234-4509) - Repair Damaged Wiring or Connector — Parts: $10-$30, Labor: $100-$200, ~1.5 hr book time (Intermediate)
- Replace Blown Fuse — Parts: $2-$5, Labor: $0-$50, ~0.1 hr book time (DIY)
- Clean or Repair Ground Connection — Parts: $0-$10, Labor: $50-$150, ~0.8 hr book time (Intermediate)
- Replace Powertrain Control Module (PCM) — Parts: $500-$1200, Labor: $150-$300, ~1.5 hr book time (Professional)
DIY vs Professional
- Replace Bank 2, Sensor 2 Oxygen Sensor — Beginner:
Tools: Jack and jack stands, O2 sensor socket set, ratchet with extension, penetrating oil, wire brush, torque wrench. - Repair Damaged Wiring or Connector — Beginner:
Tools: Soldering iron, heat shrink tubing, wire strippers, multimeter, vehicle-specific wiring diagram. - Replace Blown Fuse — Beginner:
Tools: Owner's manual, fuse puller or needle-nose pliers. - Clean or Repair Ground Connection — Beginner:
Tools: Socket set, wire brush, sandpaper, dielectric grease. - Replace Powertrain Control Module (PCM) — Beginner:
Tools: Advanced scan tools for programming, socket set.
Used vs. New Parts: Buying Guide
When a used part is worth it: Buying a used oxygen sensor never makes sense. It is a wear-and-tear component with a finite lifespan. The small cost savings do not justify the high risk of premature failure and repeat labor costs.
Donor-vehicle mileage cap: roughly under 20000 miles for the part to have meaningful remaining life.
Donor quality checklist:
- If forced to buy used, it must come from a very low-mileage wrecked vehicle.
- Avoid parts from vehicles in the 'Salt Belt' due to high corrosion risk.
- Match the part number exactly; identical-looking sensors have different internal calibrations.
Decision logic:
- If The part is an oxygen sensor → Always buy new from an OEM or reputable aftermarket brand (e.g., Denso, NTK, Bosch).
- If The cost of a new OEM sensor is prohibitive → Choose a new aftermarket sensor from a well-known manufacturer over a used OEM part.
Warranty tradeoff: Used parts from a salvage yard typically carry a 30-day warranty that excludes labor. New aftermarket sensors usually carry a 1-year warranty. OEM parts carry a 1-year/12,000-mile warranty.
Worst-case if a used part fails: $200-$400 if a used oxygen sensor fails after installation, accounting for repeat labor costs and the price of a new sensor.
What Happens If You Wait — Timeline
- 0-2 weeks: Check Engine Light illuminates. The PCM detects the heater resistance fault on a cold start. No other symptoms are perceived by the driver. (MPG impact: 0-2%% · Added cost: $0)
- 2 weeks - 3 months: Fuel economy drops as the engine runs in open-loop mode for longer after startup. The vehicle fails OBD-II emissions tests. Slight hesitation occurs during cold starts. (MPG impact: 2-5%% · Added cost: $15-$40 in wasted fuel)
- 3-8 months: The engine consistently runs on an incorrect air/fuel mixture. This overheats and stresses the catalytic converter, reducing its efficiency. (MPG impact: 5-10%% · Added cost: $50-$150 in wasted fuel, plus increasing risk to catalyst.)
- 8+ months: The catalytic converter suffers permanent damage from prolonged exposure to an improper fuel mixture. It clogs or melts internally, causing significant power loss. (MPG impact: 10-20%% · Added cost: $1,000-$4,000 for catalytic converter replacement.)
Cost of Not Fixing It
- 0-1 month: Guaranteed failure of any emissions test. A noticeable drop in fuel economy, potentially 5-10%, as the PCM defaults to a less efficient fuel map. (Added cost: $20-$50 per month in extra fuel costs.)
- 1-6 months: The engine running on an improper air/fuel ratio causes carbon buildup and stresses the catalytic converter. The converter begins to overheat and degrade. (Added cost: Negligible, but risk of major component failure increases significantly.)
- 6+ months: Permanent damage to the catalytic converter occurs. An inefficient converter clogs or melts internally, leading to severe performance loss. (Added cost: $1,000-$4,000 for catalytic converter replacement.)
Diagnosis Steps
- Visually Inspect the Sensor and Wiring
Raise the vehicle and locate the Bank 2, Sensor 2 oxygen sensor (after the catalytic converter). Inspect the sensor, connector, and wiring harness for melted plastic, frayed wires, heavy corrosion, or fluid contamination. Pay close attention to areas where the harness contacts the hot exhaust.
Tools: Jack, jack stands, flashlight (Beginner) - Check the Heater Circuit Fuse
Locate the oxygen sensor heater fuse (often labeled O2 HTR or HO2S) in the fuse box. Pull the fuse and inspect it; if blown, replace it with one of the exact same amperage. A fuse that blows repeatedly indicates a short circuit requiring further electrical diagnosis.
Tools: Owner's manual, fuse puller or needle-nose pliers (Beginner) - Test the Sensor's Heater Resistance
Disconnect the sensor's electrical connector and set a digital multimeter to Ohms (Ω). Probe the two heater circuit wires (typically the same color, like two whites or two blacks) on the sensor side. A reading between 3 and 10 Ohms is normal; 'OL' (infinite) or near zero Ohms confirms a dead sensor.
Tools: Digital multimeter (Intermediate) - Check for Power at the Harness Connector
Turn the ignition key to the 'On' position with the engine off. Set the multimeter to DC Volts and probe the power wire in the harness-side connector. A reading of approximately 12 volts confirms power delivery; no voltage points to a blown fuse, bad relay, or broken wire.
Tools: Digital multimeter (Intermediate) - Check for Ground at the Harness Connector
Set the multimeter to the continuity setting (beep). Place one probe on the ground pin in the harness connector and the other on a clean metal chassis ground. A beep and near-zero resistance confirm a solid ground path; no continuity indicates a broken or corroded ground wire.
Tools: Digital multimeter (Intermediate) - Analyze Live Scan Tool Data
Connect a scan tool and monitor live data PIDs for the O2 sensor heater (e.g., 'HO2S Htr B2S2' or heater current). Start the cold engine and verify the heater circuit turns on, typically drawing 0.5 to 1.5 Amps. Zero current draw despite a PCM 'ON' command confirms an open circuit.
Tools: OBD-II scanner with live data (Advanced) - Perform a 'Wiggle Test'
With the engine running and the scan tool displaying live O2 heater data, carefully wiggle the wiring harness leading to the sensor. If the live data values fluctuate or drop out, you have located an intermittent open or short in the harness.
Tools: OBD-II scanner with live data, heat-resistant gloves (Advanced) - Test the PCM Driver Circuit
Identify the heater control wire at the PCM connector using a wiring diagram. Back-probe this wire with a multimeter set to DC volts while the engine runs. The PCM supplies ground in pulses (Pulse Width Modulation), so you should see fluctuating voltage; a steady 12V or 0V indicates a failed PCM driver.
Tools: Digital multimeter, back-probe kit, vehicle-specific wiring diagram (Advanced) - Clear Code and Test Drive
Use an OBD-II scanner to clear the P0060 code after completing repairs. Drive the vehicle for 15-20 minutes through a mix of city and highway conditions. This allows the PCM to run its self-tests and verify the fix.
Tools: OBD-II scanner (Beginner)
When This Code Triggers (Freeze-Frame Conditions)
- Engine Coolant Temp: Below 122°F (50°C) (During a cold start. The heater test runs within the first few minutes of the engine starting.)
- RPM: 600-2500 (The test initiates at idle and continues through steady-state cruise conditions.)
- Engine Load: 20-50% (The fault logs under light to moderate engine load, not heavy acceleration.)
- Vehicle Speed: 0-55 mph (The fault triggers at idle or during steady highway driving as the PCM continuously monitors the circuit.)
Related Codes
- P2272 — O2 Sensor Signal Stuck Lean (Bank 2, Sensor 2). A cold sensor (due to a P0060 fault) cannot produce a proper signal, causing the PCM to see a false 'lean' condition. Fix P0060 first; a properly heated sensor resolves the P2272 code.
- P0059 — HO2S Heater Resistance (Bank 2, Sensor 1). This is the identical fault for the upstream sensor on the same bank. If both P0059 and P0060 appear together, suspect a shared circuit problem, like a common fuse.
- P0161 — HO2S Heater Circuit Malfunction (Bank 2, Sensor 2). P0161 is a general heater circuit malfunction, often related to current draw. The diagnostic process is identical to P0060.
- P0430 — Catalyst System Efficiency Below Threshold (Bank 2). The PCM determines catalyst health using Sensor 2. If P0060 is active, Sensor 2 is offline, making P0430 unreliable. Always resolve P0060 before addressing P0430.
Climate & Environmental Factors
- Cold Climates: The heater's function is most critical during cold starts. Cold weather makes the symptoms of a failed heater (like rough idle and poor initial fuel economy) highly pronounced.
- High Humidity & Road Salt: Regions using road salt in winter see higher rates of P0060. Salt and moisture accelerate corrosion on the sensor body, wiring connectors, and ground points, leading to high resistance.
- Altitude: Oxygen sensors adjust the air-fuel mixture at different altitudes. A malfunctioning sensor causes more noticeable drivability issues at high altitudes where air density is lower.
How to Talk to a Mechanic About This Code
Say this: "I have a P0060 code for the Bank 2, Sensor 2 O2 heater. Before replacing the sensor, please perform a diagnostic to confirm the cause. Specifically, check the fuse, verify 12-volt power and ground at the connector, and test the resistance of the existing sensor's heater element."
This signals you understand the common failure points. It directs the mechanic to perform a proper diagnosis instead of just replacing the most likely part, saving you money if the issue is a simple fuse or wiring problem.
Avoid saying:
- 'My check engine light is on, can you just fix it?' (This invites a shop to run up diagnostic time or sell unnecessary services).
- 'My car needs a new oxygen sensor.' (Don't diagnose it for them; you might be wrong and pay for a part you don't need).
- 'Just do whatever you think is best.' (This gives up all control over the cost and scope of the repair).
Questions to ask before authorizing the repair:
- What was the resistance reading on the old sensor's heater circuit?
- Did you confirm there is 12V power and a good ground at the harness connector?
- If you are recommending a catalytic converter replacement, how did you determine it failed? Did you see a corresponding P0430 code?
- What is the warranty on the new sensor and your labor?
Where to Take It: Dealer vs Independent vs Chain
- Dealer:
Recommended if the vehicle is under warranty. Otherwise, an independent shop is more cost-effective for this common repair.
Best for: Vehicles still under the 8-year/80,000-mile federal emissions warranty., Complex cases involving manufacturer-specific TSBs or PCM software updates., Owners who prioritize OEM parts and are less sensitive to cost.
Downsides: Highest labor rates, often 1.5x to 2x more than independent shops., May be quicker to replace related components rather than performing detailed circuit diagnostics. (Typical cost: +50% vs. baseline) - Independent Shop:
Best fit for most situations. P0060 is a routine code that any competent independent shop diagnoses and repairs correctly and affordably.
Best for: Most out-of-warranty vehicles., Cost-conscious owners who want a reliable repair., Straightforward diagnosis and replacement of the sensor or related wiring.
Downsides: Shop quality and technician skill vary widely; choose a shop with good reviews and ASE-certified technicians. (Typical cost: +0% vs. baseline) - Chain Shop:
Use with caution. Acceptable if you already diagnosed a bad sensor and just need it replaced, but avoid for initial diagnosis due to the high risk of misdiagnosis.
Best for: Simple, clear-cut part replacements when you are certain the sensor itself is the only issue.
Downsides: Technicians are often less experienced with electrical diagnostics., High pressure to upsell services; greater risk of being sold an unnecessary catalytic converter. (Typical cost: -10% vs. baseline)
When to Walk Away From the Repair
If the total estimated repair cost exceeds 50% of your car's private-party market value, seriously consider selling or trading in the vehicle instead of repairing it.
- Car worth $4000, fix is $350: Fix it. The repair cost is well below the 50% threshold.
- Car worth $3000, fix is $1800: Walk away. The repair cost (likely including a catalytic converter) is over 50% of the car's value.
- Car worth $8000, fix is $4200: Borderline. This repair likely includes a new catalytic converter. At 52% of the vehicle's value, get a second opinion and carefully consider the car's overall condition.
What Scan Tool You Need for This Code
Minimum: A code reader that displays live data for O2 sensor circuits and reads freeze-frame data.
A basic $20 code reader only gives you the P0060 code. It cannot show the live electrical data (like heater voltage or current) needed to determine if the fault is the sensor, the wiring, or the fuse.
Budget: BlueDriver Pro or similar Bluetooth scanner (~$100) — Connects to a smartphone app to read/clear codes, view freeze-frame data, and graph live data for the O2 sensor heater circuit. This confirms if the heater receives power.
Mid-range: Foxwell NT510 Elite (~$180) — Provides manufacturer-specific codes and bi-directional controls. This allows you to actively command the O2 heater circuit on and off, proving whether the sensor and wiring respond to the PCM.
Professional: Autel MaxiCOM MK808 / MK808BT (~$450-550) — Offers full-system, professional-level diagnostics with advanced bi-directional control and comprehensive live data graphing. This is overkill for just a P0060 code but a worthwhile investment for a serious DIYer.
How to Clear the Code After You Fix It
- Use an OBD-II scan tool to clear the P0060 code.
- Do not disconnect the battery, as this resets all readiness monitors to 'incomplete'.
- Perform a complete drive cycle to run the self-tests.
Drive cycle (~30 minutes): Start with a cold soak (engine off overnight). Start the engine and idle for 2-3 minutes. Drive at a steady speed of 55 mph for 5-10 minutes. Perform stop-and-go city driving. Allow the vehicle to coast down without using the brakes.
Readiness monitors affected: O2 Sensor Heater Monitor, O2 Sensor Monitor, Catalyst Monitor
Before emissions retest: drive at least 100 miles to fully set monitors.
Watch out for:
- Clearing the code with a scanner resets the readiness monitors, causing an immediate emissions test failure if not followed by a complete drive cycle.
- The code returns immediately if the root cause (e.g., bad sensor, wiring short) is not fixed.
Will This Fail Emissions / State Inspection?
Yes — this code typically fails an OBD-II emissions inspection.
- California: An illuminated Check Engine Light is an automatic failure. All required readiness monitors must be 'complete'. For model years 2000 and newer, only one incomplete monitor (usually EVAP) is permitted.
- New York: Most vehicles model year 1996 and newer require an OBD-II emissions inspection. An active P0060 code results in an automatic failure.
- Texas: In counties requiring emissions testing, P0060 causes a failure due to the active trouble code and illuminated MIL.
Most Commonly Affected Vehicles
- Ford F-150 (2004-2024) — This code is very common on F-150s, often appearing with P2272 (Signal Stuck Lean). The root cause is almost always a failed heater in the sensor itself.
- Chevrolet Silverado, Suburban (2005-2015) — Commonly reported on GM trucks and SUVs. A repeated failure points directly to the sensor or wiring.
- Toyota Camry (2007-2024) — Failure of the sensor's internal heater element is a frequent cause for this code on these models.
- Honda Accord (2003-2024) — P0060 on Accords almost always points directly to a failed Bank 2, Sensor 2 oxygen sensor. Use OEM or high-quality Denso/NTK aftermarket sensors.
- BMW E46, E90, X3, X5 (2000-2015) — These BMW models frequently experience oxygen sensor heater circuit issues. Wiring becomes brittle from heat over time, requiring careful inspection.
- Mercedes-Benz W203, W211, ML-Class (2000-2012) — Commonly seen in this era of Mercedes-Benz vehicles. Check for blown fuses in the front SAM (Signal Acquisition Module) before replacing the sensor.
- Volkswagen Jetta, Golf, Passat, Touareg (2000-2016) — Often reported on various VW models, where the root cause is typically a failed O2 sensor heater.
- Audi A4, A6, Q7 (2000-2014) — Similar to Volkswagen, these Audi models see this code frequently. A VAG-specific scan tool helps differentiate between heater and signal faults.
Manufacturer-Specific Notes
- Ford: On F-150 trucks, P0060 frequently accompanies a P2272 (Signal Stuck Lean) code. The root cause is almost always a failed heater in the sensor itself, not two separate problems.
- General Motors: Specific diagnostic procedures test heater resistance under strict conditions, sometimes requiring a cold soak of over 10 hours. TSBs exist involving PCM software updates to fix false codes.
- General: Water intrusion into the oxygen sensor's electrical connector blows the heater circuit fuse. Always check the fuse and look for moisture in the connector before replacing a sensor.
- General: Critical components like oxygen sensors require OEM or original equipment manufacturer brands (e.g., Denso, NTK, Bosch). Cheap aftermarket sensors fail prematurely or trigger repeat codes.
- Federal Emissions Warranty: Oxygen sensors are 'specified major emission control components' covered under the Federal Emissions Warranty for 8 years or 80,000 miles. If your vehicle is within this window, the dealer repairs it at no cost.
Real Owner Stories
2004 Ford F-150 with 65k miles
Check Engine Light came on, codes P0060 and P2272 (Signal Stuck Lean) appeared. No other symptoms were noticeable.
What they tried:
- Owner was advised the problem was likely the sensor itself, as the heater failure (P0060) prevents the sensor from reaching the correct temperature, causing the false lean reading (P2272).
Outcome: Replacing the Bank 2, Sensor 2 oxygen sensor fixed the issue. Once the new sensor's heater worked correctly, both codes cleared.
Lesson: When a heater resistance code (P0060) appears with a signal code (P2272) for the same sensor, fix the heater circuit fault first. A new, properly heated sensor almost always resolves the signal issue.
2008 Ford F-150 5.4L
Owner replaced all four O2 sensors, but codes P0060, P0141, and P0161 returned, indicating heater circuit issues on both downstream sensors.
What they tried:
- The owner confirmed the issue persisted after replacing parts, pointing away from the sensors themselves.
Outcome: The cause was a shared problem: a blown fuse that powered both downstream sensor heaters.
Lesson: If heater codes for multiple O2 sensors appear at once, suspect a shared power or ground issue. Check fuses and wiring harnesses common to the failed sensors before replacing parts.
2003 Mercedes-Benz C230 with 97k miles
Check Engine Light for an O2 sensor came on about a year after the sensor had already been replaced. Motor oil was found inside the sensor's electrical connector.
What they tried:
- The owner cleared the code, but it returned after two days. The source of the oil was a leaking camshaft adjuster magnet.
Outcome: The oil contamination within the connector caused the repeat sensor failure. The sensor was replaced again, and the oil leak was fixed.
Lesson: If an O2 sensor fails prematurely, inspect the connector for oil or coolant contamination. Oil wicks through the wiring harness from engine leaks and pools in the connector, causing it to short out.
How to Prevent This Code From Triggering
- Fix Oil and Coolant Leaks Promptly (As soon as detected) — Leaking fluids drip onto the O2 sensor or its wiring, causing contamination and electrical shorts. Coolant chemically destroys the sensor's internal elements.
- Regularly Inspect Exhaust Hangers and Mounts (Annually or during oil changes) — Broken exhaust hangers cause the exhaust system to sag or vibrate excessively. This stresses the wiring harness connected to the O2 sensor, breaking wires over time.
- Wash the Vehicle's Undercarriage Periodically (Seasonally, especially after winter) — Washing away road salt and grime prevents corrosion on the O2 sensor body, its electrical connector, and crucial ground connections for the heater circuit.
Frequently Asked Questions
What does 'Bank 2, Sensor 2' mean?
Bank 2 is the side of the engine without cylinder #1. Sensor 2 is the downstream sensor located after the catalytic converter. Consult your service manual to locate cylinder #1 on your specific V-style engine.
What are the most common mistakes when diagnosing P0060?
The biggest mistake is replacing the oxygen sensor without testing the fuse or wiring first. Always verify 12V power and ground at the connector. Another common error is replacing the wrong sensor, such as Bank 1 or Sensor 1.
What do the heater circuit wires on the O2 sensor look like?
On most 4-wire oxygen sensors, the two heater circuit wires share the same color (typically two black or two white wires). The remaining two wires handle the sensor signal and ground. Always consult a vehicle-specific wiring diagram to confirm.
Can I fix code P0060 myself?
Yes, replacing an oxygen sensor is a manageable DIY repair requiring an O2 sensor socket and basic hand tools. However, sensors often rust into the exhaust pipe and require penetrating oil or heat to remove. If the sensor is seized, take it to a professional.
Will the P0060 code clear itself?
No, P0060 indicates a hard electrical fault that will not clear itself. The Check Engine Light remains illuminated until the underlying resistance issue is repaired. You must clear the code with an OBD-II scanner after fixing the problem.
What happens if I ignore P0060?
Ignoring P0060 causes poor fuel economy and an automatic emissions test failure. Over time, the unheated sensor disrupts the air-fuel mixture, leading to carbon buildup. This eventually destroys the catalytic converter, resulting in a $1,000 to $4,000 repair.
How do I know if it's the sensor or the wiring?
Test the sensor's internal heater resistance with a multimeter; a reading outside the 3-10 ohm range means the sensor is bad. If the sensor tests good, check the harness connector with the key on. A lack of 12 volts indicates a wiring, fuse, or PCM problem.
What's the difference between P0060 and P0161?
Both codes indicate a problem with the Bank 2, Sensor 2 heater circuit. P0060 specifically flags an out-of-spec electrical resistance (ohms). P0161 is a broader malfunction code often related to current draw, but both require identical diagnostic steps.
Key Takeaways
- P0060 indicates a failure in the internal heater circuit of the downstream oxygen sensor (Bank 2, Sensor 2), preventing it from reaching its 600°F operating temperature.
- Test the sensor's heater resistance with a multimeter before replacing it; a healthy sensor reads between 3 and 10 Ohms.
- Check the O2 heater fuse and verify 12-volt power at the wiring harness connector to rule out electrical shorts before buying a $50-$150 replacement sensor.
- Driving with an active P0060 code reduces fuel economy by up to 10% and risks permanent catalytic converter damage, a repair costing upwards of $1,000.
Helpful Videos

The information in this article is provided for general reference and educational purposes only. Vehicle specifications, procedures, and part compatibility can vary by production date, trim level, and region. Always consult your vehicle's factory service manual and verify part numbers before purchasing or performing repairs. Safety-critical components such as airbags, seat belts, and braking systems should be installed by a qualified professional.
- 🎬 Helpful Videos
- What Does P0060 Mean?
- Can I Drive With P0060?
- Common Causes
- Symptoms
- Diagnostic Flowchart
- Common Fixes & Costs
- DIY vs Professional
- Used vs. New Parts: Buying Guide
- What Happens If You Wait — Timeline
- Cost of Not Fixing It
- Diagnosis Steps
- When This Code Triggers (Freeze-Frame Conditions)
- Related Codes
- Climate & Environmental Factors
- How to Talk to a Mechanic About This Code
- Where to Take It: Dealer vs Independent vs Chain
- When to Walk Away From the Repair
- What Scan Tool You Need for This Code
- How to Clear the Code After You Fix It
- Will This Fail Emissions / State Inspection?
- Most Commonly Affected Vehicles
- Manufacturer-Specific Notes
- Real Owner Stories
- 2004 Ford F-150 with 65k miles
- 2008 Ford F-150 5.4L
- 2003 Mercedes-Benz C230 with 97k miles
- How to Prevent This Code From Triggering
- Frequently Asked Questions
- What does 'Bank 2, Sensor 2' mean?
- What are the most common mistakes when diagnosing P0060?
- What do the heater circuit wires on the O2 sensor look like?
- Can I fix code P0060 myself?
- Will the P0060 code clear itself?
- What happens if I ignore P0060?
- How do I know if it's the sensor or the wiring?
- What's the difference between P0060 and P0161?
- Key Takeaways
- 🎟️ Get 5% Off