

OBD-II Code P0055: Oxygen Sensor Heater Resistance Problem (Bank 1, Sensor 3)
The Ultimate Guide to P0055: What It Means, Why It Triggers, and How to Fix It for Good
- Test the Bank 1, Sensor 3 oxygen sensor with a multimeter; a healthy heater circuit reads between 2 and 15 Ohms.
- Check the 10A or 15A O2 sensor heater fuse before buying parts, as a shorted sensor often blows the fuse and causes immediate code return.
- Do not drive more than 200 miles with an active P0055 code to prevent unburnt fuel from destroying your $1,500+ catalytic converter.
- Always buy a new, OEM-quality oxygen sensor (like Denso or NTK) for $50-$150, as used sensors have a high failure rate and void labor savings.
What Does P0055 Mean?
The Powertrain Control Module (PCM) detected a problem with the heater inside the 'Bank 1, Sensor 3' oxygen sensor. The heater warms the sensor to 600-800°F quickly, allowing the engine to run efficiently after a cold start. The PCM monitors the heater circuit's electrical resistance; if it varies by more than 10% from the preset range, it triggers P0055.
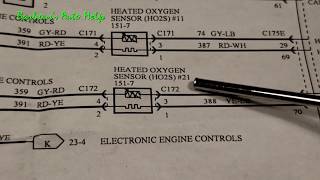
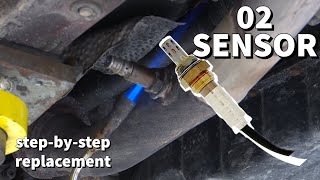
Technical definition: The official SAE/OBD-II definition is "HO2S Heater Resistance (Bank 1, Sensor 3) 🎬 Watch: A complete guide to fixing the P0055 code.". The PCM detected that the electrical resistance in the heater circuit for the heated oxygen sensor (HO2S) located on Bank 1, in the third downstream position, is outside the acceptable range.
Can I Drive With P0055?
Yes, But With Caution. Yes, but address it promptly. While safe for short trips, driving over 200 miles causes emissions test failure, wastes fuel, and risks catalytic converter damage. Ignoring this turns a $150 sensor repair into a $1,500+ converter replacement.
Common Causes
- Faulty Bank 1, Sensor 3 Oxygen Sensor (Very Common) — The internal heating element is the most common failure point, accounting for 85% of P0055 cases. Like a light bulb filament, it burns out or breaks over time, causing an open circuit (infinite resistance) or a short circuit (near-zero resistance).
- Blown Fuse or Faulty Relay (Common) — A dedicated fuse protects the O2 sensor heater circuit. A blown fuse cuts power entirely. If a replacement fuse blows immediately, a short circuit exists in the wiring or the sensor itself.
- Damaged Wiring or Connectors (Common) — Wiring and connectors are exposed to extreme exhaust heat, moisture, and road debris. Melted insulation, chafing against the chassis, or corrosion in the plug alters the circuit's resistance.
- Water Intrusion / Thermal Shock (Less Common) — Driving through deep water splashes the hot sensor, causing a sudden temperature drop known as thermal shock. This cracks the sensor's internal ceramic heater element.
- Aftermarket Parts Quality Issues (Less Common) — Low-quality or universal aftermarket oxygen sensors often lack the precise internal resistance specifications the PCM expects, triggering a persistent fault even after replacement.
- Faulty Powertrain Control Module (PCM) (Very Rare) — The internal driver circuit that sends the pulse-width modulated (PWM) signal to the sensor's heater can burn out. Consider this only after exhaustively ruling out the sensor and wiring.
Symptoms
- Check Engine Light is On — The most common and often the only symptom. The light remains illuminated as long as the fault is active.
- Failed Emissions Test — An active P0055 code automatically fails an OBD-II emissions test because the oxygen sensor system monitor will read 'Not Ready'.
- Rough Idle or Hesitation on Cold Starts — During a cold start, the engine runs rough or hesitates because the PCM lacks valid O2 sensor data to accurately adjust the fuel mixture.
- Black Smoke from Exhaust — Visible black smoke from the tailpipe during cold starts indicates unburnt fuel from the engine running too rich.
- Increased Fuel Consumption (also visible on scanner) — A slow-to-warm sensor forces the PCM to remain in 'open-loop' mode longer, running a richer fuel mixture that reduces MPG by 5-10%.
- Delayed Closed-Loop & Elevated Fuel Trims (scan-tool only — no driver-felt sign) — Live scanner data shows a delay entering 'closed-loop' fuel control and elevated short-term fuel trims as the PCM compensates for the cold sensor.
Diagnostic Flowchart
Tap your situation to follow the diagnostic path that matches what you're seeing on this code.
Common Fixes & Costs
- Replace Bank 1, Sensor 3 Oxygen Sensor — Parts: $50-$150, Labor: $100-$150, ~1.0 hr book time (DIY)
- Replace Blown Fuse — Parts: $1-$5, Labor: $0-$50, ~0.1 hr book time (DIY)
- Repair Damaged Wiring or Connector — Parts: $10-$50, Labor: $100-$200, ~1.5 hr book time (Intermediate)
- Perform PCM Software Update — Parts: $0, Labor: $100-$250, ~1.0 hr book time (Professional)
- Replace Powertrain Control Module (PCM) — Parts: $600-$900, Labor: $200-$300, ~2.0 hr book time (Professional)
Used vs. New Parts: Buying Guide
When a used part is worth it: Buying a used oxygen sensor never makes sense. It is a wear item with a finite lifespan. The small savings are not worth the risk of premature failure and repeat labor.
Donor-vehicle mileage cap: roughly under 20000 miles for the part to have meaningful remaining life.
Donor quality checklist:
- Avoid parts from rust-belt states due to corrosion.
- Part numbers must match exactly; identical-looking sensors have different resistance values.
Decision logic:
- If The part is an oxygen sensor. → Always buy new from a reputable OEM brand (Denso, NTK).
- If The part is a Powertrain Control Module (PCM). → A used PCM is cost-effective but MUST be professionally reprogrammed to your VIN.
Warranty tradeoff: Used sensors have a 30-day max warranty. New OEM sensors carry a 1-year/12,000-mile warranty.
Worst-case if a used part fails: $200-$350 if a used sensor fails, representing the new part cost plus repeat labor.
What Happens If You Wait — Timeline
- 0-2 weeks: Check Engine Light illuminates. Vehicle fails emissions tests. No drivability symptoms are noticeable. (MPG impact: 0-3%% · Added cost: $0)
- 2 weeks - 3 months: Fuel economy drops as the engine runs rich during cold starts. Slight hesitation occurs in cold weather. (MPG impact: 3-8%% · Added cost: $15-$40 per month in wasted fuel.)
- 3-9 months: The constant rich mixture overheats the catalytic converter, coating the internal substrate with soot. (MPG impact: 5-15%% · Added cost: High risk of permanent catalytic converter damage.)
- 9+ months: The catalytic converter melts or clogs. The vehicle becomes sluggish, and exhaust rattles. (MPG impact: 10-20%% · Added cost: $1,200-$2,800 for catalytic converter replacement.)
Cost of Not Fixing It
- 0-3 months: Reduced fuel economy by up to 10% as the engine runs in 'open loop' during cold starts. Automatic emissions test failure. (Added cost: $20-$50 per month in wasted fuel.)
- 3-12 months: Unburnt fuel overheats and damages the catalytic converter's internal structure. (Added cost: High risk of permanent converter damage.)
- 12+ months: Complete failure of the catalytic converter due to clogging and overheating. (Added cost: $1,200-$2,800 for catalytic converter replacement.)
Diagnosis Steps
- Read Codes and Check for TSBs
Connect an OBD-II scanner to confirm P0055 is active. Check for manufacturer Technical Service Bulletins (TSBs) for your specific year and model, as the fix is sometimes a software update.
Tools: OBD-II Scanner (Beginner) - Check the O2 Sensor Heater Fuse
Locate the O2 sensor heater circuit fuse in the owner's manual. Visually inspect it. If blown, replace it. If the new fuse blows immediately, trace the wiring for a short circuit.
Tools: Owner's manual, fuse puller (Beginner) - Visually Inspect the Sensor and Wiring
Safely raise the vehicle. Locate Bank 1, Sensor 3 (same side as cylinder #1, after the catalytic converter). Inspect the sensor, connector, and wiring harness for melting, chafing, or corrosion.
Tools: Jack, jack stands, flashlight (Intermediate) - Test the Sensor's Heater Resistance
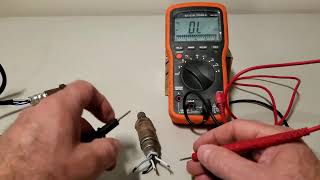
Unplug the sensor. Set a multimeter to Ohms (Ω). Touch the probes to the two heater pins (usually the same color wires) on the sensor side. A healthy cold sensor reads 2-15 ohms. Infinite (OL) or near-zero readings require sensor replacement.
Tools: Multimeter (Intermediate) - Check for Power and Ground at the Connector
With the sensor unplugged and key 'On' (engine off), check the vehicle's harness connector. One pin must have battery voltage (~12V). The other is the PCM-controlled ground. Missing voltage indicates an upstream wiring or fuse issue.
Tools: Multimeter (Intermediate) - Analyze Freeze Frame Data
Use an advanced scanner to view 'Freeze Frame' data. This reveals the exact engine temperature, RPM, and speed when P0055 triggered, providing context for intermittent faults.
Tools: Advanced OBD-II Scanner (Advanced) - Perform a Voltage Drop Test
Connect the multimeter in parallel with the loaded circuit (engine running). A reading over 200mV indicates excessive resistance in the wiring that must be traced and repaired.
Tools: Multimeter (Advanced) - Analyze Live Data PIDs
Monitor the 'HO2S HTR B1S3' PID. When commanded 'On' during a cold start, it should show a duty-cycle percentage. If commanded on but voltage tests show no activity, suspect a wiring or PCM fault.
Tools: Advanced OBD-II Scanner (Advanced) - Pro Tip: Analyze the Circuit with a Lab Scope
Connect an oscilloscope to the PCM-controlled ground side. A healthy circuit shows a square wave duty-cycle and a current ramp between 0.8A and 1.8A. No waveform points to a PCM driver failure.
Tools: Oscilloscope, current clamp (Professional)
When This Code Triggers (Freeze-Frame Conditions)
- Engine Coolant Temp: 170-220°F (Engine fully warmed up. The heater monitor runs after reaching operating temperature.)
- RPM: 1200-2000 (Steady cruise or light acceleration provides stable conditions for the monitor.)
- Vehicle Speed: 40-60 mph (Steady highway driving allows the PCM to execute the heater circuit test.)
Related Codes
- P0060 — Identical heater resistance fault for the opposite bank (Bank 2, Sensor 3). If both appear, suspect a shared fuse or relay.
- P0054 — Heater resistance fault for Bank 1, Sensor 2. Simultaneous codes point to a shared power or ground issue.
- P0147 — General 'Heater Circuit Malfunction' for Bank 1, Sensor 3. Often appears alongside P0055.
- P0160 — 'O2 Sensor Circuit No Activity Detected'. A failed heater prevents the sensor from generating a voltage signal, triggering this code.
Climate & Environmental Factors
- Cold Climates: Failures are more noticeable in winter, presenting as rough starts. Cold temperatures also make aging wiring insulation brittle and prone to cracking.
- High Humidity / Road Salt: Moisture and road salt seep into connectors, causing corrosion that increases resistance in the heater circuit.
- Deep Water Exposure: Driving through flooded areas splashes cold water onto the 600°F oxygen sensor, causing thermal shock that cracks the internal ceramic heater.
How to Talk to a Mechanic About This Code
Say this: "I have a P0055 code for the Bank 1, Sensor 3 heater circuit. I've checked the fuse. Please perform a resistance test on the sensor and check for voltage and ground at the connector before replacing parts."
This directs the mechanic to perform specific diagnostic steps rather than blindly replacing the sensor, preventing misdiagnosis of a wiring issue.
Avoid saying:
- My check engine light is on, can you look at it?
- Just replace the O2 sensor.
- Just fix whatever's wrong.
Questions to ask before authorizing the repair:
- What was the resistance reading on the old sensor?
- Did you confirm 12-volt power and a good ground at the harness connector?
- Can you show me the damaged wiring or failed part?
- What is the warranty on parts and labor?
Where to Take It: Dealer vs Independent vs Chain
- Dealer:
Best for: Vehicles under the 8-year/80,000-mile federal emissions warranty., Vehicles requiring a PCM software update via TSB.
Downsides: Highest labor rates., Prefers replacing expensive entire wiring harnesses over component-level repairs. (Typical cost: +50% vs. baseline) - Independent Shop:
Best overall fit. An experienced independent technician easily diagnoses P0055 at a lower cost than a dealer.
Best for: Out-of-warranty vehicles., Diagnosing failed sensors or repairing damaged wiring.
Downsides: May lack manufacturer-specific software for TSB updates. (Typical cost: +0% vs. baseline) - Chain Shop:
Use with caution. Acceptable for pre-diagnosed sensor replacement, but risky for initial diagnosis.
Best for: Simple replacement after you have personally diagnosed a bad sensor.
Downsides: High pressure to upsell services; P0055 is easily blamed on a catalytic converter. (Typical cost: -10% vs. baseline)
When to Walk Away From the Repair
If the estimated repair cost exceeds 40-50% of your car's Kelley Blue Book (KBB) private-party value, consider your options.
- Car worth $4000, fix is $250: Fix it. A standard sensor replacement is well below the threshold.
- Car worth $4000, fix is $2000: Walk away. If P0055 led to catalytic converter failure, the repair is 50% of the car's value.
- Car worth $12000, fix is $2000: Fix it. Even a worst-case catalytic converter repair is below the threshold for this value.
What Scan Tool You Need for This Code
Minimum: A scanner that reads codes, shows Freeze Frame data, and displays live sensor data.
A basic code reader cannot display live O2 sensor voltage or heater status, which is essential to avoid replacing unnecessary parts.
Budget: BlueDriver Pro (~$100) — Connects via Bluetooth. Reads P0055, views live data to watch the heater operate, and provides vehicle-specific repair reports.
Mid-range: Foxwell NT510 Elite (~$200) — Provides manufacturer-specific diagnostics, accessing detailed data PIDs for a more accurate diagnosis.
Professional: Autel MaxiCOM MK808 (~$500) — Offers bidirectional controls to command the O2 sensor heater circuit on and off, definitively testing the wiring and PCM driver.
Rent vs buy: For a one-time repair, use a free tool loaner program at auto parts stores like AutoZone to read the codes.
How to Clear the Code After You Fix It
- Use an OBD-II scan tool to clear the P0055 code.
- Perform a complete drive cycle to run readiness monitors.
- Re-scan to ensure the code has not returned and monitors are 'Ready'.
Drive cycle (~20 minutes): A generic drive cycle includes: cold start, 3 minutes idle, 10 minutes steady highway driving (55 mph), and 10 minutes stop-and-go city driving.
Readiness monitors affected: Oxygen Sensor Monitor, Oxygen Sensor Heater Monitor, Catalyst Monitor
Before emissions retest: drive at least 50 miles to fully set monitors.
Watch out for:
- Disconnecting the battery clears the code but resets all monitors to 'Not Ready', guaranteeing emissions failure.
- The code returns immediately if the underlying electrical fault was not fixed.
- Incomplete drive cycles leave monitors 'Not Ready', preventing a pass at the emissions station.
Will This Fail Emissions / State Inspection?
Yes — this code typically fails an OBD-II emissions inspection.
- California: An illuminated Check Engine Light is an automatic failure. All readiness monitors must be 'Ready' after repair.
- New York: Automatic failure if the light is on. For 2001+ vehicles, only one monitor is allowed to be 'Not Ready'.
- Texas: Automatic failure in testing counties. At most one monitor can be 'Not Ready' to pass the OBD-II test.
Most Commonly Affected Vehicles
- Chevrolet / GMC Blazer, S-10, various trucks (1996-2005) — Sensor failure is common due to age. Underbody wiring harnesses frequently chafe against heat shields.
- Toyota Camry (2007-2024) — Internal heater failure is the primary cause. Diagnosis usually points directly to the sensor after confirming the fuse is intact.
- Honda Accord (2003-2024) — Honda wiring harnesses are known rodent targets. Thoroughly inspect for chewed wires if the sensor tests good.
- Ford F-150 (2004-2024) — Physical damage to the sensor or exposed wiring from road debris is a strong possibility on these trucks.
- Land Rover LR4, Range Rover (2013-2016) — A PCM software update (TSB LTB00671NAS3) is often required for 2014-2015 3.0L V6 models to fix sensitivity to thermal shock.
- Hyundai / Kia Various (2005-2024) — Verify the exact OEM part number, as multiple sensor types with different resistance values are used across engine configurations.
- Nissan Altima (2002-2024) — P0055 frequently points directly to a burned-out sensor heater element.
- Jeep Wrangler, Grand Cherokee (2007-2024) — Wiring harnesses are susceptible to damage during off-roading. Check routing near the exhaust and driveshafts.
Manufacturer-Specific Notes
- Land Rover: For 2014-2015 3.0L V6 models, TSB LTB00671NAS3 advises a PCM software update to fix hypersensitivity to thermal shock before replacing the sensor.
- Toyota/Lexus: Always use the exact OEM-spec sensor. Wideband Air/Fuel Ratio sensors and conventional downstream sensors are not interchangeable.
- Honda: Wiring harnesses are highly susceptible to rodent damage. Meticulously inspect the harness for bite marks if the sensor tests good.
- General Motors (GM): On older trucks (S-10, Blazer), the downstream O2 harness frequently rubs against the frame or heat shields, causing shorts.
- Federal (All Makes): The Federal Emissions Warranty covers oxygen sensors and the PCM for 8 years or 80,000 miles. Dealerships repair P0055 for free within this window.
Real Owner Stories
2011 Chevy Cruze with multiple O2 sensor codes
Check Engine Light appeared with codes P0036, P0055, and P0138, all related to downstream oxygen sensors.
Outcome: Mechanics confirmed that multiple codes for the same sensor (heater and performance) strongly point to a single failed sensor rather than multiple wiring faults.
Lesson: When heater and performance codes appear simultaneously for the same sensor, replace the sensor.
Misdiagnosis leads to repeat repair
A driver replaced the Bank 1, Sensor 3 oxygen sensor without testing.
Outcome: P0055 returned immediately. A proper diagnosis revealed a corroded wire in the harness connector. The fix was repairing the connector, not the sensor.
Lesson: Never skip diagnostics. Inspecting the wiring and testing resistance prevents buying unnecessary parts.
Simple fix for an immediate code return
A DIYer replaced their oxygen sensor, but the code returned instantly upon startup.
Outcome: They checked the O2 heater circuit fuse and found it blown. Replacing the fuse (which blew due to the old shorted sensor) permanently resolved the code.
Lesson: Always check the fuse. A shorted sensor blows the fuse, and the new sensor won't work until it is replaced.
How to Prevent This Code From Triggering
- Use Top-Tier certified gasoline. (Every fill-up) — High-quality fuels contain detergents that prevent carbon deposits from contaminating the oxygen sensor.
- Fix oil and coolant leaks promptly. (As needed) — Burning oil or coolant poisons the O2 sensor element, leading to premature failure.
- Replace aging oxygen sensors proactively. (Every 60,000-90,000 miles.) — Sensors degrade over time. Replacing them maintains fuel efficiency and prevents strain on the catalytic converter.
- Inspect underbody wiring. (During oil changes.) — Catching chafed or melted wiring early prevents electrical shorts and blown fuses.
Frequently Asked Questions
What does Bank 1 and Sensor 3 mean?
Bank 1 is the side of the engine containing cylinder #1. Sensor 3 is the third sensor in line on that exhaust bank, located downstream of the catalytic converter. Its main job is monitoring emissions system health.
What is the most common misdiagnosis for P0055?
The most common mistake is replacing the oxygen sensor without testing it first. The code is sometimes caused by a simple blown fuse, damaged wire, or corroded connector. Skipping diagnostics guarantees the code returns if the sensor wasn't the root cause.
Can I fix P0055 myself?
Yes, replacing the sensor or a blown fuse is a straightforward DIY repair requiring basic hand tools. However, diagnosing and repairing wiring issues is more complex and carries electrical risks. If a new sensor and fuse don't fix it, take the vehicle to a professional.
How much does it cost to fix P0055?
A DIY sensor replacement costs $50 to $150 for the part. A professional shop repair typically ranges from $150 to $350, including parts and labor. Diagnosing and repairing a wiring harness issue costs $100 to $250 depending on the damage.
Will a P0055 code clear itself?
No, P0055 is a hard electrical fault code that keeps the Check Engine Light illuminated. You must repair the underlying problem and manually clear the code using an OBD-II scan tool. The vehicle then needs to complete a drive cycle to verify the fix.
Why did the code come back after I replaced the sensor?
If P0055 returns immediately, a shorted wire likely blew the heater circuit fuse, or the replacement sensor is faulty. Re-check the fuse, inspect the wiring harness for damage, and verify the connector is secure. In rare cases, the Powertrain Control Module (PCM) driver failed.
Can a bad battery cause a P0055 code?
A weak battery with low system voltage (below 10.5V) prevents the heater circuit from receiving adequate power, potentially triggering false codes. Always ensure your battery and alternator are healthy before chasing complex electrical faults. However, a bad battery rarely triggers P0055 in isolation.
Key Takeaways
- Test the Bank 1, Sensor 3 oxygen sensor with a multimeter; a healthy heater circuit reads between 2 and 15 Ohms.
- Check the 10A or 15A O2 sensor heater fuse before buying parts, as a shorted sensor often blows the fuse and causes immediate code return.
- Do not drive more than 200 miles with an active P0055 code to prevent unburnt fuel from destroying your $1,500+ catalytic converter.
- Always buy a new, OEM-quality oxygen sensor (like Denso or NTK) for $50-$150, as used sensors have a high failure rate and void labor savings.
Helpful Videos


The information in this article is provided for general reference and educational purposes only. Vehicle specifications, procedures, and part compatibility can vary by production date, trim level, and region. Always consult your vehicle's factory service manual and verify part numbers before purchasing or performing repairs. Safety-critical components such as airbags, seat belts, and braking systems should be installed by a qualified professional.
- 🎬 Helpful Videos
- What Does P0055 Mean?
- Can I Drive With P0055?
- Common Causes
- Symptoms
- Diagnostic Flowchart
- Common Fixes & Costs
- Used vs. New Parts: Buying Guide
- What Happens If You Wait — Timeline
- Cost of Not Fixing It
- Diagnosis Steps
- When This Code Triggers (Freeze-Frame Conditions)
- Related Codes
- Climate & Environmental Factors
- How to Talk to a Mechanic About This Code
- Where to Take It: Dealer vs Independent vs Chain
- When to Walk Away From the Repair
- What Scan Tool You Need for This Code
- How to Clear the Code After You Fix It
- Will This Fail Emissions / State Inspection?
- Most Commonly Affected Vehicles
- Manufacturer-Specific Notes
- Real Owner Stories
- 2011 Chevy Cruze with multiple O2 sensor codes
- Misdiagnosis leads to repeat repair
- Simple fix for an immediate code return
- How to Prevent This Code From Triggering
- Frequently Asked Questions
- What does Bank 1 and Sensor 3 mean?
- What is the most common misdiagnosis for P0055?
- Can I fix P0055 myself?
- How much does it cost to fix P0055?
- Will a P0055 code clear itself?
- Why did the code come back after I replaced the sensor?
- Can a bad battery cause a P0055 code?
- Key Takeaways
- 🎟️ Get 5% Off