

OBD-II Code P0050: A Comprehensive Guide to the O2 Sensor Heater Circuit Fault
The Ultimate Guide to Understanding, Diagnosing, and Fixing P0050
- P0050 indicates a failure in the Bank 2, Sensor 1 oxygen sensor heater, with a burnt-out internal sensor element causing over 80% of these codes.
- Always check the dedicated 'O2 HTR' fuse (typically 10A or 15A) and visually inspect the wiring harness for melted insulation before buying a replacement sensor.
- Driving with an active P0050 code drops fuel economy by 3-10% and forces raw fuel into the exhaust, risking a $1,500+ catalytic converter replacement if ignored for months.
- Bank 2 is the side of the engine opposite cylinder #1, and Sensor 1 is always the upstream sensor located between the engine block and the catalytic converter.
What Does P0050 Mean?

Your Engine Control Module (ECM) detected a fault in the heater control circuit of the 'Bank 2, Sensor 1' oxygen sensor. This sensor sits in the exhaust stream before the catalytic converter on the side of the engine opposite cylinder #1. The heater element rapidly warms the sensor to its 600°F (315°C) operating temperature, allowing the engine to achieve an efficient air-fuel ratio immediately after a cold start.
🎬 Watch: Introduction to how oxygen sensors operate and are tested.Technical definition: The SAE definition is 'HO2S Heater Control Circuit (Bank 2 Sensor 1)'. The ECM detects an open circuit, a short to ground, or excessive current in the upstream oxygen sensor's heater element on engine Bank 2. The code sets when the circuit's current or voltage falls outside expected specifications for more than a few seconds.
Can I Drive With P0050?
Yes, But With Caution. Yes, but address it within a few weeks. Ignoring the code causes a 3-10% drop in fuel economy and forces raw fuel into the exhaust, which destroys the catalytic converter. This turns a $150 sensor replacement into a $1,500-$3,000 repair bill. It is safe to drive for a few hundred miles to reach a repair shop.
Common Causes

- Failed Heated Oxygen Sensor (HO2S) (Very Common) — The internal heater element within the sensor is the most frequent point of failure, accounting for over 80% of P0050 cases. It is a simple resistor that burns out over time due to thousands of extreme heat cycles.
- Blown Heater Circuit Fuse (Common) — The O2 sensor heater circuits are protected by a dedicated fuse. A short circuit in the wiring or within the sensor itself blows this fuse, cutting power. If a replacement fuse blows immediately, a persistent short circuit exists.
- Damaged Wiring or Connectors (Common) — The wiring harness leading to the sensor is exposed to extreme exhaust heat, moisture, and road debris. Wires melt against the exhaust, break, or suffer rodent damage. Connector pins also corrode, causing a high-resistance connection.
- Low-Quality Aftermarket Sensors (Uncommon) — Low-cost, universal aftermarket sensors often have incorrect internal resistance values. This triggers the P0050 code immediately after installation because the sensor's current draw falls outside the ECM's strict expected range.
- Faulty Engine Control Module (ECM) (Very Rare) — The driver circuit inside the ECM that supplies power or ground to the heater fails, or the software calibration corrupts. Consider this only after definitively ruling out the sensor, fuse, and entire wiring harness. 🎬 See this guide on testing oxygen sensor heater circuits.
Symptoms
- Check Engine Light is On — The primary and often only symptom. The light illuminates as soon as the ECM completes its self-test and confirms the heater circuit fault, usually within the first minute of starting the engine.
- Worse Gas Mileage (3-10% Drop) — With a broken heater, the engine remains in its inefficient 'open-loop' fuel control mode for longer after a cold start. This forces a richer fuel mixture and drops fuel economy by 3-10%.
- Rough Idle and Fuel Smell on Cold Start — During the first 60 seconds after a cold start, the engine stumbles, hesitates, or idles erratically. Because the engine runs rich until the O2 sensor warms up naturally, a strong gasoline smell from the exhaust is common.
- Failed Emissions Test (also visible on scanner) — A P0050 code is an automatic failure for any OBD-II emissions test. The O2 sensor heater monitor will not pass, and cold-start emissions exceed legal limits.
Diagnostic Flowchart
Tap your situation to follow the diagnostic path that matches what you're seeing on this code.
Common Fixes & Costs
- Replace Heated Oxygen Sensor (Bank 2, Sensor 1) — Parts: $60-$150, Labor: $100-$200, ~0.8 hr book time (DIY)
- Replace Blown Fuse — Parts: $1-$5, Labor: $0-$50, ~0.1 hr book time (DIY)
- Repair Damaged Wiring or Connector — Parts: $15-$40, Labor: $120-$250, ~1.5 hr book time (Intermediate)
- Professional Electrical Diagnosis — Parts: $0, Labor: $125-$175, ~1 hr book time (Professional)
- Replace Engine Control Module (ECM) — Parts: $600-$1,200, Labor: $150-$300, ~2 hr book time (Professional)
Used vs. New Parts: Buying Guide
When a used part is worth it: Buying a used oxygen sensor is never recommended. It is a wear-and-tear component with a finite lifespan. The risk of installing a faulty used sensor outweighs any potential savings.
Donor-vehicle mileage cap: roughly under 20000 miles for the part to have meaningful remaining life.
Donor quality checklist:
- If forced to use a used sensor, source it from a very low-mileage wrecked vehicle.
- Avoid sensors from vehicles with high mileage or from rust-belt regions.
- Match the part number exactly; identical-looking sensors have different heater resistance values.
Decision logic:
- If The part is an oxygen sensor. → Buy a new, high-quality OEM or reputable aftermarket (Denso, Bosch, NTK) sensor. The cost savings of a used part are not worth the high risk of premature failure.
- If The vehicle is a Toyota, Lexus, or Honda. → Strongly prefer an OEM or Denso part. These vehicles are highly sensitive to aftermarket sensor specifications.
Warranty tradeoff: Used parts offer a 30-day warranty covering only the part. New Aftermarket comes with a 1-year to limited lifetime warranty. New OEM includes a 1-year/12,000-mile warranty.
Worst-case if a used part fails: $200-$400 if a used sensor fails shortly after installation, requiring a second repair.
What Happens If You Wait — Timeline
- 0-2 Weeks: Check Engine Light illuminates for P0050. The engine stays in 'open-loop' mode for a few minutes longer on a cold start. No other perceptible symptoms for the driver. (MPG impact: 0-5%% · Added cost: $0-$20 in wasted fuel)
- 2 Weeks - 3 Months: A consistent 5-10% drop in MPG is noticeable. The driver perceives a slight hesitation or rough idle for the first minute after a cold start. A rich gasoline smell from the exhaust on startup is common. (MPG impact: 5-10%% · Added cost: $50-$150 in wasted fuel)
- 3-8 Months: The catalytic converter is consistently overheated by unburned fuel from the rich mixture. Its internal ceramic substrate begins to crack or get coated, reducing efficiency. A P0420/P0430 code appears. (MPG impact: 10-15%% · Added cost: $150+ in wasted fuel; catalytic converter damage begins.)
- 8+ Months: Catastrophic failure of the catalytic converter. The internal honeycomb melts, creating a severe exhaust blockage. Symptoms include dramatic power loss, sluggish acceleration, and a rotten egg smell. (MPG impact: 15-30%+% · Added cost: $1,500 - $3,500 for catalytic converter replacement.)
Cost of Not Fixing It
- 0-1 Month: A noticeable 3-10% drop in fuel economy as the engine runs in open-loop for longer periods. You automatically fail any emissions test. (Added cost: $20-$60 in wasted fuel per month.)
- 1-6 Months: The engine running consistently rich sends unburned fuel into the exhaust, which overheats and clogs the catalytic converter. (Added cost: Potential for irreversible catalytic converter damage.)
- 6+ Months: Catastrophic failure of the catalytic converter. The internal substrate melts, causing a major exhaust blockage and significant loss of power. (Added cost: $1,500-$3,500 for catalytic converter replacement.)
Diagnosis Steps

- Scan and Document Codes
Use an OBD-II scanner to confirm P0050 is present. Document freeze frame data and check for related codes (e.g., P0051, P0052). Clear the codes and start the engine to see if P0050 returns immediately.
Tools: OBD-II Scanner (Beginner) - Inspect the O2 Sensor Fuse
Consult your owner's manual to locate the fuse for the O2 sensor heaters (often marked 'O2 HTR'). Visually inspect the fuse. If blown, replace it. If it blows again immediately, you have a short circuit.
Tools: Fuse Puller or Pliers (Beginner) - Visually Inspect Wiring and Connector
Locate the Bank 2, Sensor 1 O2 sensor. Follow its wiring harness, looking for melted insulation, chafing against the engine block, rodent damage, or corrosion on the connector pins.
Tools: Flashlight, Safety Glasses (Beginner) - Test for Power at the Connector
Disconnect the sensor. With the ignition key in the 'On' position (engine off), use a multimeter to check for 12V battery power on the power supply wire of the harness-side connector. No voltage points to a blown fuse or broken wire.
Tools: Multimeter (Intermediate) - Test the Sensor's Heater Resistance
Set your multimeter to Ohms (Ω). On the sensor itself, measure the resistance between the two heater circuit pins (often the two wires of the same color). A good sensor reads between 2 and 20 Ohms. An 'OL' reading means the internal heater is broken and the sensor must be replaced.
Tools: Multimeter (Intermediate) - Check the Ground Circuit Integrity
If power is present but the heater fails, check the ground path. Check for continuity between the ground pin on the harness connector and the corresponding pin at the ECM. Resistance greater than 0.5 Ohms indicates a wiring fault.
Tools: Multimeter, Vehicle-Specific Wiring Diagram (Advanced) - [PRO TIP] Heater Circuit Current Draw Test
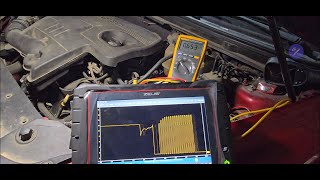
For intermittent faults, clamp a low-amp current probe around the power wire for the heater circuit. During a cold start warm-up, a healthy heater circuit draws between 0.5 and 2.0 amps. No draw indicates an open circuit; excessive draw confirms a short.
Tools: Low-Amp Current Clamp (Advanced) - [PRO TIP] Live Data PID Analysis
Using an advanced scan tool, monitor the live data PID for 'O2 Heater B2S1'. On a cold start, the duty cycle should jump to 75-100% and taper off. If the duty cycle is commanded but your current clamp shows no amperage, it confirms an open circuit.
Tools: Advanced OBD-II Scanner (Advanced)
When This Code Triggers (Freeze-Frame Conditions)
- Engine Coolant Temp: 40-120°F (4-49°C) (During the warm-up phase after a cold start, when the heater test is most critical.)
- Time Since Start: 20-120 seconds (The heater circuit test runs immediately after startup to force the sensor into closed-loop operation.)
- RPM: 700-1200 (Sets at idle shortly after the engine is started.)
- Engine Load: 15-35% (Low load or idle conditions, as the PCM runs the self-test early in the drive cycle.)
Related Codes
- P0155 — This is the older, functionally identical SAE code for 'O2 Sensor Heater Circuit Malfunction (Bank 2 Sensor 1)'. They are diagnosed and repaired in the exact same way.
- P0135 — This is the sister code to P0050, meaning 'O2 Sensor Heater Circuit Malfunction (Bank 1 Sensor 1)'. If you see both codes, it points to a shared fuse or ground issue.
- P0174 — This code means 'System Too Lean (Bank 2)'. It is a common symptom of a P0050 fault. A cold oxygen sensor provides inaccurate data, causing the ECM to falsely interpret a lean condition. Fixing P0050 resolves P0174.
- P0051 & P0052 — These are specific versions of P0050. P0051 means the heater circuit signal is too low (short to ground), while P0052 means the signal is too high (short to power). P0050 is a general circuit fault.
Climate & Environmental Factors
- Cold Climates: The heater circuit's job is critical in cold weather to reach 600°F quickly. The increased workload and larger temperature swings accelerate the failure of the heater element. Symptoms like a rich smell and rough idle are more pronounced.
- High Humidity / Rust Belt: Moisture and road salt accelerate corrosion on the sensor body and wiring connectors. A corroded connector causes high resistance and triggers a P0050 code. Rusted sensors are extremely difficult to remove without damaging exhaust threads.
How to Talk to a Mechanic About This Code
Say this: "I have a P0050 code and I'd like to schedule a diagnostic. Please test the Bank 2 Sensor 1 heater circuit for power, ground, and resistance before recommending a part replacement."
This signals you've done research and prevents a shop from immediately replacing the sensor without proper diagnosis. It directs them to perform the specific electrical tests required to find the true cause of the fault.
Avoid saying:
- 'My check engine light is on, can you look at it?' (This is too vague and invites a costly, broad inspection).
- 'Just fix whatever is wrong.' (This gives the shop a blank check to replace parts without your approval).
- 'I think I need a new oxygen sensor.' (This leads them to replace the part without diagnosing the circuit, wasting money if the sensor isn't the problem).
Questions to ask before authorizing the repair:
- What were the results of the heater circuit resistance test on the original sensor?
- Did you confirm 12-volt power and a good ground at the sensor's connector?
- Will you be using an OEM or a quality aftermarket (like Denso/Bosch/NTK) sensor?
- What is the warranty on the part and the labor for this repair?
Where to Take It: Dealer vs Independent vs Chain
- Dealer:
Recommended only if the vehicle is under warranty. Otherwise, it's not cost-effective for this common code.
Best for: Vehicles still under a powertrain or emissions warranty., Complex electrical issues on German brands (BMW, Mercedes) where specialized software is key.
Downsides: Labor rates are 1.5-2x higher than independent shops., May default to replacing an entire assembly when a simpler wiring repair would suffice. (Typical cost: +50% vs. baseline) - Independent Shop:
Best fit for P0050. This is a routine diagnostic for a competent independent shop, offering the best balance of expertise and cost.
Best for: Most out-of-warranty vehicles., Standard electrical diagnostics and part replacements.
Downsides: Quality and expertise vary widely; vet the shop through reviews and ASE certifications. (Typical cost: +0% vs. baseline) - Chain Shop:
Use with caution. Acceptable if you only need a sensor replaced, but AVOID for initial diagnosis of the electrical circuit.
Best for: Simple, clear-cut part replacements where the diagnosis is already certain.
Downsides: Technician skill varies dramatically., High pressure to upsell services; unreliable for diagnosing an electrical short. (Typical cost: -10% vs. baseline)
When to Walk Away From the Repair
If the estimated repair cost exceeds 40-50% of the car's private-party value, seriously consider selling or trading it in rather than repairing it.
- Car worth $3500, fix is $250: Fix it. The repair cost is well below the threshold and preserves the vehicle's value and functionality.
- Car worth $4000, fix is $1800: Borderline. This assumes the P0050 led to catalytic converter failure. At 45% of the car's value, get a second opinion before authorizing the repair.
- Car worth $2000, fix is $1500: Walk away. The repair cost is 75% of the car's value. It is not a sound financial decision.
What Scan Tool You Need for This Code

Minimum: A tool that reads live sensor data, specifically the O2 sensor voltage and the O2 sensor heater duty cycle.
A basic $20 code reader only gives you the P0050 code. It cannot show you if the computer is actually trying to turn the heater on (duty cycle). Without live data, you are guessing between a bad sensor, bad wiring, or a bad fuse.
Budget: BlueDriver Pro Scan Tool (~$99) — Connects to your smartphone via Bluetooth. It reads/clears codes, views freeze frame data, and graphs live data for the O2 sensor heater circuit, allowing you to see if it's being commanded on.
Mid-range: Foxwell NT510 Elite (~$180) — A handheld scanner providing manufacturer-specific diagnostics. It performs active tests (bidirectional control) on some models, allowing you to manually command the heater circuit on and off to confirm operation.
Professional: Autel MaxiCOM MK808 / MK906BT (~$500-1200) — Offers full bidirectional control to test the heater circuit directly. It provides comprehensive OEM-level diagnostics and data graphing invaluable for tracing complex wiring or intermittent ECM faults.
Rent vs buy: For a one-time fix, auto parts stores like AutoZone offer a free loaner tool program. If you plan to perform your own diagnostics more than once a year, buying a tool like the BlueDriver is a worthwhile investment.
How to Clear the Code After You Fix It
- Use an OBD-II scan tool to clear the P0050 code.
- Reconnect any disconnected components, including the battery.
- Perform a complete OBD-II drive cycle to run the readiness monitors.
Drive cycle (~20 minutes): 1) Cold start and idle for 2-3 minutes. 2) Drive at a steady speed of 55 mph for 3-5 minutes. 3) Coast to decelerate to 20 mph without braking. 4) Accelerate to 55 mph and hold for 5 minutes. 5) Stop and idle for 1-2 minutes.
Readiness monitors affected: Oxygen (O2) Sensor Monitor, O2 Sensor Heater Monitor, Catalyst (CAT) Monitor
Before emissions retest: drive at least 50 miles to fully set monitors.
Watch out for:
- Clearing the code resets all readiness monitors to 'Not Ready'. You must complete a drive cycle before an emissions test.
- Disconnecting the battery does not clear the code from permanent memory in modern vehicles.
- The code returns within minutes if the underlying electrical fault (bad sensor, wiring, or fuse) was not fixed.
Will This Fail Emissions / State Inspection?

Yes — this code typically fails an OBD-II emissions inspection.
- California: An illuminated Check Engine Light is an automatic test failure. After repair, a full drive cycle must be completed to set all readiness monitors to 'Ready' before a re-test.
- New York: The NYVIP3 inspection includes an OBD-II scan. A P0050 code and the associated Check Engine Light result in an immediate failure.
- Texas: An active P0050 code is an automatic failure. After repair and clearing codes, 2001+ vehicles are allowed one 'Not Ready' monitor; 1996-2000 vehicles are allowed two.
Most Commonly Affected Vehicles
- Toyota/Lexus Camry (V6), Sienna, Highlander, ES350, RX350 (2007-2024) — Extremely common. Bank 2 is the rear bank against the firewall, making access difficult. Using a Denso or OEM sensor is highly recommended.
- Ford F-150, Explorer, Mustang (V6/V8) (2004-2018) — On Ford V-engines, Bank 2 is typically the driver's side. The sensor fails frequently, but wiring damage from exhaust heat is also a common cause.
- Honda/Acura Accord (V6), Odyssey, Pilot, MDX (2003-2024) — Bank 2 on V6 models is the rear bank near the firewall. The original sensor's heater element is the most common failure point as the vehicle ages.
- General Motors (Chevy/GMC) Silverado, Sierra, Tahoe, Suburban (2005-2015) — On GM V8 trucks, Bank 2 is the passenger side. Inspect the harness where it contacts hot exhaust or the CV axle on 4WD models.
- BMW 3-Series, 5-Series, X3, X5 (6-cyl & V8) (2000-2013) — On inline-6 engines, Bank 2 refers to cylinders 4-6. On V8s, it's typically the driver's side (US). Using a quality Bosch or OEM sensor is critical.
- Nissan/Infiniti Titan, Armada, Frontier, G35 (V6/V8) (2004-2015) — Bank 2 is the driver's side. The cause is almost always a failed sensor heater element due to age and heat cycles.
- Dodge/Ram/Chrysler Ram 1500, Dakota, Durango (V6/V8) (2004-2013) — On Hemi V8s and V6s, Bank 2 is the passenger side. Check for oil leaks from valve covers dripping onto the sensor and wiring, causing failure.
Manufacturer-Specific Notes
- Toyota/Lexus: These vehicles are highly sensitive to the resistance of the heater circuit. Using a non-OEM or non-Denso sensor is a leading cause of the code returning after a repair.
- General Motors: On 4WD trucks and SUVs, the front driveshaft CV boot clamp chafes or rips the wires for the Bank 2 O2 sensor harness, causing an intermittent or direct short.
- BMW: On inline 6-cylinder engines, Bank 2 covers cylinders 4, 5, and 6, which are toward the rear of the engine bay and difficult to access. This code is not possible on 4-cylinder BMWs.
Real Owner Stories
2006 Chevy Silverado 1500 at 200K miles
Check Engine Light came on with codes P0050 and P0030 (heater circuit fault for both Bank 1 and Bank 2). Codes returned immediately after clearing.
What they tried:
- Owner suspected a common failure point for both sensors rather than two simultaneous sensor failures.
Outcome: Forum advice pointed to a shared fuse for the O2 sensor heaters. The owner found and replaced a single blown 15A fuse, resolving both codes instantly.
Lesson: When you have heater codes for both engine banks (P0050 and P0030), the culprit is a single shared component. Always check the O2 heater fuse first.
2003 Porsche 996 Targa
P0050 code appeared immediately after major exhaust work where the manifolds and catalytic converters were removed and reinstalled.
What they tried:
- The owner assumed the fault was related to the recent repair and sought to identify the exact location of Bank 2, Sensor 1 to check the connection.
Outcome: Confirmed that Bank 2 on a Porsche 996 is the right-hand side and Sensor 1 is pre-catalyst. The issue was an improperly seated connector during the exhaust reassembly.
Lesson: If a code appears directly after a repair, the cause is related to the work performed. Re-check all connectors and wiring in the serviced area before replacing parts.
2016 Chevy Colorado V6
P0050 and P0051 codes appeared. The owner replaced all four O2 sensors, but the Check Engine Light returned after two weeks.
What they tried:
- Replaced all O2 sensors as a first step without electrical testing.
Outcome: The code returned, proving the problem was not the sensors. A shop traced the harness and found melted wire insulation shorting against the exhaust block.
Lesson: Replacing parts without diagnosis is expensive and ineffective. If a code returns after replacing the sensor, the fault lies in the wiring, fuse, or ECM.
How to Prevent This Code From Triggering
- Address oil and coolant leaks promptly (At first sign of leak) — Fluids leaking onto the O2 sensor or its wiring contaminate the sensor element and degrade the wire insulation, leading to shorts and failures.
- Apply dielectric grease to the O2 sensor connector (When replacing sensor or if connector is exposed) — Dielectric grease seals the electrical connector from moisture, road salt, and dirt. This prevents pin corrosion, which causes high resistance and triggers heater circuit codes.
- Consider proactive O2 sensor replacement (Every 80,000-100,000 miles) — O2 sensors are wear items. They become slow and less accurate with age, reducing fuel economy by up to 15%. Replacing them proactively ensures peak efficiency and prevents catalytic converter damage.
Frequently Asked Questions
What is Bank 2 and where do I find it?
Bank 2 is the side of a V-style engine that does NOT contain the #1 cylinder. For most US and German manufacturers, Bank 2 is the passenger's side, while Japanese manufacturers often place it near the firewall. Sensor 1 is always the upstream sensor located before the catalytic converter.
What is the most common misdiagnosis for P0050?
The most common mistake is replacing the oxygen sensor without checking the fuse or testing for power at the connector first. A blown fuse indicates a wiring short that a new sensor will not fix. A 5-minute fuse check saves over $100 on an unnecessary part.
My mechanic replaced the sensor but the code came back. What now?
A returning code means the replacement sensor was out of spec, the wiring is damaged, or the ECM is faulty. The next step is a full circuit integrity test checking power, ground, and wiring continuity back to the ECM. Always use OEM or Denso/Bosch sensors to prevent resistance mismatches.
Can I fix P0050 myself?
Yes, checking fuses, inspecting wiring, and replacing the sensor are manageable DIY tasks. You need an O2 sensor socket and penetrating oil, as old sensors frequently rust into the exhaust pipe.
Can a vacuum leak cause code P0050?
No. A vacuum leak introduces unmetered air and causes lean codes like P0171 or P0174. It does not affect the electrical integrity of the sensor's heater circuit, which is what P0050 monitors.
What is the difference between P0050 and P0030?
Both codes indicate an oxygen sensor heater circuit failure, but on opposite sides of the engine. P0050 is for Bank 2, Sensor 1. P0030 is for Bank 1, Sensor 1.
How tight should an O2 sensor be?
Never overtighten an O2 sensor, as this damages the threads or the sensor body. The typical torque specification is 25-35 ft-lbs (35-47 Nm). Always use a torque wrench and apply anti-seize compound to the threads before installation.
Key Takeaways
- P0050 indicates a failure in the Bank 2, Sensor 1 oxygen sensor heater, with a burnt-out internal sensor element causing over 80% of these codes.
- Always check the dedicated 'O2 HTR' fuse (typically 10A or 15A) and visually inspect the wiring harness for melted insulation before buying a replacement sensor.
- Driving with an active P0050 code drops fuel economy by 3-10% and forces raw fuel into the exhaust, risking a $1,500+ catalytic converter replacement if ignored for months.
- Bank 2 is the side of the engine opposite cylinder #1, and Sensor 1 is always the upstream sensor located between the engine block and the catalytic converter.
Helpful Videos

The information in this article is provided for general reference and educational purposes only. Vehicle specifications, procedures, and part compatibility can vary by production date, trim level, and region. Always consult your vehicle's factory service manual and verify part numbers before purchasing or performing repairs. Safety-critical components such as airbags, seat belts, and braking systems should be installed by a qualified professional.
- 🎬 Helpful Videos
- What Does P0050 Mean?
- Can I Drive With P0050?
- Common Causes
- Symptoms
- Diagnostic Flowchart
- Common Fixes & Costs
- Used vs. New Parts: Buying Guide
- What Happens If You Wait — Timeline
- Cost of Not Fixing It
- Diagnosis Steps
- When This Code Triggers (Freeze-Frame Conditions)
- Related Codes
- Climate & Environmental Factors
- How to Talk to a Mechanic About This Code
- Where to Take It: Dealer vs Independent vs Chain
- When to Walk Away From the Repair
- What Scan Tool You Need for This Code
- How to Clear the Code After You Fix It
- Will This Fail Emissions / State Inspection?
- Most Commonly Affected Vehicles
- Manufacturer-Specific Notes
- Real Owner Stories
- 2006 Chevy Silverado 1500 at 200K miles
- 2003 Porsche 996 Targa
- 2016 Chevy Colorado V6
- How to Prevent This Code From Triggering
- Frequently Asked Questions
- What is Bank 2 and where do I find it?
- What is the most common misdiagnosis for P0050?
- My mechanic replaced the sensor but the code came back. What now?
- Can I fix P0050 myself?
- Can a vacuum leak cause code P0050?
- What is the difference between P0050 and P0030?
- How tight should an O2 sensor be?
- Key Takeaways
- 🎟️ Get 5% Off