

P0017 on 2011 Chevrolet HHR: Exhaust Cam Correlation Causes and Fixes
On a 2011 Chevy HHR, code P0017 is most often caused by a faulty exhaust camshaft actuator solenoid or low/dirty engine oil. The highly recommended first diagnostic step is to swap the intake and exhaust solenoids to see if the code changes to P0016. If this free test doesn't pinpoint a bad solenoid, and an oil change doesn't help, the cause is likely a stretched timing chain, a known weak point on Ecotec engines and a much more involved repair.
- Always check your engine oil level and condition first; it's the easiest and cheapest potential fix.
- The most likely faulty part is the exhaust VVT solenoid. Swapping it with the intake solenoid is a free and effective diagnostic test.
- Do not immediately assume the camshaft or crankshaft sensors are bad; they are usually just reporting the timing problem.
- A rattling noise on startup is a major red flag for a stretched timing chain.
- Because this is an interference engine, do not ignore P0017, as a complete timing failure can destroy the engine.
What's Unique About the 2011-2011 Chevrolet HHR
The 2.2L and 2.4L Ecotec engines in the 2011 HHR are well-known for timing chain system issues. Unlike in some vehicles where P0017 might point to a bad sensor, on the HHR it is very frequently a symptom of a deeper mechanical or hydraulic problem. Common culprits include stretched timing chains, failing plastic chain guides, or clogged VVT solenoids due to oil condition. Experienced owners and technicians on forums like chevyhhr.net often suspect these underlying issues before condemning the sensors themselves. Because the exhaust camshaft is on the 'push' side of the timing chain's rotation, slack from a stretched chain often causes the exhaust cam's timing to deviate first, triggering P0017 before other codes.
Diagnostic Flowchart
Tap your situation to follow the diagnostic path that matches what you're seeing on this vehicle.
Symptoms You May Notice
- Check Engine Light is on
- Rough idle or stalling
- Reduced engine power and poor acceleration
- Rattling noise from the engine on startup, often described as a short, sharp rattle lasting a few seconds.
- Engine cranks but won't start (in severe cases of timing jump or reluctor failure)
- Poor fuel economy
- Engine seems to struggle or bog down during low RPM acceleration.
- Replacing the camshaft or crankshaft position sensors first. While these sensors can fail, the P0017 code on an HHR is more frequently caused by oil issues, a bad VVT solenoid, or a stretched timing chain. Always diagnose by swapping the VVT solenoids before spending money on parts.
Most Likely Causes
- Low or Dirty Engine Oil 🔴 High Probability The Variable Valve Timing (VVT) system is hydraulically operated by engine oil. The small passages and screens in the camshaft actuator solenoids are easily clogged by dirty, sludgy, or low-viscosity oil, preventing correct cam phasing. Ecotec engines are known to be sensitive to oil quality and level.
How to confirm: Check the oil level on the dipstick and inspect its condition. If it is low, black, or sludgy, this is a likely cause. Ensure the correct oil viscosity (5W-30) is being used.
Typical fix: Perform an engine oil and filter change using the correct 5W-30 full synthetic oil and a quality filter. Clear the code and see if it returns.
Est. part cost: $30-$60 - Faulty Exhaust Camshaft Position Actuator Solenoid (VVT Solenoid) 🔴 High Probability These solenoids are a very common failure point on Ecotec engines, either from electrical failure or from internal clogging due to oil debris. The fine mesh screens on the solenoids can get blocked or even break, allowing debris into the phaser.
How to confirm: The solenoids can be tested for resistance (spec is 8-12 Ohms). A common and effective diagnostic trick is to swap the intake and exhaust solenoids (they are located next to each other on the valve cover). If the code changes to P0016 (Intake Cam Correlation), the solenoid is confirmed bad. This is a widely documented fix on owner forums.
Typical fix: Replace the exhaust VVT solenoid. It is highly recommended to replace both intake and exhaust solenoids as a pair using OEM ACDelco parts, 🎬 Watch: How to replace both intake and exhaust solenoids. as aftermarket solenoids have a reputation for premature failure.
Est. part cost: $30-$80 - Stretched Timing Chain or Failed Tensioner/Guides 🟡 Medium Probability The timing chain system is a known weak point. The chain can stretch over time, and the plastic guides can become brittle and break, causing slack that leads to a correlation error. A rattling noise on startup is a classic symptom. The original timing chain tensioner design was also prone to failure.
How to confirm: This requires removing the valve cover and/or timing cover to physically inspect the chain for slack and check the timing marks. A key sign is finding broken pieces of the black plastic guides in the oil pan. This is an advanced diagnostic step.
Typical fix: Replace the entire timing chain kit, which includes the chain, tensioner, guides, and sprockets. This is a labor-intensive job. Many owners on chevyhhr.net have documented this process.
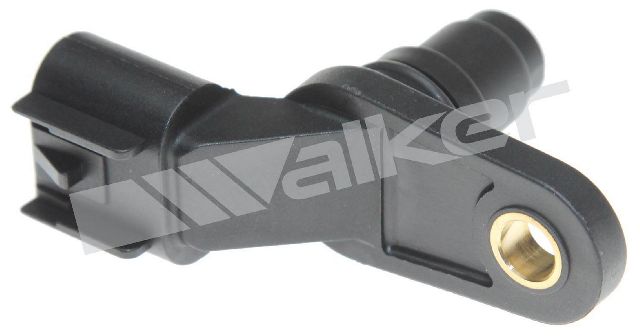
Est. part cost: $150-$400 - Faulty Exhaust Camshaft Position (CMP) Sensor ⚪ Low Probability While possible, the sensor itself is less likely to be the cause than the VVT solenoid or the timing chain. The sensor is usually just accurately reporting the timing error. Owners and mechanics repeatedly state that replacing sensors rarely fixes this specific code.
How to confirm: After ruling out the VVT solenoid and checking oil, the sensor can be tested or swapped with the intake CMP sensor (they are identical parts) to see if the code changes to P0016. If it does, the sensor is bad.
Typical fix: Replace the exhaust camshaft position sensor.
Est. part cost: $40-$75
Rare But Worth Checking
- Spun Camshaft Reluctor Ring: Mentioned in TSB #PIP4548F, this can happen if the engine overheats. The reluctor ring that the camshaft sensor reads is press-fit onto the camshaft and can spin out of position. This causes a correlation code even with a perfectly timed chain. The fix requires replacing the entire camshaft as the ring cannot be repositioned.
- Failed Camshaft Phaser (Actuator Gear): The gear at the end of the camshaft, which is controlled by the VVT solenoid, can fail internally or become clogged with debris from a failed solenoid screen. This is less common than a solenoid failure but can cause the same code, often after other parts have been replaced.
- Spun Crankshaft Reluctor Wheel: Though much rarer than the camshaft reluctor issue, some forum users have reported the reluctor wheel on the crankshaft itself moving, which will cause persistent P0016 and P0017 codes that cannot be fixed by timing chain or camshaft replacement.
Diagnosis Steps
- Check Engine Oil: Verify the oil level is full and the oil is clean. If low or dirty, perform an oil and filter change with 5W-30 synthetic oil, clear the code, and drive to see if it returns.
- Inspect VVT Solenoids: Locate the two VVT solenoids on the top of the engine valve cover. The exhaust solenoid is toward the rear (firewall side). Inspect the connectors for damage or corrosion.
- Swap VVT Solenoids: This is the most critical and cost-effective diagnostic step. Disconnect and swap the positions of the intake and exhaust solenoids. They are identical parts, held by a single 10mm bolt each. Be careful not to drop the bolt into the engine bay.
- Re-Scan for Codes: Clear the codes and drive the vehicle. If the code changes to P0016 (Intake Correlation), the solenoid you moved to the intake position is faulty and must be replaced.
- Test Sensors (If Necessary): If the code remains P0017, you can perform the same swap test with the intake and exhaust camshaft position sensors (they are also identical parts) to see if the code changes to P0016. If it does, the sensor is bad. This is a less likely cause. 🎬 See this video for a deep dive into correlation codes.
- Inspect Timing System: If all previous steps fail to resolve the issue, the problem is almost certainly with the timing chain, tensioner, or guides. This requires removing the valve cover for a visual inspection of the top guide and chain slack. Finding plastic debris in the oil pan during an oil change is also a strong indicator of guide failure. This level of diagnosis often requires a professional.
Parts You'll Likely Need
- Exhaust Camshaft Position Actuator Solenoid
(OEM #12679100)— This is one of the most common failure points for code P0017 on this engine, caused by clogging or electrical failure. The intake and exhaust solenoids are the same part. Using genuine GM/ACDelco parts is highly recommended by forum members to avoid repeat failures.
Trusted brands: ACDelco (GM Genuine), Delphi
OEM price range: $40-$60
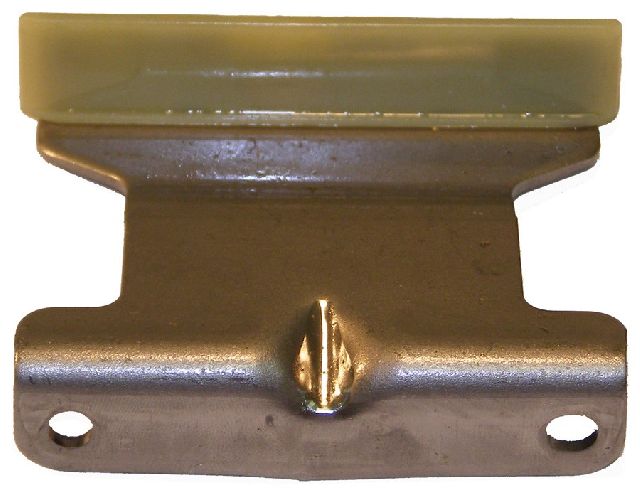
Aftermarket price range: $25-$45 - Engine Timing Chain Kit — If oil and solenoids are good, a stretched chain or failed guides are the next most likely cause. This is a known weak point on Ecotec engines. A complete kit ensures all wear items are replaced at once. 🎬 Watch: A step-by-step guide to replacing the timing chain.
Trusted brands: Cloyes, ACDelco (GM Genuine)
OEM price range: $250-$400
Aftermarket price range: $150-$250
Related Codes That Often Appear With This One
- P0016 — Crankshaft Position - Intake Camshaft Position Correlation. If both P0016 and P0017 are present, it strongly suggests a base timing issue, like a stretched timing chain or jumped tooth, affecting both camshafts.
- P0013 — Exhaust Camshaft Position Actuator Solenoid Control Circuit. This code points more directly to an electrical problem with the exhaust VVT solenoid itself (open or short in the circuit), which is a primary cause of P0017.
- P0014 — 'B' Camshaft Position - Timing Over-Advanced. This often appears with P0017 and can indicate the VVT phaser is stuck in an advanced position due to a faulty solenoid or low oil pressure.
Technical Service Bulletins (TSBs) & Recalls
- PIP4548F: Advises inspection of the camshaft reluctor ring if P0016/P0017 codes persist after confirming correct timing. A spun reluctor requires camshaft replacement.
- PIP4716F: Notes that a startup rattle is a significant symptom when diagnosing timing-related DTCs like P0017.
- 14882: A special coverage bulletin related to clogged PCV orifices that could cause main seal leaks due to crankcase pressure. While not a direct cause of P0017, it highlights the engine's sensitivity to proper oiling and pressure systems.
Platform-Specific Known Issues
- The Ecotec engines in the 2009-2011 HHR (both 2.2L and 2.4L) have Variable Valve Timing (VVT) and are susceptible to these codes.
- Technical Service Bulletin #PIP4548F (and its revisions) addresses P0016/P0017 setting even on a properly timed engine, pointing towards a potential spun camshaft reluctor ring, which is press-fit and can move, especially after an overheat. The fix is camshaft replacement.
- Technical Service Bulletin #PIP4716F notes that a startup rattle accompanied by codes like P0017 is a key symptom pointing towards timing system or related issues.
- Special Coverage Adjustment #14882 was issued for some Ecotec engines for a clogged PCV orifice that could increase crankcase pressure and cause oil leaks, which could indirectly lead to oiling problems that trigger VVT codes.
Mechanic-Grade Diagnostic Values
- VVT Solenoid (Camshaft Position Actuator) Resistance — expected: 8 to 12 Ohms. Failure: A reading outside this range indicates an electrical fault in the solenoid's coil.
- Scan Tool Live Data: Desired vs. Actual Camshaft Position (Exhaust) — expected: At idle, both desired and actual position should be at or near 0 degrees. Under load or acceleration, the values should change but remain closely matched.. Failure: If the 'Actual' position is stuck at 0 and does not change with RPM, while the 'Desired' position does, it points to a stuck phaser or faulty solenoid. If the 'Actual' position is offset from 'Desired' at all times, it suggests a base timing issue (stretched chain) or a spun reluctor ring.
Scan Tool Commands That Help
- GM GDS2 / Tech2 or equivalent professional bidirectional scanner: Camshaft Position Actuator Solenoid Test — This bidirectional control allows a technician to command the VVT solenoid on and off or to a specific duty cycle, independent of the ECM's normal control. This directly tests the solenoid's mechanical and hydraulic function. If the engine's idle changes or stumbles when the solenoid is commanded, it proves the solenoid and phaser are mechanically capable of moving. If there is no change, it points to a clogged solenoid, oil passage, or a failed phaser.
- GM GDS2 / Tech2 or equivalent professional bidirectional scanner: Crankshaft Position Variation Learn (Crank Relearn) — This procedure should be performed after replacing a crankshaft position sensor, timing chain, or ECM. While it doesn't directly fix a P0017 mechanical fault, it calibrates the ECM to the minor variations of the new components. A failure to complete the relearn procedure can sometimes cause correlation codes to persist even after a successful repair.
Wiring & Ground Locations
- G107 — On the front left corner of the transmission housing.. This is a primary ground point for the Engine Control Module (ECM) and Transmission Control Module (TCM). A poor connection here can cause erratic signals and false codes from various engine sensors, including the crank and cam sensors.
- G105 — On the left front of the engine block.. This is another critical engine block ground. The camshaft and crankshaft position sensors rely on a clean ground path to the ECM. A corroded or loose G105 can introduce noise or voltage offsets into the sensor signals, potentially triggering a correlation fault.
- G103 — On the left front corner of the engine compartment.. Serves as a chassis ground point in the engine bay. While less direct than the block grounds, poor chassis grounds can create electrical issues that affect sensor performance.
- ECM Connector X1 — The Engine Control Module is located on the left side of the engine compartment, in front of the underhood fuse block.. This is where the signals from the crankshaft position sensor and camshaft position sensors terminate. When diagnosing persistent issues, technicians may need to perform pin-out testing at this connector to verify signal integrity directly at the module, ruling out wiring harness issues.
Real Owner Repair Stories
- Chevy Equinox Forum user (Chevy Equinox with 2.4L Ecotec engine (similar architecture to HHR)) — P0017 code was an instant pending code on startup and would set a hard CEL within a few minutes of driving.
❌ Tried (didn't work) Replaced timing chain and guides, verifying timing marks multiple times., Successfully performed a crank/crank relearn procedure with a high-end scan tool., Swapped VVT solenoids., Verified live data showed desired and actual exhaust cam positions were both 0 degrees at idle.
✅ What actually fixed it The user ultimately discovered the issue was a spun reluctor ring on the exhaust camshaft. Even though the timing chain was perfectly aligned, the ring the sensor reads had moved, causing the ECM to see a correlation error. Replacing the exhaust camshaft resolved the code.
OEM Part Supersession History
12655421 (Exhaust) / 12655420 (Intake)→12679100 (Exhaust) / 12679099 (Intake)— Updated internal design for improved reliability and resistance to oil contamination.
Heads up: The old and new part numbers are interchangeable for the 2011 HHR. However, it is highly recommended to use the latest superseded part number (e.g., 12679100) when replacing, as it represents the most current design from the manufacturer.Various older designs→12608580— GM went through three major timing chain tensioner designs for the Ecotec engine. The latest design (GM #12608580) is a one-piece unit with a smaller piston and is considered the most reliable replacement, superseding all prior versions.
Heads up: The newest tensioner is shipped in a deactivated state and must be installed that way. Activating it before installation will result in incorrect chain tension.
Helpful Videos
We Have This Part in Stock


The information in this article is provided for general reference and educational purposes only. Vehicle specifications, procedures, and part compatibility can vary by production date, trim level, and region. Always consult your vehicle's factory service manual and verify part numbers before purchasing or performing repairs. Safety-critical components such as airbags, seat belts, and braking systems should be installed by a qualified professional.
- Chevrolet HHR:
- 🎬 Helpful Videos
- 🛍️ Shop This Part
- What's Unique About the 2011-2011 Chevrolet HHR
- Diagnostic Flowchart
- Symptoms You May Notice
- Most Likely Causes
- Rare But Worth Checking
- Diagnosis Steps
- Parts You'll Likely Need
- Related Codes That Often Appear With This One
- Technical Service Bulletins (TSBs) & Recalls
- Platform-Specific Known Issues
- Mechanic-Grade Diagnostic Values
- Scan Tool Commands That Help
- Wiring & Ground Locations
- Real Owner Repair Stories
- OEM Part Supersession History
- 🎟️ Get 5% Off