

P0017 on 2009-2011 Chevrolet Aveo: Crank-Cam Correlation Causes and Fixes
P0017 on a 2009-2011 Chevy Aveo usually means the timing belt has stretched or jumped, or the camshaft actuator (VVT) solenoids are failing. First, check engine oil level and condition, as low or dirty oil is a primary cause of VVT issues. If the oil is fine, inspect and test the VVT solenoids. A common diagnostic step is to swap the intake and exhaust solenoids to see if the code changes to P0016. If solenoids and sensors are good, the issue is likely a mechanical timing problem with the belt o
- P0017 on a 2009-2011 Aveo indicates a timing mismatch between the crankshaft and the exhaust camshaft.
- Before any complex repairs, check the engine oil level and condition, as low or dirty oil is a frequent cause.
- The most common parts to fail are the VVT solenoids (actuators), which are affordable and relatively easy to replace.
- If the timing belt is old or has been recently serviced, it is a primary suspect. Verify the mechanical timing is correct.
- Be aware of the specific TSB regarding a small plastic oil sleeve that can be lost during repairs, which will cause this code.
What's Unique About the 2009-2011 Chevrolet AVEO

The 1.6L engine in the 2009-2011 Aveo uses a timing belt, not a chain. While belt stretch or slippage is a common cause for this code on many cars, these specific GM engines have a known issue documented in Technical Service Bulletin PIP4543D. A small, black plastic oil sleeve between the camshaft and the camshaft actuator (phaser) can get lost or damaged during repairs. This sleeve is critical for directing oil to the actuator; without it, the ECM cannot control cam timing, leading directly to P0017 and related codes. This part is often overlooked by technicians and is not sold separately from the camshaft actuator assembly, making it a unique and frustrating problem for this platform.
Diagnostic Flowchart
Tap your situation to follow the diagnostic path that matches what you're seeing on this vehicle.
Symptoms You May Notice
- Check Engine Light is on
- Rough or uneven idle, sometimes fluctuating between 400-2000 RPMs before stalling.
- Engine stalling, especially at low speeds or when put into gear.
- Reduced engine power and poor acceleration.
- Difficulty starting the engine, or extended cranking time.
- Rattling noises from the engine.
- Increased fuel consumption.
- Hard, jolting deceleration for a split second while driving at highway speeds.
- Replacing the camshaft or crankshaft position sensor when the actual problem is a stretched timing belt, a faulty VVT solenoid, or incorrect mechanical timing.
- Replacing timing components without checking for the missing black plastic oil sleeve mentioned in TSB #PIP4543D, leading to the code returning immediately after the repair.
- Assuming the code will clear on its own after a repair. The code must be cleared with a scan tool, and a drive cycle completed to confirm the fix.
Most Likely Causes

- Worn or Stretched Timing Belt 🔴 High Probability The 1.6L engine is an interference design with a timing belt that has a finite service life (typically 60,000 miles). Over time, the belt can stretch or jump a tooth, causing the cam and crank to go out of sync. A bad tensioner can also cause slack and lead to a jumped tooth.
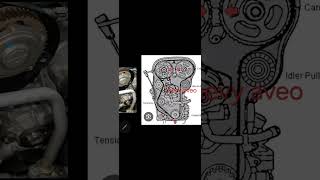
How to confirm: Visually inspect the timing belt for wear, damage, or slack. The definitive check is to verify the mechanical timing by aligning the crankshaft and camshaft timing marks. This requires specialized locking tools for accuracy on this engine.
Typical fix: Replace the timing belt, tensioner, and idler pulleys. 🎬 Watch: Step-by-step timing belt replacement for the 1.6L Aveo engine. This is always done as a kit. It is critical that the timing marks are perfectly aligned upon reassembly.
Est. part cost: $50-$150 - Faulty Camshaft Position Actuator Solenoid (VVT Solenoid) 🔴 High Probability These solenoids control oil flow to the cam phasers. They can become clogged with dirty oil or fail electrically, preventing the camshaft from adjusting its timing correctly. The screens on the solenoids can also become damaged or go missing, causing issues.
How to confirm: Check for related codes like P0014. Swap the intake and exhaust solenoids; if the code changes to P0016 (intake correlation), the solenoid is bad. You can also test the solenoid's resistance with a multimeter (should be 6.9-7.9 ohms at 68°F) or apply 12V to see if it actuates.
Typical fix: Replace the faulty camshaft position actuator solenoid. They are typically replaced in pairs (intake and exhaust) as they are the same age and exposed to the same conditions.
Est. part cost: $20-$50 per solenoid - Low or Dirty Engine Oil 🟡 Medium Probability The Variable Valve Timing (VVT) system is hydraulically operated by engine oil. If the oil level is low, the viscosity is wrong, or the oil is dirty and sludgy, it can't create the pressure needed to operate the cam phasers correctly, leading to correlation codes.
How to confirm: Check the engine oil dipstick for level and inspect the oil's condition. If it's low or very dirty, this is a likely contributor.
Typical fix: Perform an oil and filter change using the manufacturer-specified oil viscosity (5W-30 is common for this engine). Clear the code and see if it returns.
Est. part cost: $30-$70 - Faulty Camshaft or Crankshaft Position Sensor ⚪ Low Probability While less common than solenoid or timing belt issues, the sensors that read the cam and crank positions can fail, sending incorrect data to the ECM. Owners often replace these first, but they are frequently not the root cause.
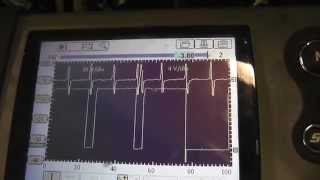
How to confirm: Use a scan tool to monitor live data from the sensors. An oscilloscope is the best tool to verify the sensor's signal pattern. You can also test the sensor's resistance with a multimeter, comparing it to the manufacturer's specification.
Typical fix: Replace the failed sensor. Note that some vehicles may require a crankshaft position sensor relearn procedure after replacement.
Est. part cost: $25-$60
Rare But Worth Checking
- Missing Camshaft Actuator Oil Sleeve: According to GM TSB #PIP4543D, this code can appear after a repair involving the camshaft actuators. A unique black plastic oil sleeve between the actuator and the camshaft can be lost or damaged, disrupting oil flow and causing the code. This part is only available with a new camshaft actuator assembly and is a common cause for the code returning immediately after service.
- Failed Camshaft Phaser (Actuator): The mechanical gear (phaser) on the end of the camshaft can fail internally, getting stuck in one position or having a sheared locating pin. This is a more complex and expensive repair than replacing the control solenoid.
- Damaged Reluctor Wheel: The toothed wheel that the crankshaft or camshaft sensor reads can become damaged, bent, or slip on the shaft, causing incorrect readings even with a good sensor.
- Melted/Distorted Oil Restrictor Orifice: An AERA bulletin notes that on 1.6L LXV engines, a plastic oil restrictor orifice in the block deck (exhaust side, between cylinders 2 and 3) can melt or become distorted if the engine has been severely overheated. This can disrupt oil flow to the head and VVT system.
Diagnosis Steps
- Check Engine Oil: Verify the oil level is correct and the oil is clean and of the proper viscosity (5W-30). Low or dirty oil is a common cause of VVT system problems. If low, top it off. If dirty, perform an oil and filter change.
- Scan for Other Codes: Check for other related codes like P0016 or P0014, which can help narrow down the diagnosis.
- Inspect VVT Solenoids: Locate the intake and exhaust VVT solenoids on the top of the engine. Inspect the wiring and connectors for damage, corrosion, or loose connections.
- Swap VVT Solenoids: A simple diagnostic trick is to swap the exhaust solenoid (Sensor B) with the intake solenoid (Sensor A). Clear the codes and run the engine. If the code changes to P0016 (Intake Correlation), you have confirmed the exhaust solenoid is faulty.
- Test VVT Solenoid: Remove the suspect solenoid and test its resistance with a multimeter. It should be between 6.9 and 7.9 ohms at room temperature. You can also apply 12V to the terminals to see if the internal piston clicks. Check that the screens are clean and intact.
- Inspect Mechanical Timing: If all electronic components check out, the next step is to inspect the mechanical timing. This involves removing the timing belt cover and verifying that the timing marks on the camshafts and crankshaft are perfectly aligned. This is the most likely cause if codes appear right after a timing belt service. Check the timing belt for stretching, wear, or damage.
- Check for TSB Issue: If timing components have recently been serviced, remove the camshaft actuators and inspect them to ensure the black plastic oil sleeves are present and undamaged, per TSB #PIP4543D.
Parts You'll Likely Need

- Exhaust Camshaft Position Actuator Solenoid
(OEM #12655421)— This solenoid controls oil flow to the exhaust cam phaser and is a very common failure point, often getting clogged or failing electrically. - Timing Belt Kit (Belt, Tensioner, Idlers)
(OEM #TCK334 (ACDelco kit))— The timing belt is a maintenance item that can stretch or jump a tooth, directly causing correlation codes. It should be replaced as a complete kit. - Engine Oil and Filter — Low or dirty oil is a primary cause of VVT system malfunctions. An oil change is a crucial first step in diagnosis.
Related Codes That Often Appear With This One
- P0016 — Crankshaft Position – Intake Camshaft Position Correlation. If both P0016 and P0017 are present, it strongly suggests a base timing issue, like a slipped/mistimed timing belt, rather than a single sensor or solenoid failure.
- P0014 — Exhaust Camshaft Position (CMP) System Performance. This code points more directly to a problem with the control of the exhaust camshaft, often the VVT solenoid or the phaser itself, rather than just a correlation error. It frequently appears with P0017.
- P0106 — Manifold Absolute Pressure (MAP) Sensor Performance. This can appear alongside timing codes because incorrect valve timing leads to erratic engine vacuum, which the MAP sensor reads as an implausible signal.
Technical Service Bulletins (TSBs) & Recalls
- PIP4543D: Details the issue of DTCs P0011, P0014, P0016, or P0017 setting after camshaft actuator service due to a missing or damaged black plastic oil sleeve between the actuator and the camshaft.
- AERA Technical Bulletin (No specific number): Cautions about a melted or distorted plastic oil restrictor orifice in the block deck on 1.6L & 1.8L GM engines that have been severely overheated, which can affect oil flow.
Platform-Specific Known Issues
- TSB #PIP4543D and #PIP4543C mention that DTCs P0016 or P0017 can set after a repair involving the camshaft actuators. This is often caused by a missing or damaged black plastic oil sleeve that fits between the camshaft and the actuator. This part is not sold separately and comes with a new actuator assembly.
Mechanic-Grade Diagnostic Values
- Exhaust Camshaft Position (CMP) Sensor Pin Voltage — expected: Pin 1: Low Reference (Ground), Pin 2: 5V Reference, Pin 3: Signal (pulsing voltage when engine is cranking/running).. Failure: Missing 5V reference, no signal pulse, or a short to ground on any pin.
- Exhaust Camshaft Position (CMP) Actuator Solenoid Connector Voltage — expected: Pin 1: Ignition Voltage (12V with key on), Pin 2: Control Signal (duty-cycled ground from ECM).. Failure: No voltage at Pin 1, or an open/short on the control wire at Pin 2.
- Scan Tool Live Data - Exhaust Camshaft Position Variance — expected: The value in degrees should change in response to bidirectional control commands.. Failure: Value does not change or changes erratically when the solenoid is commanded, indicating a mechanical or hydraulic fault.
Scan Tool Commands That Help
- GDS2 / Tech2: Camshaft Position Actuator Control — This bidirectional command allows the technician to manually command the exhaust VVT solenoid to a specific angle (e.g., 0-20 degrees) while monitoring the camshaft position sensor data. It is used to confirm if the solenoid, oil passages, and phaser are responding to ECM commands, separating electrical from mechanical/hydraulic issues.
- GDS2 / Tech2: Crankshaft Position Variation Learn — This procedure should be performed after replacing the crankshaft position sensor or making significant timing component repairs. While primarily for misfire detection, failing to perform the relearn can sometimes cause other system monitors to run incorrectly.
Wiring & Ground Locations
- G103 — On the left side of the engine block, below the Engine Control Module (ECM).. This is a primary engine ground. A loose or corroded connection at G103 can cause erratic signals from the crankshaft and camshaft position sensors, leading to false correlation codes.
- G104 — On the engine block, next to the starter motor.. Another critical engine ground. Poor contact here can affect the starter and also introduce electrical noise that may interfere with sensor readings.
- ECM Connector X2, Pin 21 (D-BU/WH wire) — At the Engine Control Module, typically located on the driver's side of the engine bay near the battery.. This is the signal wire from the Crankshaft Position Sensor. It can be back-probed to check for a proper signal with an oscilloscope.
- ECM Connector X2, Pin 26 (L-BU/BK wire) — At the Engine Control Module, typically located on the driver's side of the engine bay near the battery.. This is the signal wire from the Exhaust Camshaft Position Sensor. It can be back-probed to check for a proper signal with an oscilloscope.
- ECM Connector, Pin 59 (BN wire) — At the Engine Control Module.. This is the control signal wire for the Exhaust Camshaft Position Actuator Solenoid. It can be tested for activity from the ECM.
Real Owner Repair Stories
- Reddit user in r/MechanicAdvice (2011 Chevrolet Aveo5, 1.6L, 120k miles) — Codes P0016, P0017, and P0106 appeared after a timing belt replacement. Hard starting when cold and a hard, jolting deceleration at highway speeds.
❌ Tried (didn't work) Shop replaced the timing belt., Owner replaced the valve cover and spark plugs., Clearing codes with a scanner (they returned immediately).
✅ What actually fixed it The user took the car to a second mechanic who discovered the timing was off by one tooth on the exhaust cam. The timing was corrected, which resolved the codes and driving issues. - ChevroletForum.com user (2009 Chevrolet Aveo) — Codes P0016, P0017, and P0106 appeared immediately after a timing belt change. The check engine light was not on before the service.
❌ Tried (didn't work) The owner questioned if the sensors were bad.
✅ What actually fixed it The consensus from other forum members was that the mechanical timing was set incorrectly during the timing belt installation. The solution was to take the vehicle back to the shop to have the timing re-done correctly. - AveoForum.com user (2011 Chevrolet Aveo) — P0014 and P0017 codes, rough idle from 900-2000 RPM then dropping to 400-1000 RPM before stalling.
❌ Tried (didn't work) Changing the very dirty engine oil and filter did not fix the stalling issue.
✅ What actually fixed it The owner replaced one of the camshaft position actuator solenoids because its filter screen was missing from the tip. After replacement, the car ran and was drivable, resolving the primary codes and stalling condition.
OEM Part Supersession History
12628348→12646784, then 12655421, which is now replaced by 12679100.— Likely internal design improvements to combat clogging and electrical failure.
Heads up: While all parts in the supersession chain should be compatible, using the latest available genuine GM or ACDelco part (12679100) is highly recommended for longevity. Some aftermarket versions are known for premature failure.
Model Year Variations Within This Range
- 2009-2011: For the purpose of diagnosing P0017, there are no significant mechanical or electrical system differences within the 2009-2011 model year range for the 1.6L LXV engine. The diagnostic procedures are consistent across these years.
Helpful Videos

![How to Fix P0017 Engine Code in 6 Minutes [4 DIY Methods / Only $6.81]](https://img.youtube.com/vi/Vcj-f_J2hyo/mqdefault.jpg)
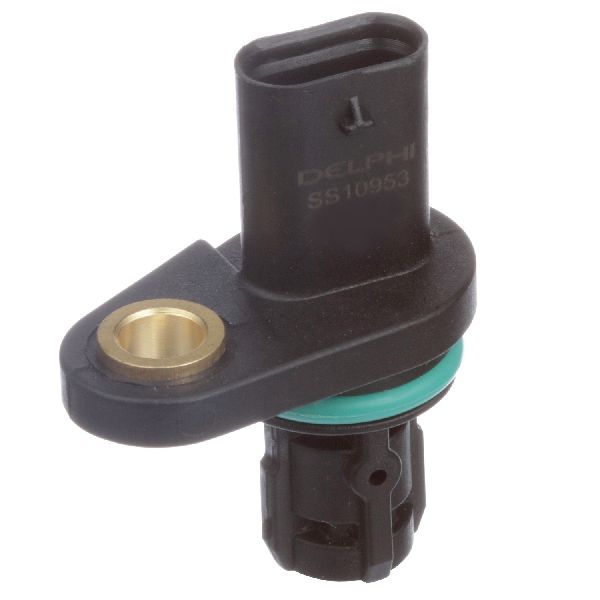
We Have This Part in Stock


The information in this article is provided for general reference and educational purposes only. Vehicle specifications, procedures, and part compatibility can vary by production date, trim level, and region. Always consult your vehicle's factory service manual and verify part numbers before purchasing or performing repairs. Safety-critical components such as airbags, seat belts, and braking systems should be installed by a qualified professional.
- Chevrolet AVEO:
- 🎬 Helpful Videos
- 🛍️ Shop This Part
- What's Unique About the 2009-2011 Chevrolet AVEO
- Diagnostic Flowchart
- Symptoms You May Notice
- Most Likely Causes
- Rare But Worth Checking
- Diagnosis Steps
- Parts You'll Likely Need
- Related Codes That Often Appear With This One
- Technical Service Bulletins (TSBs) & Recalls
- Platform-Specific Known Issues
- Mechanic-Grade Diagnostic Values
- Scan Tool Commands That Help
- Wiring & Ground Locations
- Real Owner Repair Stories
- OEM Part Supersession History
- Model Year Variations Within This Range
- 🎟️ Get 5% Off